
In a culture of instant gratification and short attention spans, students lack opportunities to hone their planning and time management skills. Make your art studio a place to cultivate these skills with reduction printmaking! Reduction printmaking is a form of relief printing where the artist uses the same block to carve and print multiple layers for one final, complex print. Students will love to see their designs take shape with each pulled print and it will challenge them to plan, think ahead, and work through a multi-step process.
Embrace reduction printmaking with the steps and pro tips below to bring this intricate process and opportunity to foster valuable life skills to your students.
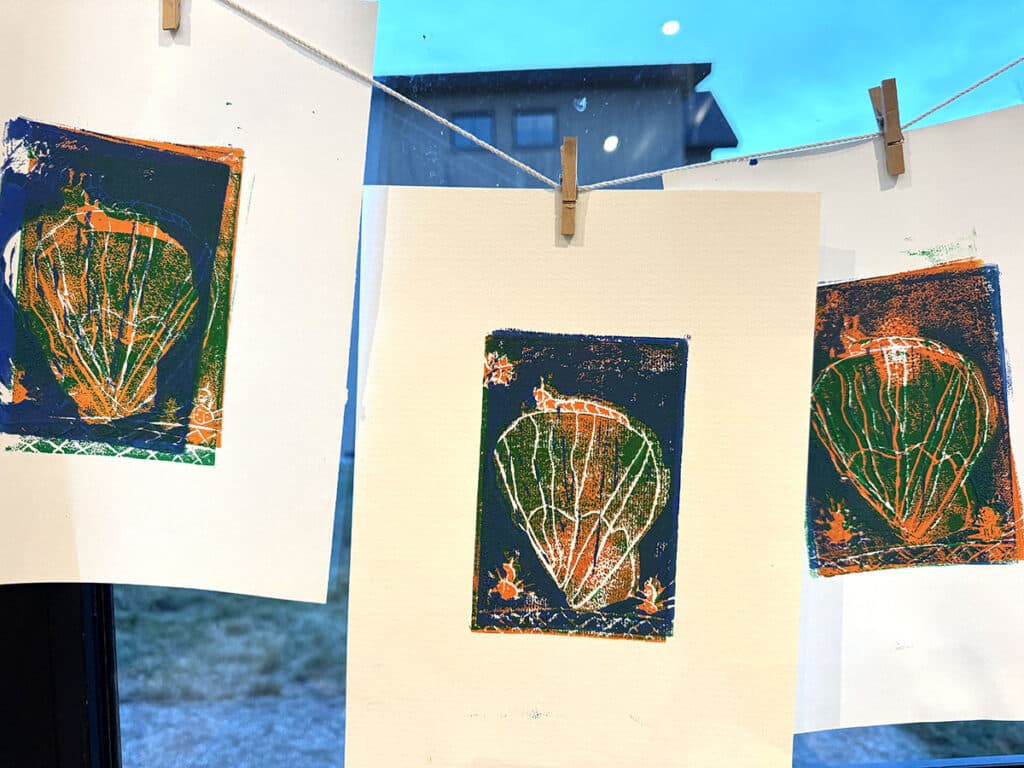
Relief printmaking is a technique where the artist carves away the negative space of a block. They ink the raised parts of the block, or the positive space, to create a design to print on paper. Reduction printmaking is a form of relief printmaking, however it uses one block for multiple layers. Each layer builds up the image and typically starts from the background to the foreground and the lightest to the darkest color. The artist destroys the image and the block in the process, coining the term “suicide printing.” Unlike other forms of relief printmaking, reduction printmaking creates only one print.
Start reduction printing with these materials:
- Block
Soft rubber blocks are ideal for beginners. Linoleum works well for more advanced students. - Carving Tools
Carve designs with gouges of various sizes, including V-tools and U-tools. - Brayers
Apply ink evenly to the printing surface with roller tools. - Printing Ink
Use water-based ink for easy cleanup or oil-based ink for less troubleshooting. - Palettes
Load the brayer with ink with a piece of acetate, glass, or plexiglass. - Paper
Print on smooth, sturdy paper such as lightweight cardstock or specialized printing paper. - Barens
Rub the paper to transfer the ink with a flat, circular tool or spoon. - Registration Boards
Repurpose cardboard to align prints. - Masking Tape
Secure the paper to the registration board. - Newspapers or Drying Racks
Create a clean space to dry prints. - Aprons or Old Shirts
Keep students’ clothes clean. - Vegetable Oil
Clean the ink off the blocks and palettes. - Cotton Balls or Clean Rags
Apply the vegetable oil and clean the blocks and palettes.
Preparation for reduction printmaking is key!
Get the studio ready.
Just like with any complex artmaking process, taking the time to prep well can make or break the lesson. Printmaking prep is twofold: preparing the classroom and materials and preparing students for instruction. Get the studio ready by setting up stations for materials, printmaking, and cleanup. Cover as many surfaces as possible to protect your furniture from oil-based inks and set up clean areas for finished prints to dry. Ensuring everything is in place will make it easy for you and the students to grab what you need when you need it.
Make registration boards.
For younger students, prepare artmaking spaces so students can dive right into printmaking. Assemble a few registration boards that are all the same size for students to share. For older students, invite them into the setup to foster ownership and give you extra sets of hands!
Each student can make their own registration board from pieces of scrap cardboard. Use one piece of cardboard for the base. Cut more cardboard into two large L-shapes that are different widths and stack them on the base. (See the image below.) Tack in place with hot glue and masking tape. Use the cardboard edges to denote where the block and paper will go. This will ensure the students print the image in the same exact spot each time!
Assign student helpers.
Another way to ensure the printing process goes as smoothly as possible is to assign student helpers. Sometimes having an extra set of clean hands is invaluable while in the middle of printing! A peer-assistant approach also builds a classroom environment of support and encourages collaboration and communication. Assign other students responsibility or “management roles” over various tables or stations in the art room. This gives you an extra set of eyes to double-check that things are clean and put away properly.
Create a printmaking schedule.
Lastly, create a printmaking schedule to keep traffic flowing as students progress through the printmaking steps. Break the class period down into smaller timeslots for the bellringer, instruction, demonstration, studio time, peer review, clean up, and transitions. Further break the studio time down into timeslots for carving, inking, and printing. This will allow groups of students to continually work without overcrowding. Periodically incorporating peer review slots during artmaking gives students an opportunity to reflect and troubleshoot in pairs or as a whole.
Show the process in multiple formats.
Prepare students for instruction by setting up the medium and process with an animated video, live demonstration, and step-by-step photos. Seeing the process and how the layers build to create a complex image in multiple formats demystifies the process. It also helps students understand what they are working toward. Show lots of examples of finished prints and ask students to identify what they think are the different layers.

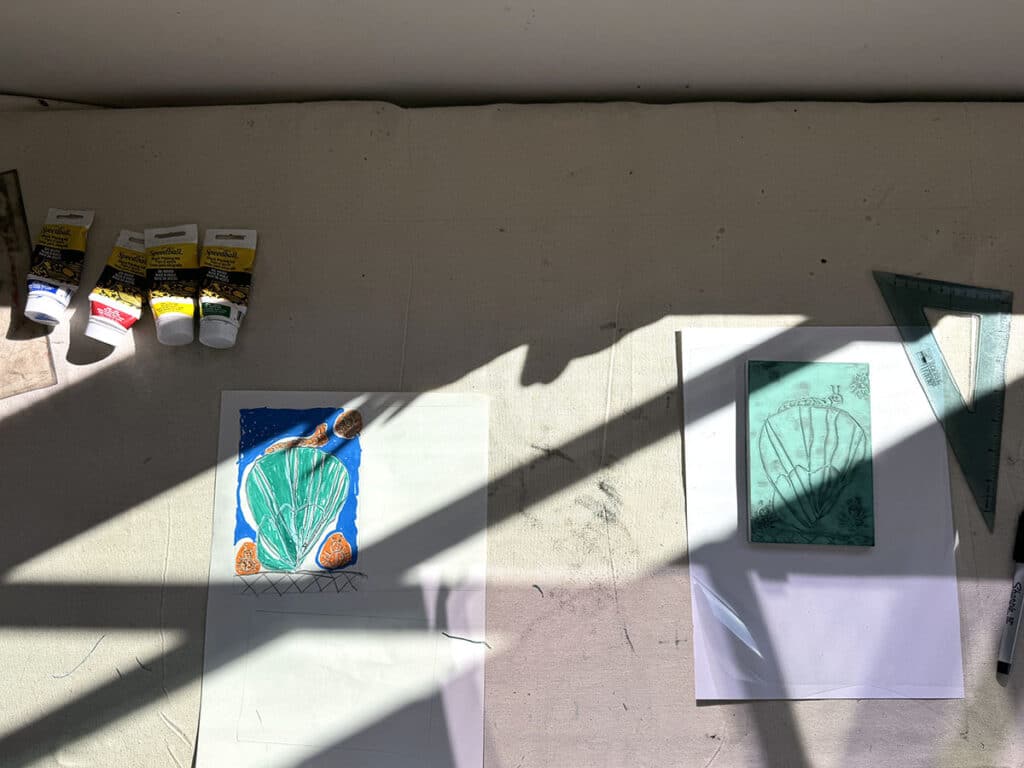
Sketch designs.
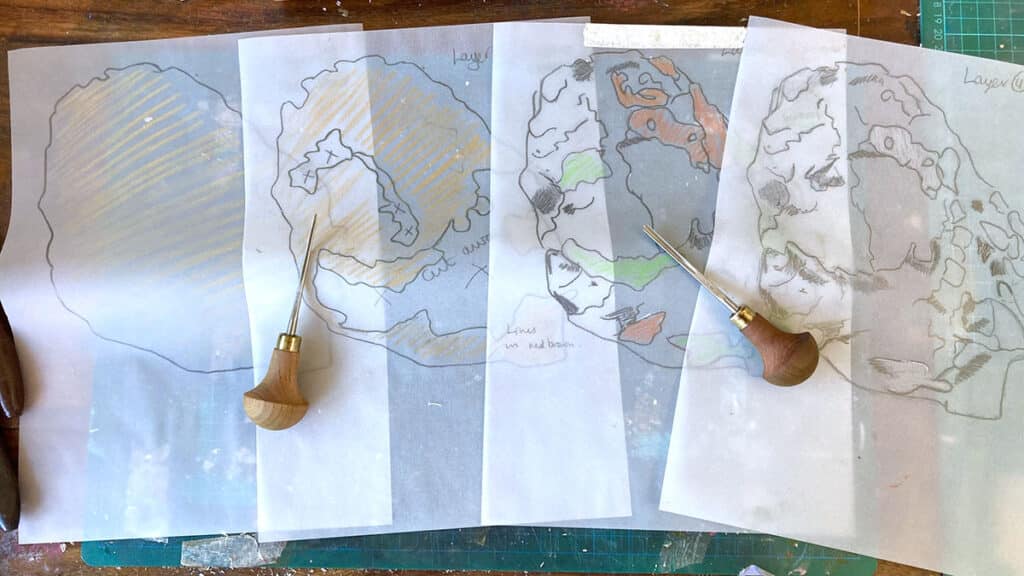
Students also need to prepare their imagery by brainstorming and sketching! Students trace their blocks in their sketchbooks and draw their imagery inside. Encourage simple, strong shapes for the first print. For a three-layer print, there will be three colors, not including the white of the paper background. Students color their images with three colors. If students are struggling to understand the layers, try using acetate or tracing paper to help visualize the layers.
Number the colors and layers so the background is Layer 1, the midground is Layer 2, and the foreground is Layer 3. If there are overlapping colors, remind students to start with the lighter colors in the first layer. The last layer will be the darkest color and is good for intricate details and final touches.
Make Layer 1.
Discuss safety procedures.
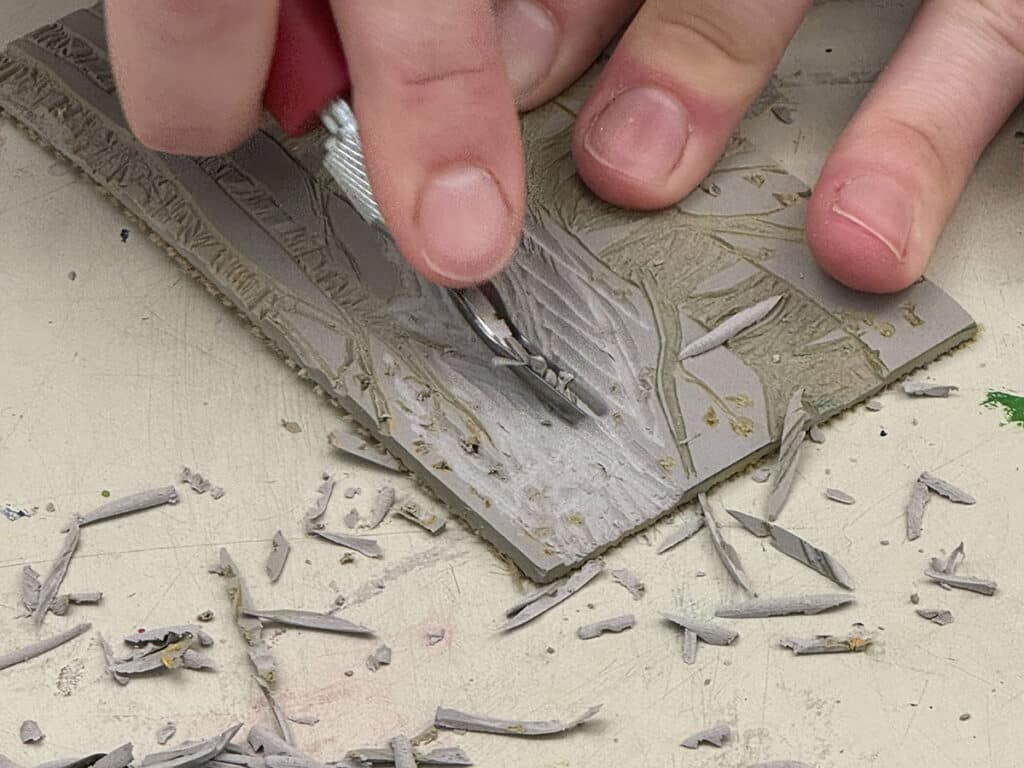
Review safety procedures around carving and the carving tools. Show students how to make shallow cuts and how to cut away from them.
Carve Layer 1.
It’s time to carve the first layer! Students will find Layer 1 in their sketch and replicate it on their block. Remind students to make shallow cuts—they can always carve more later if needed.
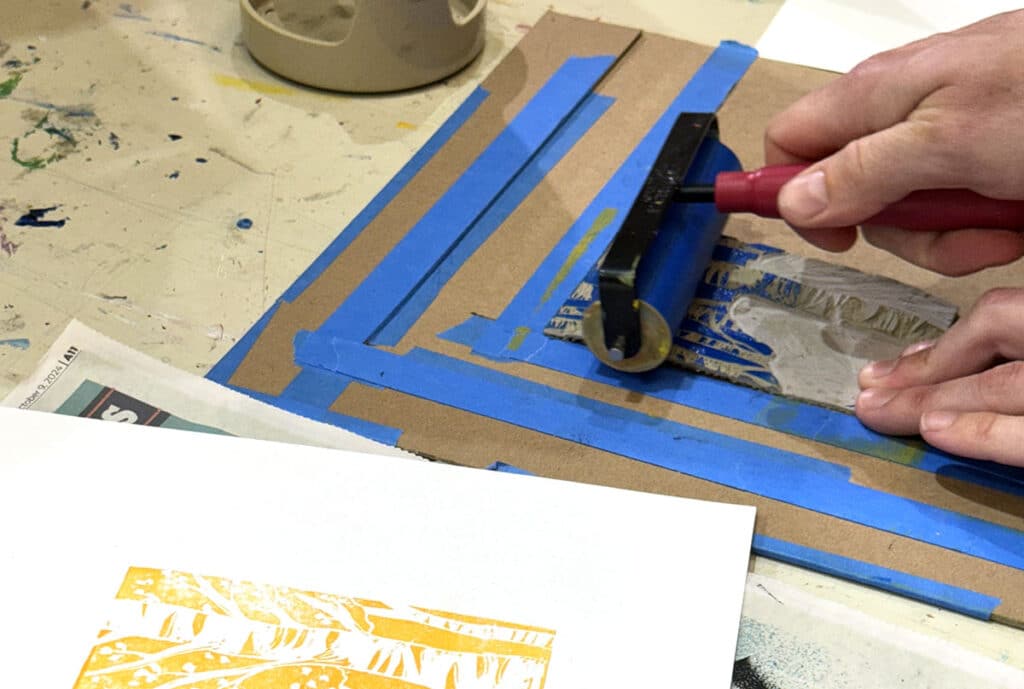
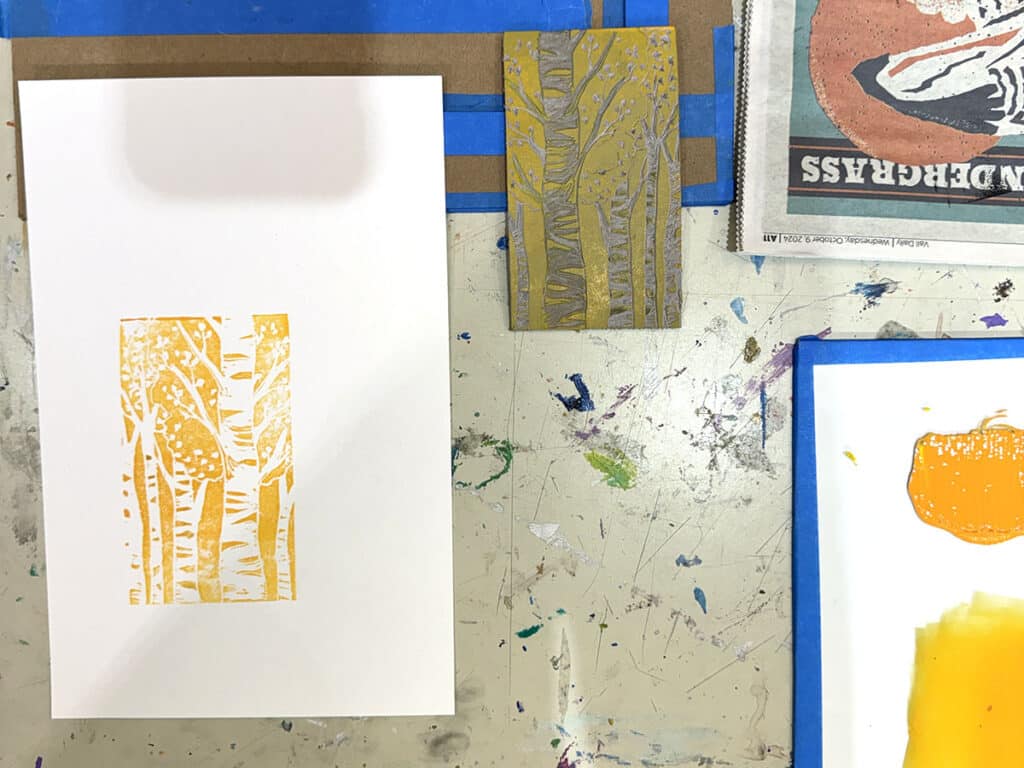
Print Layer 1.
When it’s time to print, students move their blocks to a printing station and place them on their registration boards. Take a small amount of ink and roll it on a palette with a brayer. The ink should look velvety and roll smoothly and evenly. Roll the loaded brayer on the block. Take a piece of paper with clean fingers and carefully place it on top of the block, using the edges of the cardboard registration board as a guide. Gently yet firmly rub a baren on the back of the paper to transfer the image to the paper. Carefully pull the paper back to reveal the first layer! Lay on a clean table to dry.
Note: If time allows, permit students to print 3-5 prints of each layer. This will provide a margin in case there is a mistake!
Clean up and review.
After students print each layer, take a few minutes to clean up and review. Maintaining a tidy workspace and clean tools is vital to producing precise prints. Wipe the ink off the blocks, palettes, and brayers with a cotton ball or rag and a few drops of vegetable oil. Remove all oil residue with strong soap and water. Be sure to dry everything thoroughly!
While prints and tools are drying, review the experience. Regularly reviewing the process and prints will reinforce the value of reflection and prompt students to problem-solve as they go. Review each layer and stage as well as the final print and process. It can be as simple as a pair-share of glows and grows or a more formal critique with a written artist statement.
Here are three common issues students may need to troubleshoot:
- Misaligned Prints
Review registration techniques using registration boards. Print multiple copies of each layer to allow for human error. Remind students that error is normal and expected! - Ink Problems
Show students again how to roll out the ink to the right consistency. If using water-based ink, switch to oil-based ink. It takes longer to dry which allows students more time to prep their brayers and blocks. - Carving Depth
Provide examples of prints pulled from a block that was too shallow and too deep. Examples can help students see how varying carving depths can affect the final print.
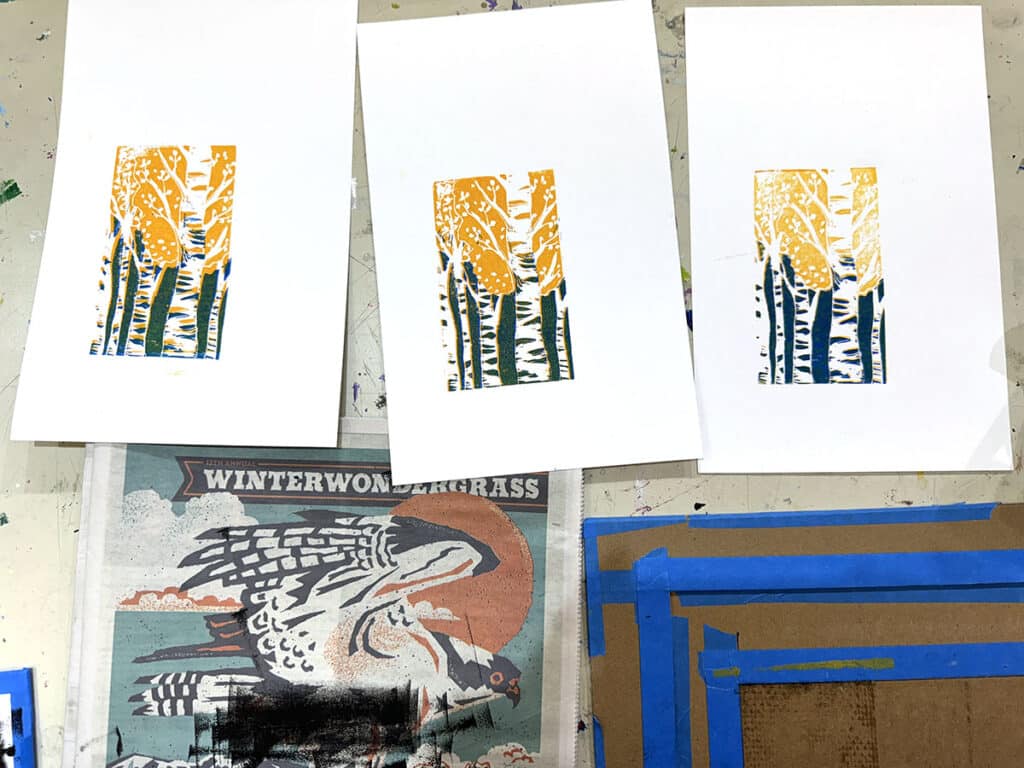
Repeat the process for Layers 2 and 3.
Depending on the level of your students, the length of the class period, and the difficulty of the imagery, each layer may need to happen in a different class period. Students find the next layer in their sketch and replicate it on their block. Remind students to continually reference their sketch, make shallow cuts, and progress to darker colors with each layer.
Reduction printmaking challenges students to think ahead, stay patient, break complex ideas down, and refine skills over time. The joy of printmaking lies in seeing the final layered artwork come to life—a truly rewarding experience for both students and teachers! While the setup and process can be cumbersome, there are many ways to make it manageable for the K-12 art room. Assign helpers, create schedules, and build in pauses for cleanup and reflection to make learning meaningful and productive. Model the risk-taking you want to see in your students by bringing “suicide printing” to your studio this year!
What mediums do you teach to cultivate planning and time management skills?
Share your best tip for teaching multi-step printmaking to your students.
To continue the conversation, join us in The Art of Ed Community!
Magazine articles and podcasts are opinions of professional education contributors and do not necessarily represent the position of the Art of Education University (AOEU) or its academic offerings. Contributors use terms in the way they are most often talked about in the scope of their educational experiences.