
Making butter is simple, fun, and well worth the little effort it takes. It’s a great project for kids, too. My recipe shows you how to make butter at home and how ridiculously easy it is.
Will homemade butter taste better? A lot depends on the quality of the cream you use, but generally, homemade butter tastes slightly fresher and better than most American storebought butters. Some commercial butters, especially European butters such as Kerrygold, one of my favorites, are made from cream that is higher fat and are renowned for their flavor. Your homemade butter could even best some of these butters if you use high-fat cream.
Most American storebought butter consists of butterfat from cow’s milk. Most have a pinch of salt (1 to 2% by weight), and some have a touch of lactic acid added. A few contain annatto, a ground seed that makes the butter yellower. Homemade butter can be much simpler—just pure butterfat—and it tastes better. I prefer unsalted butter for cooking so I can control the amount of salt. For instance, on toast, I like to sprinkle on large-grain flake salt like Maldon.
As The Butter Churns
Ever wonder how commercial butter is made? After milking cows, cream floats to the top, and it is skimmed off and pasteurized into whipping cream, which contains about 30% milk fat, or heavy cream, which contains about 36% milk fat. The cream is then whipped, or churned in dairy parlance, until the fats cling together in a yellowish lump, and the water separates out into a slightly sweet, pale fluid called traditional buttermilk. The fats are then gathered and shaped into blocks or rolls. The cultured buttermilk you see in most grocery stores is slightly different. Cultured buttermilk is made by fermenting low-fat milk (or, less often, whole milk) with lactic acid bacteria, which convert sugars into lactic acid. This type of buttermilk is more tart and less sweet than traditional buttermilk. Both types are used in baking, marinades, and salad dressings.
That’s the butter-making process: cream + churning = butter + buttermilk. Pretty pure and unadulterated.
At home, a quart of heavy cream yields just under a pound of butter and a pint of traditional buttermilk. Alas, the cost savings are minimal. A quart of non-organic heavy cream runs $5 to $6. A pound of commercial (non-organic) butter runs $5 to $6 and a pint of non-organic buttermilk costs $1 to $2. So making it yourself will save you $1 to $3. But saving money isn’t the point here. Flavor is. And the bragging rights of telling your guests, “this is housemade butter.”
After you make your butter, you can increase its smoke point by making clarified butter.
Homemade Butter Recipe
Tell others what you thought of it and give it a star rating below.
Yes, you can make your own butter in your own kitchen! It’s pretty quick and easy to do and a wonderful project for kids. Since a quart of cream spatters quite a bit in a home stand mixer, this recipe uses a only pint.
Makes:
8 ounces (1 cup) unsalted butter
Takes:
-
stand mixer – Butter is dead simple to make if you have a KitchenAid or other stand mixer. You can use a blender or food processor, or one of the butter churns for sale in stores or online, but I prefer the stand mixer.
These recipes were created in US Customary measurements and the conversion to metric is being done by calculations. They should be accurate, but it is possible there could be an error. If you find one, please let us know in the comments at the bottom of the page
-
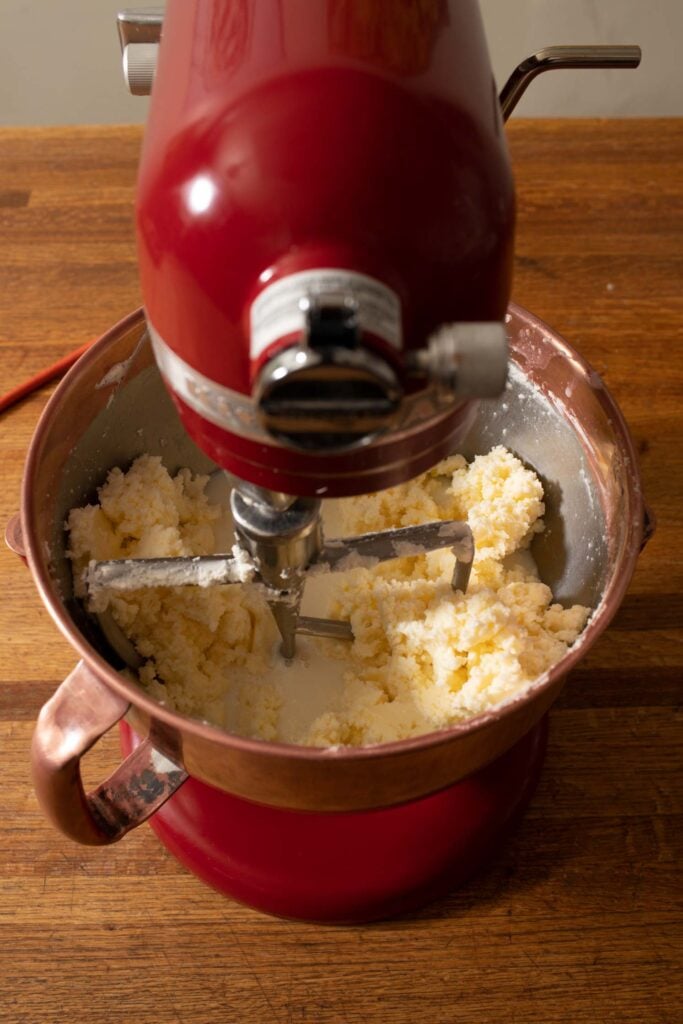
Churn. Clean the mixer bowl, attach the paddle, pour in a pint of cream and turn it on low to start. Keep it churning for 5 minutes and it should start to get thick enough that you can begin to increase the speed. You might want to drape the bowl with a cover of some sort, like plastic wrap, as it will eventually start spattering all over the counter. For the fun of it, turn the machine off and taste the whipped cream as you go. If you want to extract some whipped cream for, say, topping strawberries, scoop some out and add sugar to it. After another 10 to 15 minutes of churning, depending on the speed of the mixer, the whipped cream will break into liquids and solids, and the solid butter will start to clump on the paddle, while the liquid buttermilk will separate and fly around the bowl and onto the counter (keep that cover on).
-
Flavor. Now, if you wish, you can add salt. A flake salt like Maldon really amps up the flavor and gives it a nice crunch. Normally I don’t stir in salt because I prefer unsalted butter, and I can always add salt later. At this stage, you can also make compound butter by adding spices, herbs, black garlic, and more. Just remember that adding things like this can introduce contaminants and shorten shelf life. Unadulterated, homemade butter will keep in the coldest part of the fridge for three months or more. Salted butter will keep longer.
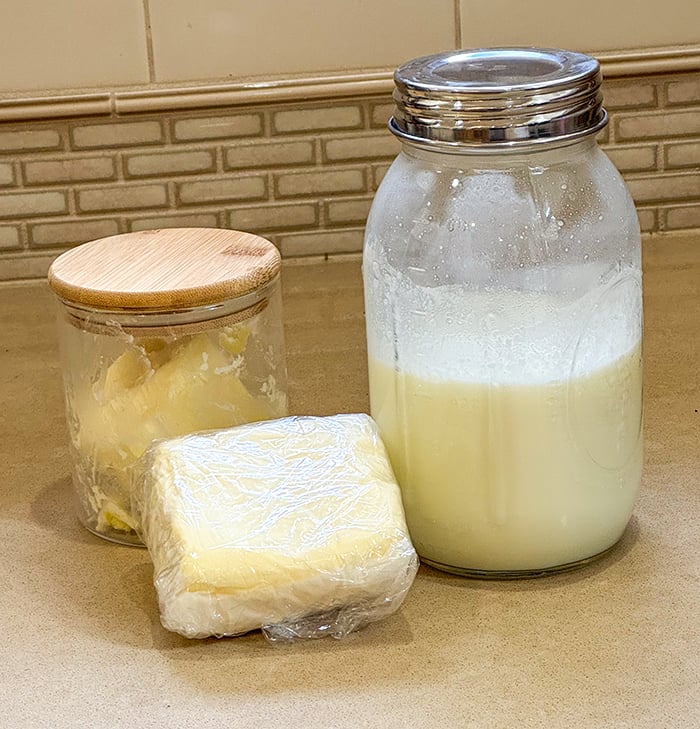
-
Finish. When the fat lumps congregate and reach the texture of butter, remove the bowl and the paddle. Pour the buttermilk through a strainer into a bowl or jar. You can use this traditional buttermilk to make buttermilk biscuits or buttermilk pancakes, or just add it to your morning cereal. Scrape the paddle with a silicone spatula. Wash your hands and then use your hands to gather the butter bits and make a single lump of butter. Submerge the butter in a bowl of cold water and knead it, squeezing out any trapped buttermilk. Change the water as it gets cloudy, and keep squeezing, kneading, and refreshing the water until the water remains clear. Remove the butter from the water, pat dry with a paper towel, and shape it into a block, or roll it up like a Tootsie Roll in waxed paper, cheese paper, parchment paper, or plastic wrap. You can also scrape it into molds of various shapes. Keep your wrapped butter in the coldest part of your refrigerator.