
Secure Shell (SSH) is an essential tool for anyone managing servers or working in a web hosting environment. But what is secure shell?
SSH provides a secure, efficient, and flexible way to interact with remote systems. Most web hosting plans offer secure shell access, among other ways, to interact with your web server. By understanding its features and best practices, you can harness shell access to enhance productivity and ensure the security of your operations.
At its core, SSH is a method of connecting to your server and interacting with it using direct commands instead of a graphical interface. This way, you can save a lot of time when it comes to executing simple tasks such as editing files and modifying permissions.
Let’s explore secure shell, explain what it is, look at how it works, and outline the benefits of using shell access. We’ll then teach you how to access your A2 Hosting server using a secure shell client in three short steps.
What Is Secure Shell (SSH)?
Secure Shell (SSH) is a cryptographic network protocol designed to securely access and manage devices over an unsecured network. SSH ensures that all communication between your computer and a remote server is encrypted, protecting sensitive information like login credentials and commands.
It is commonly used for:
- Remote server management
- Secure file transfers
- Automating tasks through scripting
- Tunneling other protocols securely
Key Features of SSH
Secure shell offers a range of features designed to protect data, enhance usability, and streamline tasks. Below are the key capabilities of SSH that make it indispensable for developers, system administrators, and hosting professionals.
- Encryption: SSH uses robust encryption algorithms to secure data transmitted between the client and the server. This ensures that sensitive information, like passwords or commands, is protected from interception or tampering.
- Authentication: SSH supports multiple authentication methods, including:
- Password Authentication: Simplest method but less secure as it relies on user-generated passwords.
- Key-Based Authentication: Uses a public and private key pair for enhanced security.
- Two-Factor Authentication (2FA): Combines traditional methods with an additional layer of verification for maximum protection.
- Secure File Transfers: Tools like SCP (Secure Copy Protocol) and SFTP (Secure File Transfer Protocol) leverage SSH to transfer files securely between local and remote systems, ensuring the integrity and confidentiality of the data.
- Port Forwarding: It allows users to forward network traffic securely through encrypted tunnels. This feature can protect data transmitted over insecure networks and enable access to remote resources.
- Remote Command Execution: SSH enables users to execute commands on remote servers directly from their local machines. This functionality is vital for server administration, debugging, and managing applications.
- Session Resumption: SSH sessions can resume automatically after a network interruption, ensuring uninterrupted work.
- Configurable Security Settings: It provides the flexibility to configure various security options, such as allowed cipher suites, maximum authentication attempts, and timeout intervals.
At first, this may sound like using File Transfer Protocol (FTP). However, the two methods are quite different, since:
- SSH uses the command line to control your server remotely. With secure shell, you can give direct commands to your server.
- SSH provides you with more options. With FTP, you’re limited to interacting with your files in basic ways. Secure shell, on the other hand, enables you to do whatever you want as long as you know the right commands.
If you’ve ever run the cmd application in Windows, then you’re familiar with the command line. Almost every Operating System (OS) enables you to interact with it directly, by typing direct instructions using the command line. Some, such as Linux, provide you with more control over what you can do than others.
Why Use SSH?
SSH (Secure Shell) has become a critical tool for modern server management and web hosting. It provides a secure and efficient way to interact with remote systems, offering unparalleled flexibility and control. Whether you’re managing files, executing commands, or troubleshooting issues, it ensures that your connection remains protected and your operations streamlined. Below are the key reasons why SSH is widely adopted:
- Security: SSH protects data from eavesdropping, spoofing, and other cyberattacks.
- Efficiency: CLI operations are faster and more resource-efficient than GUI tools.
- Versatility: Manage servers, transfer files, and even debug network issues.
- Automation: Write and execute scripts to automate server tasks.
Secure Shell (SSH) is an essential tool for anyone managing servers or working in a web hosting environment. It provides a secure, efficient, and flexible way to interact with remote systems.
Secure Shell SSH Authentication Methods
Authentication is a critical aspect of SSH, ensuring that only authorized users can access remote servers. It supports multiple authentication methods, each with its strengths and use cases. Below is an overview of the most common methods available for securing your secure shell connections:
- Password Authentication:
- Simplest method but less secure.
- Requires the user to enter a password each time.
- Key-Based Authentication:
- Involves a public and private key pair.
- The public key is stored on the server, and the private key remains on your local machine.
- Use the command to generate keys:
ssh-keygen
- Two-Factor Authentication (2FA):
- Combines SSH authentication with an additional verification step, like a code from an authenticator app.
What is Shell Access?
Shell access refers to the ability to interact directly with a system’s operating system through a command-line interface (CLI) or terminal. This access allows users to execute commands, manage files, configure software, and perform various administrative tasks. Shell access can be provided locally (on the physical machine) or remotely (over a network).
Common uses of shell access include:
- Server Management: Configure, maintain, and monitor servers.
- File Operations: Create, delete, move, or edit files and directories.
- Software Installation: Install and manage applications via package managers.
- System Diagnostics: Analyze logs, monitor resource usage, and troubleshoot issues.
- Automation: Execute scripts for repetitive tasks.
What Are the Benefits of Shell Access?
Having shell access is a game-changer for managing systems and servers, particularly for developers, system administrators, and advanced users. It offers unique advantages that enhance control, flexibility, efficiency, and customization, making it an invaluable tool in both local and remote environments.
- Control: Shell access provides granular control over system operations, enabling users to manage system configurations, fine-tune settings, and perform low-level tasks that may not be accessible through graphical user interfaces (GUIs). This deep level of control is essential for troubleshooting and advanced system management.
- Flexibility: With shell access, you can perform tasks that are not available or are limited in graphical interfaces. It allows for complete interaction with the system, including modifying permissions, accessing hidden files, and running system-level commands that would otherwise require additional tools.
- Efficiency: Command-line operations are inherently faster and consume fewer resources compared to GUIs. This efficiency is especially crucial when managing multiple systems or executing repetitive tasks, as the shell enables rapid input and response with minimal overhead.
- Customization: Shell access empowers users to create and run scripts tailored to specific workflows. This capability automates complex or repetitive tasks, saving time and reducing errors. Custom scripts can integrate with other tools and applications, further enhancing productivity and system functionality.
Shell access, especially when combined with tools like SSH, is a powerful capability for developers and administrators, enabling secure, efficient, and versatile system management.
What Is the Difference Between Secure Shell (SSH) and Shell Access?
Although often used interchangeably, there is a difference between SSH and Shell Access.
- SSH, Secure Shell, and SSH Shell: These terms refer specifically to the use of a secure protocol to access the shell of a remote server securely. All communication between the client and the server is encrypted, making it a preferred choice for secure remote access.
- Shell Access: Shell access is a more general term that refers to the ability to access a system’s command-line interface (CLI) or shell. Shell access can be local (direct access to the system) or remote (using tools like Telnet, RDP, or SSH). Without SSH, shell access methods may not include encryption, leaving data vulnerable during transmission.
SSH Shell vs Shell Access: Key Differences
| Feature | SSH Shell | Shell Access |
|---|---|---|
| Security | Encrypted communication using SSH protocol | May or may not be secure (e.g., Telnet is insecure). |
| Remote Access | Primarily used for secure remote access | Can be local or remote depending on the setup. |
| Authentication | Uses secure shell methods like key-based or password authentication | Depends on the method (local login, Telnet, etc.). |
| Preferred Use | For secure, encrypted, and reliable remote server management | General CLI access, not always focused on security. |
In summary, SSH Shell is a subset of Shell Access that ensures secure, encrypted communication over potentially insecure networks. It is particularly important in web hosting and remote server management.
How to Access Your Server Using SSH (In 3 Steps)
If you’re using Linux or OS X, you can use SSH with a remote server right from your command line. However, Windows users will need to download an application or client that supports this type of connection. That’s the method we’ll be showing throughout this tutorial.
Step 1: Choose and Install an SSH Client
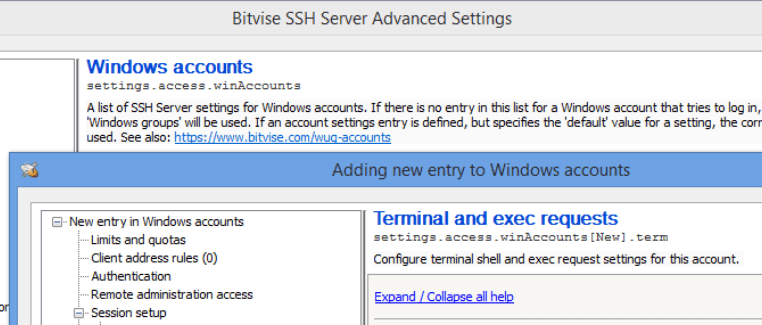
SSH clients enable you to connect to your server using the protocol. If you’re a Windows user, you have plenty of options to choose from. Once you connect to your server and enter the command line, however, every client works much the same.
Two popular choices are Bitvise and WinSCP. The former stands out, thanks to its vast array of configuration options and a classic Windows interface:
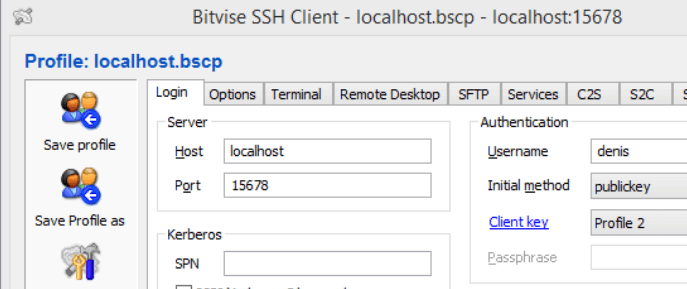

WinSCP, on the other hand, feels more modern. However, keep in mind that this is primarily an FTP client, so it’s more optimized towards file management rather than SSH connections:
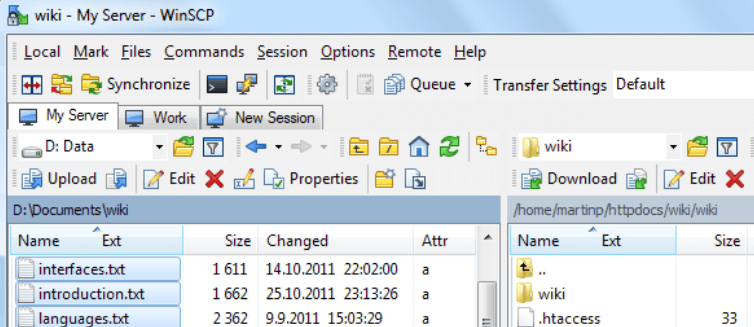

Finally, we have PuTTY, which is by far the most feature-packed SSH client we’ve used:


We recommend taking a few minutes to check out these clients, then download and install the one that suits you best. We’ll be using PuTTY for the rest of this tutorial, but the process of connecting to your server via SSH is similar for all three clients.
Step 2: Connect to Your Server Using Your SSH Credentials
Before we launch into the technical details, remember that not every type of hosting plan will enable you to connect to your server via secure shell. Shared hosting, for example, almost never offers this level of control over your server.
However, if you’re using a Virtual Private Server (VPS) or a dedicated server, secure shell access should be possible. You’ll need your server’s IP address and your admin password to make the connection. First, you’ll want to launch the PuTTY client:
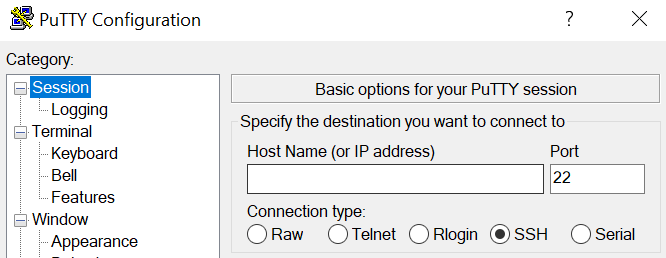

The important section is the one right below where it says Specify the destination you want to connect to. Within this section, you can choose which type of connection and port to use, and indicate your server’s host name or IP address.
Set the connection type to SSH, and if you’re using A2 Hosting, change the default port to 7822. As for your host name, you can use the following format instead of an IP address:
Replace yourusername with your A2 Hosting username, and domainname.com with your site’s domain. The result should look something like this:
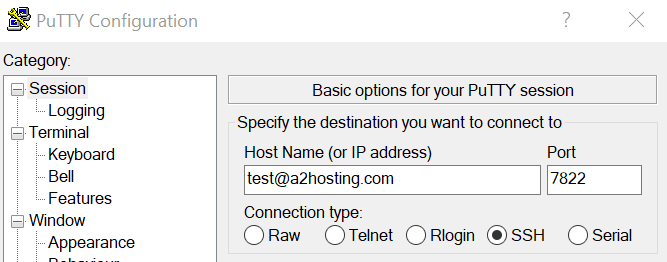

Now click on the Open button at the bottom of the page, and a command line window will appear. If you entered your credentials correctly, you should see a password prompt:


Enter your account password, and that’s it! You have full secure shell access to your server:


Now, let’s talk about what you can do here.
Step 3: Interact With Your Server Using the Command Line
The command line can seem intimidating at first. There are a lot of commands you can use to interact with your server, but most of them are quite simple. With a little practice, you should be able to memorize them and get used to the lack of a graphic interface.
Right now, your command line should be waiting for you to enter your first input. So let’s try something simple, and type ls:


This will list all the files in the directory where you’re currently located, which should be your root folder at the moment. If you want to navigate to another directory, type cd followed by the directory’s name:


In this example, we navigated to the email_patch directory. Once inside that folder, we can interact with its files. For example, we could use the Nano editor to make changes to them, by typing nano file.txt:


Using a text editor within the command line requires a bit of practice, but it’s a handy skill to learn. When you’re ready to leave your server’s command line, type exit and PuTTY will close the connection automatically.
For now, we recommend that you check out some of the other commands you can use, and practice them when you get the chance. That way, you’ll be ready to use the command line for secure shell access when you need to!
Get Affordable Web Hosting With Secure Shell Access Today
A2 Hosting offers high-performance web hosting with secure shell access at competitive prices. Get Secure Shell Hosting today with our 99.9% uptime commitment, no-risk money-back guarantee, and 24/7/365 in-house customer support.

