 |
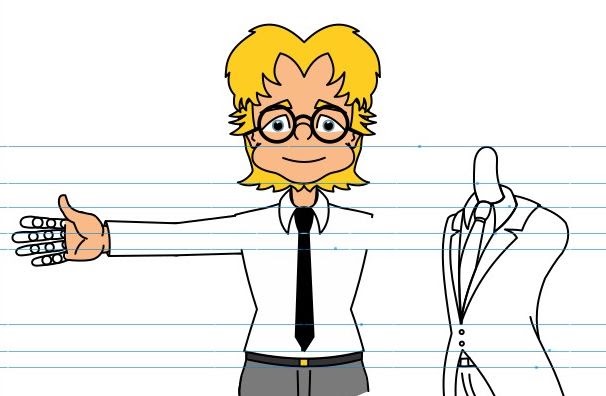
| This will be the definitive version of my TET Avatar character rig. |
Following on from my introductory post to Building My Two Cartoon Web Series in this post I will be showing you the behind the scenes on the steps I’m following to draw and rig the first Resident Dragon character, TET, who is an avatar of myself.
Typically you wouldn’t start a web series by rigging characters but I’ve already scripted three of the six 2-3 minute episodes, and storyboarded the first two well over two years ago. Both storyboards are actually on my Instagram account if you dig far enough.
The Easy Way to Draw Front Facing Human Characters
When drawing front facing human characters for rigging I always use the horizontal mirror function in my graphics editor. Since humans are generally symmetrical it saves me time and ensures all the limbs are identical opposites.
 |
| Krita’s Horizontal Mirror tool helps create perfectly symmetrical characters and saves you time. Turn off mirroring to add any non symmetrical features. |
Convert a Front Facing Character to a Three Quarter, Side Facing Character with this Shortcut
Front facing characters are useful to have but a three quarter (315 degree), side facing character is more versatile as, it can be used as a substitute for both full side facing (90 or 270 degree) angles, as well as front facing when teamed with a three sixty degree head. It also gives your character the ability to walk/run side to side.
The easiest shortcut to a side facing character rig is to draw all your front facing character limbs in such a way that they’ll also work on a side facing character (you can use the same three sixty degree head since that already can turn to the side). Then all you need to do is create a new side facing, torso/hip sprite.
 |
| My side facing version of the character uses the same arms, legs, and head. Only the torso/hip sprite has been completely redrawn. Note that I did skew the feet back slightly to maintain the character’s balance, standing still but that is a far cry from a complete redraw. |
Turning the Character into a Vector Image Using Inkscape
Since I’m aiming for my series to be of a higher quality, all the art will be vector art. This will not only keep all my lines sharp but will also give me access to vector color management. This can be very useful for giving your character simple costume changes like removing a jacket simply by turning the jacket ‘off’ through color management.
In Inkscape I simply imported my finished art from Krita and manually traced just the essential elements. Again I only drew half of the character, flipping each element to get the other half and then combining them together.
 |
| The initial trace of the character in Inkscape with just the essential elements not yet divided into the various sprites needed for a completely rigged character. |
From here I systematically went through, renaming all the sprites, breaking them up into the actual parts needed, creating all the joints, and coloring everything with one eye on how each part could be utilised to create different outfit combinations with color management.
Color Management and Joints
Since my TET character is nearly always seen in his gray suit I didn’t want to go too crazy with multiple outfit variations that I may never use. I’m mostly using color management to remove his jacket and tie, and to turn his button up shirt into a long sleeve T-shirt.
 |
| The main image shows TET wearing his standard gray suit. The top two smaller images show variations I can create through color management just by making those layers invisible. The bottom smaller image shows how the arm and leg joints can move without the outline breaking. |
The Absence of Shading?
You may have noticed the character uses only flat colors without shading. This is intentional. I’m hoping to add shading in post production in my video editor. By not having any shading on the character I should be able to light the character for any scene as needed.
I will have to do some more extensive tests on that idea but I’m pretty sure it should work. Worst case my series will all be flat color – or I’ll have to go through and add shading to the characters directly.
—o —o— o—
That’s where the character is at, at the time of writing. By the next update I hope to have the front facing version fully rigged with some animation tests to show you.
Did you find this article useful?
Subscribe to my newsletter and get the
latest articles delivered to your inbox.