How to Truss a Chicken (2 Easy Ways for Perfect Roasting)

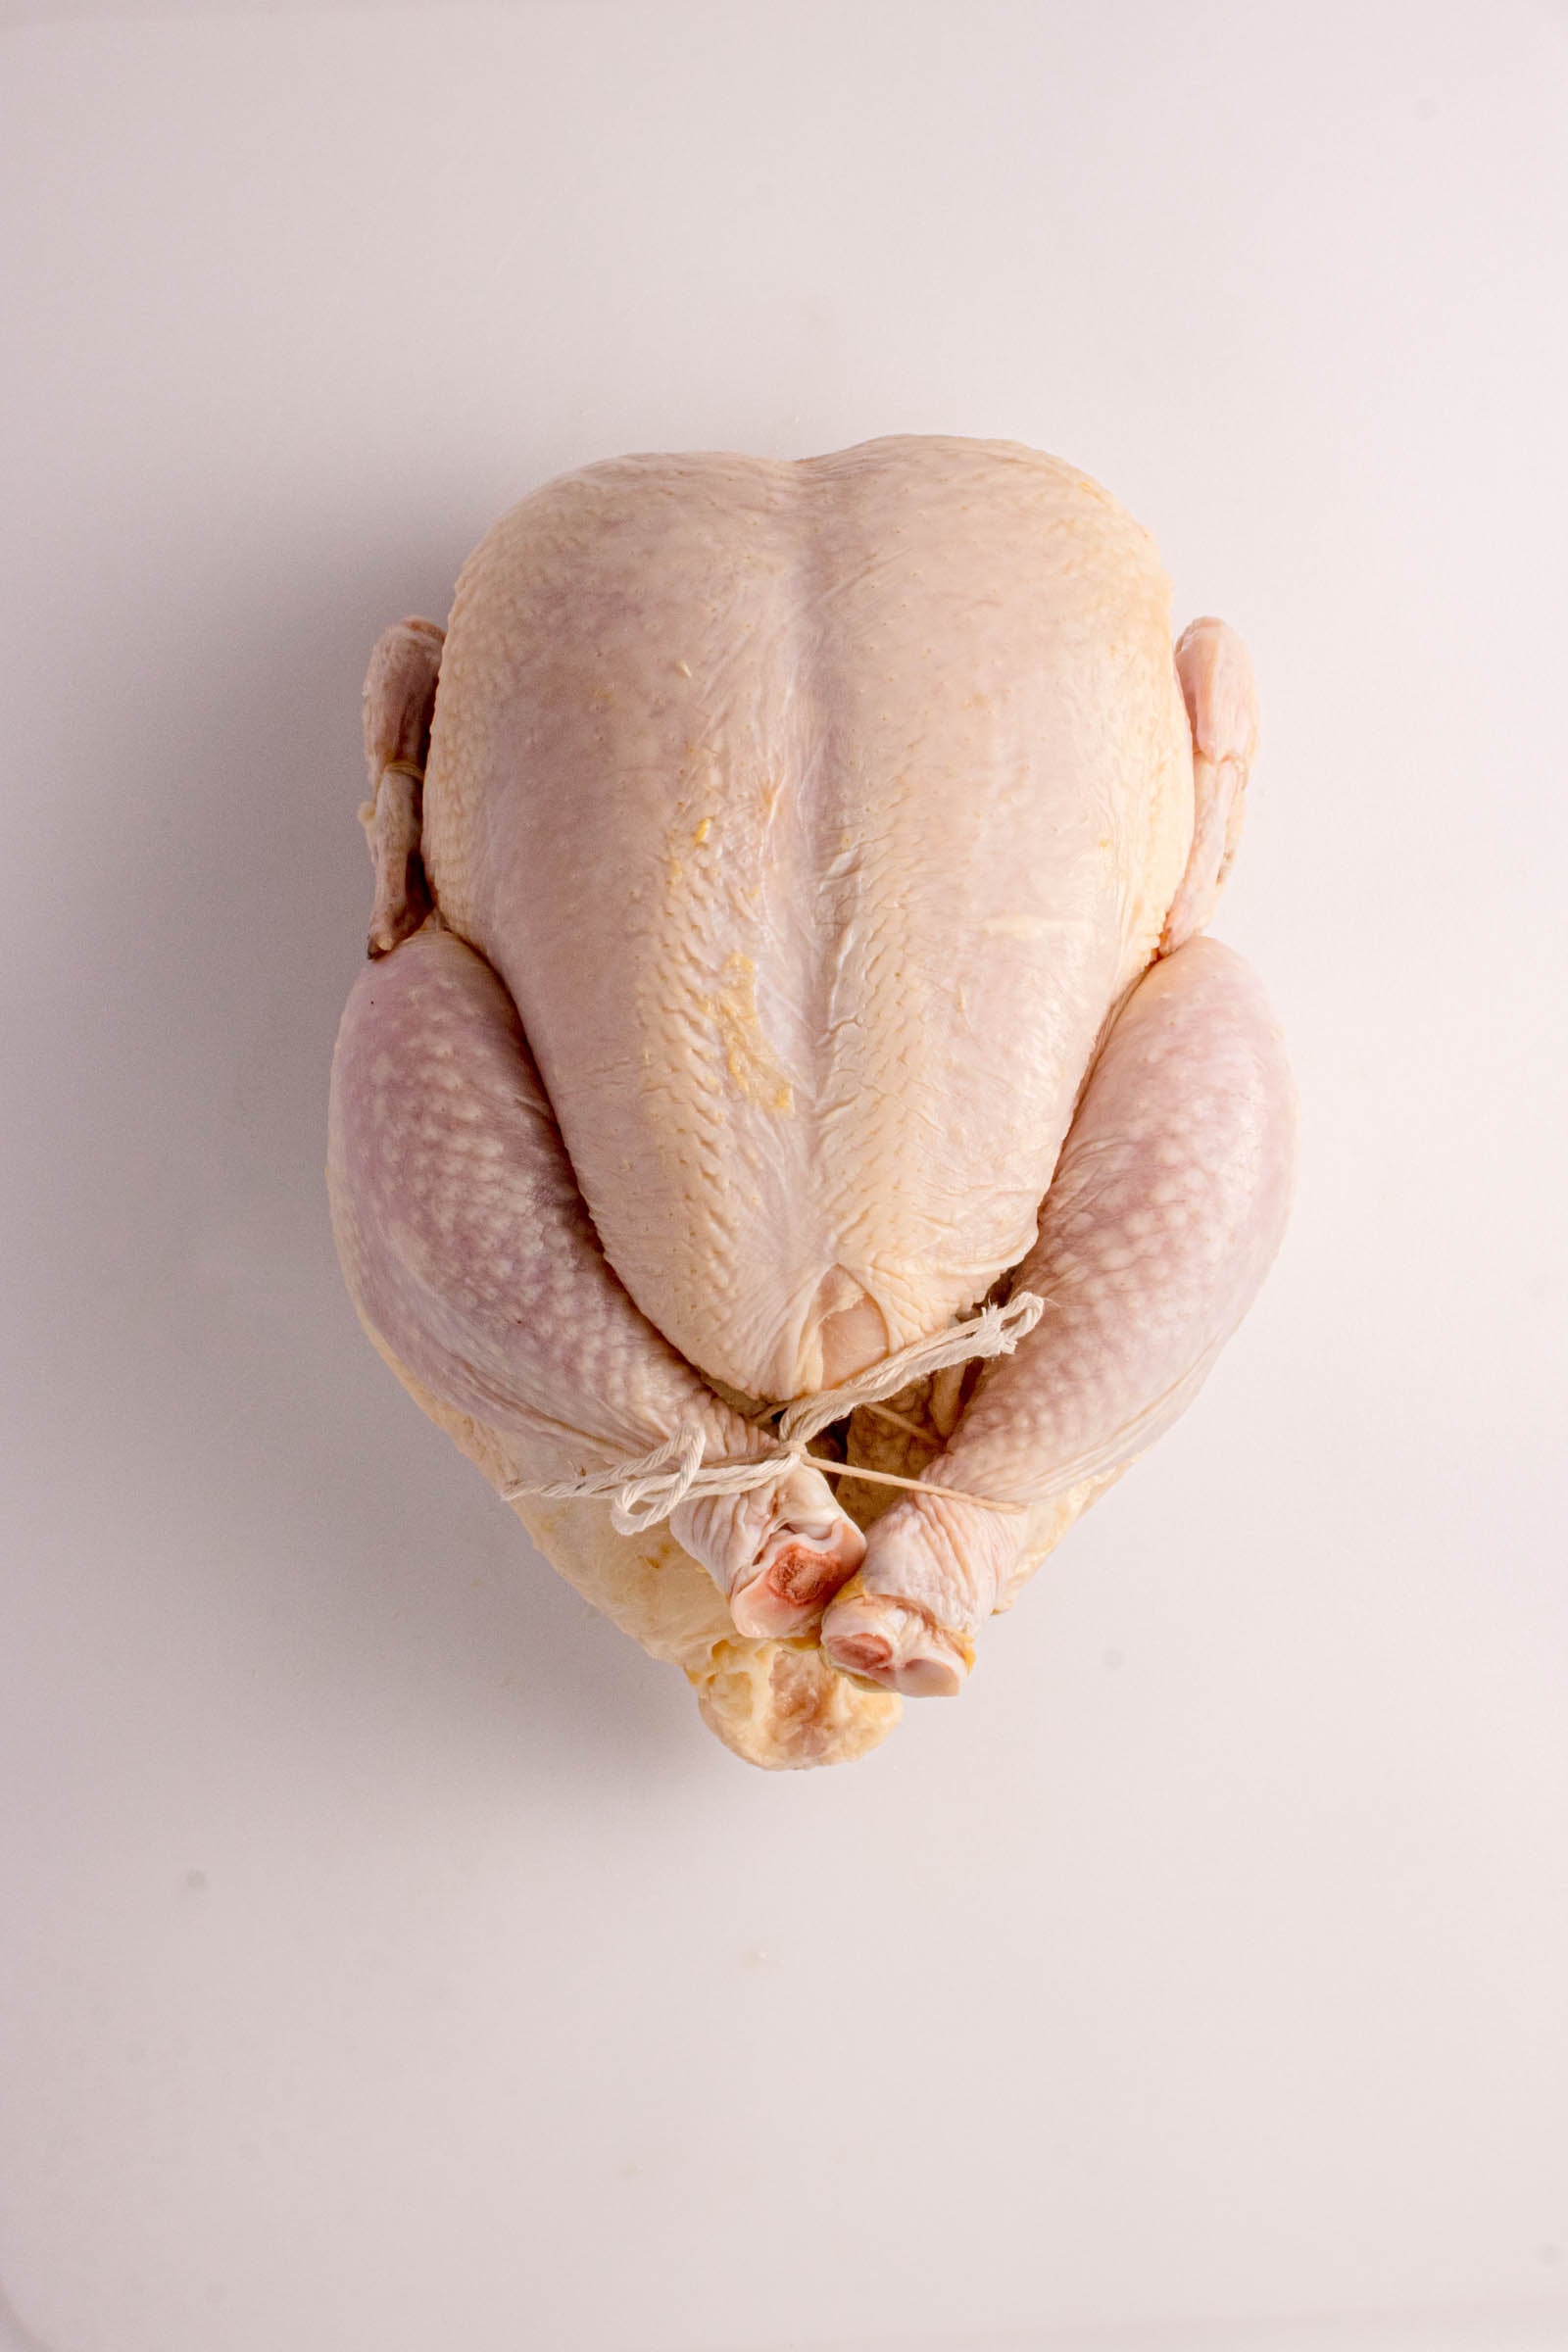
Trussing gets treated like chef theater, something you do to impress the people at your table. But it’s not. Trussing a chicken is a two minute fix for a problem every whole bird has: the legs and wings finish cooking long before the breast is anywhere close to done. By tieing the whole bird together, you create a more uniform shape that promotes even cooking.
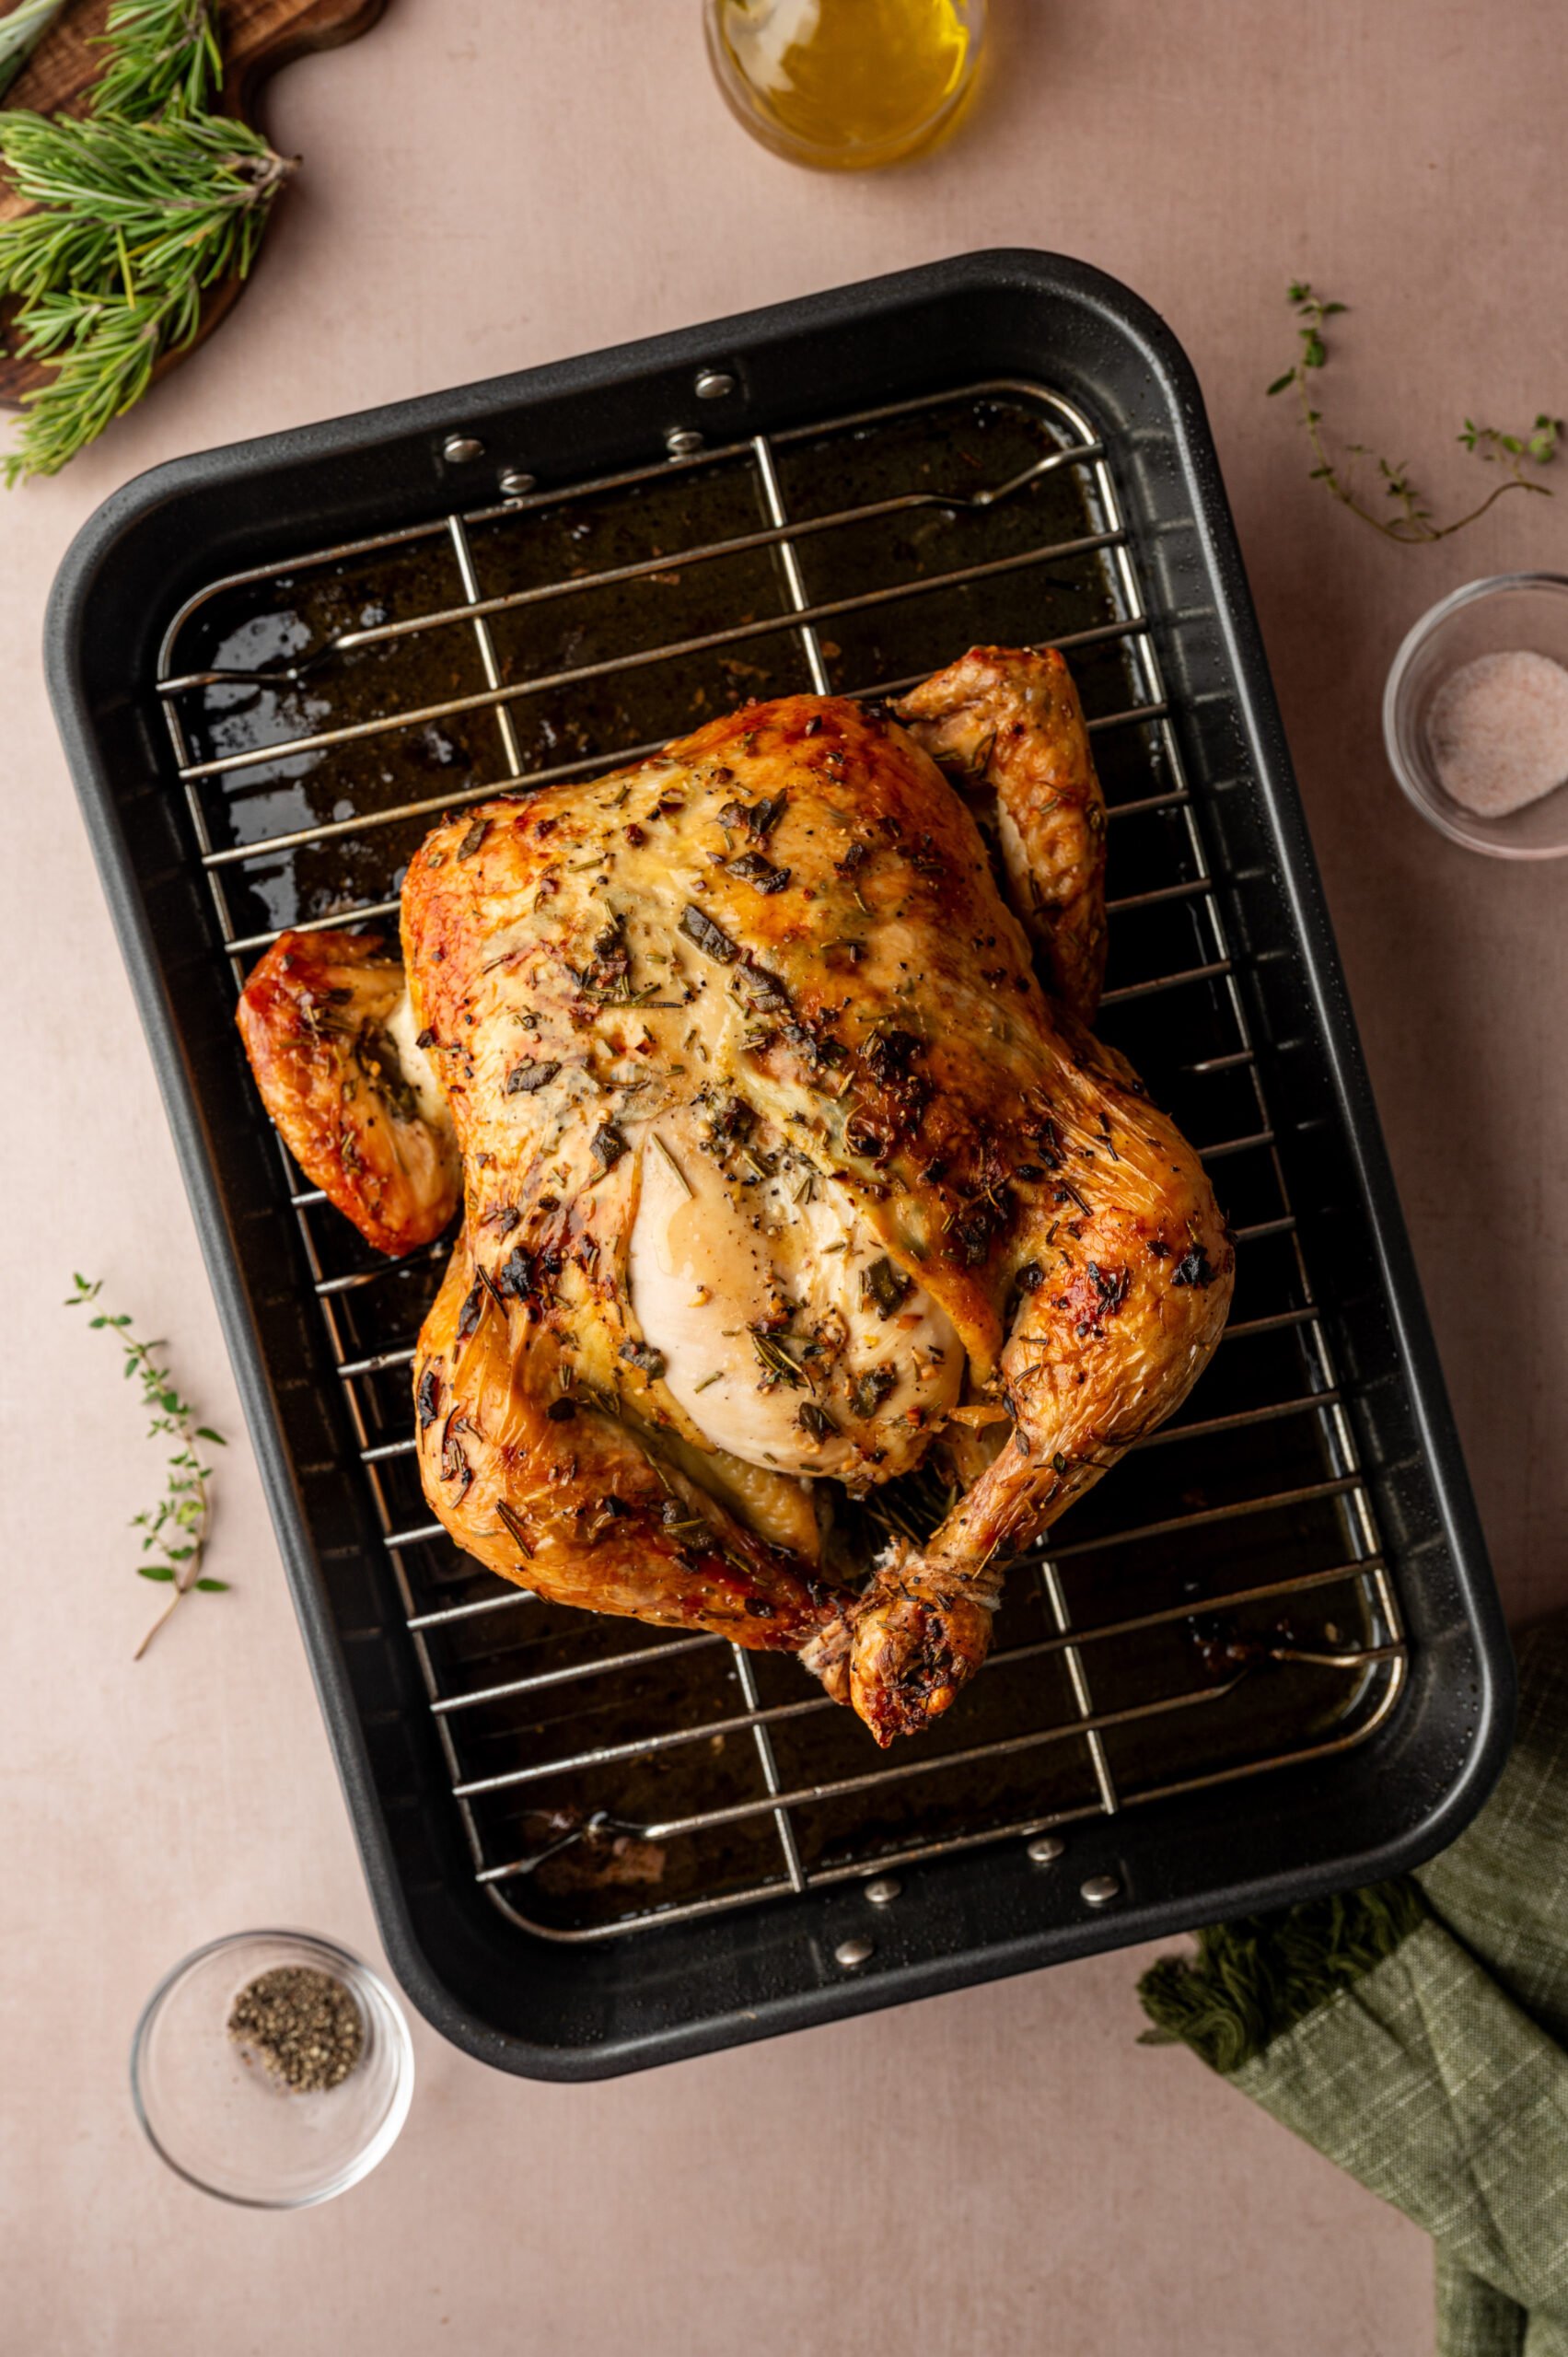
When properly trussed, the bird roasts as one compact shape, which is a fundamental skill to give you a juicer well cooked bird, instead of trying to manage the dark and white meat at the same time. Here is how to truss a chicken two ways. One takes two minutes and a single loop of twine. The other is the full classic version, and it is worth knowing the day the bird goes to the table whole.
🍗 Why Truss a Chicken at All
A whole chicken is not one piece of meat. It is a breast that wants to come off the heat at 160°F sitting between two thighs that are still tough and rubbery until 175°F, with wing tips and drumstick ends sticking out into the hottest air in the oven. Trussing pulls those extremes toward the middle.
It buys you a narrower gap between the fastest part of the bird and the slowest. That is the entire argument, and it is a good one.
What trussing actually buys you:
- Even cooking from breast to thigh, because the bird holds one shape instead of splaying open.
- Wing tips and drumstick ends that stop scorching before the center is done.
- Aromatics that stay in the cavity instead of tumbling out onto the sheet pan.
- A bird that looks like it came out of a French kitchen instead of a wrestling match.
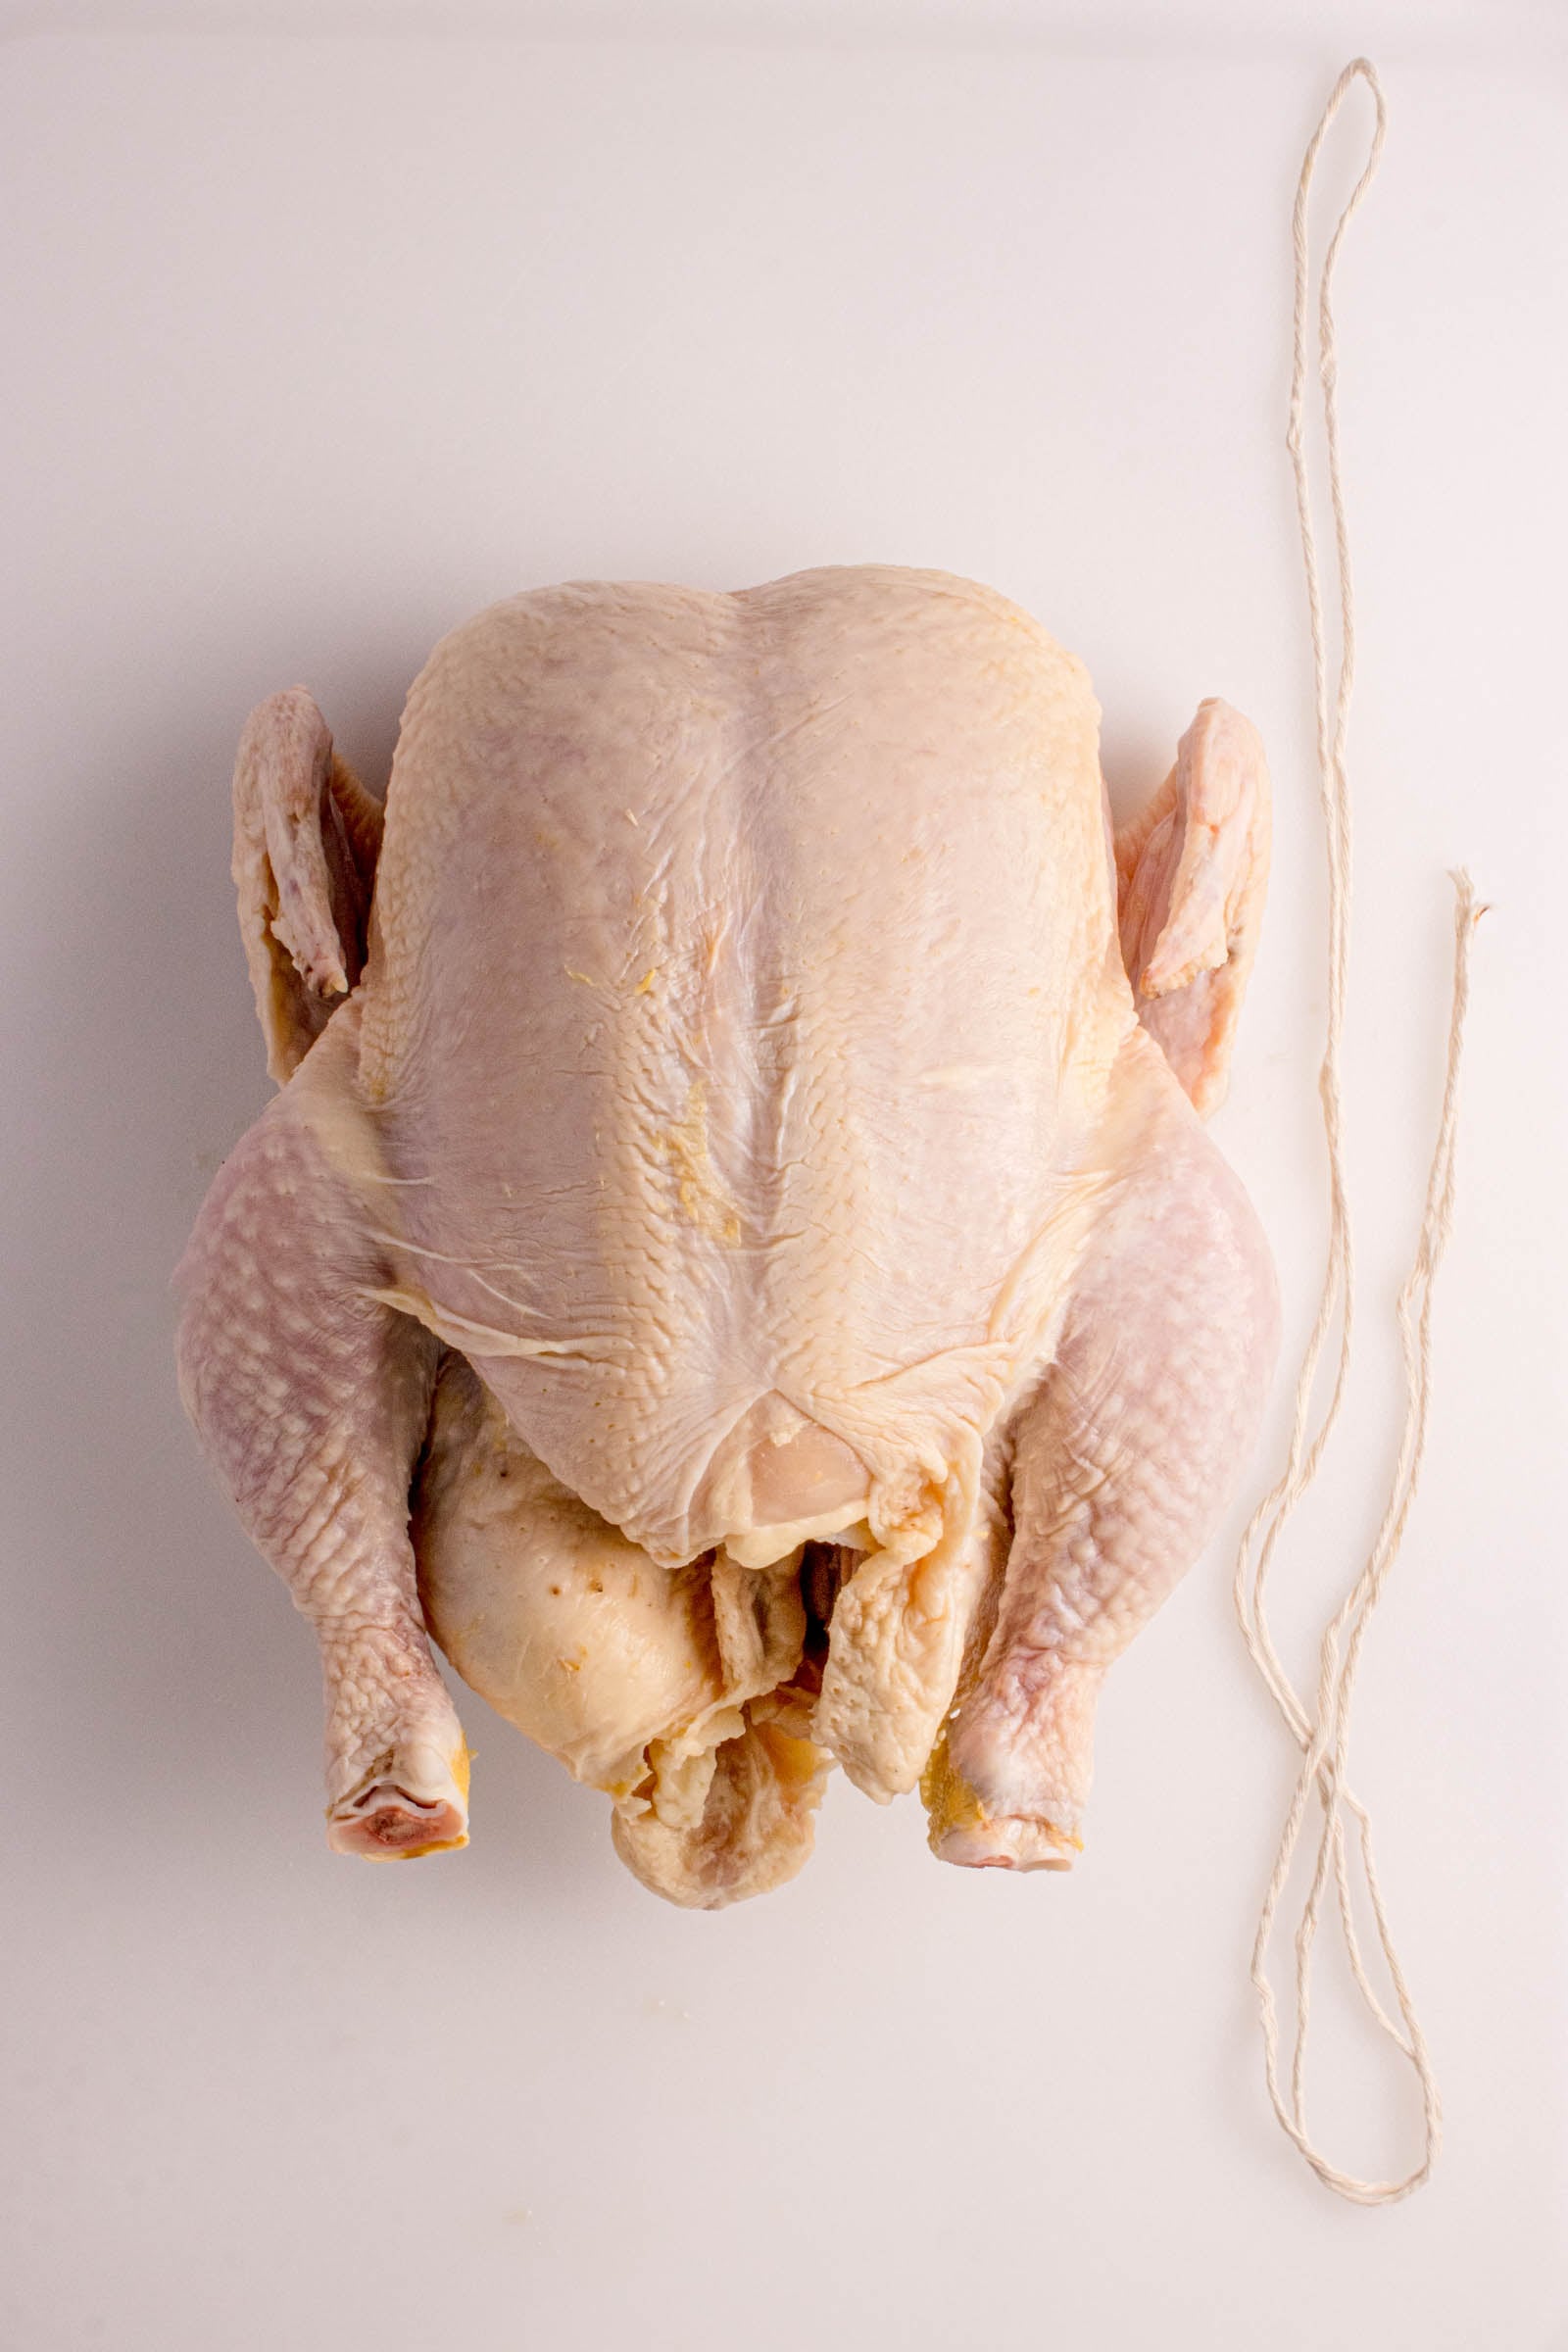
🔪 What You Need
- Butcher’s twine. Unbleached cotton, nothing else. It will not melt, smoke, or leave a chemical taste behind. Dental floss is not a substitute no matter what the internet tells you, and neither is anything with a synthetic core.
- Kitchen shears or scissors. For cutting twine to length, and for snipping it off after the bird rests.
- A big cutting board. Big enough to lay the bird out with room to work on both sides. A juice groove keeps the raw poultry mess where it belongs.
- A whole chicken, 3 to 5 pounds. Fully thawed all the way through. Air chilled birds roast more evenly than water chilled ones, and they start out drier, which matters a lot when you are trying to get twine to grip.
🧠 Pro Tip: Sanitize the board, the shears, and your hands the second the bird goes in the oven. Raw poultry does not forgive a lazy cleanup.
⏱️ Method 1: The Two Minute Truss
This is the one you will actually use on a Tuesday. One loop, one knot, done before the oven finishes preheating.
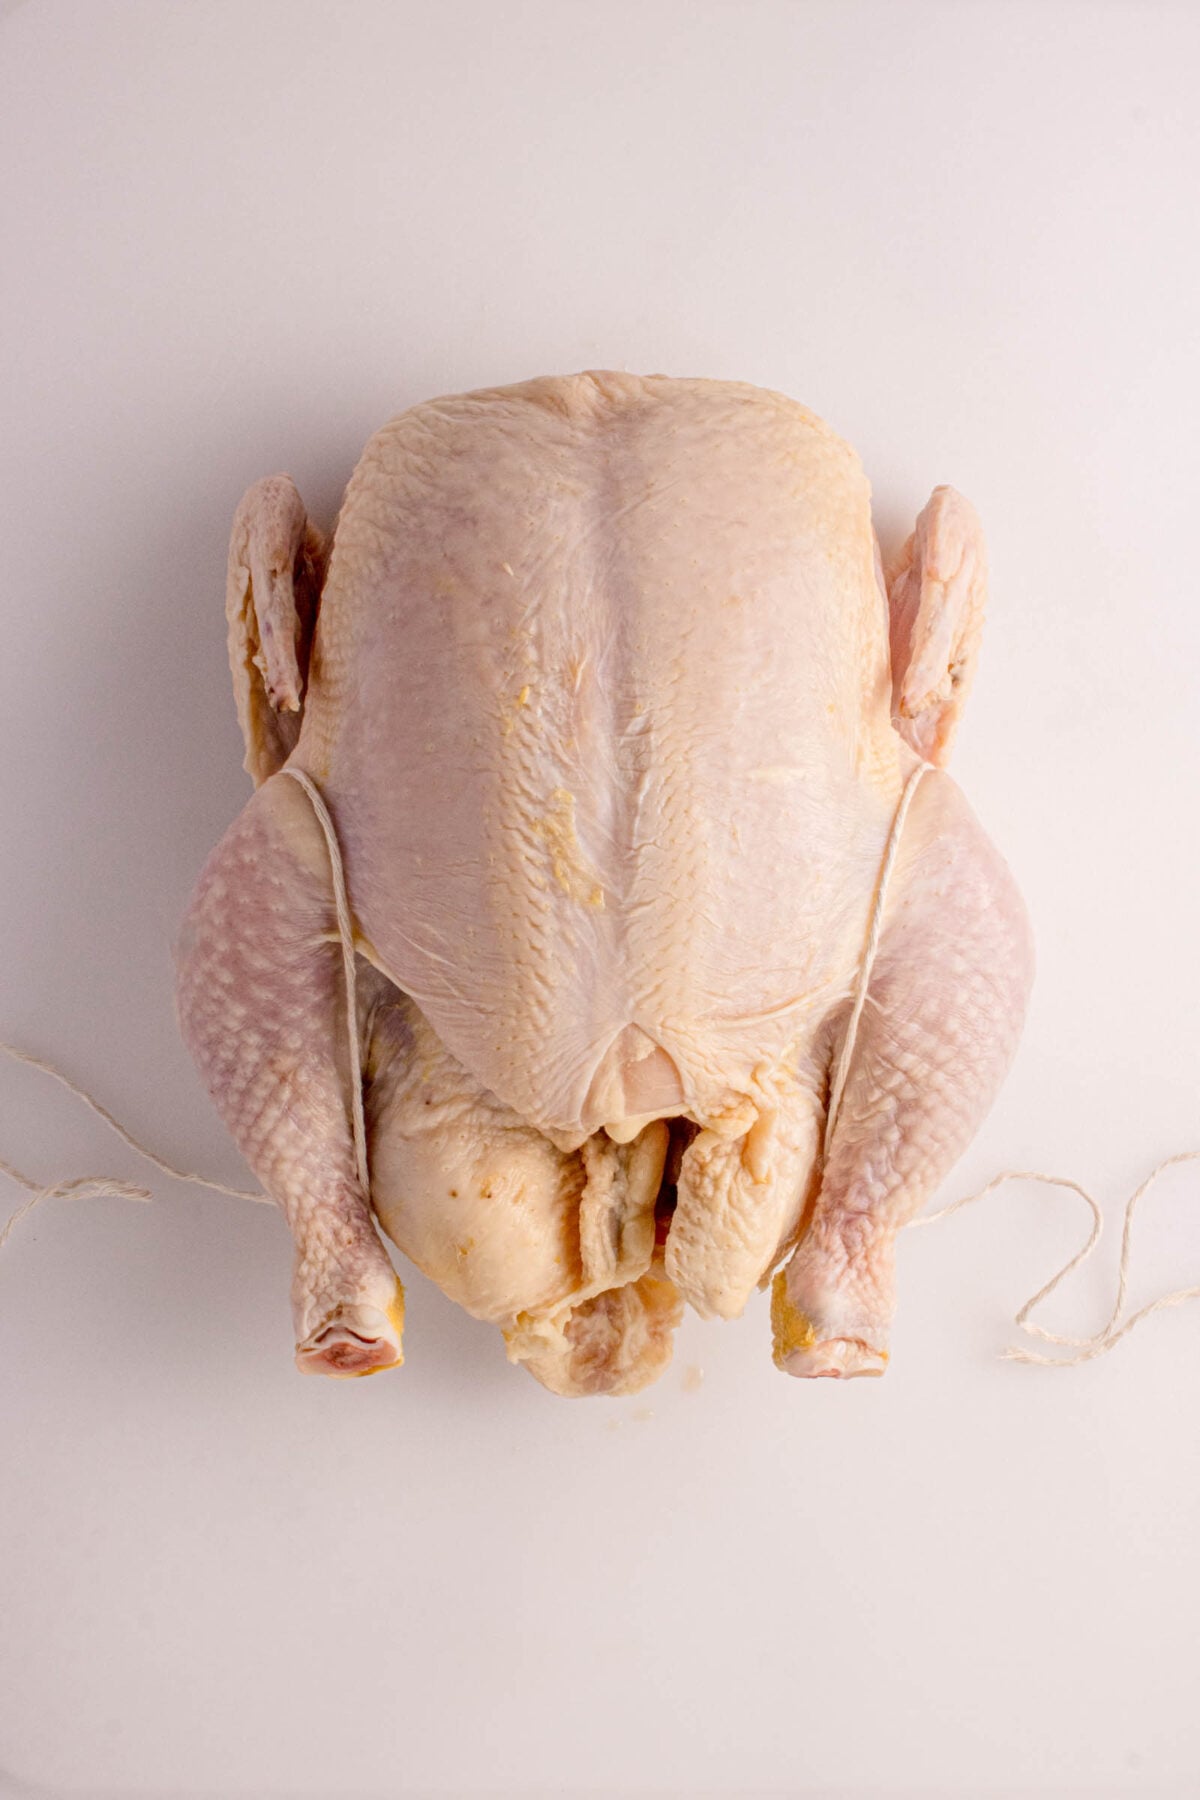
- Cut the twine.
About 3 feet. Cut long. Coming up short with raw chicken on both hands is its own kind of misery. - Set the bird up.
Breast side up, twine centered underneath at the leg joints, both ends even and hanging off the board. - Bring the ends up.
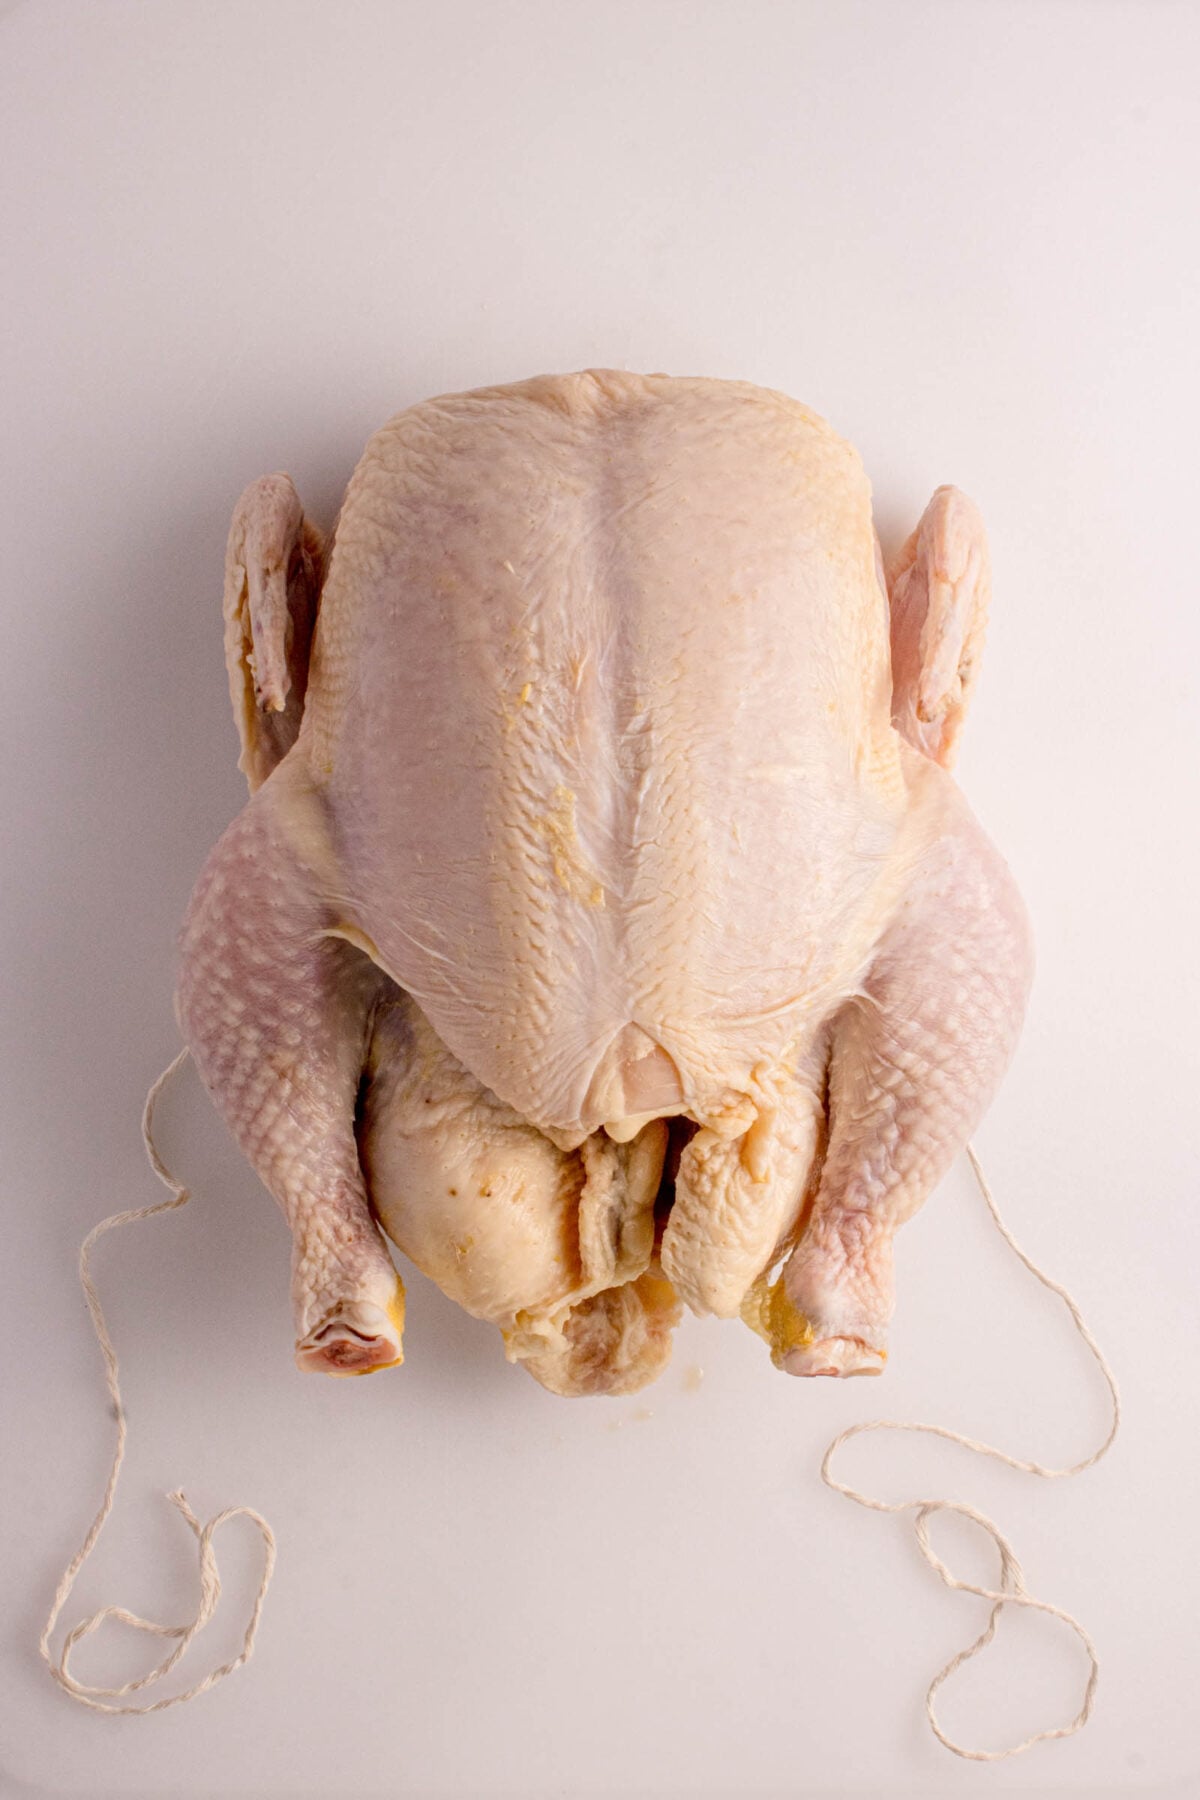
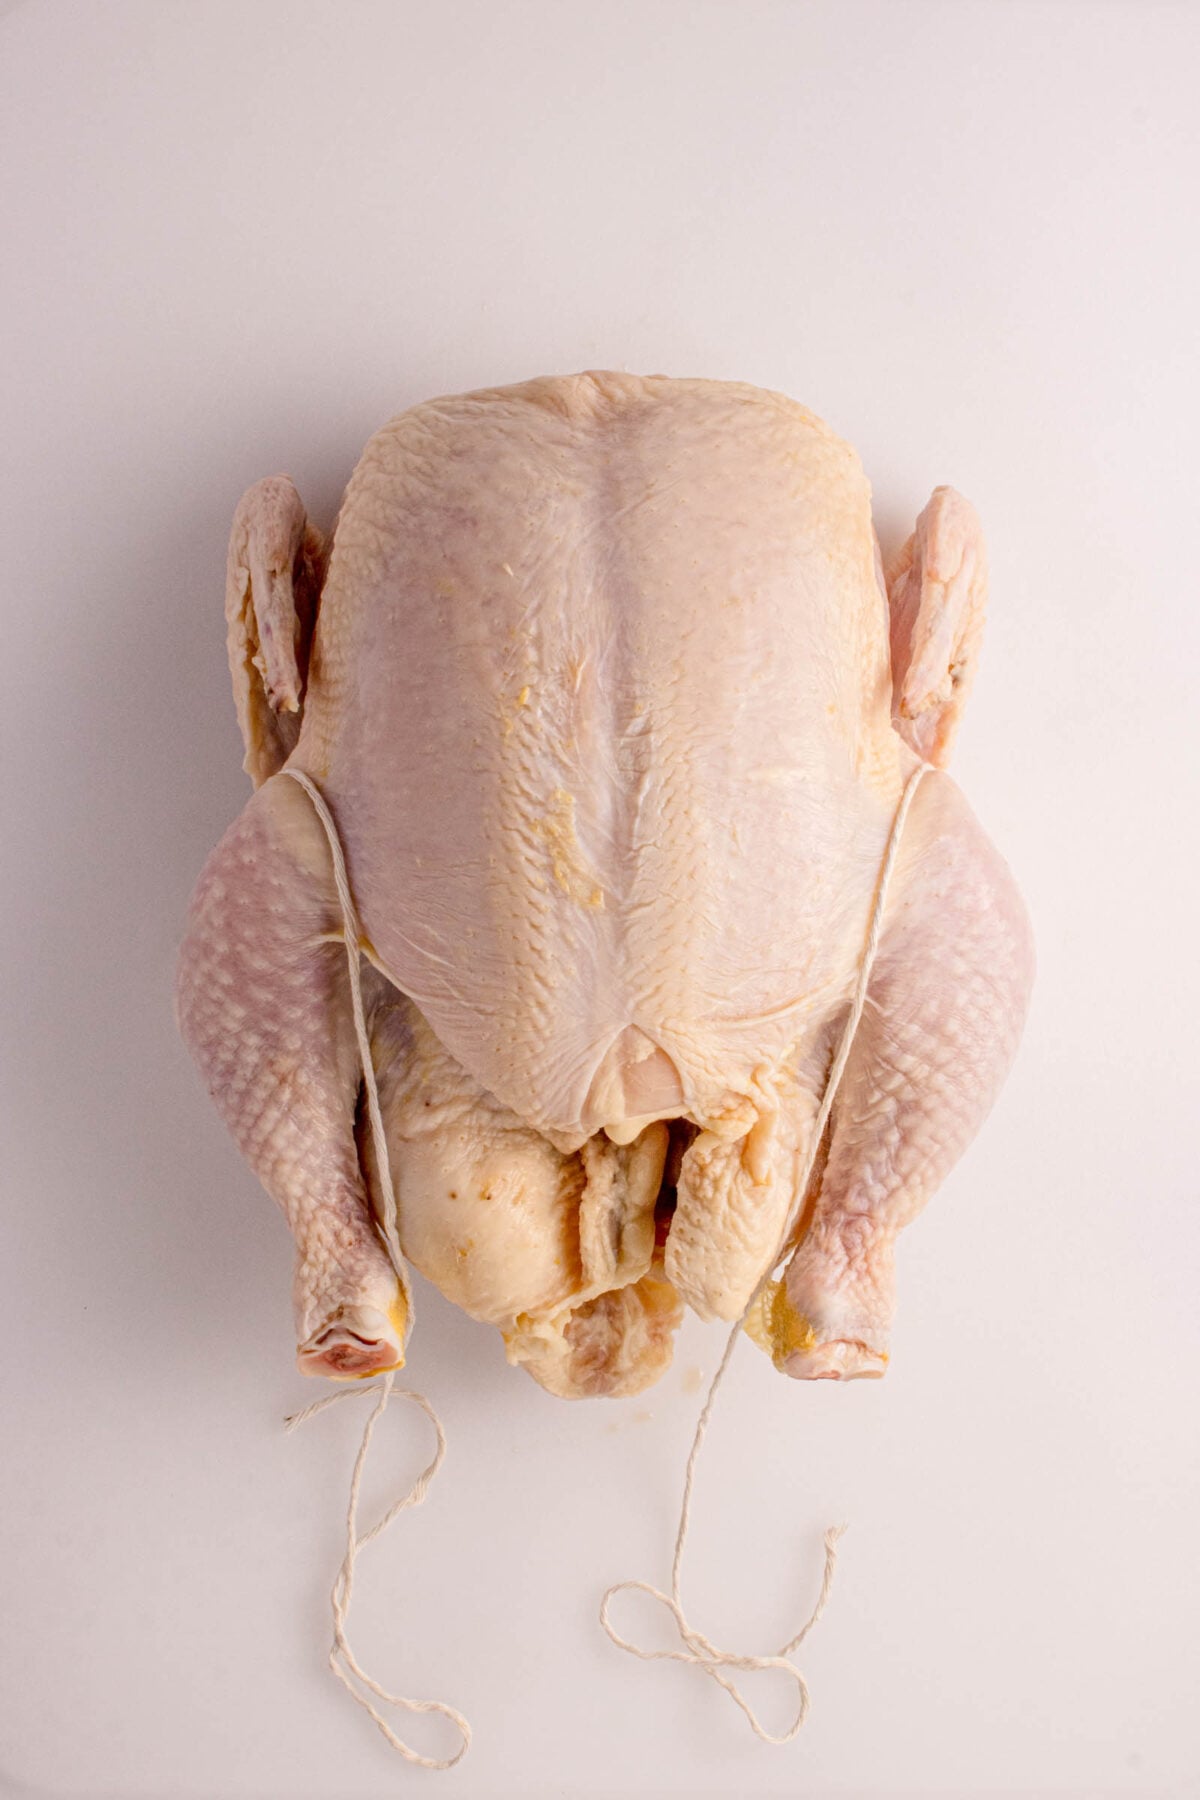
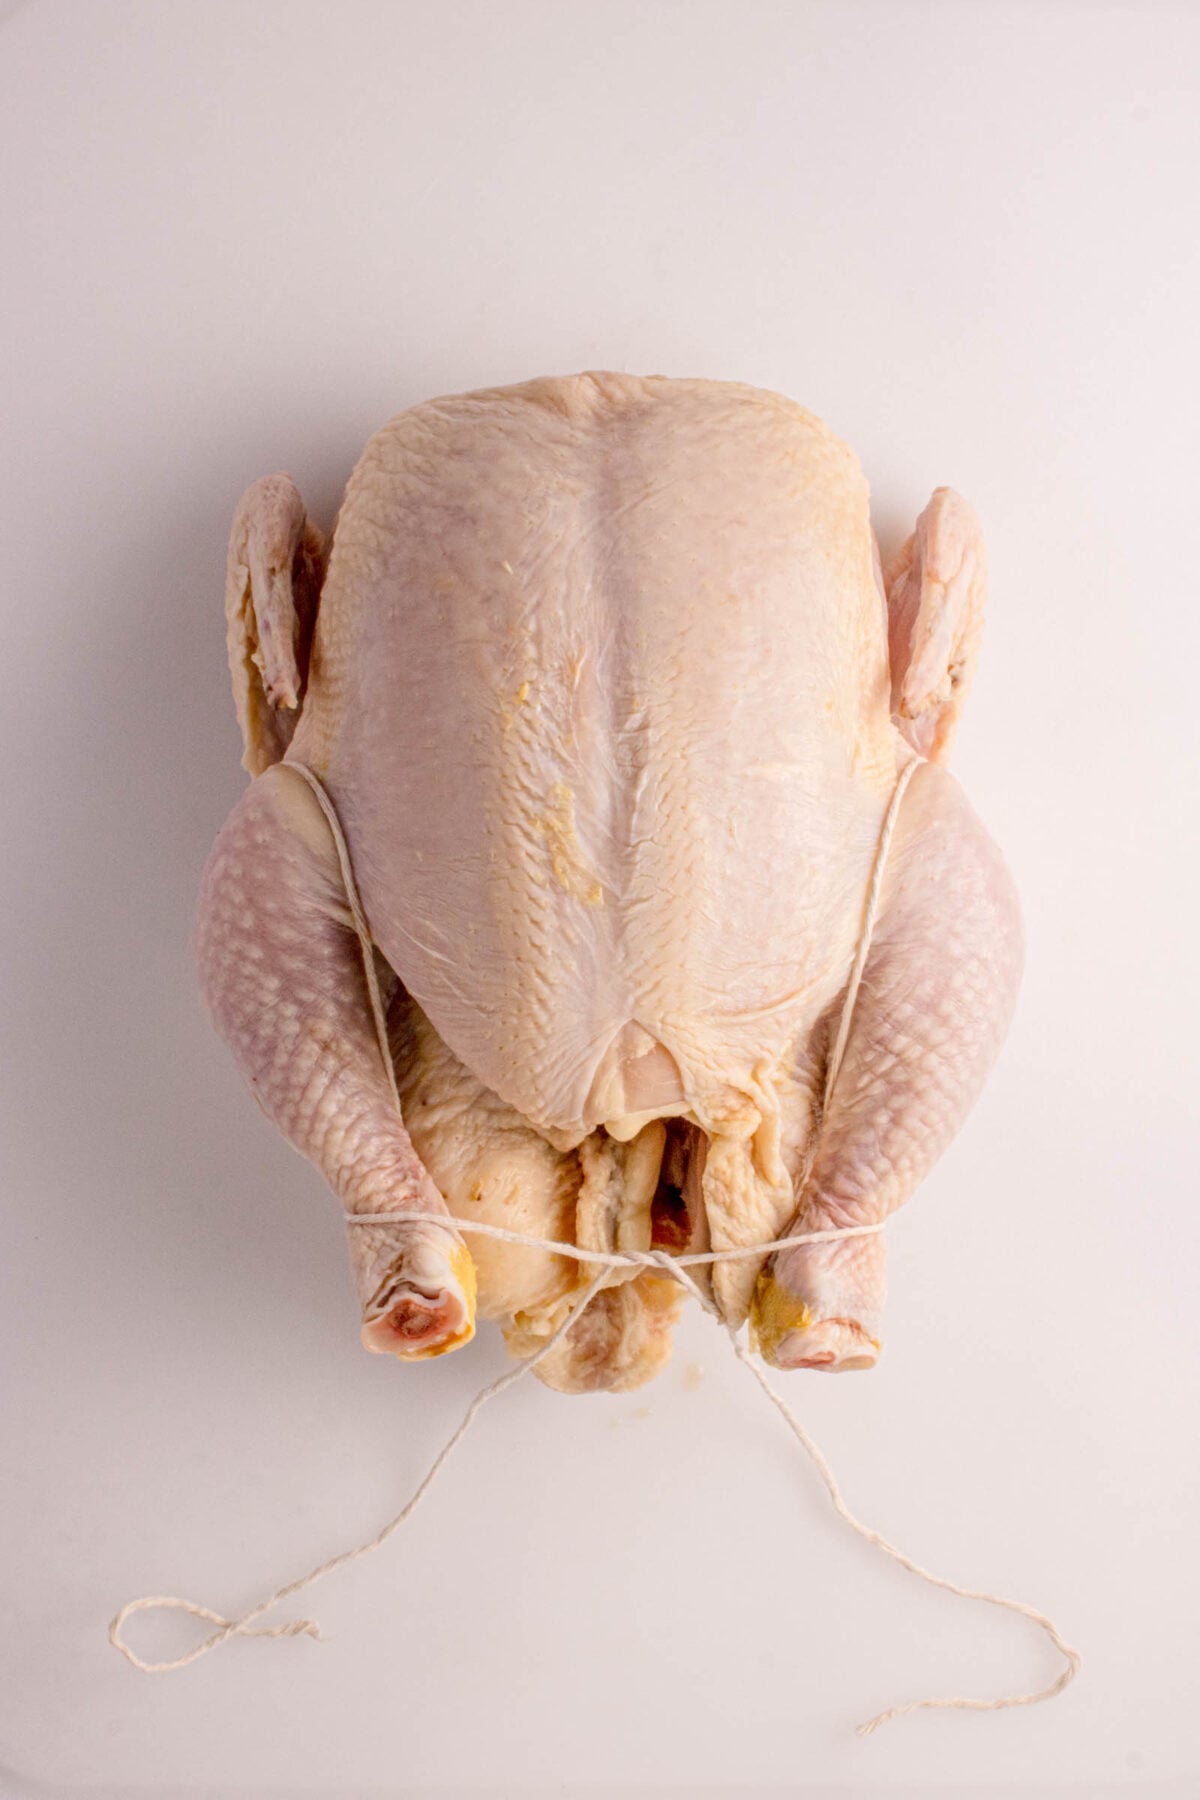
Pull both ends up and over the drumsticks, seating the twine down in the crease where the legs meet the body. - Cross into an X.
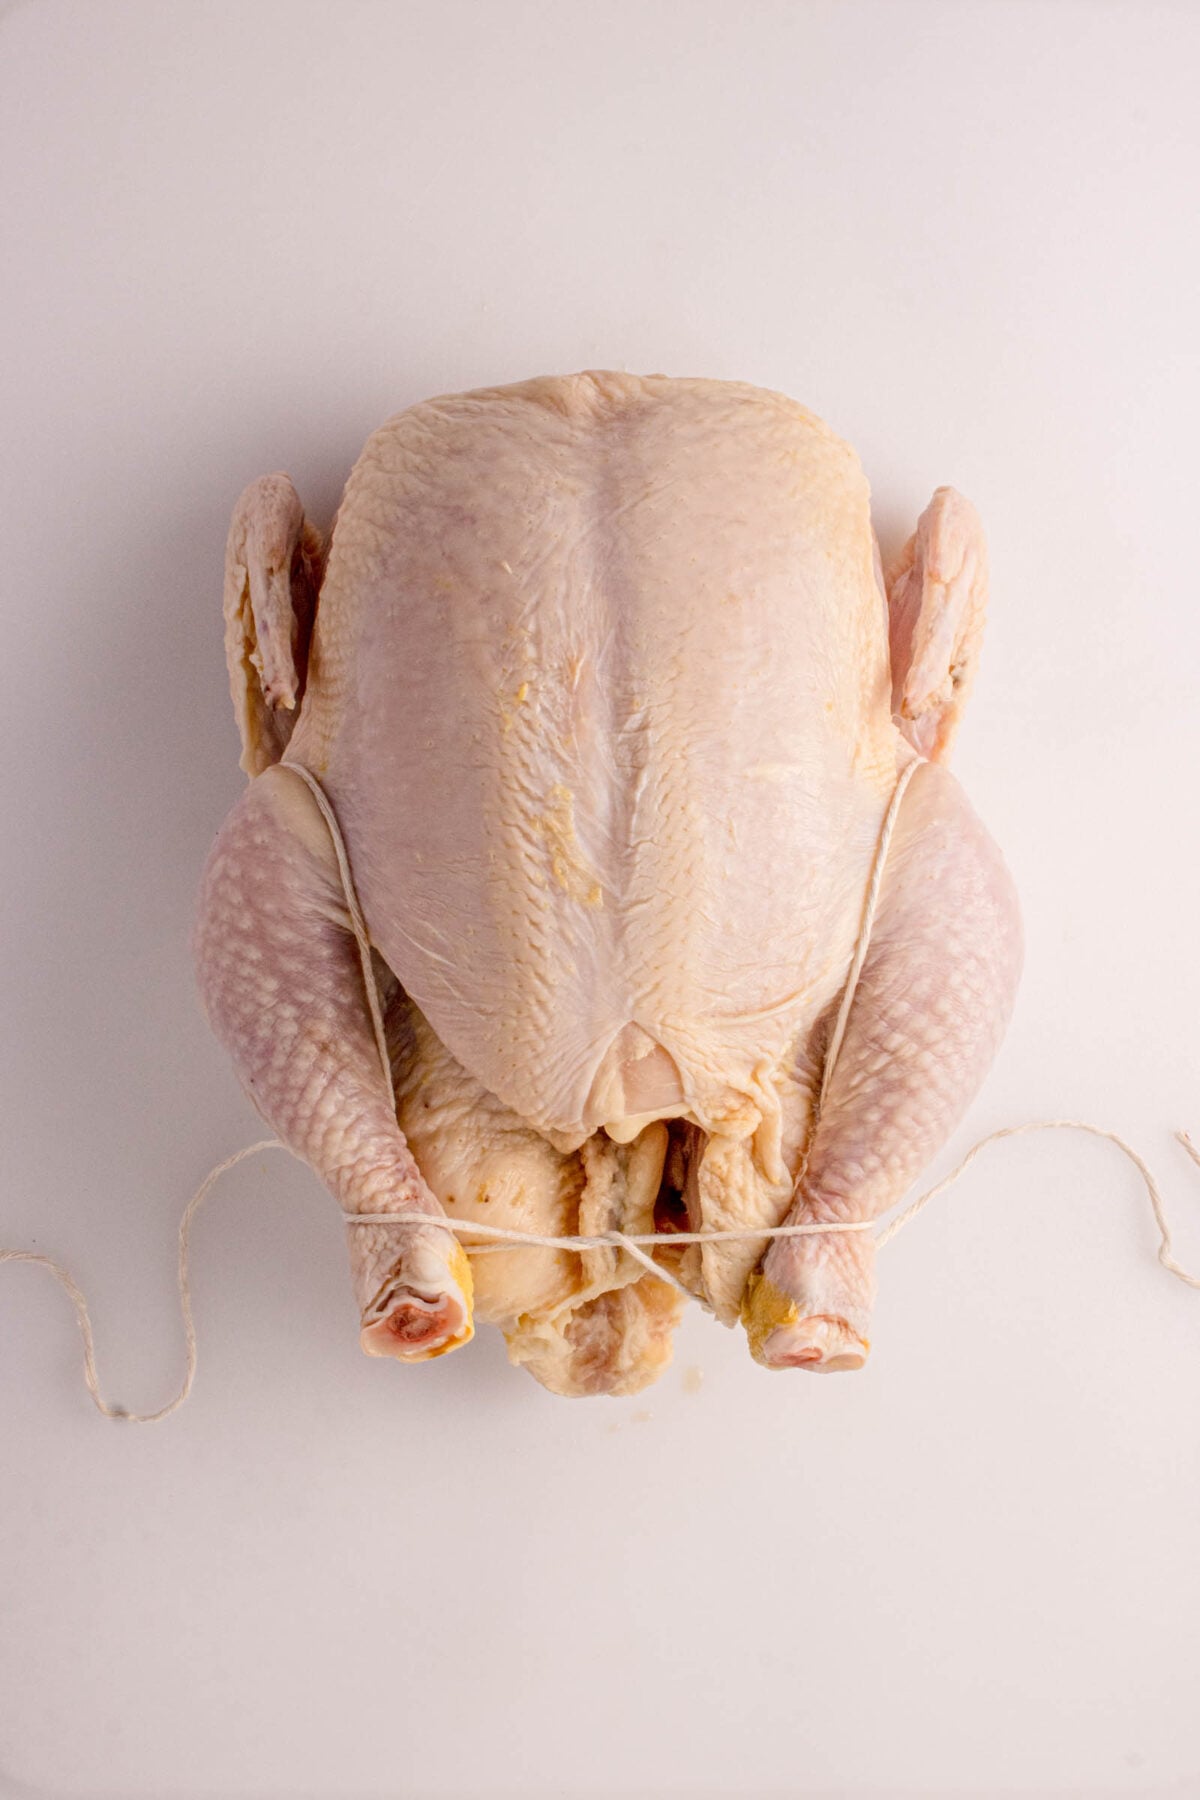
Pass each end under and back over its own drumstick, then cross the two ends over each other. - Pull it snug.
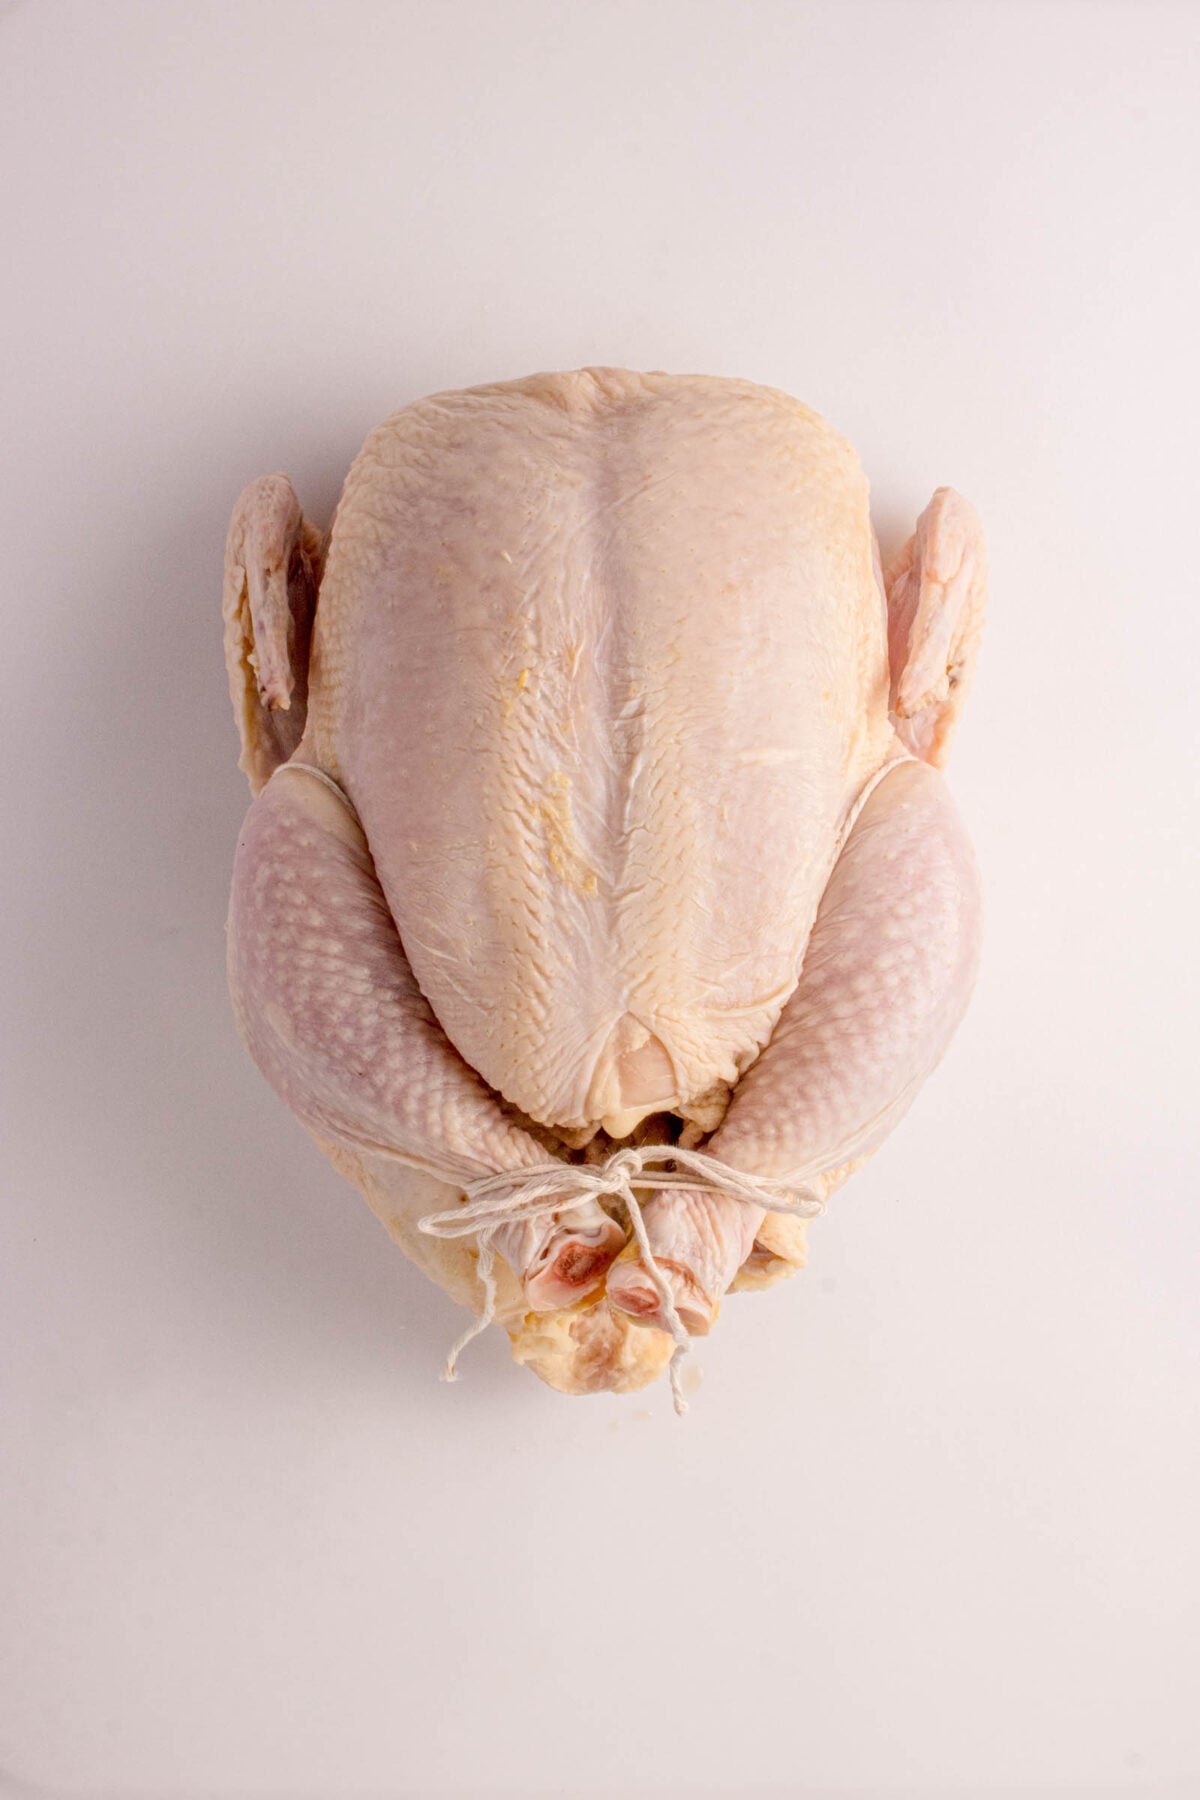
Draw the legs together until the drumstick ends touch. Snug, not strangled. If the skin is puckering or denting, you have gone too far. - Tie it off.
Bring the ends back over the drumsticks and finish with a firm double knot, or a bow you can kill with one snip later.
📝 Method 2: The Full Classic Truss
This is the textbook version, the one that pins the wings as well as the legs. It takes five minutes and it is what you want when the whole bird is going to the table and everyone is going to look at it.
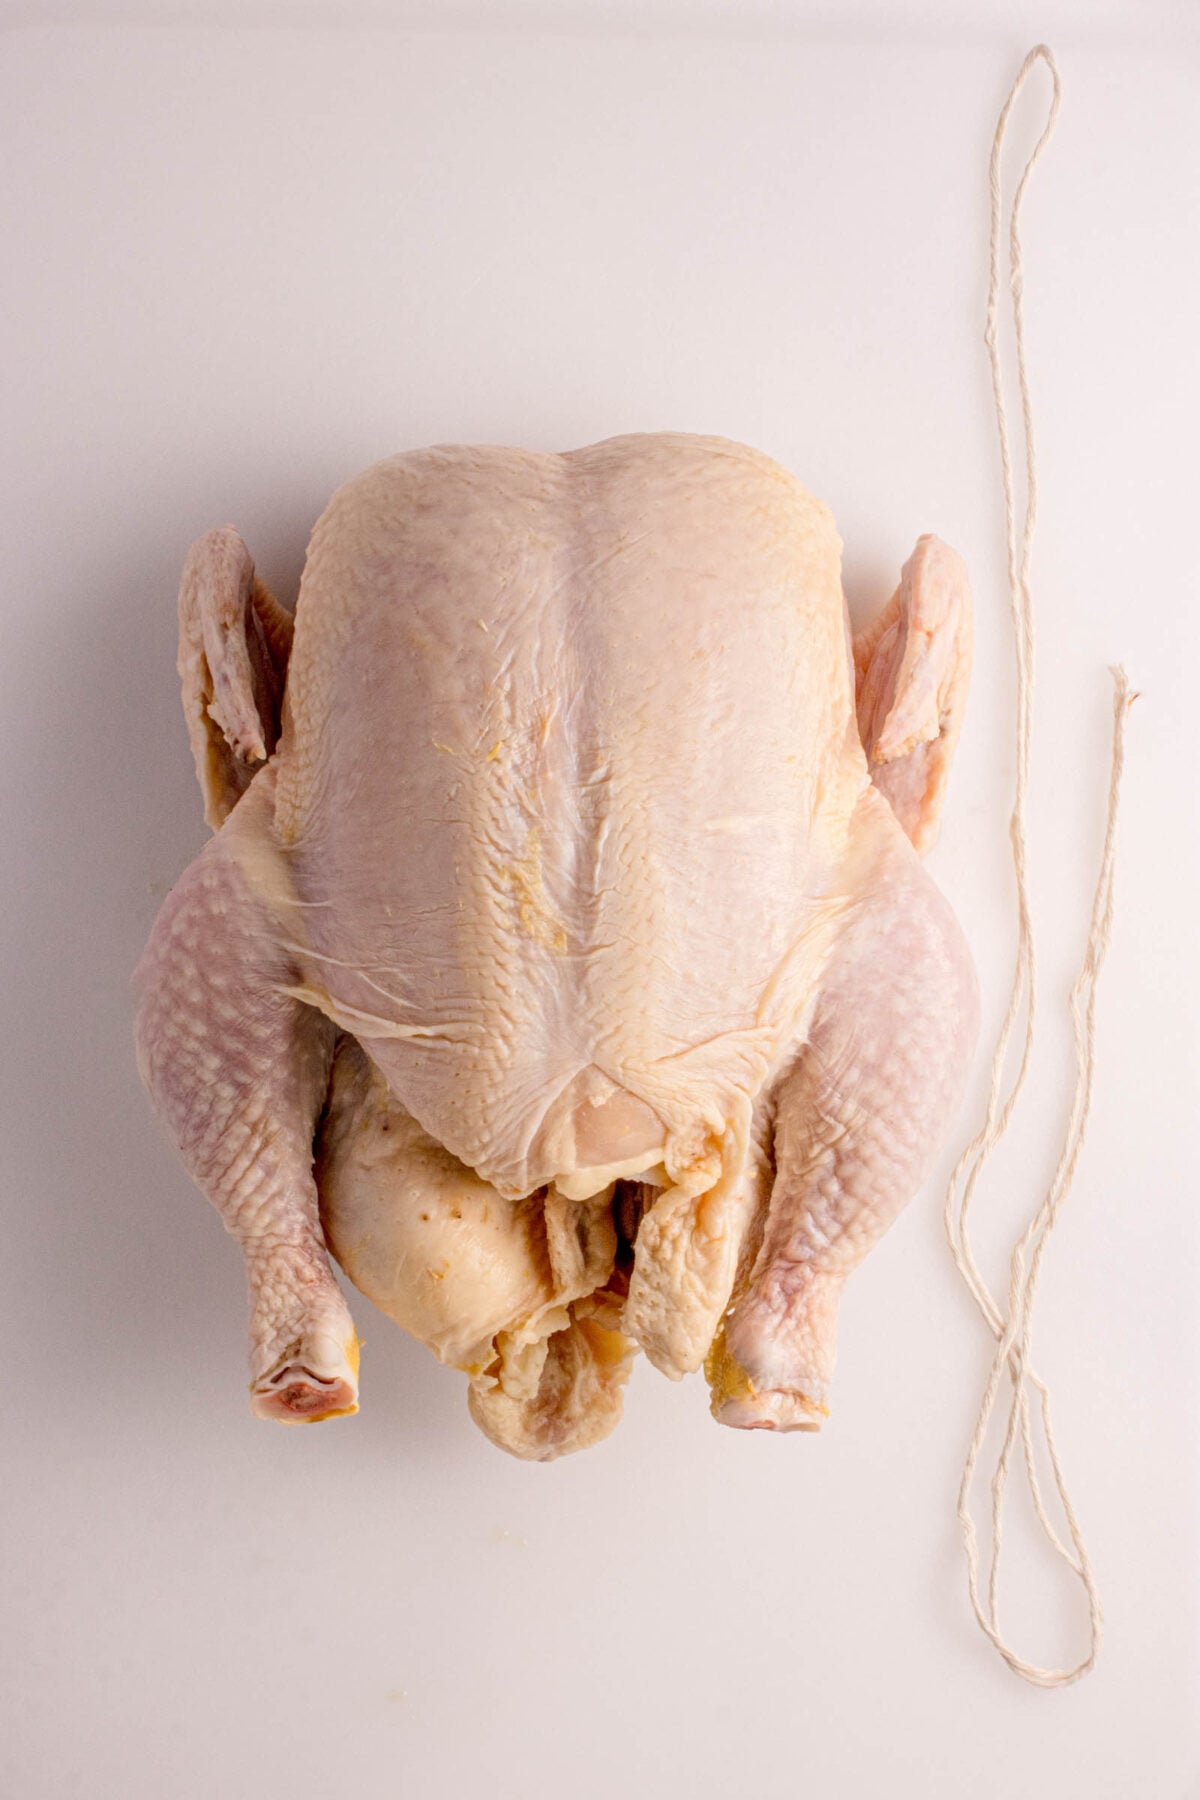
- Start long.
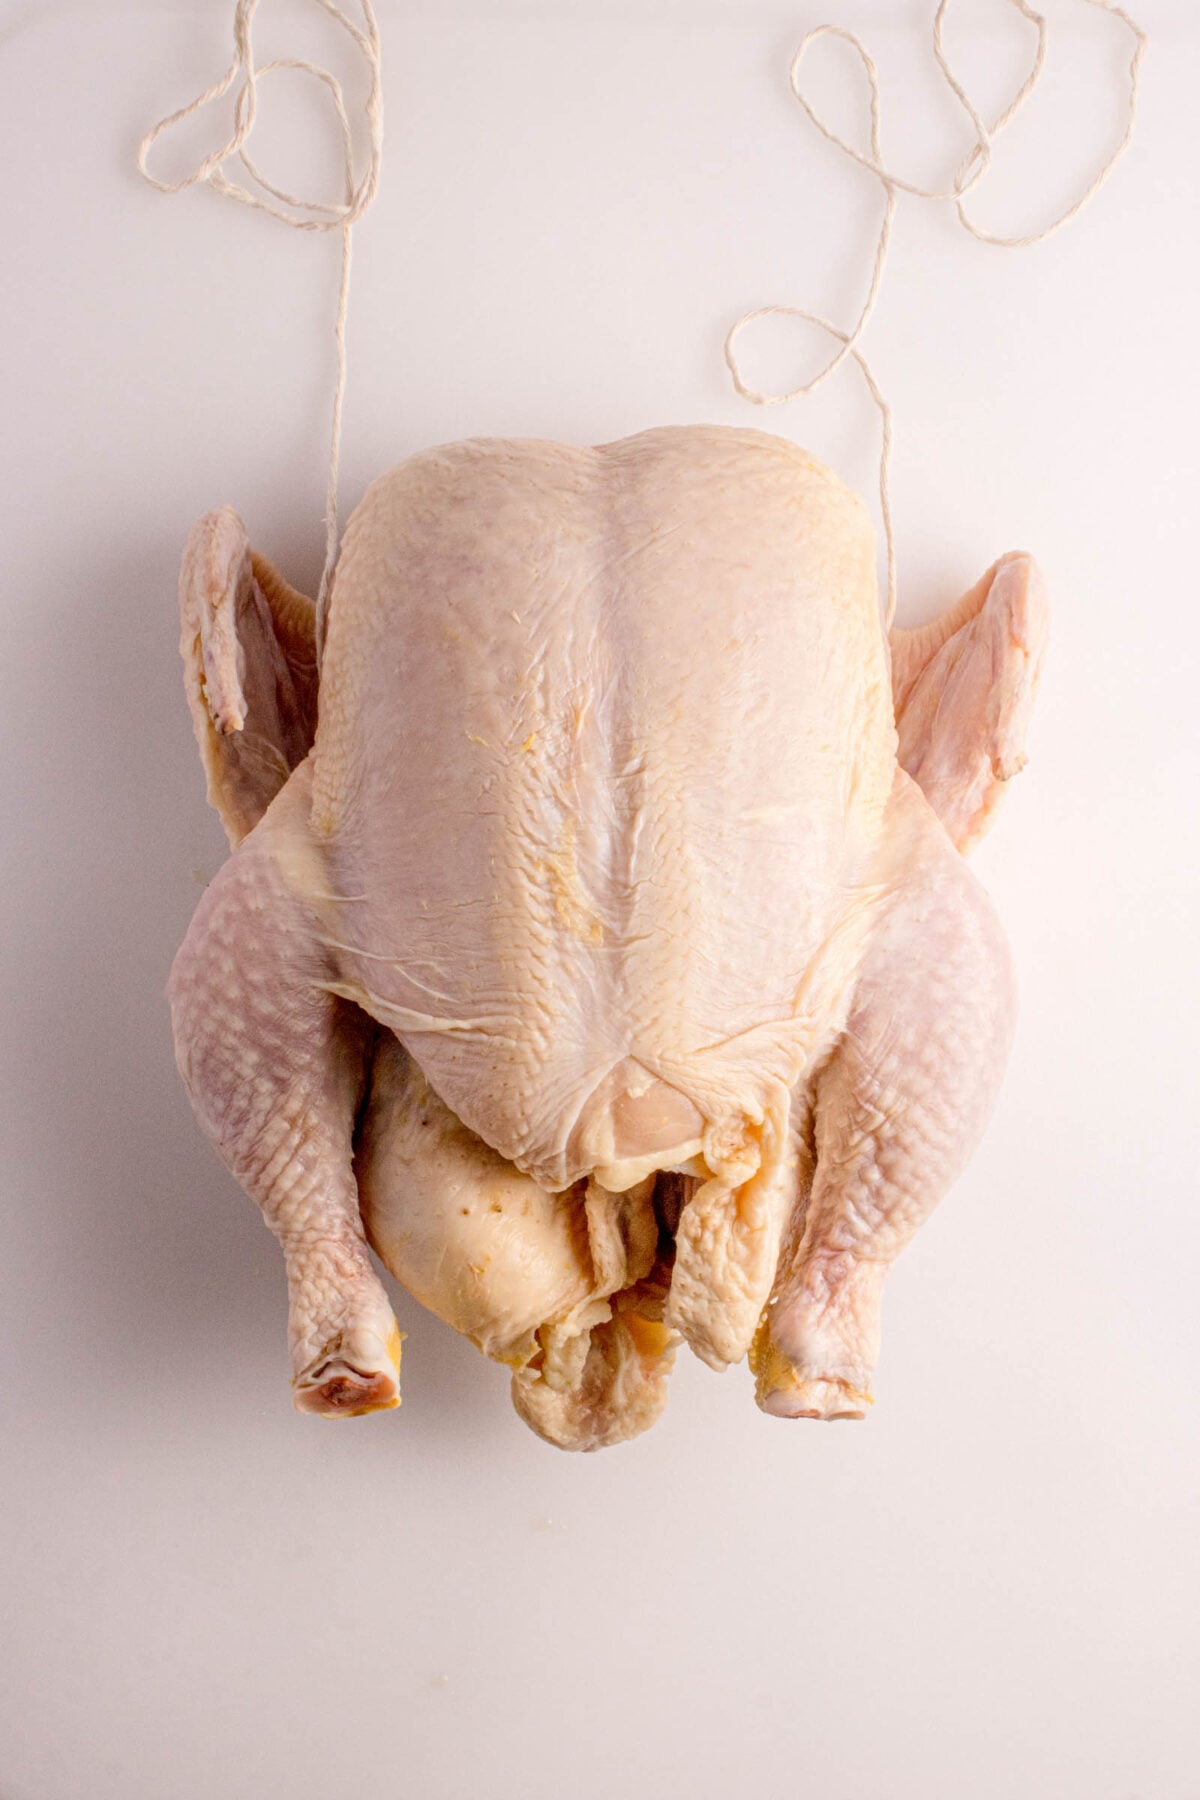
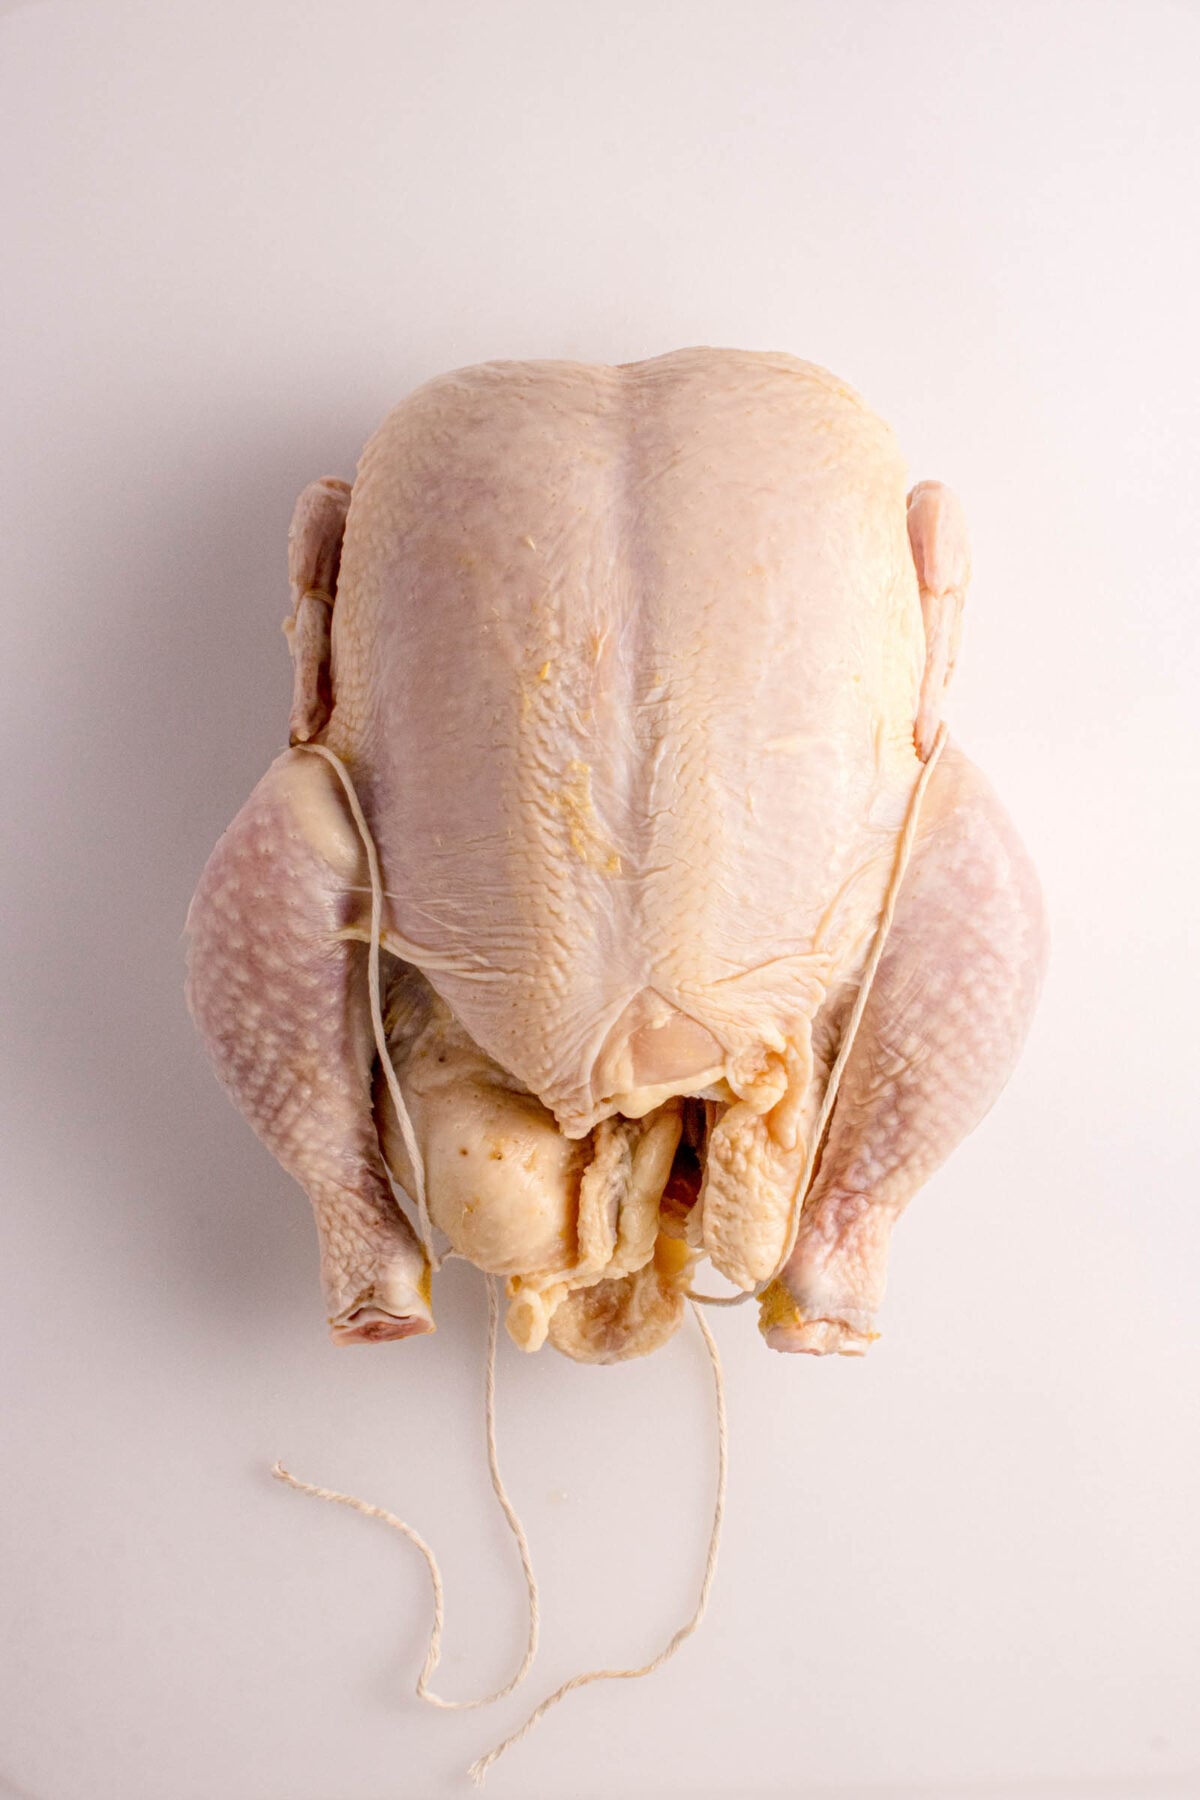
Cut about 5 feet of twine, roughly five times the length of the bird. Slide the midpoint under the back so both ends come out even. - Catch the wings.
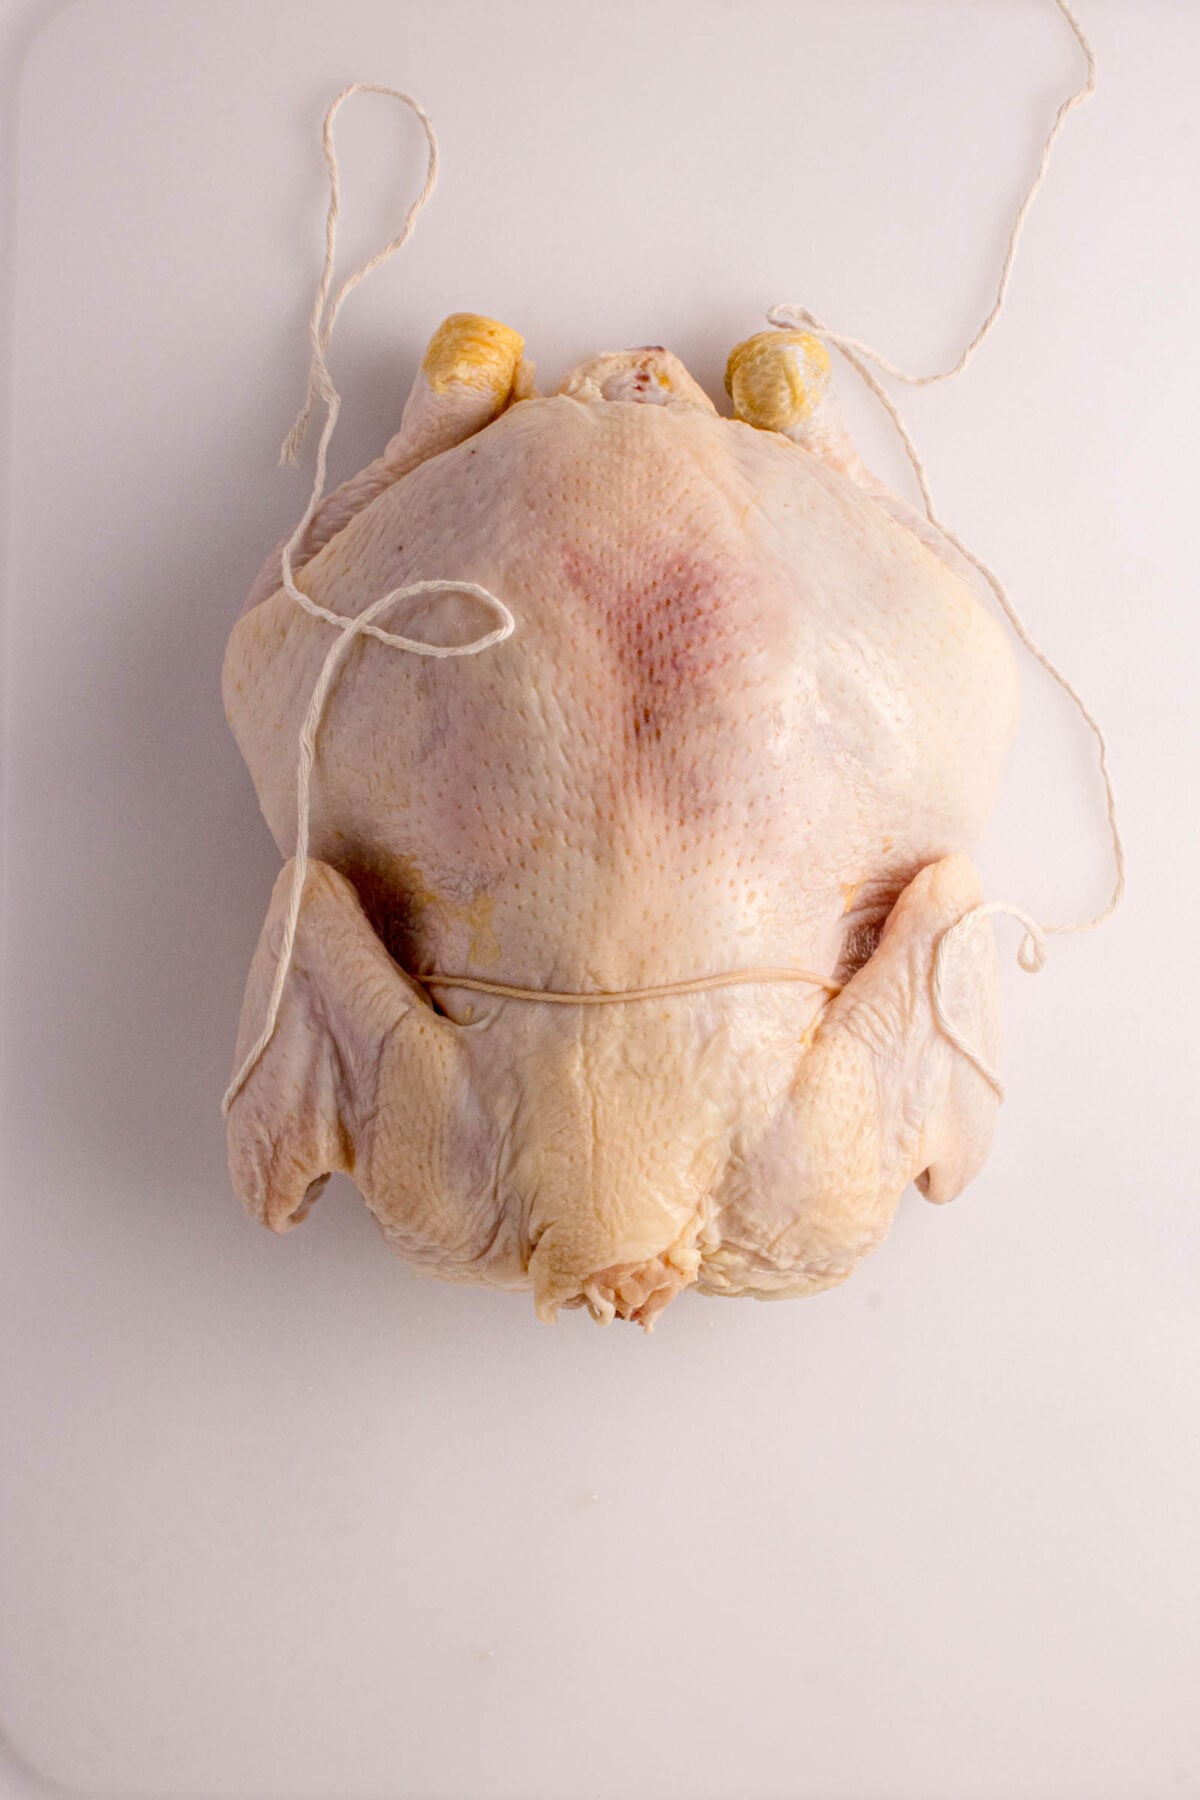
Loop the twine under the wing tips so they pin tight against the body. Tuck the tips back behind the shoulders if they will go, which keeps them out of the direct heat entirely. - Around the back.
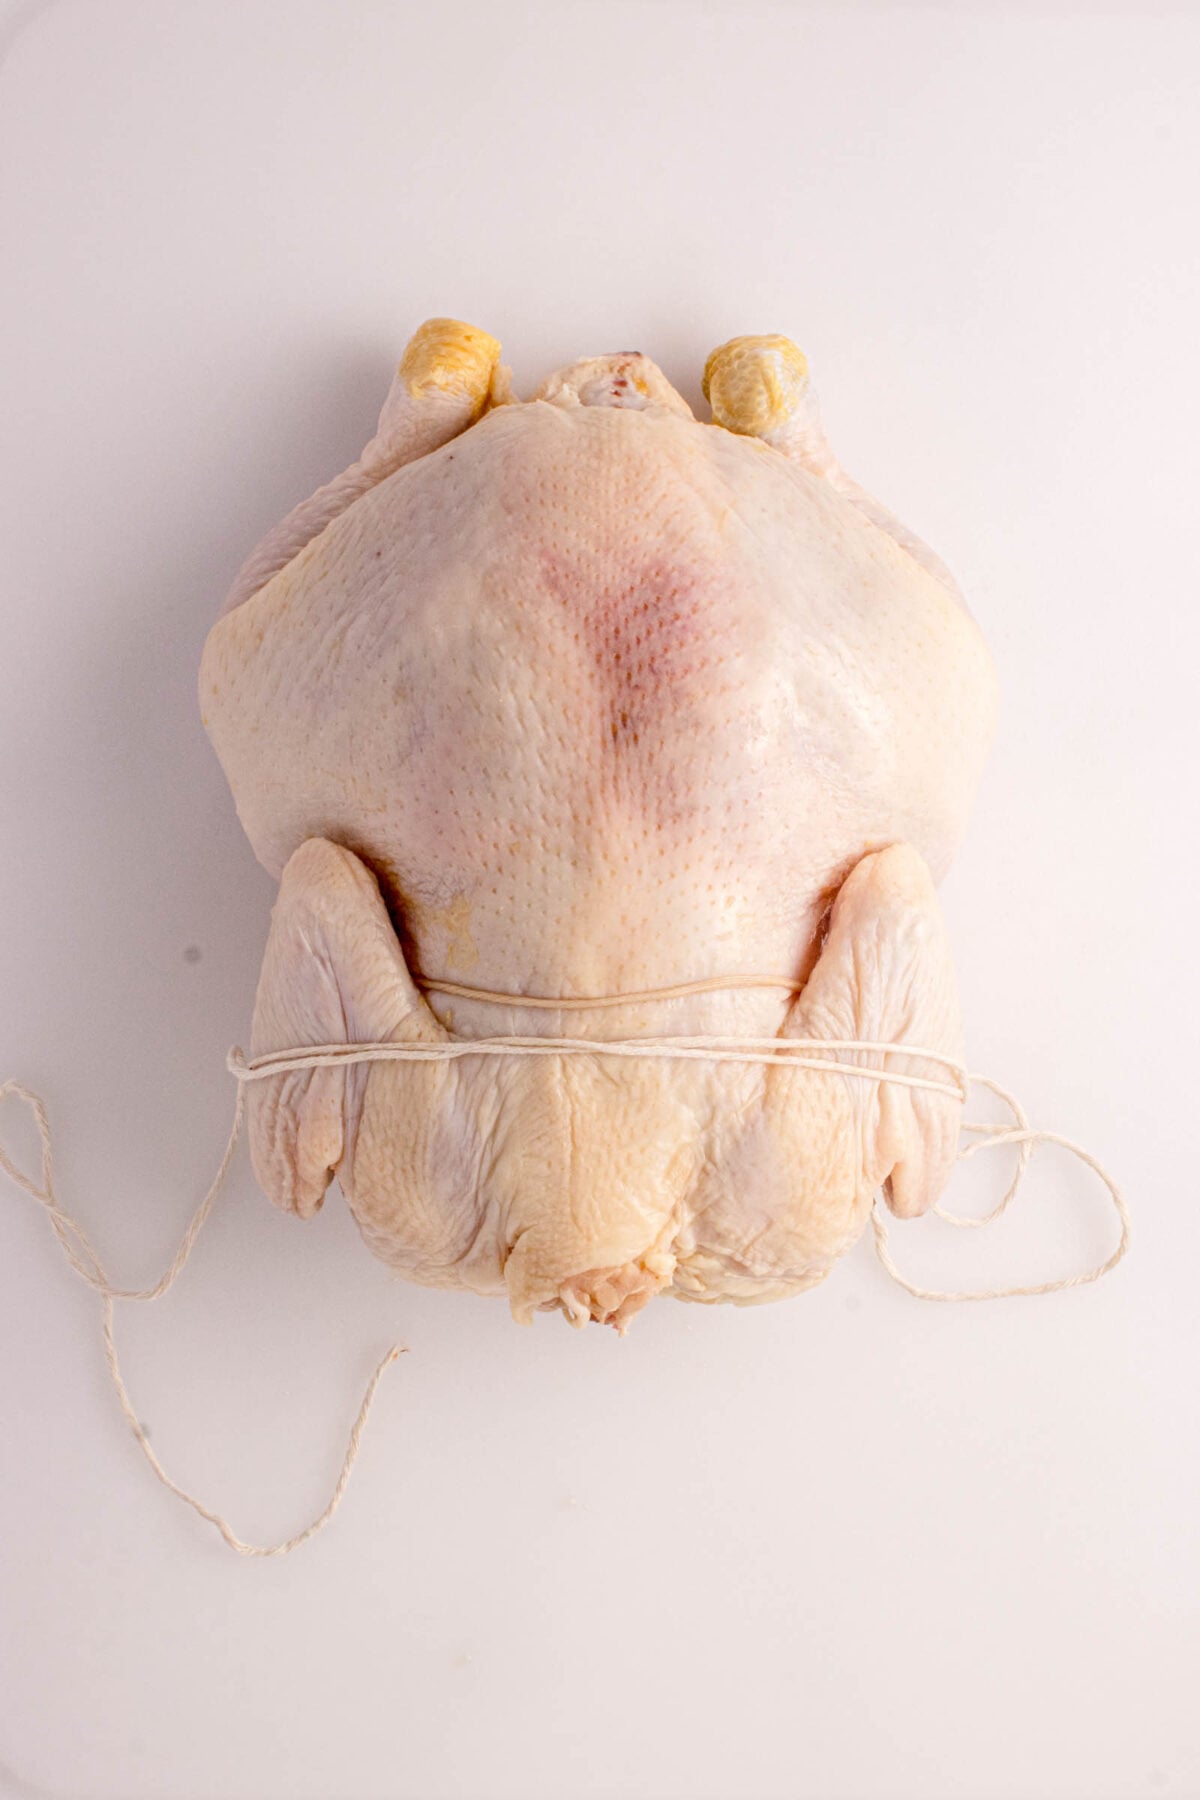
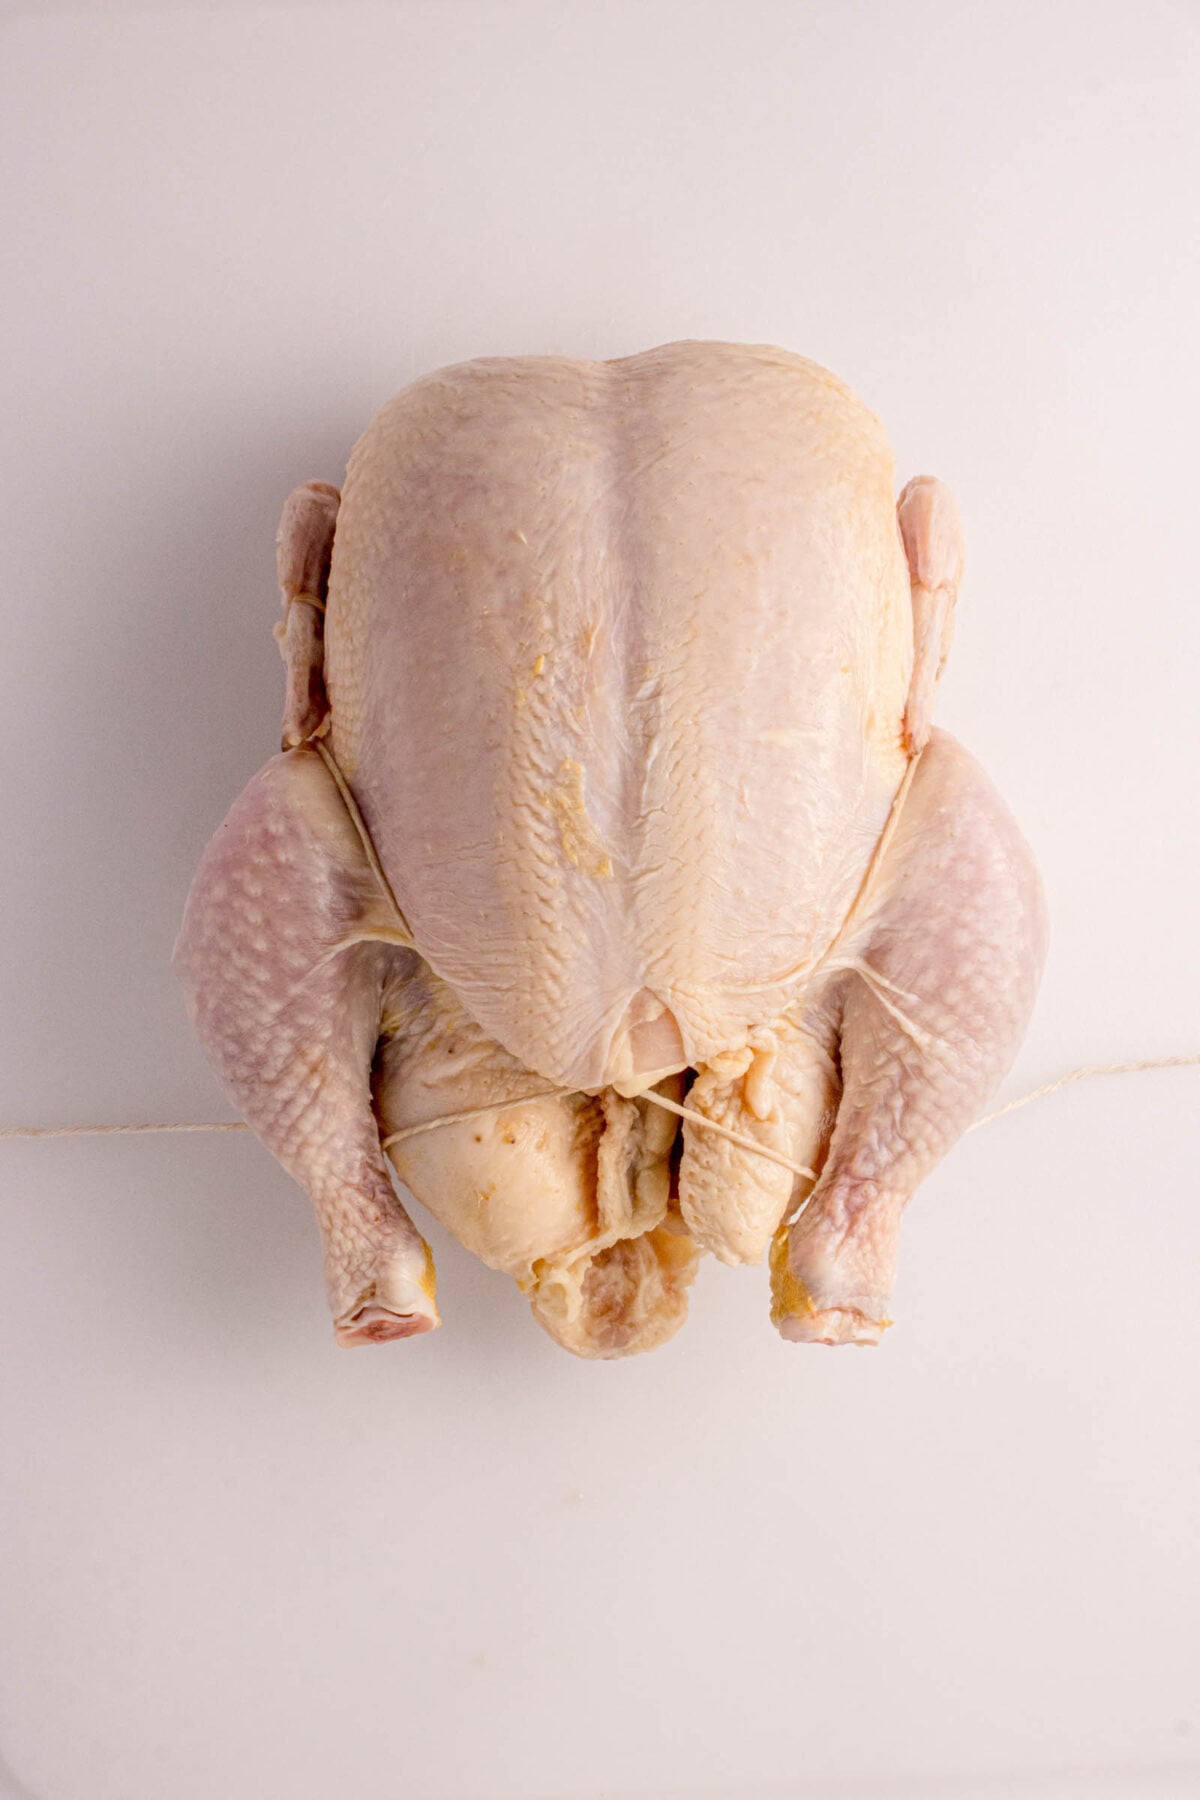
Flip the bird breast side down, bring both ends around the back, loop once, and pull gently to take up the slack. - Flip and cross.
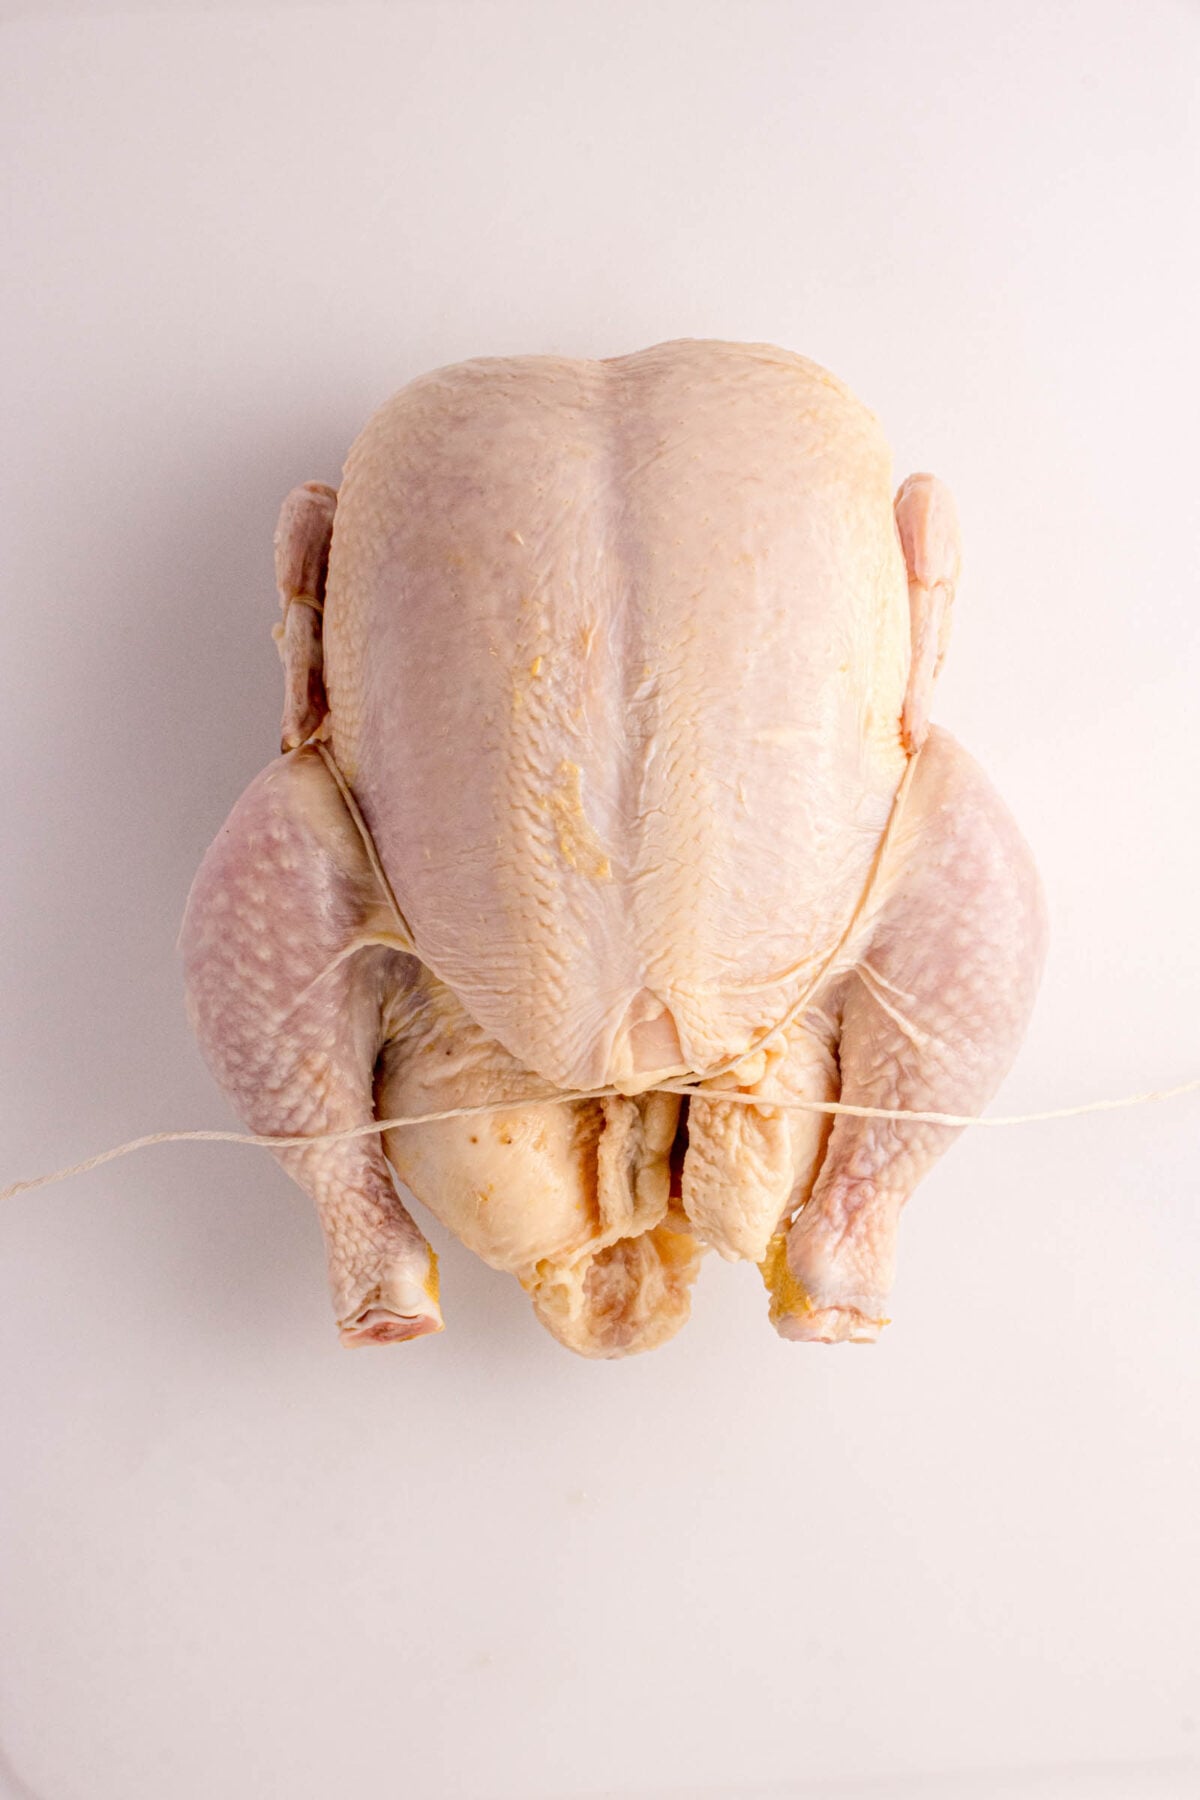
Turn it breast side up again, cross the twine over the cavity opening, then pull both ends down and around the ankles, meaning the very ends of the drumsticks. - Tie and check.
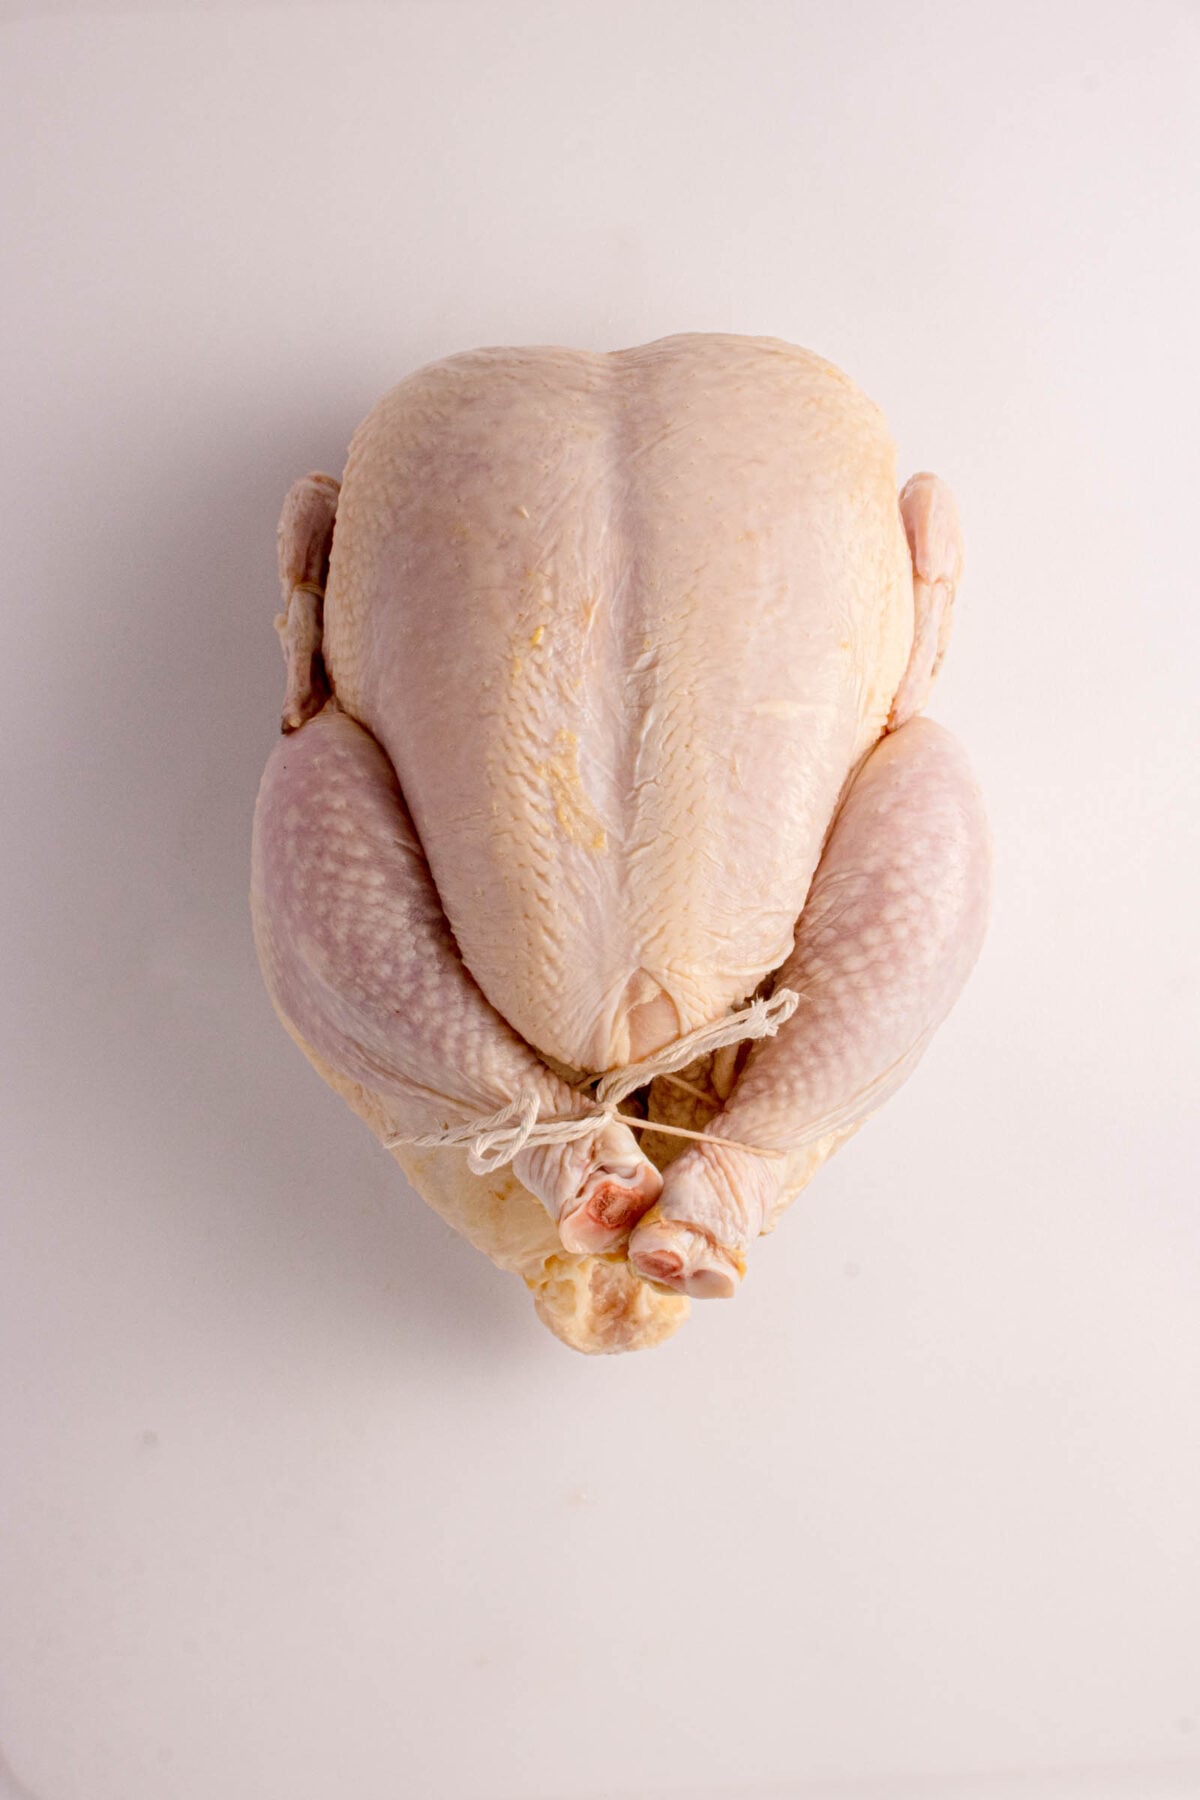
Cross once more and tie a firm double knot. Lift the bird an inch by the twine. If nothing sags and nothing swings, you tied it right.
🚫 When to Skip Trussing
Trussing is not free. It trades crisp skin for even cooking, and there are nights when that is the wrong trade.
- A spatchcocked bird. The entire point of spatchcocking a chicken is laying it flat so it cooks fast and evenly. Tying it back up undoes the work you just did with the shears.
- When you want crackling skin everywhere. A tight truss shields the inner thigh and the skin tucked under the legs, and shielded skin steams instead of crisping. If crispy skin is the whole reason you are roasting, leave the legs open.
- Slow cooker, braise, or anything wet. Nothing scorches at 200°F in liquid, and shape stops mattering the moment you pull the meat apart. A whole chicken in a crock pot needs no twine at all.
💡 Meat Nerd Tips
- Pat the bird bone dry first. Wet skin makes twine slide and you will fight the knot the whole way. Paper towels, then an uncovered hour in the fridge if you have the time.
- Salt before you tie, not after. Once the legs pull in you lose access to the inner thigh and the crease along the breast. Season those surfaces while you can still reach them.
- Tighten, do not crush. The twine holds the limbs close. It should never dent the skin or squeeze the thigh out of shape.
- Truss tighter for the rotisserie. A loose wing catches, tears, and throws the spit out of balance halfway through the cook.
- Cut the twine off before you carve, not before it rests. The truss helps the bird hold its shape through the rest. Snip it when the knife comes out.
A whole chicken is really five pieces cooking at five different rates, and three feet of butcher’s twine is what pulls them back together. Two ways to tie it: the two minute version you will use on a Tuesday, and the full classic truss for the bird that goes to the table whole.
Prevent your screen from going to sleep
Method 1: The Two Minute Truss
-
Cut about 3 feet of twine. Cut extra, it’s better to have too much here than to start over.
-
Lay the bird breast side up with the twine centered underneath at the leg joints, both ends even.
-
Pull both ends up and over the drumsticks, seating the twine down in the crease where the legs meet the body.
-
Pass each end under and back over its own drumstick, then cross the two ends over each other into an X.
-
Draw the legs together until the drumstick ends touch. Snug, not strangled. If the skin is puckering or denting, back it off.
-
Bring the ends back over the drumsticks and finish with a firm double knot, or a bow you can kill with one snip later.
Method 2: The Full Classic Truss
-
Cut about 5 feet of twine, roughly five times the length of the bird. Slide the midpoint under the back so both ends come out even.
-
Loop the twine under the wing tips so they pin tight against the body. Tuck the tips back behind the shoulders if they will go.
-
Flip the bird breast side down, bring both ends around the back, loop once, and pull gently to take up the slack.
-
Turn it breast side up again, cross the twine over the cavity opening, then pull both ends down and around the ankles, meaning the very ends of the drumsticks.
-
Cross once more and tie a firm double knot. Lift the bird an inch by the twine. If nothing sags and nothing swings, you tied it right.
- Pat the bird bone-dry before you start. Wet skin makes twine slide, and you will fight the knot the whole way.
- Salt before you tie, not after. Once the legs pull in, you lose access to the inner thigh and the crease along the breast.
- Skip trussing entirely for spatchcocked birds, for the slow cooker, and for any night crackling skin everywhere matters more than even cooking.
- A trussed bird is done at 165°F in the thickest part of the thigh, measured away from the bone. Trussing tucks the thigh in tighter, so probe from the outside of the leg rather than down through the top.
- Cut the twine off after the bird rests, not before. This helps it hold shape through the rest.
Quick Summary
Trussing a chicken means tying the legs and wings tight to the body so the bird roasts as one shape instead of five pieces cooking at five different rates. Three feet of butcher’s twine and two minutes gets you most of the benefit. Pull it snug enough that the drumstick ends touch, never tight enough to dent the skin, and cut the twine off after the bird rests but before you carve.
❓ FAQs
Snug enough that the drumstick ends touch and nothing swings when you lift the bird, but never tight enough to dent or pucker the skin. A truss that cuts into the skin squeezes the thigh out of shape and leaves a pale band where the twine sat.
Yes, and the timing matters. Leave it on through the rest so the bird holds its shape, then snip it with clean kitchen shears right before you carve. Cutting it too early lets the legs fall open while the juices are still redistributing.
Yes. Aromatics like lemon halves, smashed garlic, onion wedges, and hardy herbs go in the cavity before you tie, and trussing is what keeps them from tumbling out onto the pan. Bread stuffing is a different story, since a packed cavity slows the thigh down and pushes your total cook time out.
165°F in the thickest part of the thigh, measured away from the bone. Trussing tucks the thigh in tighter against the body, so probe in from the outside of the leg rather than down through the top. A Thermapen is the tool we reach for every single time, because guessing on poultry is how good birds get ruined.
Yes, the mechanics are identical. You just need a longer length of twine, closer to 6 or 7 feet, to handle the extra size. Here is our full guide to trussing a turkey.
More Chicken Know-How
Keep building the whole bird skill set with the rest of our Meat Labs how to guides: