If you’re an actor, it’s likely you’re recording your self tapes with a smartphone camera. While using your phone to film is convenient, getting the right self tape framing can be challenging. This can be especially difficult when you can’t see yourself.
If you film using the back camera (which we always recommend, for a higher quality video) you might be wasting precious time trying to get the framing right. But what if I told you there was an easy way? Today we’re taking you through a super simple way to nail your self tape framing every time with a great feature called “mirroring”. If you’re ready to transform your self tape set up, read on!
What is the Correct Self Tape Framing for Actors?
Bad self tape framing is one of the biggest self tape mistakes we see actors make. Sometimes, this comes from simply not knowing the correct framing. In other cases, it’s a symptom of other difficulties with equipment and setup.
Before we continue, let’s run through the correct self tape framing in case you need a refresher. Correct self tape framing is made up of 3 key components: body position, headroom, and cut-off point. Below you’ll find the key elements to nailing each component.
- Body Position. Where the actor is placed in the frame. The actor should be central. It’s not necessary to be perfectly centred, but too far either side and it feels off to the viewer.
- Headroom. This is the space above the actor’s head at the top of the frame. There should be just enough room that it feels comfortable. We don’t want it to seem like the head could touch the top of the frame at any point. Likewise, too much room and it feels like the actor has too much space floating above them. The ideal proportion leaves a tiny bit of room above the actor’s head at the top of the frame.
- Cut Off Point. This refers to where the frame cuts off in relation to the actor. In a self tape, the bottom of the frame should cut off around the actor’s mid-bicep (either at or slightly above).
Additionally, the camera is typically eye level. Or at least positioned to seem that way in the playback! To steal my colleague Patrick’s excellent example, it looks like this:
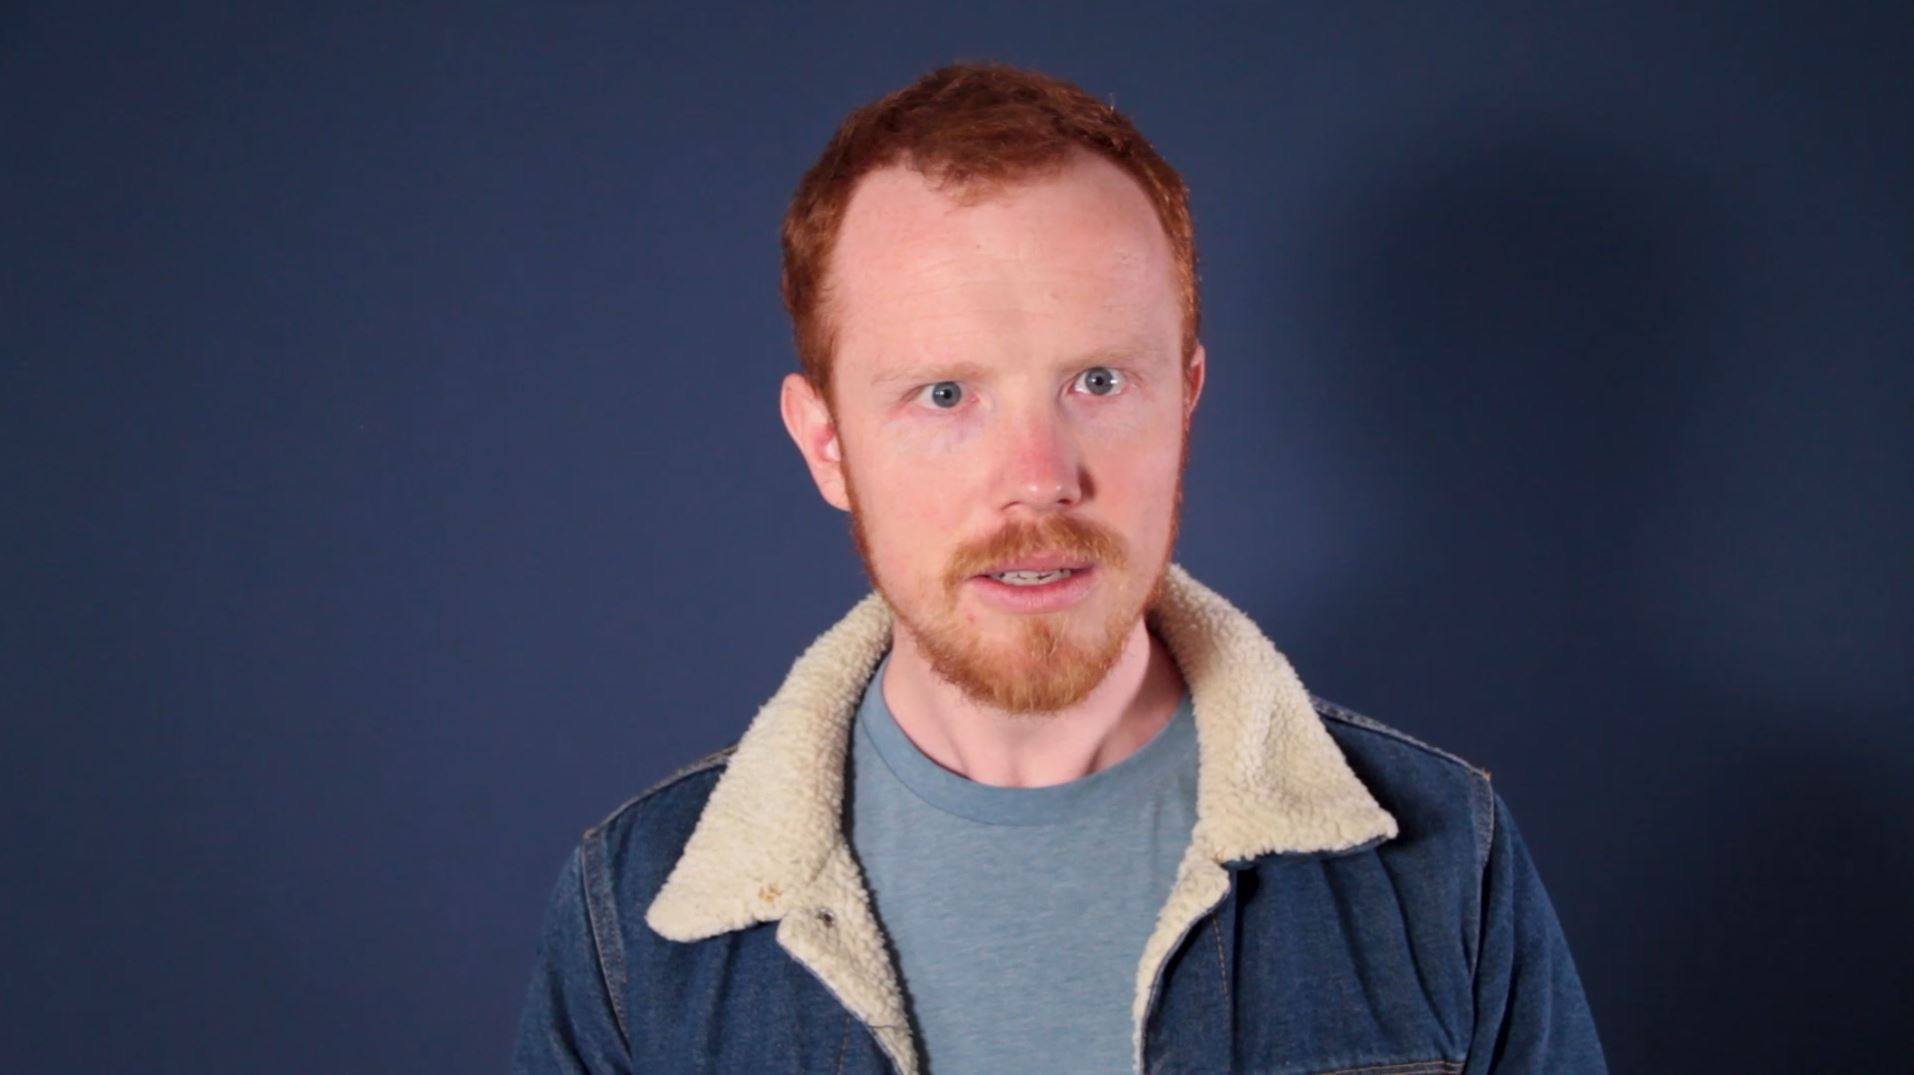
Patrick giving his scene partner a fantastic expression, and us a fantastic example of good framing!
Why You Should Use Your Phone’s Back Camera for Self Tapes
The issue of bad framing in self tapes isn’t always knowledge based. Sometimes the problem is simply that the actor can’t see themselves while framing the shot.
While some actors like to film using the front camera for their self tapes, the back camera of a phone generally produces better quality footage. Despite the improvement in video quality, filming using the back camera isn’t without its challenges.
The primary issue when filming with the back camera is that you can’t see yourself while recording. This makes it difficult to check whether your framing is correct.
Many actors in our Scene Club share with us that they struggle with this. Some run back and forth between their mark and the camera to check test videos, while others rely on a second pair of eyes to help them get the framing right.
Both methods can be time consuming or lead to disappointing results. Nevertheless, it’s no excuse for poor framing!
How to See Your Frame When Using the Back Camera
The method I’m about to share allows you to monitor the frame of the self tape while using your phone’s back camera. For this tutorial we’ll only need two pieces of equipment:
- A smartphone (eg. iPhone)
- A laptop or tablet (eg. MacBook)

Note: this tutorial will demonstrates the iPhone to MacBook process. Android users can apply the same principle using screen casting or mirroring features.
How to Frame a Self Tape When Using the Back Camera (iPhone Hack!)
By the time you finish reading this, you’ll have a straightforward and effective method for framing your self tapes when using the back camera.
First, you will need to set up your self taping equipment as you normally do. Because every actor is different, this will vary slightly for each individual, but if you’re looking for guidance on how to set up a professional self tape we’ve got you covered!
Next, follow these simple steps.
- Place your MacBook somewhere you can easily see its screen from your position in front of the camera.
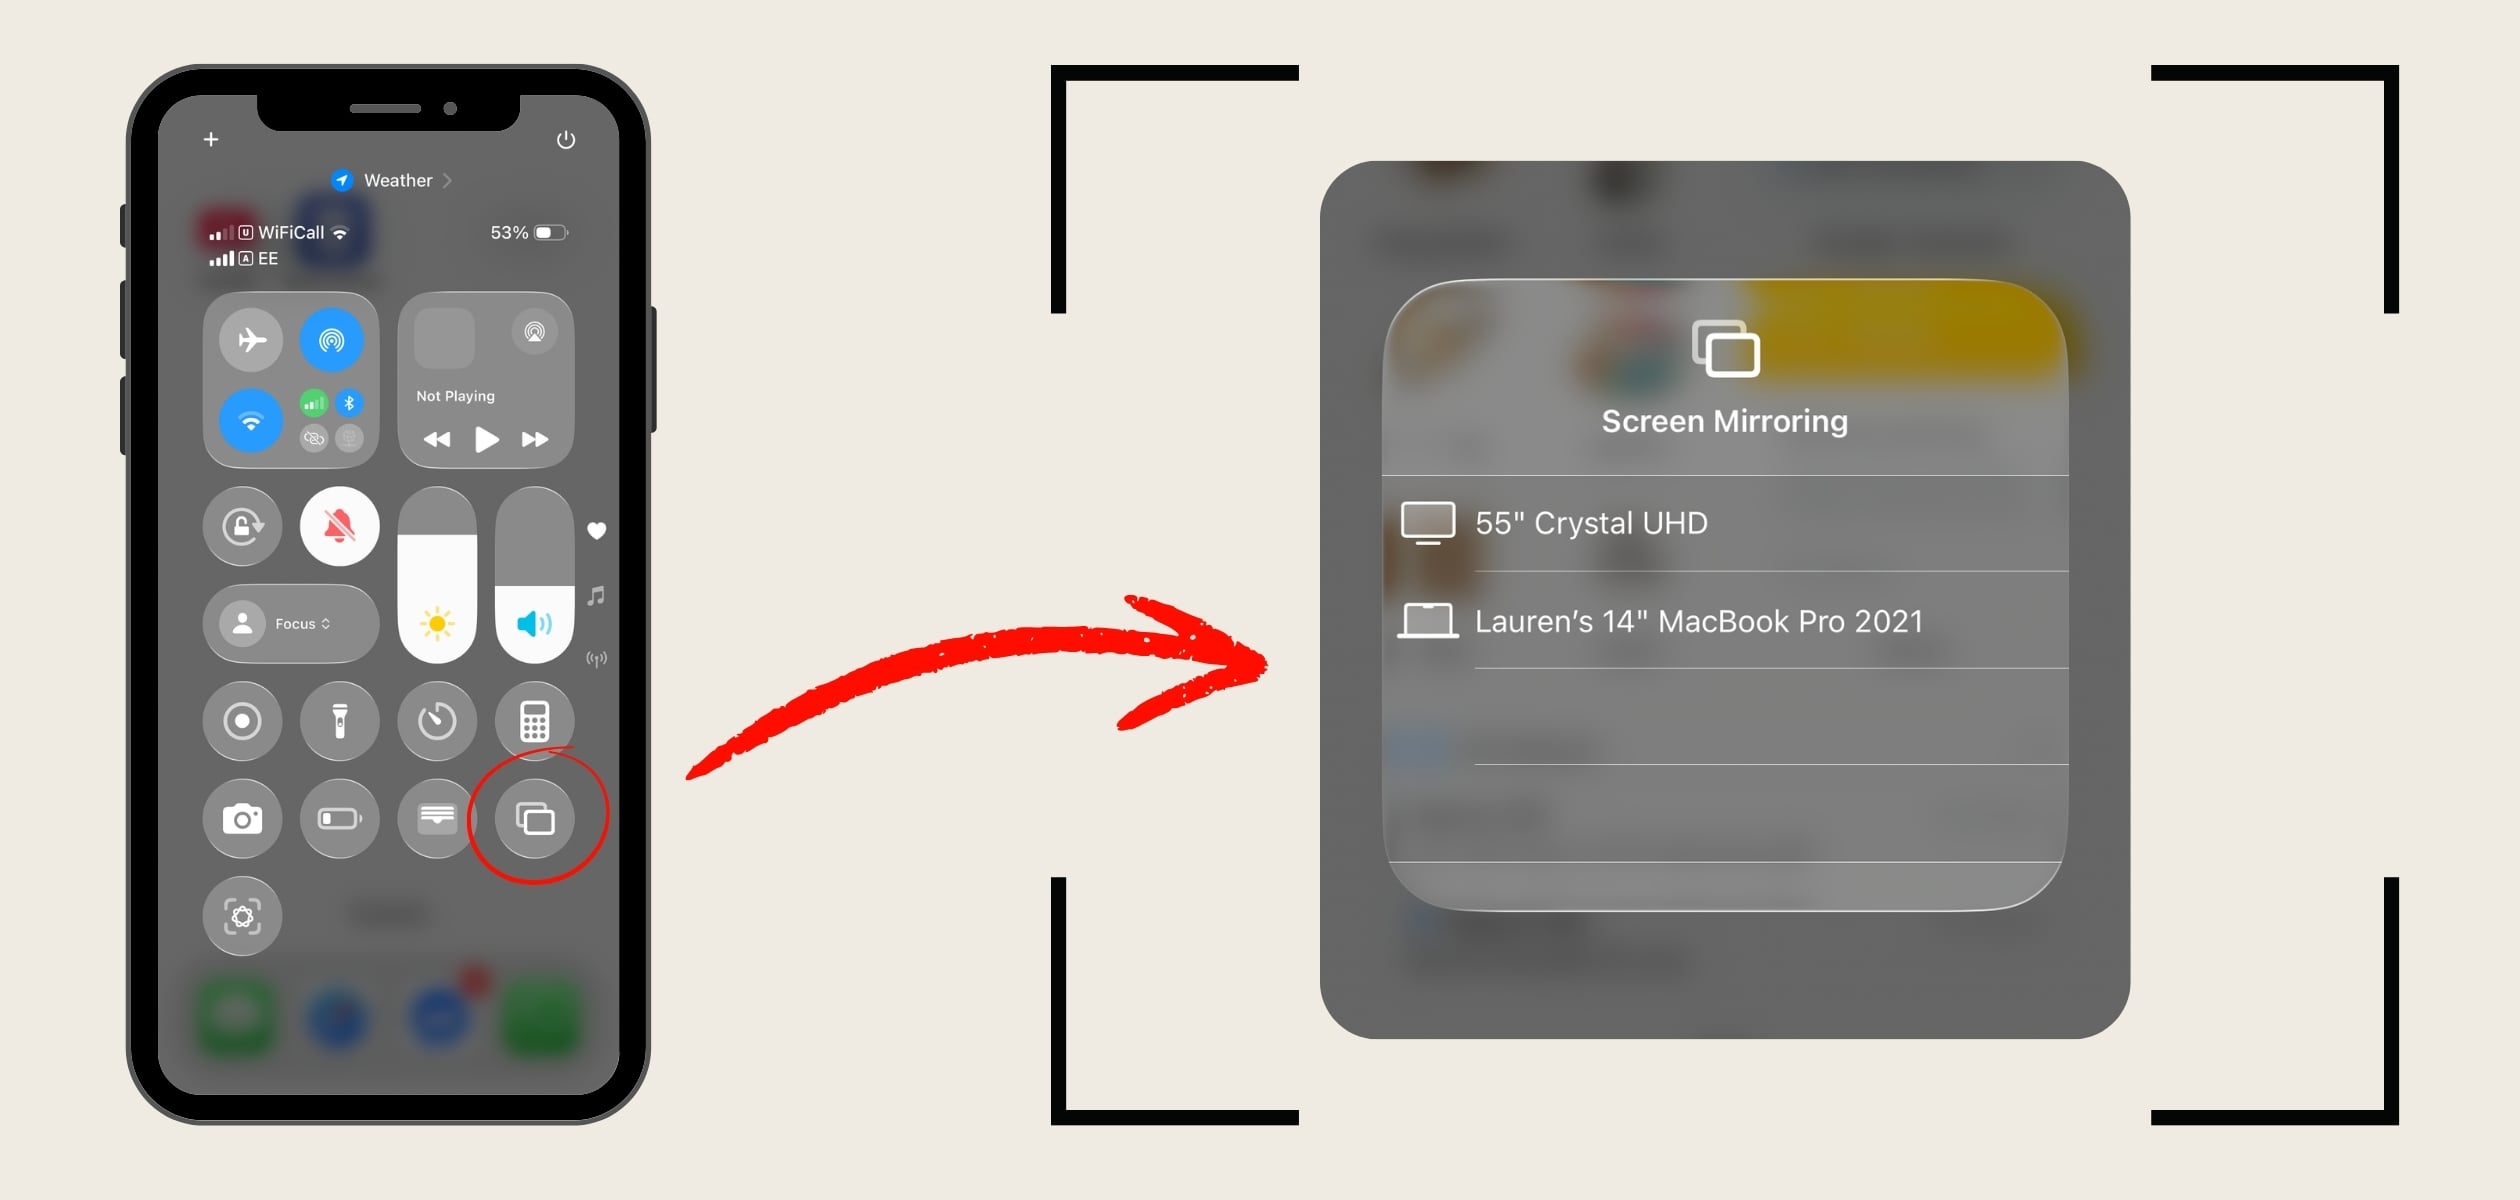
- Swipe down from the top screen of your iPhone.
- Look for the button that has two intersecting squares on the bottom right. This is the screen mirroring function.
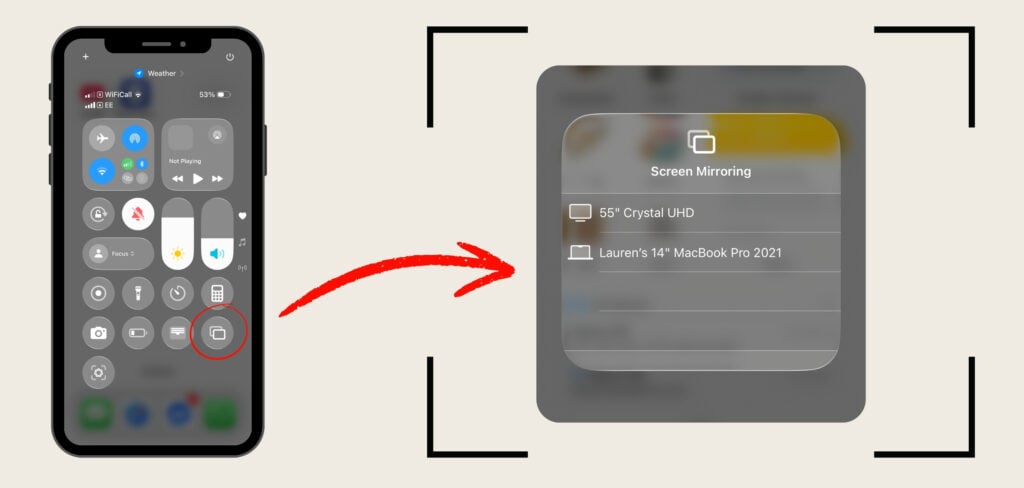
- Select your MacBook and the screen will automatically begin mirroring to your laptop.
- Return your iPhone to the tripod, and use your MacBook screen as your new mobile viewfinder.
- Find your perfect framing, and press record!
- Note: you can also keep the mirrored screen active while you record. Feel free to play around after starting the recording, find your mark, and then launch into the take.
This process has significantly cut down the time it takes me to set up a self tape.
While it (unfortunately) doesn’t speed up the process of wrangling my soft boxes, backdrop, tripod and equipment stands into my tiny living room, finding the frame is now quick and easy!
Final Tips for Perfect Self Tape Framing
There you have it. Whether you’re a new or seasoned actor, discovering a self tape setup and process that works for you is crucial.
This method gives you an uncomplicated way to frame up your self tapes, and makes finding the frame a breeze. Feel free to experiment with it as you refine the self tape setup that works best for you.
If you’re interested in practicing the craft of auditioning, come and join us! We share plenty of practical industry and craft lessons to help you level up your acting in our StageMilk Scene Club.