
Ask A Teamster
by Dr. Doug Hammill D.V.M. of Montana
INTRODUCTION:
Rather than respond to a specific question in this issue I have chosen to share the following comprehensive information on trimming, shoeing and the care of equine feet by Gene Ovnicek. My reason for doing so is that hoof care is one of the most necessary, reoccurring, complex, and often confusing requirements of domestic horse ownership, and Gene, an internationally respected authority and researcher, as well as a highly skilled farrier, has developed the best information I know of on the subject. Don’t be intimidated by the more technical aspects the first time you read it. Things will become more understandable on the second and third readings. – Doc Hammill
Natural Balance Hoof Care
by Gene Ovnicek
Prologue
As we look at the wild horse foot, we clearly see a pattern from the bottom that is consistent with all of the horses from the variety of terrain and environments looked at. We also observe many similar features on the ground surface of the domestic foot, and wonder if there may be something we’ve overlooked in our quest for knowledge and understanding of the domestic equine foot. Farriers, veterinarians and horsemen have been curious about common subtleties of the sole and hoof wall of domestic bare foot horses for decades. Questions such as:
- Why does the hoof wall always break at the quarters before the toe and heel?
- Why is there frequently a small amount of callused frog present at the frog apex?
- Why is there a substantial frog build-up in the back part of the frog between the heels & why is this portion also heavily calloused?
- What does a hoof wall flare mean to the foot?
- Why is there often a small section of the hoof wall below the coronary band at a different angle than the rest of the dorsal hoof wall?
- Why is there always a lip of frog that forms on the ground surface of the frog?
- What purpose does the raised area on the sole (just inside of the lamina) serve?
- Why is there always dirt packed in the bottom of horse’s feet, and particularly in the back half?
- Why is thrush noticed in feet and frogs that are narrow, with deep creases in the central sulcus?
- Why do shoes always wear more at the toe than the rest of the shoe?
- Why do the shoes wear more rapidly at the toe when the foot appears to have a long toe, low heel conformation?
- Why do most front shoes wear more at the outside (lateral) toe?
- Why does the frog and sole change to hard and soft textures rapidly when the weather changes?
All of these questions are posed to farriers and by farrier on a regular basis. However there is rarely a good explanation that follows. In many cases, farriers go about their daily routine without giving much thought to why basic, common tasks are done. For example, farriers are often instructed to trim the frog and sole to reduce weight-bearing from the ground, and to make it easy to remove dirt and debris. At the same time, horse owners are instructed to keep the feet cleaned out to prevent thrush and check for stones. Is it possible that the very things we are eliminating, based on the wild horse research, may be the most important link that is broken in the chain of facilitating foot functional through the ground surface of the foot? At the same time, we go to great lengths to try to preserve the hoof wall when it so desperately trying to break and crack to expose the other solar structures to the ground. Far too often, we take for granted that what we do on a daily basis is correct or even makes sense. It is with that thought that got me looking at my work more closely and forcing myself into having a reason for everything I do, including the basics.
What to Expect
We have now established the starting point to understanding Natural Balance Hoof Care. The questions and comments from the above section are very important when learning how to look at the horse’s foot differently. The remaining sections of this “Natural Balance Hoof Care” tutorial will teach you how to look at the foot differently and how to listen to the horse and Mother Nature when servicing the needs of the foot. You will learn:
· Why and how the foot relies on the entire back region of the foot for support.
· Why the frog is so important for hoof development, bone column alignment and circulation.
· Where the optimal point of breakover is for a shod and barefooted horse.
· How to balance the hoof using the sole plane and other landmarks on the bottom of the foot.
· Why foal activity is so important in the first few days and even hours after birth.
· How to recognize if a horse is in danger of having future lameness problems.
And hopefully many more interesting and helpful aspects of the equine digit that will keep your horses happy and sound!
Definitions & Terminology
Basic Anatomical & Relational Terminology
Distal Phalanx – Also known as the third phalanx, PIII, or the coffin bone of the equine foot.
Medial – For our purposes, this refers to the inside (toward the horse’s mid-line) of the limb.
Lateral – For our purposes, this refers to the outside (away from the horse) of the limb. In Radiographic (X-Ray) terminology, this generally refers to a Radiograph or X-Ray that was taken from the side view and perpendicular to the limb.
Medial/Lateral or M/L – In hoof care terms this means from the inside to the outside of the hoof or side-to-side.
Anterior (or cranial) – For our purposes, this refers to the front portion of the limb.
Posterior (or caudal) – For our purposes, this refers to the back portion of the limb.
Anterior/Posterior or A/P – In hoof care terms this means from the front to the back of the hoof.
Dorsal – For our purposes, this refers to the frontal portion of the hoof or coffin bone.
Proximal – For our purposes, this refers to the upper aspect of an anatomical structure.
Distal – For our purposes, this refers to the bottom (generally used when describing the bottom border of the coffin bone).
Ventral – For our purposes, this is a directional reference to “BELOW.”
Quarters – In hoof care terminology, this refers to the sides of the hoof wall. If looking at the bottom of a foot, where the center of the toe is at the 12:00 position, the quarters would be at the 3:00 and 9:00 position.
Toe Quarters – Again, looking at the bottom of the foot using the clock analogy, the toe quarters would fall at approximately the 10:00 and 2:00 positions.
Heel Quarters – Again, looking at the bottom of the foot using the clock analogy, the heel quarters would fall at approximately the 8:00 and 4:00 positions.

Sole Callus – The “sole callus” is the functional epidermal tissue that extends beyond the anterior distal border of the distal phalanx, and is seen as the raised area just inside, or axial to the hoof wall in the front part of the foot. The sole callus maintains its relationship with the distal phalanx in the toe quarters (10:00 and 2:00) and adapts quickly to changes in the environment to best offer protection and support to the distal phalanx. (Figure 1)
Live Sole – The “live sole” is described as the functional epidermal sole tissue that is ventral to the distal phalanx, and is seen as a waxy appearing surface (once the exfoliated, chalky material is removed).

Basic Definition (Description) of the Natural Balance Trim
To start, we should define what good hoof balance consists of. In our opinion, the hoof is balance when the bottom of the distal phalanx (PIII or coffin bone) is parallel to the ground on a medial/ lateral (side to side) plane. From an anterior/posterior (front to back) plane, the angle of the distal phalanx can vary from 8 – 10 degrees positive (elevated in the back) to 3 – 5 degrees negative (lower in the back). It is commonly accepted that most normal or sound feet are slightly positive between 3 to 5 degrees (meaning elevated in the back). (Figure 2)
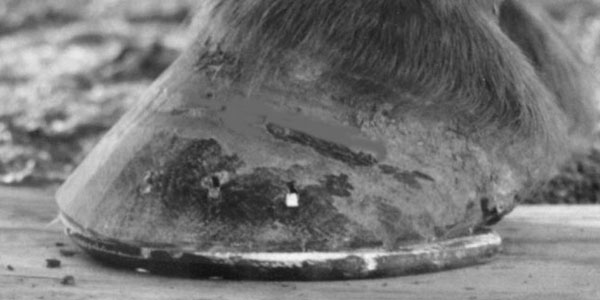
Radiographs show that each side of the live sole callus of the toe is equal thickness from the distal border of PIII to the ground. To achieve our goals for balancing the PIII, the wall is prepared close to or equal in height to the sole callus at the toe. (The amount of wall left above the level of the sole will vary depending on environment & foot health.) This will ensure that the weight bearing is shared by the full thickness of the sole callus at the medial and lateral toe quarters, and the inner edge of the hoof wall (the stratum medium). The hoof wall is rolled (rockered) ahead of the inner edge of the sole callus, approximately 10 to 15 degrees, to produce a natural breakover wear pattern seen on self-maintaining horses and domestic horses that have reasonable area to roam (also seen on shoes that have been worn any amount of time). Parts of the frog are trimmed only when they are obviously exfoliating. The bars are trimmed to the height of the outer wall or not at all, except in cases where they are rolled over and are flat with the sole, or if they have a sharp curvature to them. At that time, they should be removed enough to encourage a more upright re-growth. The hoof wall behind the toe quarters is trimmed to the same height as the functional sole through the widest part of the foot. The heel is left with a height that is close to the level of the frog. Special attention should be given to leave adequate sole thickness below the distal border of PIII, which is the functional sole callus. This procedure is consistent with what is seen on horses that have selfmaintaining feet, both domestic and feral (wild).
*Please keep in mind that these definitions and/or terminology may not be exact or complete by AAEP or other veterinary and farrier organizations standards. They have been adapted to satisfy the usage within this website.
What is Natural Balance?
The principles of Natural Balance are an accumulation of common sense ideas about hoof care that have been supported by anecdotal research and by scientific scrutiny. The study and observation of self-maintaining equine feet (both wild and domestic) are the basis from which research has been directed. Our traditional theories and ideas on hoof care and lameness treatment are constantly being challenged in an effort to further our knowledge, improve our ability to maintain normal feet, treat lameness, and most importantly prevent lameness. Our objective is to inform the hoof care community about some of our findings so that hopefully better choices can be made in general foot maintenance and in the treatment of certain lameness problems.
Conventional Thoughts about the Foot
· If the pastern is in line with the dorsal hoof wall, then the phalanges (pastern) would be aligned as well.
· Medial/Lateral (M/L) balance is attained by using the cannon bone, pastern, and heels bulbs as a guide.
· Dirt should be cleaned regularly from the foot to prevent thrush and stone bruises.
· The hoof wall is designed to bear the weight of the horse.
· Horse’s feet should land flat from both a M/L and A/P plane.
Much of the past research has been carried out with these concepts in mind. However, recent research information has forced us to rethink many of these traditional concepts. Common sense questions often inspire common sense answers. For example, the questions posed on the first page regarding hoof wall flares, broken-out quarters, calloused parts of the frog, etc. can largely be addressed once we understand the inner workings of the hoof and the natural life cycle of the foot. The wild (feral) horses have been a vehicle to help start this learning process. Many will say that the wild horses can’t teach us anything because their feet are not the product of a domestic environment and are never subjected to the stresses of carrying a rider. However, every horse is born with exactly the same basic structures of the foot. What happens after they hit the ground can depend on the environment and the things we do to them. Because most wild horses don’t have the hoof problems that our domestic friends do, it seems a reasonable place to possibly find some answers to our current soundness (or lameness) situation. As you may have gathered if you have looked over the “Wild Horse Study” section of the website, some very basic patterns were found in every foot studied. Below is a summary of those findings:
The purpose of our wild horse study was to see if there were hoof wear patterns that were consistent, unlike many domestic horses that have a wide range of hoof shapes and wear patterns. Arrangements were made with the BLM to examine wild horse feet once these horses were in lateral recumbency. We found each foot packed with dirt in the caudal region of the foot, around the frog and bars. The distance from the frog apex to the wall at the toe was always shorter than what we commonly see with domestic feet that are shod. It is common for domestic hooves to have a wide range of distances from the frog apex to the edge of the wall at the toe. The frog of domestic horses often becomes distorted and stretched forward as well. The bars on wild horse feet all terminated about ¾” caudal to the frog apex. The heels were worn back to the frog buttress in one group of horses that lived in a shale, granite and sandstone environment. Others who lived in softer, less abrasive terrain had longer heels that would press into the sand instead of being worn away, very much like domestic horses in similar environments. All horses had a small enlargement of frog at the buttress and apex that was calloused, showing signs of weight bearing, again very much like what we see on domestic horses. When the dirt was removed, a flat board was freshly spray painted and rubbed over the bottom of the foot. The high points on the groundside of the foot received the fresh paint. There were 4 primary contact points seen on every foot, two at the medial/lateral toe quarters and one on each heel. A line was drawn across the foot at the cranial edge of the black marks at the toe quarters. Lines were also drawn from the toe quarter marks to the diagonal heel marks. (Figure-WH-A) The purpose for the line across the toe was to identify where breakover occurred. Measurements were taken from the apex of the frog to that line. A distance of 1″ to 1 ½” was recorded from the smallest to the largest feet (sizes ranging from ‘00’ to ‘2’). A closer look at the photographs and slides revealed that the line across the foot at the toe passed through the back edge of the sole ridge or callus. The lines drawn diagonally across the foot from toe mark to heel mark intersected just behind the frog apex from ¾” to 1″ (small to large feet respectively). A closer review of photographs and slides also showed this intersection generally marked the widest part of the foot. Traditionally, many authors agree that the widest part of the foot always maintains its relationship with the distal phalanx, even when the sole at the toe migrates forward, and the heels become underrun and change their relationship to the widest part of the foot. This static feature of the foot helps us to see the distal phalanx (PIII) more clearly and enables us to see hoof deformities long before they become a problem. The self-maintaining feet of horses in the wild as well as domestic self-maintaining feet, all have the same basic surface pattern when viewed from the bottom of their foot. To establish a guideline for measuring, a line is drawn across the foot at the widest part. Another line is drawn across the toe at the leading edge of the imprint marks. A final line is drawn to identify the most caudal part of the frog. This line will fall at the back of the frog, or at the caudal aspect of the central sulcus. All self-maintaining horse’s feet measure a greater distance behind the centerline at the widest part of the foot to the caudal frog, than forward to the point of breakover. Ground surface mass is described as the area of the foot that is on the ground, behind the line identifying the breakover point and ahead of the line identifying full caudal support of the foot. Routinely, in wild horse feet the ratio was 1/3 foot mass ahead of the widest part of the foot, and 2/3 behind the widest part of the foot. (Figure-WH-A) The dorsal hoof wall had no deviation from the hairline to the ground, unlike many domestic feet. In domestic horses, the dorsal hoof wall at the hairline is often more upright or vertical than the lower half, which is an early sign of hoof deformity.


Data from the wild horse studies opened the door to many questions about our traditional thoughts on hoof anatomy and function, not to mention nutrition, lifestyle, and genetics. One of the tools we gained from the wild horse research was the ability to more easily recognize hoof deformity. By simply evaluating the foot from the bottom using a line drawn across the foot at its widest point (approximately 1″ behind the frog apex, where the bars terminate) allows us to see if there is more ground surface mass ahead of or behind the centerline. (Figure 3) This is covered in more depth in the next section.


As a rule, horses that stumble, forge, interfere, and land toe-first will have more ground surface mass ahead of the widest part of the foot. From the self-maintaining hoof patterns, we have been able to put together some basic guidelines (or goals) to help us better service our domestic horses. However, what many people fail to see is that the wild horses gave us more than just a hoof pattern. They gave us a direction in which to look for more answers to the mysteries of the foot, and subsequently opened the door to understanding what needs are not being met.
Over the next few sections of this series you will find that Natural Balance is not so much a single technique of trimming or shoeing, but a combination of simple guidelines that address the basic needs of the equine foot (wild or domestic, shod or barefoot) as determined from current research, common sense biomechanics, and practical experience.

Recognizing Hoof Deformity
One of the keys to treating hoof pathologies and/or maintaining feet in a way to prevent pathologies is by learning how to recognize when the external hoof capsule has lost its relationship to the bones within the hoof capsule. From what you have read so far, you may already have a good idea as to what would constitute hoof deformity. From the definition or description of Natural Balance, we know that the hoof is balanced when the hoof capsule is in its most optimal relationship to the boney structures within. Because the outer hoof wall does migrate and lose its relationship to the coffin bone, it is not the most reliable reference when determining balance. As farrier, we do not always have well marked Radiographs available, so the true apex of the frog, the center of the foot, and the sole callus are proving to be more reliable landmarks for determining where the coffin bone is within the hoof capsule because they do not lose their relationship to the bone. For this reason, we will primarily focus on those structures when determining hoof capsule deformity.

· To begin, look at the hoof from the bottom. Locate and draw a line across the widest part of the foot (or more specifically the widest part of the sole). For most feet, this location is about 1″ behind the true tip of the frog apex, or where the bars terminate. (Figure 4-A & 5-A)
· Next, you will need to determine the point of breakover. Draw a line across the toe that looks like the location where the foot pivots as the heels come off the ground. (Figure 4-B & 5-B)
· You will then need to find the location of surface mass that represents the most caudal region of support. For horses with shoes on, this is typically the end of the heels of the shoe. (Figure 4-C) For barefoot horses, this can be the back of the frog if the frog sticks down further than the heels, otherwise this is typically the back of the heels. Draw a line across the back of the foot establishing this area of caudal support. (Figure 5-C)

As you can see in figure 4, there is definitely more ground surface mass ahead of the widest part of the foot than what is behind the widest part of the foot. In figure 5, the distance ahead of the widest part of the foot and behind the widest part of the foot is approximately the same. As you may have gathered already from the wild horse information, the optimal ratio of ground surface mass from the point of breakover to the widest part of the foot and then from there to the point of full posterior support should be at least 50/50 or as much as 1/3 to 2/3’s respectively. If we look at a lateral view of the foot in figure 1, we can clearly see that the heels are long and under run, not allowing the back of the frog to make primary contact with the ground on load. (Figure 6)
Typically, the low, under run heel is accompanied by a long toe, as seen above. Most often, this type of deformity is a result of trying to align the pastern and dorsal hoof wall by leaving the heel and thinning the toe from the bottom. In actuality, what this procedure usually ends up doing is weakening the sole callus at the toe and disturbing the protective support material beneath the tip of PIII. As mentioned above, it also does not allow the “digital cushion – lateral cartilage” mechanism to be activated from initial frog contact at the time of load. All-in-all, the result of this type of deformity causes undue stress on the Navicular bone due to the extended point of breakover. The lack of frog contact decreases the blood flow and causes the frog to shrink, allowing the heels to contract. It is not uncommon for horses with this conformation to interfere, forge, and stumble.
In the shoeing and trimming sections of this series we will discuss ways to help overcome these types of hoof deformities and better service the needs of the foot.
Trimming and Shoe Placement Suggestions
Special Notice Before Beginning
Trimming the Sole Too Close
One research project has shown that when a foot is routinely trimmed too close at the toe each time the horse is shod, PIII can settle some and the horse can be ‘off’ for a few days. It is our belief that the sole ridge (callus) plays a major role in supporting PIII. When the sole ridge is overtrimmed, the laminae attachment of PIII at the distal border may be compromised, which can allow the hoof wall to migrate forward, much like in laminitis. The settling of PIII within the hoof capsule causes a vertical deformity in the hoof wall at the hairline. A common practice for farriers is to trim the toe and leave the heels in order to achieve pastern alignment.¹ However, when farriers trim the sole close at the toe to raise the foot angle, the heels are frequently left too long. With the weakened laminae attachment at the distal border of PIII, the dorsal hoof wall and the long heels will migrate forward, allowing the entire hoof wall to migrate ahead of PIII. This can be easily seen when viewed from the bottom as well as when viewed from the side.
Heel First Landing
Slight heel first landing is common with feral horses as well as sound domestic horses; therefore we find it to be optimal for use in Natural Balance principles. Research has shown proprioceptors in the calloused portion of the frog buttress.² This supports and suggests that heel first contact may be important. Later research of Dr. Barbara Pages showed that when the breakover was placed ¼” ahead of the tip of PIII and the heels were trimmed so the frog buttress had contact with the ground, pastern alignment improved and the Navicular bone became more vertical.³ These combined hoof preparation techniques will routinely initiate a heel first landing. In retrospect, this will help to avoid stumbling, forging, interfering and has shown to improve hoof deformities that lead to heel soreness, contracted heels and Navicular syndrome tendencies.
Special attention must be given when preparing the foot for shoes. For farriers shoeing horses in the field without radiographs to properly position the shoe, the following instructions are important to get the best results.


Hoof Preparation Procedure For Shoe Application
Start by identifying the true apex of the frog, either by probing or by removing a small amount from the tip of the frog pad if necessary. At that time you should get a mental picture of where the live functional sole is for that part of the foot. Next, remove all of the chalky sole material next to the hoof wall at the widest part of the foot. (Fig. 7-A & 8-A) There will often times be small cracks in the chalky sole material. The sole material that is left should have a waxy appearance and will not contain any small cracks. If there are any doubts, return to the frog apex and work your way back out to the outer edge of the sole, searching for chalky layers as you go. With those feet that are very difficult to decipher the difference between live and dead sole, take the conservative approach and do not get too close. It’s better to leave it too long than too short. Your goal is to clearly identify the live sole ridge (callus), which is the waxy surface seen once the crumbly, chalky material of the sole is removed. (Fig. 9 & 10) When you exfoliate the rear of the foot with your knife, again, remove the chalky material and leave the waxy, functional, live sole. Be careful to leave as much of the upright, healthy bars as you can.

When the foot is properly exfoliated, you should notice the slightly raised area of the sole next to the wall. (Fig. 9 & 10) That raised area is the sole callus and should blend in gradually to the wall with no ledge. Once you become familiar with the sole callus, you can clearly see the position for breakover on the sole. To help you find the breakover position on the sole, lightly move your thumbs forward from the frog apex to the medial and lateral toe quarters. (Fig. 11) A slight depression will be felt on the sole. At the cranial aspect of that depression is the inner edge of the sole callus. A line drawn across the toe at the inner edge of the sole ridge (callus) is where breakover should be. (Fig. 11-A)


Keep in mind, the coffin bone is the part of the horse’s anatomy we are trying to put in balance with the ground. The objective is to prepare the hoof wall in a manner that will allow this to happen. It is best to prepare the back part of the foot first. From a line drawn across the foot at about the widest part, rasp or nip the heel so that the height of the wall behind the widest part of the foot in the heel quarters is approximately 1/8″ higher than the waxy live sole. (Figure 12 & 13) Each side of the hoof wall in the heel region should be prepared similarly.


The next step is to prepare the front or toe area. Remember that many self-maintaining feet of domestic or wild horses are shown to have the sole and wall share the weight-bearing load in this toe quarter area. (Fig. 14) Bring the wall down to within 1/16″ of the sole, or to actually meet the sole in some cases, by rasping the wall across the toe quarters until flattened areas appear equally on both sides. (Fig. 15) This will ensure that you have left enough sole thickness below PIII for protection and support. This will also accurately balance the front of the coffin bone to the ground from side to side. The bottom surface of the foot is then finished flat when the foot is prepared for shoeing (not relieved in the quarters as is the case when left barefoot) and is hot-seated if necessary.

Flares should only be removed from the mid portion of the hoof wall to the ground. (Fig. 16) The amount of wall that is rasped away should never exceed the outer layer (stratum externum). When the white zone appears at the ground level, wall flare removal should cease. The wall should have a uniform thickness all the way around when viewed from the bottom. In some cases there may be hoof wall that extends ahead of the toe of the shoe, remove only what is beyond the shoe by under-cutting (with a rasp) at approximately a 30°-45° angle. (Fig. 10-A)

Shoe Placement and Application
Shoe selection is important if you wish to meet the natural breakover requirements. Wide-web rim type shoes work best for easy modification. The outer rim is normally tapered-in somewhat to the nail groove, which is helpful and somewhat mimics the way the bare foot naturally wears. That same feature is equally helpful at the toe where the shoe is somewhat bold and positioned on the foot so that point of breakover is in its optimal place. The shoe should be fitted to the foot so the breakover point of the shoe fits directly over the back edge of the toe callus at the center of the toe. The heel of the shoe should extend to the full length of the frog. A good reference for that position is the back of the crease in the central sulcus. Radiographs can be used to determine the desired position for breakover,³ as described by Dr. Page in the 1999 AAEP Proceedings.

When pre-made steel or aluminum Natural Balance Shoes™ are used, the same criteria for shoe placement for breakover, as well as heel length, should be followed. The Natural Balance Shoe™ instructions suggest a varied distance from the frog apex to the inside edge of the shoe for placement. (Fig. 17-A & 18-A) Regulate that distance with the heel position. Remember, the hoof preparation is exactly the same for both modified and Natural Balance Shoe™ application. Again, the breakover point is at the inside edge of the sole callus in the center of the toe, approximately 1 1/8″ ahead of the frog apex. (Fig. 17-B & 18-B) Do not allow sole pressure between the shoe and the sole callus. Hot-seating will ensure that sole pressure does not occur. The heels of the shoe should extend to the back of the crease in the central sulcus of the frog.

These shoe placement guidelines are for normal hooves, in the field, when no radiographs are used. Radiographs should be taken for horses that have lameness issues such as laminitis, Navicular disease, or when severe hoof deformity is present.
Radiographic Method ³
A thumbtack is inserted at the true apex of the frog, and a metallic wire is taped to the hoof capsule along the dorsal hoof wall with the proximal end of the wire at the edge of the hoof capsule at the coronet. This location is palpated as the junction between the skin and the hoof capsule. Both front and hind feet are placed concurrently upon wooden blocks imbedded with a horizontal radiopaque wire. Feet are positioned so that the third metacarpus or metatarsus is perpendicular to the ground. Efforts should be made to have both forelimbs (or hind limbs) equally weighted. Lateral-medial radiographs are obtained with both bulbs of the heel being parallel to the x-ray beam and the radiographic cassette touching the hoof capsule.

Using the first radiograph of each foot, a line is drawn on each radiograph from the tip of the third phalanx perpendicular to the ground. A second line dorsal and parallel to the first line is drawn at the following distances: 0.4 cm for horses 200-300 kg, 0.5 cm for horses 300-400 kg, 0.6 cm for horses 400-500 kg. The distance from the thumbtack to the most dorsal line is then measured. (Figure 1) This same distance is measured on the solar aspect of the hoof capsule from the thumbtack dorsal toward the white line. A perpendicular line is then drawn between the medial and lateral walls of the hoof capsule at this location. This line indicates where breakover of the shoe is placed. Hoof preparation is the same as with the shoeing of normal feet.
End Notes
- Butler D. Principles of Horseshoeing II. self published, Maryville, MO, 1985
- Bowker RM, Brewer AM, Vex KB, Guida LA, Linder KE, Sonea IM, Stinson AW. Sensory receptors in the equine foot. Am J Vet Res, Vol 54,No. 11, November 1993; 1840 – 1844
- Page BT, Bowker RM, Ovnicek G, Hagen T. How to mark the hoof for radiography. Proceedings, 45th Ann. Convention AAEP, 1999
Trimming Procedure For Horses Left Barefoot
Exfoliation Procedure Used When Horse Has Previously Been Barefoot
For most horses that have previously been barefoot and will continue to be left barefoot, the exfoliation of sole material is minimal, if any is required at all. The only time any removal of sole is done with a hoof knife is when large cracks are present in the sole. The size of the cracks will determine the amount of exfoliation that will be necessary (with very small cracks, very little or no exfoliation is needed). If cracks are present, simply start at the tip of the frog and work your way outward by only scraping the hoof knife on the sole. It is not necessary to cut into the sole, as the live sole (waxy appearing surface) is just beneath this cracked surface. Once the live sole is located, you can move on to the “Post-Exfoliation Procedure” covered later in this article.


Exfoliation Procedure Used When Shoes Are Pulled Off & Now the Horse Will Be Left Barefoot
Start by identifying the true apex of the frog, either by probing or by removing a small amount from the tip of the frog pad if necessary. At that time you should get a mental picture of where the live functional sole is for that part of the foot. Next, remove most of the chalky sole material next to the hoof wall BEHIND the widest part of the foot. (Fig. 21-A) This is generally a safe zone and there is less chance of doing any damage if you accidentally over exfoliate. Once you reach a waxy appearing surface, you should stop. If there are any doubts about the sole plane, return to the frog apex and work your way back out to the outer edge of the sole, searching for any chalky layers as you go. With those feet that are very difficult to decipher the difference between live and dead sole, take the conservative approach and do not get too close. It’s better to leave it too long than too short. Your goal is to clearly identify the live sole in the back half of the foot, which again is the waxy surface seen once the crumbly, chalky material of the sole is removed. (Fig. 22) When you exfoliate the front of the foot with your knife, you must be very careful to not remove any more sole than you absolutely have to. Usually, uncovering just a small portion of waxy material in each toe quarter is sufficient to get your sole plane balancing references. When it comes to the frog and bars, be careful to leave as much of the upright, healthy bars as you can. You only need to remove lose tags or parts of the frog that come off easily or are in the process of shedding.


Post-Exfoliation Procedure for Horses Left Barefoot
When the foot is properly exfoliated, you should notice the slight raised area of the sole next to the wall. (Fig. 23) That raised area is the sole callus and should blend in gradually to the wall with no ledge. Once you become familiar with the sole callus, you can clearly see the position for breakover on the sole. To help you find the breakover position on the sole, lightly move your thumbs forward from the frog apex to the medial and lateral toe quarters. (Fig. 24) A slight depression will be felt on the sole. At the cranial aspect of that depression is the inner edge of the sole callus. A line drawn across the toe at the inner edge of the sole ridge (callus) is where breakover should be. (Fig. 24-A)


You should always keep in mind that the coffin bone should be kept in balance with the ground. The objective in trimming is to prepare the hoof wall in a manner that will allow this to happen. With the “normal foot,” the wall at the toe quarters will be firmly attached to the sole callus at the ground level. The sole callus on most normal bare feet is narrow and well de-fined, which differs some from those feet that are flat or clubbed. The wider sole callus in flat or clubbed feet means that the tip of the distal phalanx is usually closer to the ground. Be conservative when you rasp or nip the hoof wall to the back edge of the sole callus. The rocker or roll you prepare in the foot should not exceed 10° to 15° from the flat plane of the sole (Fig. 25), or in simple terms, what is normally found on a well-worn shoe. Next, rasp a flat landing in the wall so it is equal in height on each side of the toe, behind the rockered portion. (Fig. 26-A) The length of that flattened area (landing) will should be about ¾” to 1″. (Figure 26-B)


To prepare the back of the foot, start your nipper cut behind the toe callus and trim down close to the level of the live sole through the quarters. (Fig. 27-A) The heel that remains is flattened off so that the heels are equal in height to each other and at the same level as the frog buttress or slightly lower. (Fig. 7-B) This generally means that the quarters are relieved or floated some through the widest part of the foot between the sole callus and the heels. (Fig. 28-A)
The only area of the frog that is routinely trimmed is the cleft of the central sulcus. Keeping this area open seems to lessen the chance of bacteria forming in horses that are less active. The rest of the frog should not be trimmed much if at all, unless there are parts that are hanging by a small attachment from the live frog structure.
The bars are trimmed only when they are sharply curved, roll over and become flat to the sole. If the bars become cracked or diseased with a black substance under them, it’s best to trim some away to en-courage a stronger, more upright re-growth.

If flares exist on the outer hoof wall, find the most prominent growth ring near the middle of the dorsal hoof wall and remove only the amount necessary to make the wall straight from top to bottom. (Fig. 29-A) On badly flared feet, never rasp beyond the white zone of the wall. The white zone is the lighter colored part of the wall that is next to the laminae. The wall should have a uniform thickness all the way around when viewed from the bottom. Once you have finished dressing the outer hoof wall, round the outer rim of the hoof wall that is closest to the ground (chamfer the rim). (Fig. 29-B)


Review & Conclusions
Review of Main Points
· Weight bearing is shared between the frog, bars, caudal sole, sole callus and hoof wall.
· Ground surface mass should be distributed so that an equal amount or MORE ground mass is behind the widest part of the foot and LESS ground mass if ahead of the widest part of the foot to the point of breakover.
· The horse’s foot should land just slightly heel first and the frog should be able to make primary ground contact.
· The optimal point of breakover is found to be approximately 1/4″ ahead of the tip of the distal phalanx, as determined by Radiographs. (Without Radiographs, the point of breakover is found to be the back edge of the sole callus, usually about 3/4″ to 1 1/2″ ahead of the tip of the frog depending on the size of the foot (000 – 5 respectively).)
· Heels should be prepared relative to the live sole and should end near the back of the frog.
· The live sole callus is a protective mechanism that extends ventral to the distal border of the distal phalanx and the circumflex artery. It should always be preserved so that optimal protection and support is provided for the distal phalanx.
· When shoeing and trimming, it is important to locate the live sole and to not invade that surface with a hoof knife.
· When preparing the wall, to ensure good medial/lateral balance, it is important to trim the wall equal on both sides of the foot (at the toe and heels) relative to the live sole.
· When applying shoes, the quarters of the hoof wall are left flat. However, when trimming a foot that will be left bare, the quarters will often be relieved somewhat.
· Hoof wall flares are only removed from the mid portion of the hoof wall down.
We hope that we have been able to provide enough information in this tutorial to answer the questions posed in the opening prologue. However, just in case the answers did not fully reveal themselves, we have provided a few sentences to briefly address each question specifically.
Q-1: Why does the hoof wall always break at the quarters before the toe and heel?
A-1: The hoof wall breaks at the quarters in most environments because the sole dips somewhat in that region of the foot. The wall cannot support itself easily without the cooperation of the sole. Therefore, with the sole lower in the quarters the wall naturally wants to be lower in that region as well. Additionally, the wall is hard and brittle, and often thinner in the quarter region of the foot, it tends to lend itself to breakage more easily.
Q-2: Why is there frequently a small amount of calloused frog present at the frog apex?
A-2: The frog apex callous is positioned very close to the center of the coffin bone. It is more noticeable in flat feet and proliferates on demand. Therefore, it may offer some secondary support to the coffin bone when it is needed.
Q-3: Why is there a substantial frog build-up in the back part of the frog between the heels? Why is this portion also heavily calloused?
A-3: The calloused build-up at the frog buttress helps to hold dirt in that area between the heels, which promotes heel first ground contact upon landing. Additionally, there are a mass of proprioceptors in the back part of the frog, which are sensory receptors that most likely aid in the coordination of the horse. Most importantly though, support to the frog buttress (callus) helps to absorb concussion, aid in circulation, and participate in the alignment of the pastern internally through the loading of the back of the foot.
Q-4: What does a hoof wall flare mean to the foot?
A-4: A hoof wall that does not maintain a strait line from the hairline to the ground is not as strong as one that is strait. The bending and flattening of the wall at the ground level makes it easier to be eliminated by breaking and chipping. This is common with hoof wall that is allowed to grow beyond the sole level.
Q-5: Why is there a small portion of the hoof wall below the coronary band at a different angle than the rest of the dorsal hoof wall?
A-5: The area below the coronary band that does not parallel the lower hoof wall is an indication of some vertical displacement of the distal phalanx, and in most cases is a clue that hoof deformity exists.
Q-6: Why is there always a lip of frog that forms on the ground surface of the frog?
A-6: The lip helps to hold dirt firmly in the commissures of the frog to assist in the foot’s biomechanical function.
Q-7: What purpose does the raised area on the sole (just inside of the lamina) serve?
A-7: The live sole callus is a protective mechanism that extends ventral to the distal border of the distal phalanx and the circumflex artery & vein. It has a different density than other sole material, and should always be preserved so that optimal protection and support is provided for the distal phalanx.
Q-8: Why is there always dirt packed in the bottom of horse’s feet, and particularly in the back half?
A-8: The dirt compaction in the caudal portion of the foot helps promote a more even load sharing between all structures when the horse bear’s weight. The dirt’s presence also helps maintain a constant environment in and around the frog and rear of the foot, plus helps absorb concussion & maintain heel expansion.
Q-9: Why is thrush noticed in feet and frogs that are narrow, with deep creases in the central sulcus?
A-9: Horses that lead a less than active lifestyle, are stalled most of the time, and who’s feet are cleaned regularly are the ones that often have non-functional frogs that are narrow, stretched forward, and have contracted heels. Although thrush is a bacterial problem, it seems to be present in horses where poor circulation and foot function exists. Therefore, it is almost like a secondary problem to poor frog function because that is what provides the environment in which thrush can thrive. If you can im-prove the quality and function of the frog, you can almost eliminate the instances of thrush completely.
Q-10: Why do shoes always wear more at the toe than the rest of the shoe?
Q-11: Why do the shoes wear more rapidly at the toe when the foot appears to have a long toe, low heel conformation?
Q-12: Why do most front shoes wear more at the outside (lateral) toe?
A-10, 11, 12: The direction in which breakover occurs is related to the direction in which the knee bends. The horse fulcrums over the front feet with every step. Toes that are longer are subjected to more force & friction at the time of break-over which causes more shoe wear at the toe. Additionally, horses with a longer toe are more apt to land toe first, which also can cause the toe to wear more quickly.
Q-13: Why does the frog and sole change to hard and soft textures rapidly when the weather changes?
A-13: The sole, frog, and bars are major support members in the foot; therefore they adapt to protect the foot when adversities occur. So, if the ground quickly dries out, the sole & frog will toughen to provide protection and support. These structures are also live, so they are constantly in a stage of generating new layers and exfoliating nonfunction layers. If the conditions change from hard & dry to soft & wet, then the exfoliating layers will loosen and most likely shed because they are no longer needed (at least until the ground dries back out.)
We hope that you have found this tutorial informative and useful in whatever your hoof care duties may be. As you can imagine, the horse’s foot is proving to be a complex mechanism that has a fairly simple task, support and protect the horse in movement and at rest. We’ve worked hard at keeping an open mind to new technology and tried to stay abreast to the latest research and practical application experiences of others. Natural Balance is and will continue to be an evolving approach to hoof care. Our goal has always been to supply hoof care professionals with the best possible information, as well as some tools to make their jobs easier and their work more effective. Thank you for interest in Natural Balance Hoof Care and your interest in the pursuit of soundness in horses.
CONCLUSION:
Back in the “old days” Gene Ovnicek was my personal farrier, the one I called when I needed professional help with my client’s horses, and a good friend. Gene had an inquisitive mind and was always trying to learn more, advance his skills, and figure out how to better help horses stay sound, or get sound. As far as I’m concerned, consistently applying the Natural Balance techniques that Gene developed is the best thing you can do for your horses’ feet in terms of comfort, soundness, performance, and hoof and leg longevity. – Doc
Doc Hammill lives on a ranch in Montana. He and his partner Cathy Greatorex help people learn about gentle/natural horsemanship and driving and working horses in harness – through writing, workshops, demonstrations, lectures, and his horsemanship video series. www.DocHammill.com


