
Moringa (Drumstick), often called the miracle tree, is a hardy tree that can be found in many different climates and is known for its nutritious and beneficial leaves, pods, and seeds. Moringa seeds require special attention when planting to ensure robust growth and long-term yield. From backyards to community gardens or even large pots, this all-inclusive guide provides experienced and novice gardeners with the step-by-step instructions they need to cultivate healthy moringa trees. If one knows what a seed wants, they may grow it into a huge, practical tree that enhances both the nutritional value of food and the visual appeal of their gardening space.
Moringa grows naturally in warm, humid climates, including those of Africa and South Asia. Plant it anywhere you have warm, sunny weather, and it will flourish in your garden. Moringa seeds can only germinate in ideal conditions, such as soil that drains well, consistent warmth, and enough sunshine. Due to its rapid growth rate and resilience, the tree is an excellent choice for anyone seeking low-maintenance plants that yield substantial rewards. The correct planting techniques lay the framework for a strong, fruitful tree, whether the aim is to harvest leaves for food or seeds for oil.
This comprehensive book covers every crucial aspect of moringa production, from selecting the best seeds to nurturing young trees through their early stages. To maximize development potential and avoid common hazards, each section provides practical, straightforward advice. If gardeners follow these meticulously crafted recommendations, they can safely grow moringa trees, which improve the health of people and the environment for years to come through shade, nutrition, and longevity. What are we waiting for? Let’s look at the instructions for moringa seed planting.
How to Plant Moringa Seeds: Step-by-Step Guide for Healthy Growth
Selecting High-Quality Moringa Seeds for Optimal Planting Success
For your moringa planting experience to be successful, it is vital to select high-quality seeds. To select healthy moringa seeds, look for reputable vendors selling them, including organic nurseries or recognized agricultural suppliers. Bulky, robust, and devoid of visible damage like cracks, discoloration, or mold, high-quality seeds provide the vitality needed for germination.
| Criteria | Details |
|---|---|
| Seed Source | Organic nurseries, agricultural suppliers |
| Seed Condition | Bulky, robust, no cracks, discoloration, or mold |
| Germination Rate | 80–90% |
| Harvest Timeframe | Within last 12 months |
| Storage Conditions | Cool, dry, airtight container |
| Preferred Seed Type | Moringa oleifera |
An ideal germination rate for seeds is 80–90% when they are harvested recently, preferably within the last 12 months. When you sow high-quality moringa seeds, their tough, undamaged shell will protect the embryo and hasten the sprouting process. Avoid using seeds that appear too mushy, too dry, or too shriveled; these can have lost their viability due to storage issues or age, and you won’t be happy with the results.
To ensure quality, check the seeds thoroughly for size and color consistency, as this often indicates genetic uniformity. Storage in a cool, dry area, such as an airtight container at room temperature, preserves the germination potential of seeds until planting season. Moringa oleifera seeds are a wonderful option for people seeking certain traits, such as increased leaf output or faster growth, due to their adaptability and widespread usage.

It is more efficient to check the germination rate of a small sample of seeds before committing to a full planting. Soaking some seeds and monitoring their sprouting progress for two weeks can give you a good idea of quality. This foresight ensures that the moringa seed planting instructions are grounded in reality, paving the way for a garden flourishing with minimal obstacles.
Preparing Soil Perfectly for Moringa Seed Planting
Soil preparation has a direct effect on moringa’s development and overall health. Making a nutrient-rich, well-draining medium that suits the requirements of the plant is necessary for preparing moringa soil. Loamy or sandy soils with a pH range of 6.3 to 7.0 are perfect for growing moringa because they foster strong root development and excellent nutrient uptake.
| Soil Parameters | Specifications |
|---|---|
| Soil Type | Loamy or sandy |
| pH Range | 6.3–7.0 |
| Digging Depth | At least 12 inches |
| Organic Additives | Compost, aged manure, leaf mold |
| Drainage Enhancers | Coarse sand, perlite |
| Sunlight Requirement | 6 plus hours daily |
Dig a hole that is at least 12 inches deep by using a shovel or tiller to loosen any compacted dirt. To enrich soil with essential nutrients, incorporate organic elements like compost, aged manure, or leaf mold. If you’re planting moringa seeds, you should avoid using heavy clay soil because it might choke the roots and hold in too much water, leading to rot or poor development.
Using a home kit to check the soil’s pH is a must for ensuring perfect conditions. If the soil is very acidic, add agricultural lime; if it is excessively alkaline, apply sulfur. The use of coarse sand or perlite enhances drainage and aeration, two crucial factors for the development of young moringa roots. The moringa planting guide suggests picking a spot that gets six or more hours of direct sunshine per day to promote quick growth.
Clear the planting area of any rocks, weeds, or other debris to ensure that plants have an equal opportunity to absorb water and nutrients. Regularly checking the soil’s moisture content might help you maintain a balanced atmosphere when planting. Moringa is at its best when planted in soil that is both germination-friendly and conducive to the tree’s long-term health.
Soaking Moringa Seeds to Boost Germination Rates
Soaking seeds before planting them increases their ability to sprout evenly and quickly. Soaking moringa seeds softens their tough shell, allowing water to penetrate and encourage the embryo, thereby starting the germination process. For older seeds or those with thicker coatings, this technique greatly improves the chances of a successful sprout.
| Soaking Parameters | Details |
|---|---|
| Water Type | Lukewarm, non-chlorinated |
| Soaking Duration | At least 2 days |
| Water Change Frequency | Once during soaking |
| Germination Timeframe | 5–10 days |
| Post-Soaking Action | Pat dry with clean cloth |
Fill a basin with lukewarm, non-chlorinated water and submerge the seeds entirely for at least two days. Moringa seed soaking methods include changing the water once throughout this time to keep things clean and prevent germs from forming. After soaking, seeds could look a bit swollen, but that only means they’re ready to plant.
If any seeds float to the top during the soaking process, it’s likely they won’t sprout. During this stage, moringa seeds can go from taking weeks to as little as 5–10 days to mature, under perfect conditions. To prevent fungal infections, which can occur if there is excessive moisture left over after planting, carefully pat the seeds dry with a clean cloth.
Soaking not only speeds up the germination process, but it also promotes uniform seedling growth, which makes young plants easier to manage. For efficient gardeners, this simple yet effective method ensures successful planting of moringa seeds by preparing them for perfect growth in a controlled, nurturing environment.
Choosing the Ideal Planting Location for Moringa Seeds
If you want your moringa to thrive and last, you need to pick the right spot. For moringa trees to thrive, the planting spot should offer full exposure to sunshine for six to eight hours daily. Plants might become stunted or provide lower yields in areas that receive insufficient sunlight or shade.
| Location Parameters | Specifications |
|---|---|
| Sunlight Exposure | 6–8 hours daily |
| Wind Protection | Avoid strong winds |
| Soil Drainage | Well-drained, slightly sloped or elevated |
| Tree Spacing | At least 10 feet apart |
| Proximity to Water | Near water source for irrigation |
| Tree Width Potential | Up to 15 feet |
Because strong winds can damage young trees or impede their root systems, it’s important to choose a spot that’s not too close to strong winds. Moringa seeds do best when planted in well-drained soil, ideally on a slightly sloped bed or at an elevated position to prevent water accumulation. Moringa can survive dry spells after it’s established, but it needs regular watering when it’s young so that its roots may develop strongly.
You need to ensure that there is sufficient space for the moringa trees to grow, as they can reach a width of 15 feet. 15 feet. Plants should be at least ten feet apart to prevent crowding and ensure that each tree receives an adequate amount of sunlight and nutrients. A low-lying area that is prone to floods is not recommended for moringa seed planting since damp soil might hinder growth and cause root rot.
Being near a water source facilitates irrigation, especially during the first few months when frequent watering is essential. The aesthetic and functional value of the garden can be enhanced by strategically placing moringa trees so that they can reach their full potential in terms of height and yield.
Planting Moringa Seeds at the Correct Depth for Healthy Growth
If you plant moringa seeds at the correct depth, they will grow into strong plants. Moringa seeds are often sown half an inch to an inch below ground level to ensure adequate moisture and oxygen reach the seeds without being buried too deeply. When planted at the correct depth, seeds are more likely to germinate and form strong roots.
| Planting Parameters | Specifications |
|---|---|
| Planting Depth | 0.5–1 inch |
| Seeds per Hole | 1–2 seeds |
| Germination Period | 7–14 days |
| Soil Contact | Gently press soil over seeds |
| Watering Post-Planting | Gentle watering to settle soil |
Make little furrows or holes in the soil with a trowel or your finger to get it ready for planting. Plant a single or double seed in each hole and sprinkle a little dirt on top to make room for seeds that may not germinate. When planting moringa seeds, be careful not to bury them too deep in the soil, as the soil can limit oxygen flow, delay sprouting, or cause seed rot.
Gently pressing the dirt over the seeds will create sufficient contact and aid moisture retention. Water the area gently after planting so the earth can settle without getting too compacted. Moringa planting guidelines recommend maintaining consistently wet soil throughout the germination period, which typically lasts between seven and fourteen days, to hasten the emergence of seedlings.

Overwatering or heavy rain can cause seeds to shift, so it’s crucial to monitor the planting spot to ensure they stay at the correct depth. Proper depth planting encourages robust development and healthy root systems, which in turn produces a moringa tree that can tolerate environmental stressors.
Watering Moringa Seeds to Support Strong Germination
Moringa seeds must be watered in order for them to germinate and grow in their initial phases. Water moringa seeds regularly without soaking the soil to avoid seed rot or fungal issues. Proper watering creates the ideal environment for seedlings to sprout and develop.
| Watering Parameters | Specifications |
|---|---|
| Watering Frequency | Every 1–2 days |
| Soil Moisture | Moist, not soggy |
| Water Type | Room temperature, non-chlorinated |
| Establishment Period | 4–6 weeks |
| Watering Tool | Watering can with fine nozzle |
After planting, use a watering can with a fine nozzle to lightly wet the soil so as not to disturb the seeds. Depending on the weather and how well the soil drains, watering moringa seeds should be done once every one to two days to keep the soil moist but not soaked. In warmer climates, watering may have to be done more often.
You can tell if the soil is moist by feeling it; it should be damp but not soggy. Overwatering can kill seeds, while submerging them can delay their germination. Avoid damaging delicate seedlings with chlorinated tap water by watering moringa with water that is room temperature instead.
You should water the plants less frequently once they sprout, but maintain a steady moisture level until they are well-established, which should take about four to six weeks. When you water moringa seeds correctly, they are more likely to germinate and grow into strong, healthy plants.
Providing Adequate Sunlight for Moringa Seedlings
In the early stages of its life cycle, sunlight is crucial for the growth of moringa. Moringa seedlings require six hours of sunshine daily to facilitate photosynthesis and ensure proper growth. When light levels are too low, plant growth is stunted, and the leaves are underdeveloped.
| Sunlight Parameters | Specifications |
|---|---|
| Daily Sunlight | 6+ hours |
| Preferred Location | South-facing or open garden |
| Indoor Option | Near sunny window or grow lights |
| Signs of Light Deficiency | Yellowing leaves, stunted growth |
Find a south-facing place or an open garden that gets plenty of sunshine and plant the seedlings there. Moringa seeds are best sown in full sunlight, preferably first thing in the morning when the sun’s rays aren’t as strong, so the young plants can adapt without stress.
To get the most out of indoor moringa plants, place them near a sunny window or use grow lights to supplement what little light they get. Remember to rotate the pots often so that the light can be evenly distributed. When planting moringa seeds, it’s important to monitor the plant for signs of light deficiency, such as yellowing leaves or stunted growth, and move it to a more suitable spot if needed, according to the planting instructions.
To keep their rapid growth and leaf development going even as they mature, seedlings still need plenty of sunshine. Moringa seedlings will grow into strong, productive trees that are both aesthetically pleasing and nutritionally dense if they receive adequate sunshine from the start.
Protecting Moringa Seedlings from Pests and Diseases
Moringa plants, especially when young, require strong protection from pests and diseases. Regular monitoring is necessary to safeguard moringa seedlings from significant threats like aphids, caterpillars, and fungal infections, which can stunt growth if not addressed.
| Protection Parameters | Specifications |
|---|---|
| Common Pests | Aphids, caterpillars |
| Pest Control Methods | Neem oil, insecticidal soap, hand-picking |
| Fungal Prevention | Adequate drainage, avoid overhead watering |
| Monitoring Frequency | Weekly |
Look for signs of insect activity, such as chewed leaves or sticky residue, in your seedlings once a week. One approach to controlling pests in moringa is to use natural remedies, such as neem oil or insecticidal soap. However, it is important to apply these solutions carefully so as not to harm beneficial insects. Picking off bigger pests by hand, like caterpillars, also helps for smaller infestations.
Overwatering and poor air circulation are common causes of fungal diseases; to prevent these problems, it is important to keep plants well-spaced and ensure that drainage is adequate. The best way to care for moringa seedlings is to avoid watering them from above and to remove any broken leaves immediately so that the foliage stays dry and disease-free.
Keeping the growth area clean by removing weeds and trash decreases the number of habitats for pests. If you care for your moringa seedlings, they will grow into strong trees that can withstand any storm.
Fertilizing Moringa Seedlings for Robust Growth
When moringa is young, it benefits greatly from fertilization since it speeds up its growth. If you want your moringa seedlings to have healthy roots and leaves, you need to fertilize them with a balanced organic fertilizer that contains nitrogen, potassium, and phosphorus.
| Fertilization Parameters | Specifications |
|---|---|
| Fertilizer Type | Organic (compost tea, fish emulsion) |
| Application Frequency | Every 2 weeks initially, monthly later |
| Nutrients | Nitrogen, potassium, phosphorus |
| Avoid | Synthetic chemical fertilizers |
Once every two weeks beginning when the seedlings emerge, spray with a diluted organic fertilizer such as compost tea or fish emulsion. When selecting fertilizers for moringa seedlings, stay away from synthetic chemicals. These chemicals have the potential to burn sensitive roots or disrupt the soil’s microbial balance.
It is important to monitor plant growth to adjust the fertilizer intensity, as overfertilizing can lead to leaf burn or excessive vegetative growth that compromises root strength. When fertilizing moringa seedlings, it is best to use slow-release organic matter, like well-rotted manure, because it releases nutrients gradually over time.
With careful attention to maintaining soil fertility, reduce fertilizer frequency to once per month as plants age. Fertilizing moringa seedlings correctly causes them to grow into sturdy trees that produce an abundance of pods and leaves.
Pruning Young Moringa Plants to Encourage Healthy Structure
Pruning moringa trees shapes them and promotes quick development. Moringa seedlings are clipped to encourage bushier growth and stronger branches when they reach a height of one to two feet, which is typically about six to eight weeks following germination.
| Pruning Parameters | Specifications |
|---|---|
| Pruning Height | 1–2 feet |
| Timing | 6–8 weeks post-germination |
| Tools | Clean, sharp shears |
| Pruning Limit | Less than one-third of plant volume |
| Pruning Weather | Dry weather |
Use clean, sharp shears to cut branches that are weak or overcrowded just above a leaf node. Moringa trimming aims to maintain an open canopy, which improves airflow and reduces disease risk. Removing more than a third of the plant’s total volume at once can cause stress.
Regularly trimming moringa leaves enhances their harvestability for culinary or medicinal purposes. The best time to prune moringa is during dry weather since it speeds healing. Also, sanitize tools in between cuts to prevent disease spread.

Make sure that new growth appears within a week after trimming, and observe how the plant responds to the cut. Following the moringa seedling care guidelines, regular trimming throughout the first year will promote the tree’s robustness, fruitfulness, and balanced structure for many years of growth.
Transplanting Moringa Seedlings to Their Permanent Location
Transplanting moringa seedlings allows them to grow into mature trees with lots of space. Transplanting moringa seedlings should be done when they are 6–12 inches tall, which is typically 4–6 weeks following germination, to minimize root damage and transplant shock.
| Transplanting Parameters | Specifications |
|---|---|
| Seedling Height | 6–12 inches |
| Timing | 4–6 weeks post-germination |
| Hole Size | Twice as deep and wide as root ball |
| Soil Additive | Compost |
| Transplanting Time | Morning or late afternoon |
To prepare the spot for the seedling’s permanent home, dig a hole that’s twice as deep and wide as its root ball. According to moringa transplantation instructions, adding compost to the hole would improve the soil quality and promote root development. Carefully remove seedlings from their containers while keeping the root ball in place.
Prior to inserting the seedling into the hole and gently pressing the dirt back down, check that the root collar is flush with the soil surface. It is important to moisten the soil thoroughly after transplanting to settle it. When transplanting moringa, it’s preferable to do so in the morning or late afternoon when temperatures are cooler.
Stake young plants if you feel the need to protect them from wind. Provide shade for a few days if needed and watch out for signs of transplant shock, including wilting. Successful transplantation of moringa seedlings produces sturdy, well-established trees.
Maintaining Moringa Trees for Long-Term Health
When cared for regularly, moringa trees stay robust and fruitful. Moringa trees need regular watering, mulching, and checking for pests or nutritional deficiencies to continue growing and producing consistently.
| Maintenance Parameters | Specifications |
|---|---|
| Watering Frequency | Deep, infrequent (soil slightly dry between) |
| Mulch Thickness | 2–3 inches (wood chips, straw) |
| Pest/Nutrient Check | Regular inspections |
| Pruning Frequency | Annually |
Water elder trees deeply but sparingly, allowing the soil to dry out slightly in between treatments, to encourage deep root systems. To prevent water loss and weed infestation, instructions for caring for moringa trees recommend covering the soil with an organic mulch layer of two to three inches thick. This mulch can be made of wood chips or straw.
When nutrients are lacking, plants may show signs like stunted growth or yellowing leaves; in such cases, apply organic fertilizer as needed. Pruning moringa trees once a year is a great way to maintain their shape and remove any dead branches. This will help the trees to produce more leaves and pods.
Maintain a regular schedule of inspections for signs of disease or pests, and address any issues promptly with natural remedies. By following the health guidelines for moringa trees on a regular basis, you can ensure that your trees will thrive for years to come and produce invaluable harvests.
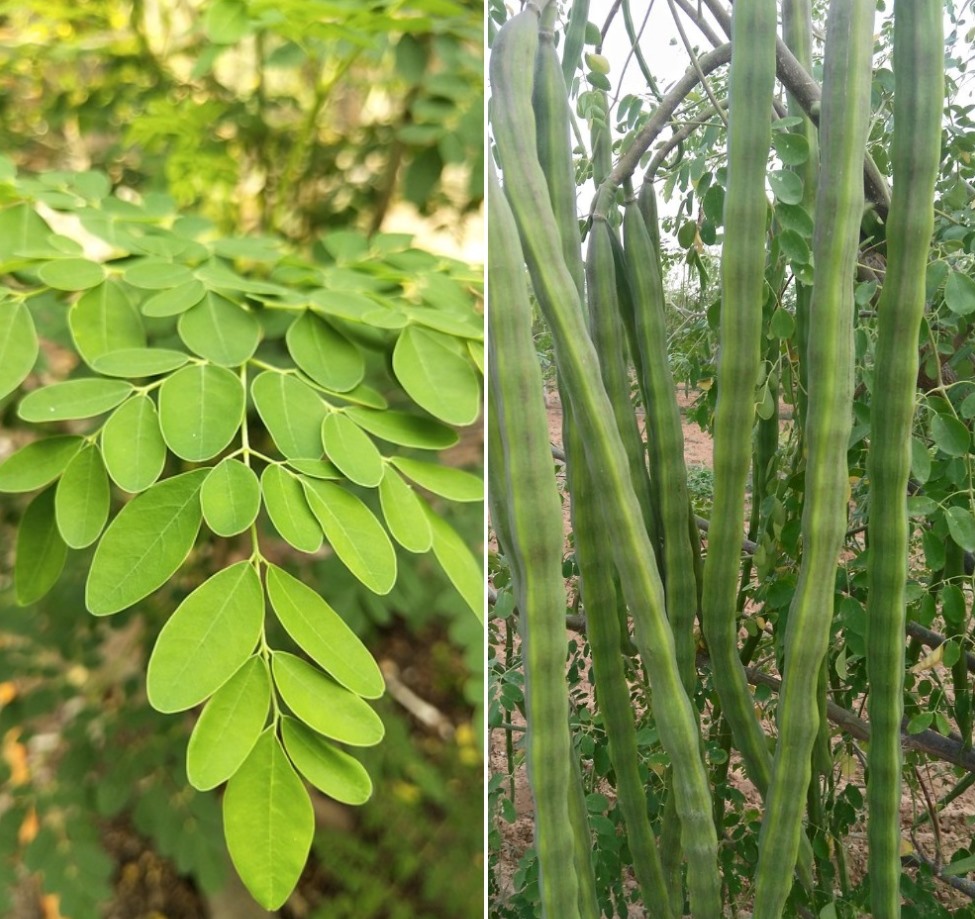
Harvesting Moringa Leaves and Seeds Sustainably
The benefits of harvesting moringa are at their peak while the plant is in its optimal state of health. Harvesting moringa leaves typically occurs three to four feet up the tree, which is around six months after planting. Tender, fresh leaves are best for flavor and nutrition.
| Harvesting Parameters | Specifications |
|---|---|
| Leaf Harvest Height | 3–4 feet |
| Leaf Harvest Timing | 6 months post-planting |
| Seed Harvest Timing | 6–12 months post-planting |
| Pod Condition | Dry, brown, splitting |
| Harvesting Tool | Clean shears |
Half of the leaves on the outside branches should be pruned off with clean shears to encourage photosynthesis. If you want your moringa leaves to stay fresh all day, it’s best to gather them first thing in the morning. The plant should not be stressed out by being overharvested.
Typically, you need to wait 6 to 12 months after planting for the pods to dry up and turn brown before you can harvest the seeds. It is best to harvest moringa seeds when the pods spontaneously split, revealing the ripe seeds that are prepared for oil extraction or replanting.
Store collected seeds and leaves in a cool, dry place to maintain quality. Trees can keep on growing and producing seeds and leaves for a long time with sustainable harvesting.
Conclusion
The process of growing moringa from seed is rewarding since it results in trees that are beneficial to people and the environment and are rich in nutrients. Due to their low maintenance requirements and relative ease of growing, moringa trees are suitable for gardeners of all experience levels. The guide comprehensively covers every aspect, from seed selection to ongoing care, enabling anyone to plant and maintain moringa plants at an expert level.


