

Multi-headed characters are often used to portray aliens or more dramatically, inner turmoil and self-loathing. Most of these stories, however, revolve around two-headed characters or three-headed characters to explore the duality of inner conflict or how having multiple opinions can stifle progress and cause extreme frustration.
There have been many times over the years that people have used iClone to put together multiple characters for this purpose. It could get a bit complicated and downright messy in the earlier versions but a prior update to Character Creator gave us a quick way to hide any body part(s).
With the introduction of Character Creator’s Hide Mesh tool this went from being a tedious process of opacity maps to being able to use a single piece of cloth like shorts, to hide all of the character except the neck and head. This meant getting the extra “talking heads” ready was a snap that I will demonstrate in a short tutorial further down this article.
In fact, it is incredibly easy to assembly a character like this now making the hardest parts dialog and motion.
Linking versus Attaching
This one is easy as we have no choice with characters. While things can be attached to them, as characters they cannot attach to anything themselves which leaves us with linking. We don’t lose a lot as the characters still move as one, but we can’t save our combined character as characters. We have to save them as a project file. This is not a problem as we can merge parts of project files anyway.
Main Character
The main character is the control point so the other “heads” will be linked to this character specifically to the Spine Bone 2 so the heads will move properly with the shoulders of the main character.
Shoulder Width and Size
If you are going to keep all the heads at 100 percent in size you will need a main character with large, wide shoulders. You can use the Bodybuilder slider and shoulder sliders in Character Creator 4 to edit the shoulder size.
The demo characters I created while practicing had a regular herculean build that provided big broad shoulders. Putting two normal sized heads, one on each side of the main character’s head was easy enough.

In the image above the left sided character consists of three Base male characters with the “head” characters on each side scaled to 80 percent for an easier fit but notice what happens with the shoulders. The middle character has shoulders broadened with the Proportion tool in CC4. The character on the right has a large build all around and gives plenty of room for heads at 100 percent.
I wouldn’t worry a lot about the broaden shoulders not looking quite right as three heads don’t look quite “right” either. Don’t box yourself in by applying conventional anatomy to this type of character. Just keep proportions recognizable or within reason.
Make sure you do any body size scaling BEFORE you animate them as this will remove the animation and return the character to a default pose. There may be scenarios where we would need different sized heads on the same body so take that into consideration when necessary.
The heads don’t have to be just on the shoulders either. We can scale whatever size we need and smaller heads can be placed in many places. We could literally have a character talking out of his… err… backside for memes or comedy.
We might even be able to mimic a giraffe type neck with a little ingenuity and creativity. I won’t’ go so far as to say the possibilities are endless but they are numerous depending on your imagination.
Preparing the Characters
We need three characters. In my video I use Meshy AI community generated heads for Batman and Joker. I then went to Character Creator 4’s Headshot 2 Mesh plugin tool to shape the heads and transfer the textures. This takes a huge burden off of us by doing all the work after we “point-and-click” outline enough features to get a good duplicate.
Next, we use CC4 to select the shorts then hide all of the body except the head and neck. After that we make the shorts invisible with opacity and I will show you how to do that too.
Superman was created using the Headshot 2 image to face technology on a Character Creator body and the suit came from creator Fate Han in the Marketplace.
Scale, Place and Link
Now we need to scale down the Heads (in reality the entire body which in turn affects the head). Then we can move the characters over, tilt them if needed and place them in the proper location.
Since these are characters, we cannot attach them as “attach” is not available for the character itself, so we use Link. Keep in mind that linking does NOT store linked items when the character is saved. To accomplish this, we must save our tri-characters as project files. We can then use Merge to merge those characters into another project. This is a very simple process.
Easy Three Character Dialog
A multi-character dialog may sound tough but it’s not. If you can use an enlarged timeline it will be much easier. For me it’s important to have the timeline visible, enlarged and use multi-select to put all three characters in the timeline at once. This keeps me from loading one character’s dialog over another character.
It also helps in editing the timing within the timeline by showing you exactly where all three character’s dialogs reside for easy adjustment. I realize not everyone has screen space for a large timeline but the larger the better.
For Superman I used the soundtrack because he is just thinking not speaking his dialog. Musing to himself. For this I dragged and dropped the audio file onto his character. For Batman and Joker, I used AccuLIPS to import the audio and create the visemes in the appropriate location down the timeline. All dialog is from Eleven Labs.
Animating the Trio
Since this is a beginner level tutorial, I’m going to stick to basic Motion Puppet motions and one motion clip from an old pack named Wings. It is a very short up down idle motion to simulate hovering. It should not be a hard motion to emulate with AccuPOSE or manually moving down the timeline while moving the character slightly up and down or side to side.
With the Head characters I used the Motion Puppet masking tool to make sure the heads did not move out of place by allowing only the head to be animated. If you are using a regular motion, there is the Remove Motion option on the clips right click context menu. You can even use Break on that same menu to cut out the section needing motion removal from the rest of the clip by breaking it before and after the edited section. You can then use the Remove Motion selection without effecting the entire clip. I’ll go into this a bit more towards the end. As I wrote earlier, I dragged and dropped an old motion clip that simulated hovering in the air with wings to animate Superman. From there I looped the clip and slowed it down.
Final Render
Below is the final render after adding an image background and some ice column props to add some depth. This only covers the basics and could certainly be more cinematic with more effort, as it didn’t take long to produce. It’s a great learning exercise too.
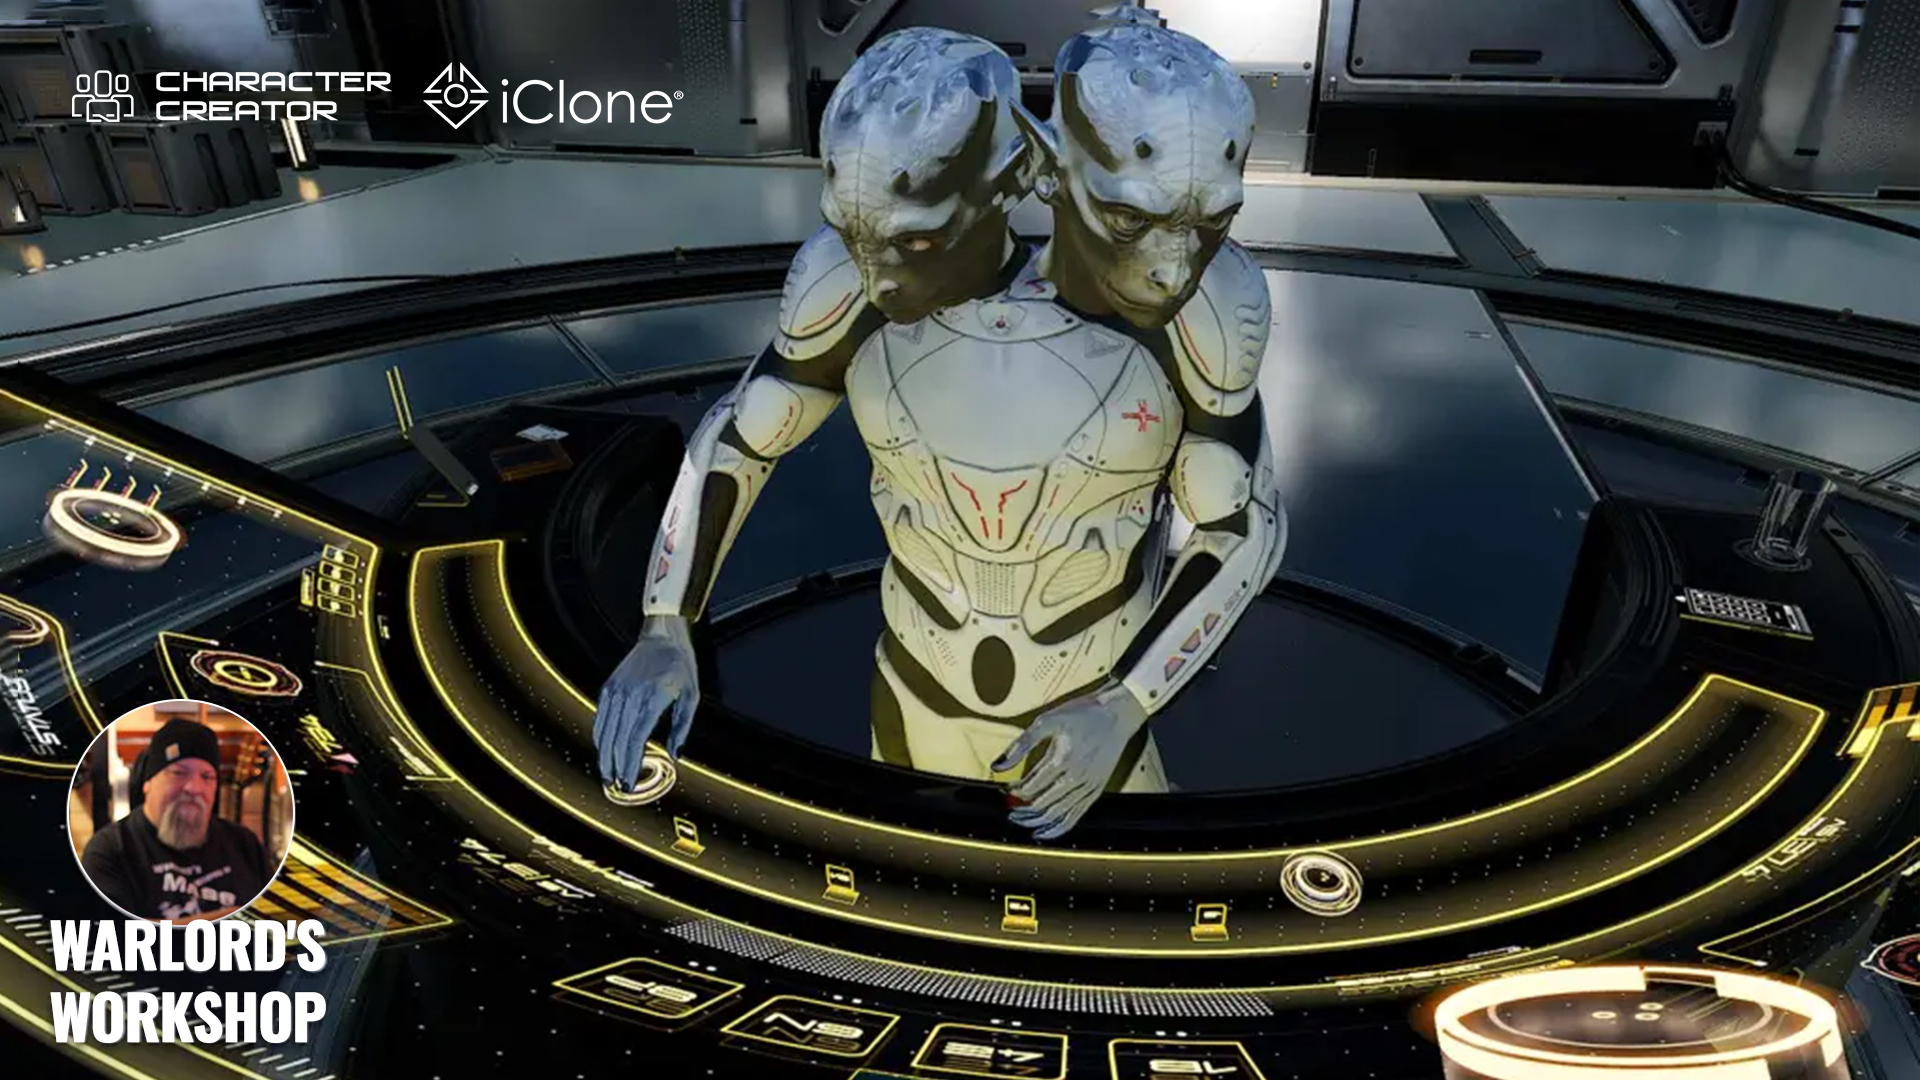
Two-Headed Via Proportional Neck Bone Placement
There is a simple way to create two headed characters with the main head pushed over to one side so the two heads are balanced in case you don’t want one head in the center and one head on the side. For this we go into Character Creator 4 to use the Proportion tool to move the bottom of the neck over to whichever side you prefer.


Apply the same procedure as above to prep and attach another character for the second head then position and link.
These characters are one hundred percent in size and could easily illustrate a story about good and evil, determination and laziness or comedy.
NOTE: When you push the bone over like this it distorts the neck mesh which is why I pushed it downward to hide that part.
NOTE 2: For those of you that want to know… yes it can be done with limbs too, but it can start to get a bit complicated. Possibly naming each character after the limb(s) it represents will help sort things out like an extra pair of arms.
Getting Them into Unreal Engine
Getting these combined characters into Unreal Engine is easy but you must unlink them in iClone first, or you get unexpected positioning in Unreal Engine. Once you have transferred all three characters to Unreal Engine you can link them back together in iClone and the combined characters will work as expected with Live Link into Unreal Engine.

Using Motions
Using Drag and drop motions for BOTH characters (including the same motion) will require you to UNLINK the characters before adding the motions or the Head character will jump out of place. Then go into the timeline and REMOVE MOTION from the Torso to keep the body from moving out of place. While it is some extra steps it keeps the characters synced.
This multi-character method is more efficient when using a drag and drop motion for the main character and using the Motion Puppet for the second “head” with the masking features where only the head is animated. Now that I think of it, animation layers might work too but I haven’t tried it.

Summary
While this method is not new, advances in iClone and CC4 have made it much easier to accomplish especially when using the motion and motion puppet combo. Load your motion onto your main character and use the Motion Puppet to animate the second “head”.
The pipeline of Character Creator 4, Headshot 2 Mesh, Image to mesh and iClone can put together some compelling characters with a lot of potential for great dialog between the heads and like a lot of iClone projects it can be done at a beginner’s level as long as you understand the timeline.

MD McCallum – WarLord
Digital Artist MD “Mike” McCallum, aka WarLord, is a longtime iClone user. Having authored free tutorials for iClone in its early years and selected to write the iClone Beginners Guide from Packt Publishing in 2011, he was fortunate enough to meet and exchange tricks and tips with users from all over the world and loves to share this information with other users. He has authored hundreds of articles on iClone and digital art in general while reviewing some of the most popular software and hardware in the world. He has been published in many of the leading 3D online and print magazines while staying true to his biggest passion, 3D animation. For more information click here.


