For some time I have wanted to purchase a Universal Snap Jack, but like many Universal games they are not always an easy game to find. Until I am able to locate one I’ve decided that I am going to start piecing one together using an old converted generic Universal cabinet. This is the first in a series of posts to document my progress.
Universal Snap Jack – Starting the ball rolling
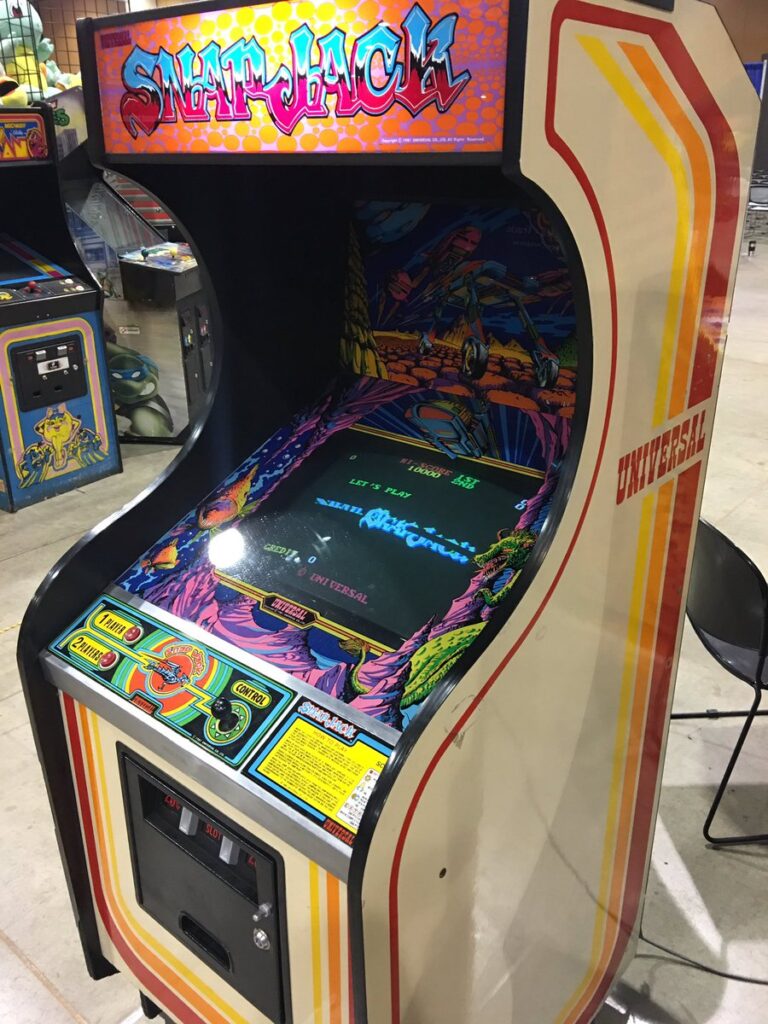
As of this writing I now own 9 different Universal machines and am always on the lookout to grow the collection. Each and every one of their cabinets is gorgeous. Even though Snap Jack was released in Universal’s generic cabinet used by several other games like Mr. Do and Cosmic Avenger, the bezel, back-plexi and marquee all have uniquely, illustrated artwork specific to the game.
If you aren’t familiar with what the game looks like, here is a great photo of one:
Over at least the last five years I’ve started to piece together artwork for a Snap Jack cabinet. About three years ago Jason S. (Evansville) and I started chatting about a Universal cabinet he had in his garage that was towards the end of a long list of projects.
Once I acquired a Snap Jack bezel in late 2019, I knew it was more likely that I could actually put together a somewhat complete cabinet. I now had a marquee, the back-plexi and the bezel. Jason’s cabinet was converted to a Yie Ar Kung Fu. With a quick paint strip test he confirmed the painted over cabinet was in fact one of the generic Universal’s, and we worked out a deal.
Picked up the Universal Cabinet
At the end of June, I finally got my opportunity to make the drive down 69 to Evansville. Its been nearly 10 years since I was last in Evansville, and at that time the best route was still 70 to Terre Haute and down 150. It was a quick turn, a day drive down with the kids to pick up the game and only a quick stop for ice cream before coming right back home.
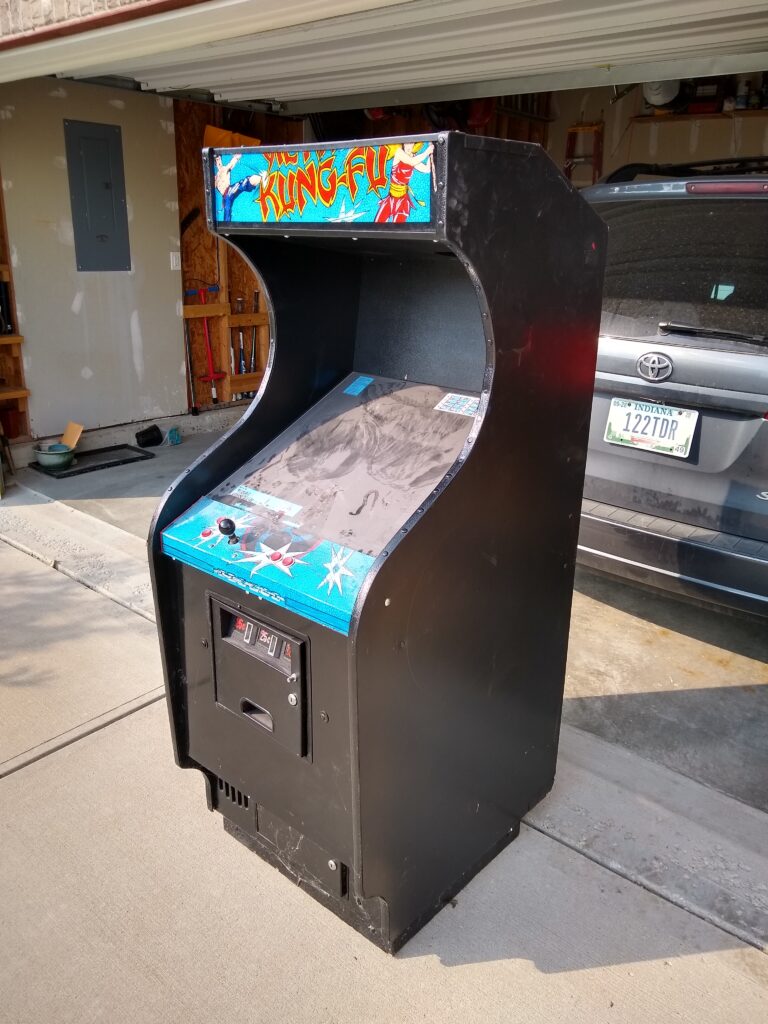
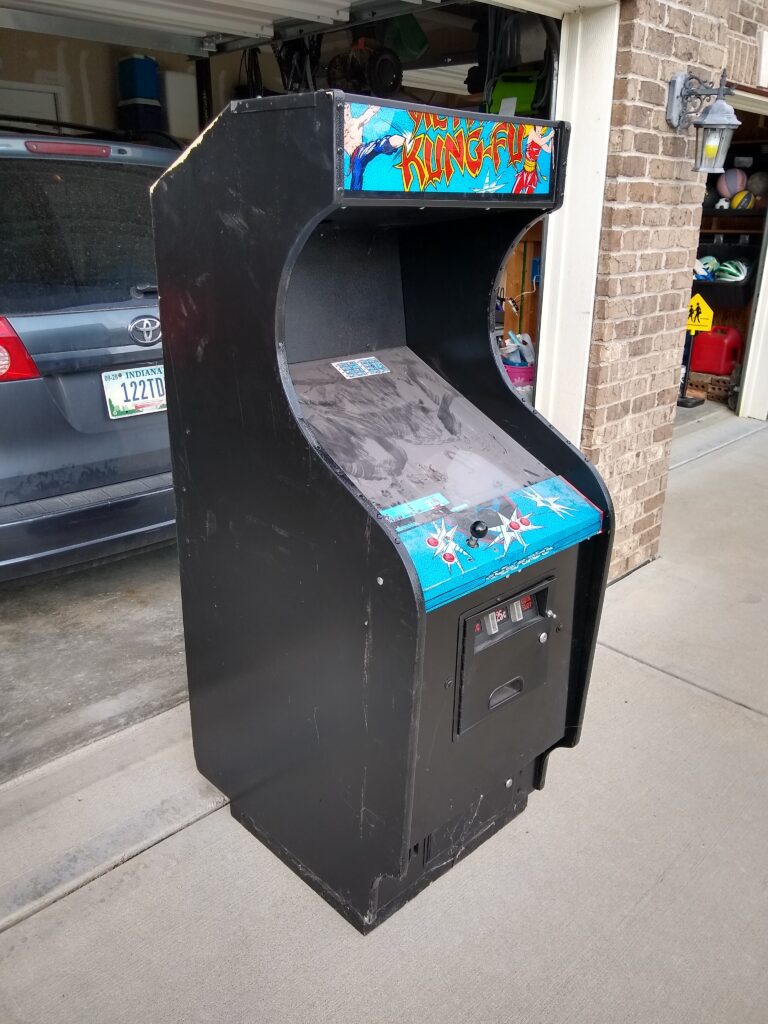
Here is the cabinet.
Anytime you are working from a fully converted cabinet, you know you are in for a project. This cabinet is no different and has some particular areas that are a bit unique that will need attention:
- Side Cabinet Damage – The side of the cabinet looks like it suffered some sort of impact, a punch? The inside right of the monitor will need to be sanded and re-patched
- Top Access Panel – The top of every Universal game has a wooden access panel that is screwed into the cabinet. The one on this cabinet was missing. Will need to cut a new one.
- Marquee Area Wood Damage – The operator replaced the marquee bracket screws with ones that were too large. The wood is missing chunks around those holes, that will need to be repaired and will probably be replaced with t-nuts.
- Lower Back of Cabinet – Possibly exposed to some moisture, the lower piece of wood on the back isn’t worth saving. The trick with this one will be routing a new piece using the old one as the template, and cutting new ‘runners’ that run the full height on the back of these Universals.
Closing
Short and sweet for the first project post for the Snap Jack.
Next post will get into the fun of the first step which was stripping the black paint from the sides of the cabinet. Brand new vinyl sideart is available for Universal cabinets from This Old Game, but I much prefer to save the original artwork if at all possible.
Although this project is in flight – I’m still interested to purchase a complete Snap Jack. For this project I could also use a control panel with as much of the original plexi overlay and instruction card as possible.
Please contact me if you have either of these things and are open to discussing a sale or trade, I can make things worth your while.
Here are some similar arcade posts
If you enjoyed this post, please consider to leave a comment or subscribe to the feed and get future articles delivered to your feed reader.


