Understanding how to create a workspace in TYPO3 is essential. This feature enables content sharing, editorial review, and multi-level approval for any process within your TYPO3 project.
In this guide, we share how to create a workspace in TYPO3.
What is a Workspace in TYPO3
A workspace in TYPO3 is a space in your project where users can edit, preview and approve any type of content before publishing it. Workspace in TYPO3 are ideal for collaborative workflows and any changes made inside a workplace remains hidden to the public, until explicitly published.
How to Create a Workspace in TYOPO3
The process of creating workspaces in TYPO3 is simple and comprises a few easy-to-follow steps:
Step 1: Log in to TYPO3
The first step is to access the TYPO3 admin panel. This is the place from where you manage all your ongoing processes.
Step 2: Enable Workspace System Extension
Now that you have accessed the TYPO3 admin dashboard, it is time to enable the Workspaces extension, so you can add new workspaces to your project.
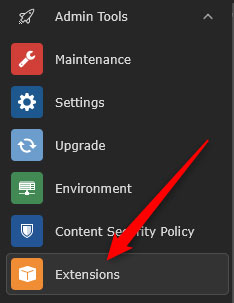
Via the admin panel, navigate to Admin Tools -> Extensions:

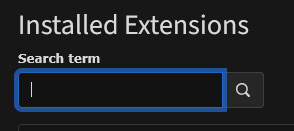
Then, search for “workspaces” in the search box:

Once you see the Extensions module, click the Activate button, so you can use extensions on your TYPO3 project:

Now, you can create a new workspace.
Step 3: Create a New Workspace
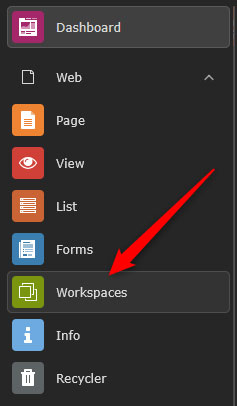
Now that you have activated the workspaces module via the TYPO3 admin panel, navigate to Dashboard -> Workspaces:

Then, click on the Create a workspace button:

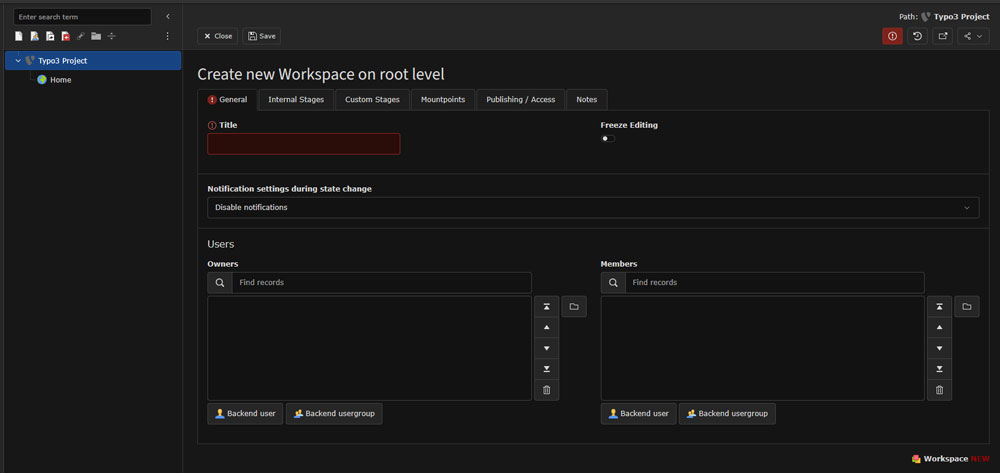
Step 4: Fill in Workspace Details
Add information such as:
- Title: Add a clear and descriptive name to your new workspace
- Description: Add the purpose and use of the workspace
- Stage Configuration: set stages such as Draft, Review, and Approval
- Mount Points: limit the workspace to specific page trees.
- Auto-publish: Use to publish your content at a set time

Step 5: Assign Users and Permissions
Now that the initial workspace setup is done, you should assign permissions for your team. Keep in mind that TYPO3 gives you 3 main roles to choose from:
- Editor: Create and edit content
- Reviewer: Checks and approves content drafts
- Published: Publish content live
Conclusion
Knowing how to create a workspace in TYPO3 gives your team tons of versatility options when working on your online project. Whether you are managing a small editorial team or a large one, TYPO3 workspaces give you full control and can greaetly enhance your work.


