
Security always seems more complicated online than in the real world.
You can’t just bolt the front door and hire two big dudes to stand guard. And there are way too many acronyms going on.
But don’t worry. Securing your website doesn’t have to be a major headache.
The best way to make your users feel safe is by offering them a secure, encrypted experience using Hypertext Transfer Protocol Secure (HTTPS). This protocol makes it almost impossible for anyone to steal sensitive information.
To use HTTPS, you need to purchase a Secure Sockets Layer (SSL) or Transport Layer Security (TLS) certificate.
In this post, we’re going to explain what HTTPS and SSL/TLS are all about, and how you can set up these key features on your website.
Let’s get started!
An Introduction to SSL/TLS and HTTPS
SSL and TLS certificates are digital documents that you can add to your website. They create an encrypted connection between web browsers and the web servers hosting your website. This means only your website can access any data sent by the user.
SSL is actually the predecessor of TLS, and it’s now considered outdated and unsafe.
However, the acronym “SSL” is often used interchangeably with TLS when talking about website security. So, we’ll refer to them as SSL/TLS in this guide.
To set up SSL/TLS, you’ll need to install a certificate on your site. This allows your site to use the HTTPS protocol for establishing secure connections.
Here’s How HTTPS Protects Your Website
While you can’t hire a security guard for your website, HTTPS is probably the closest thing. Here’s why you need it:
- It creates a cipher: Imagine sending a confidential letter in a locked box. That’s what HTTPS does with your website data. When customers enter their credit card details or personal information, HTTPS scrambles it so only your website and their browser can read it.
- It provides proof of identity: Just like the sign above a bricks-and-mortar store, HTTPS shows visitors they’re on your genuine website — not a fake copy set up by scammers. You’ll see this confirmed by a padlock icon in the browser’s address bar and “https://” at the beginning of the URL.
- It keeps your content locked down: HTTPS also ensures that nobody can tamper with your website. It’s like having a tamper-proof seal on a product; if someone tries to modify your web pages or inject malicious code, your customers’ browsers will detect it immediately.
Why an SSL/TLS Certificate Is Important for Your Website
The primary reason to get an SSL/TLS certificate is to protect your website from being hacked.
Here are some common threats that you can prevent:
- Man-in-the-middle (MITM) attacks: These attacks involve intercepting communication between a user and a website. SSL/TLS prevents this by ensuring that only the intended parties can access the data.
- Data breaches: HTTPS encrypts sensitive data, making it much harder for hackers to steal customer information like credit card numbers, addresses, and login details.
- Phishing attacks: Hackers create fake websites that look like actual businesses to trick people into giving up their information. HTTPS helps to prevent this by verifying your website’s identity.
- Eavesdropping and tampering: HTTPS ensures data integrity, meaning the information sent between your website and your customers can’t be altered without detection.
Neutralizing these web security threats is obviously good for your reputation. And given that a breach could cost your small business up to $650,000, your accountant would definitely approve.
But that’s not all. There are other business benefits.
Google prefers sites and web applications that are secure. SSL/TLS is a key part of meeting the required standards. If you want your website to rank, you really need to get a certificate.
Another important reason to install an SSL/TLS certificate is if you’re in an industry that requires you to comply with certain standards.
For example, finance companies are required to follow security guidelines regarding payment information. The Payment Card Industry (PCI) sets rules that site owners must comply with to safely accept credit card information on their websites.
How To Tell if Your Website Is Using SSL/TLS
Not sure whether you have SSL/TLS on your site? You can check in your browser.
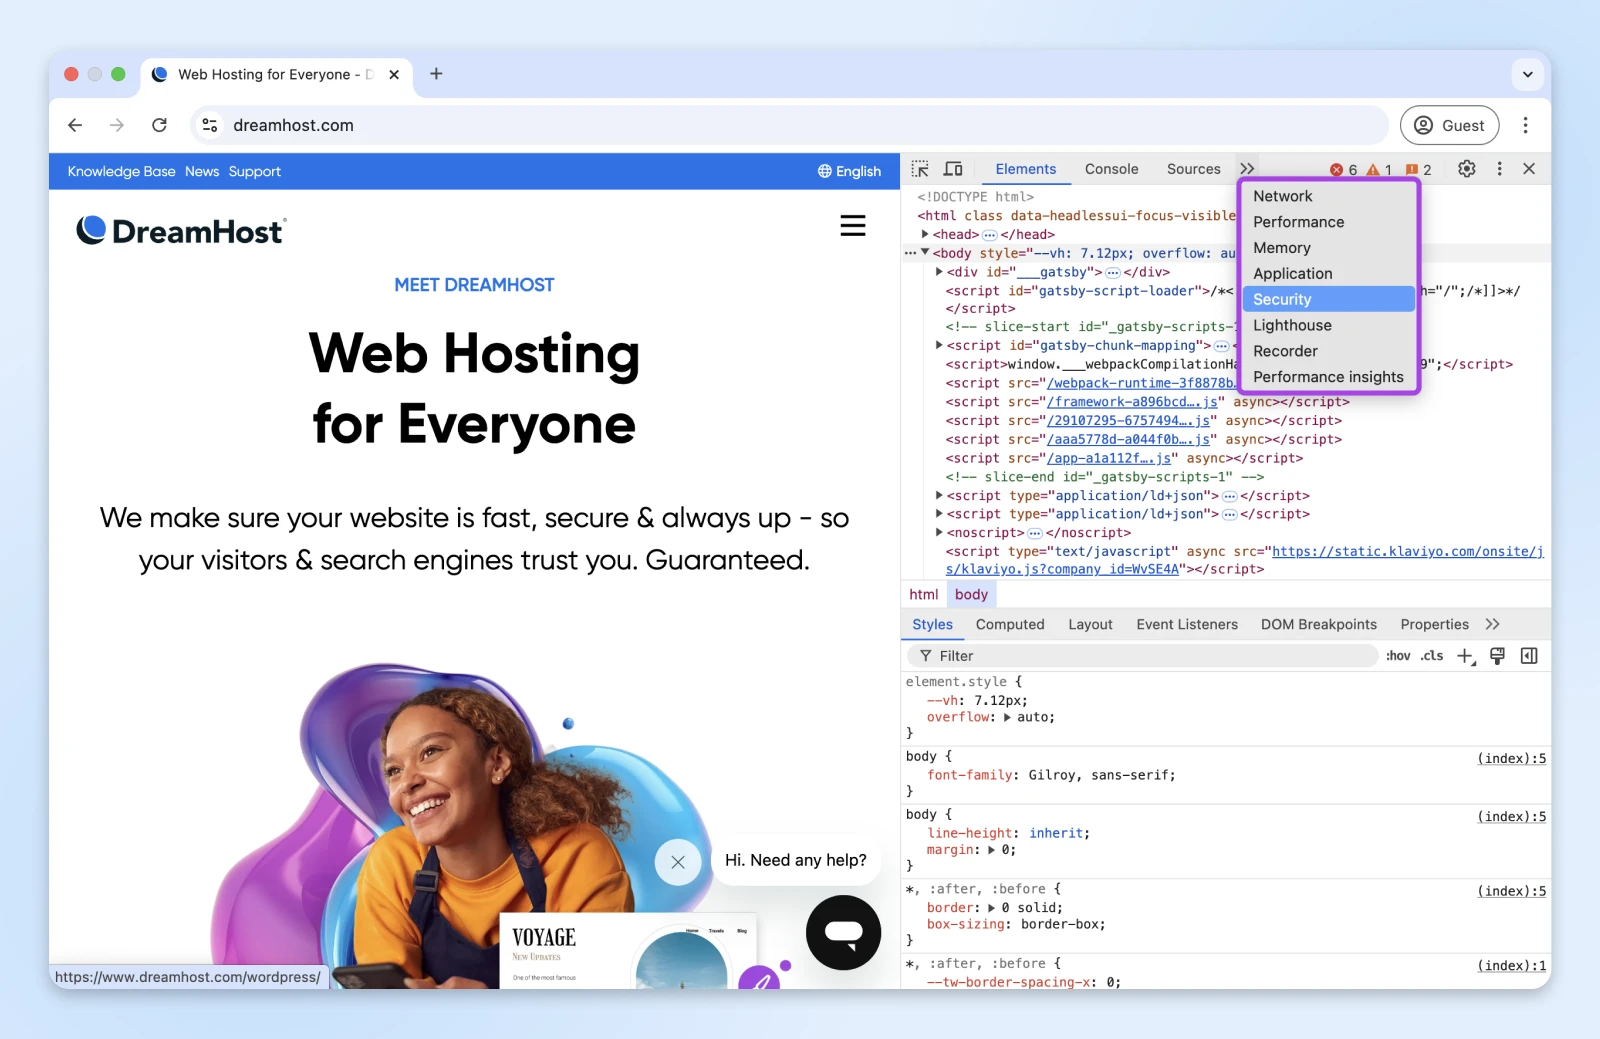
If you’re using Chrome, open up the Developer Tools area. Hit F12 on Windows and Linux or ⌘ + Option + i on Mac.
Alternatively, you can hit the ⋮ icon on the right of the main toolbar and navigate to More Tools > Developer Tools.

This should bring up a panel with loads of code and technical stuff. Don’t panic! Just select the Security tab.
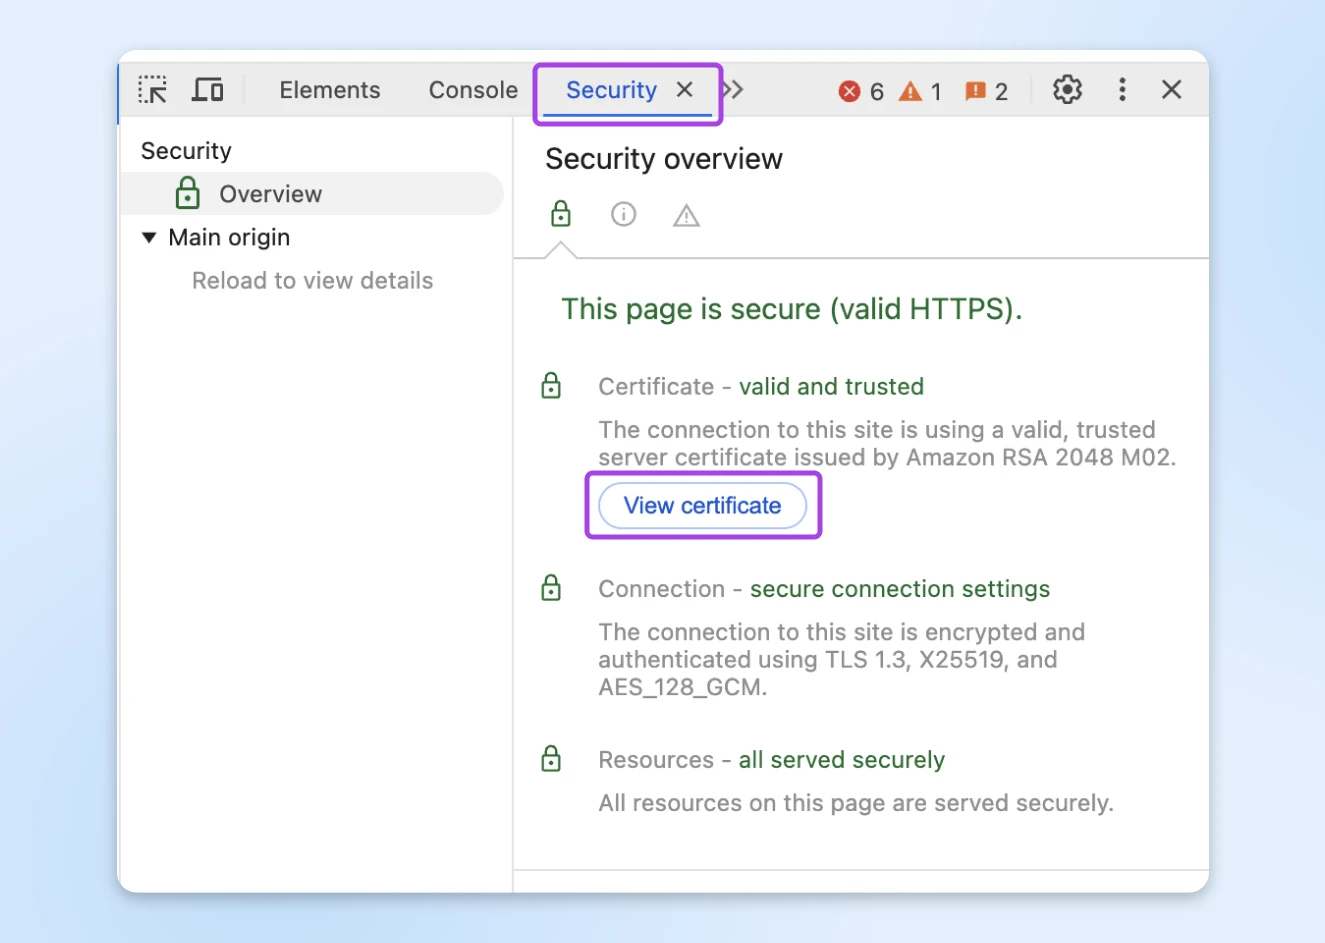
Chrome will tell you whether:
- The page you’re viewing is secure.
- HTTPS is operating properly.
- The SSL/TLS certificate is valid, trusted, and up to date.
Click View certificate to see all the details relating to SSL/TLS.
In other browsers, you can access similar information by clicking the padlock icon in the address bar.
Different Types of SSL Certificates
Found out that your site doesn’t have an SSL/TLS certificate? Oops…
Don’t worry, it’s easy enough to fix. The first step is to identify what type of certificate you need.
SSL/TLS certificates come in many forms, all of which have their unique pros and cons. To get one, your site will need to be verified by a Certificate Authority (CA). The type of SSL/TLS certificate you decide to buy will affect what kind of checks you need to go through.
Your choice of certificate depends largely on your requirements and budget.
Let’s go through the different categories to help you find the option that works best for you.
Domain Validation (DV)
This type of certificate only requires you to prove that you have the right to use a specific domain. This makes it the least secure option.
However, it’s also the cheapest type of SSL/TLS certificate, and you might even be able to acquire one for free. You can also get one approved very quickly — even within minutes.
DV certificates are good for smaller sites that don’t handle sensitive data, such as blogs or portfolios.
Organization Validation (OV)
This is a more secure option, which requires a more thorough check of your website. The CA will vet your organization to ensure that you are legitimate and trustworthy.
As such, OV certificates are also slightly more expensive and will take a little longer to acquire.
For larger sites that handle user data and purchasing, the extra layer of security is worth the investment.
Extended Validation (EV)
This is the most secure option but also the most costly and time-consuming.
Acquiring extended validation requires a thorough vetting process and is usually more expensive than the previous option. This also means that it takes the longest to be approved.
EV certificates are geared toward very large, high-traffic sites, such as e-commerce businesses and official government sites.
Still not sure which type of certificate you need? We recommend reading more about the different certificate levels to make sure that you’re picking the right option.
Where To Get an SSL/TLS Certificate for Your Website
You know that you need an SSL/TLS certificate, and you have a decent idea of the type of certificate that your site requires.
Now, you just need to purchase one.
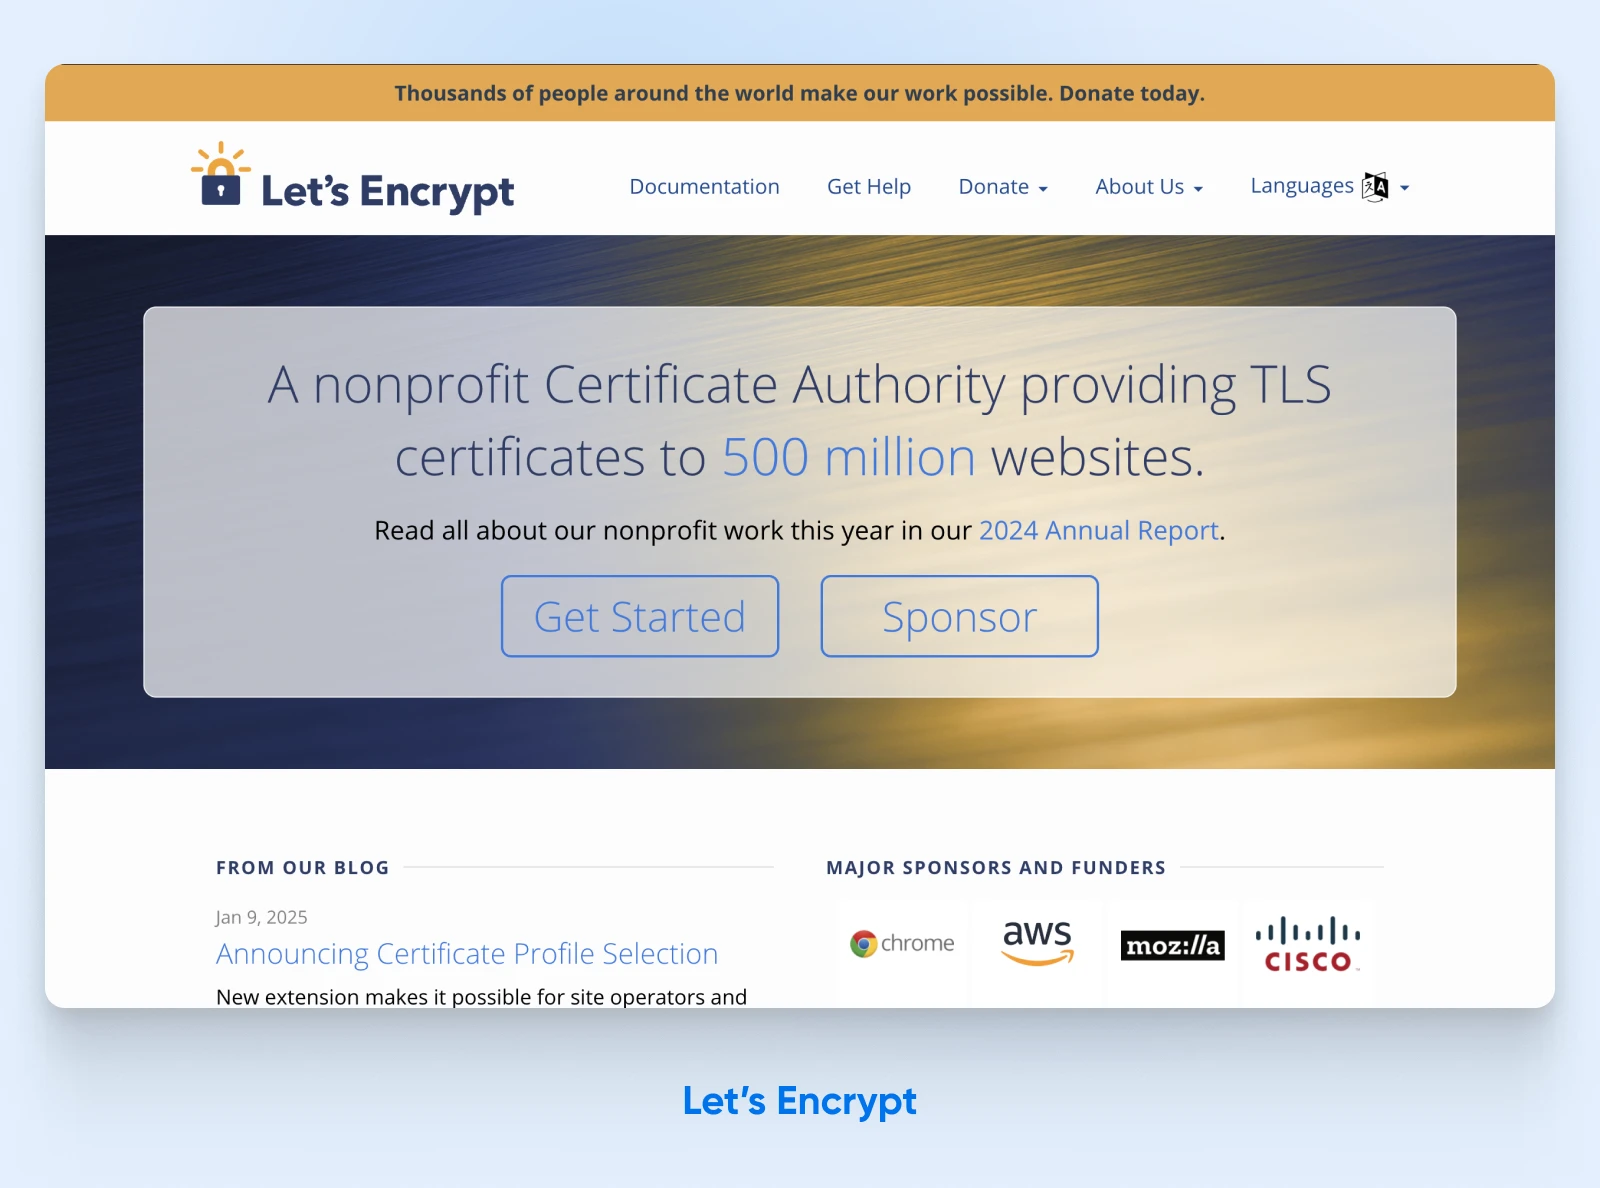
You can get an SSL/TLS certificate from a Certificate Authority, such as Let’s Encrypt. Some hosting providers also offer them as free extras, or bundled in with their paid plans.
At DreamHost, SSL/TLS certificates can easily be added to your site from your control panel.
Let’s look at the available options:
Let’s Encrypt SSL/TLS
This service offers free DV certificates. Let’s Encrypt is a great choice for smaller sites that handle little personal data. Of course, if you need something more robust, you might want to look elsewhere.
Sectigo-Verified SSL/TLS
You can get a signed DV certificate from Sectigo for around $99.99 per year. With this installed, your site will appear in browsers as fully secure. This makes it a better option for commercial websites or sites that handle sensitive data.
You can access both of these options by heading to the “Secure Certificates” page in your DreamHost Control Panel. Once you’ve purchased and installed your certificate, your site should be secure in about 15 minutes!
How To Install an SSL/TLS Certificate on Your WordPress Website (2 Options)
Of course, there are other SSL/TLS certificate providers out there. If you’ve already purchased a certificate, or would like to try a different solution, what then?
If you’ve bought an SSL/TLS certificate from an external CA, you must connect it to your site and install it.
The process can vary depending on your site, your web host, and the type of certificate you’ve chosen.
However, there are two main routes: using a security plugin, and through your hosting control panel. Let’s take a closer look at each method.
Option 1: Install the Really Simple SSL Plugin
One of the easiest ways to add an SSL/TLS certificate to your site is to use a plugin. Really Simple Security (formerly Really Simple SSL) is a tool that lives up to its name.
The tool is free to download and install, although a premium version is also available. It’s also incredibly easy to use, with a simple configuration process and a user-friendly interface.
The plugin will perform the entire installation and activation process for you. All you need is an SSL/TLS certificate, and the tool handles pretty much everything else.
Start by installing and activating Really Simple Security on your WordPress site. Then, a message will appear on your dashboard with some additional information about what you need to do before activating SSL/TLS. Make sure you complete all of these steps before you proceed.
If your site already has a connected SSL/TLS certificate, you’ll see the option to Activate SSL.
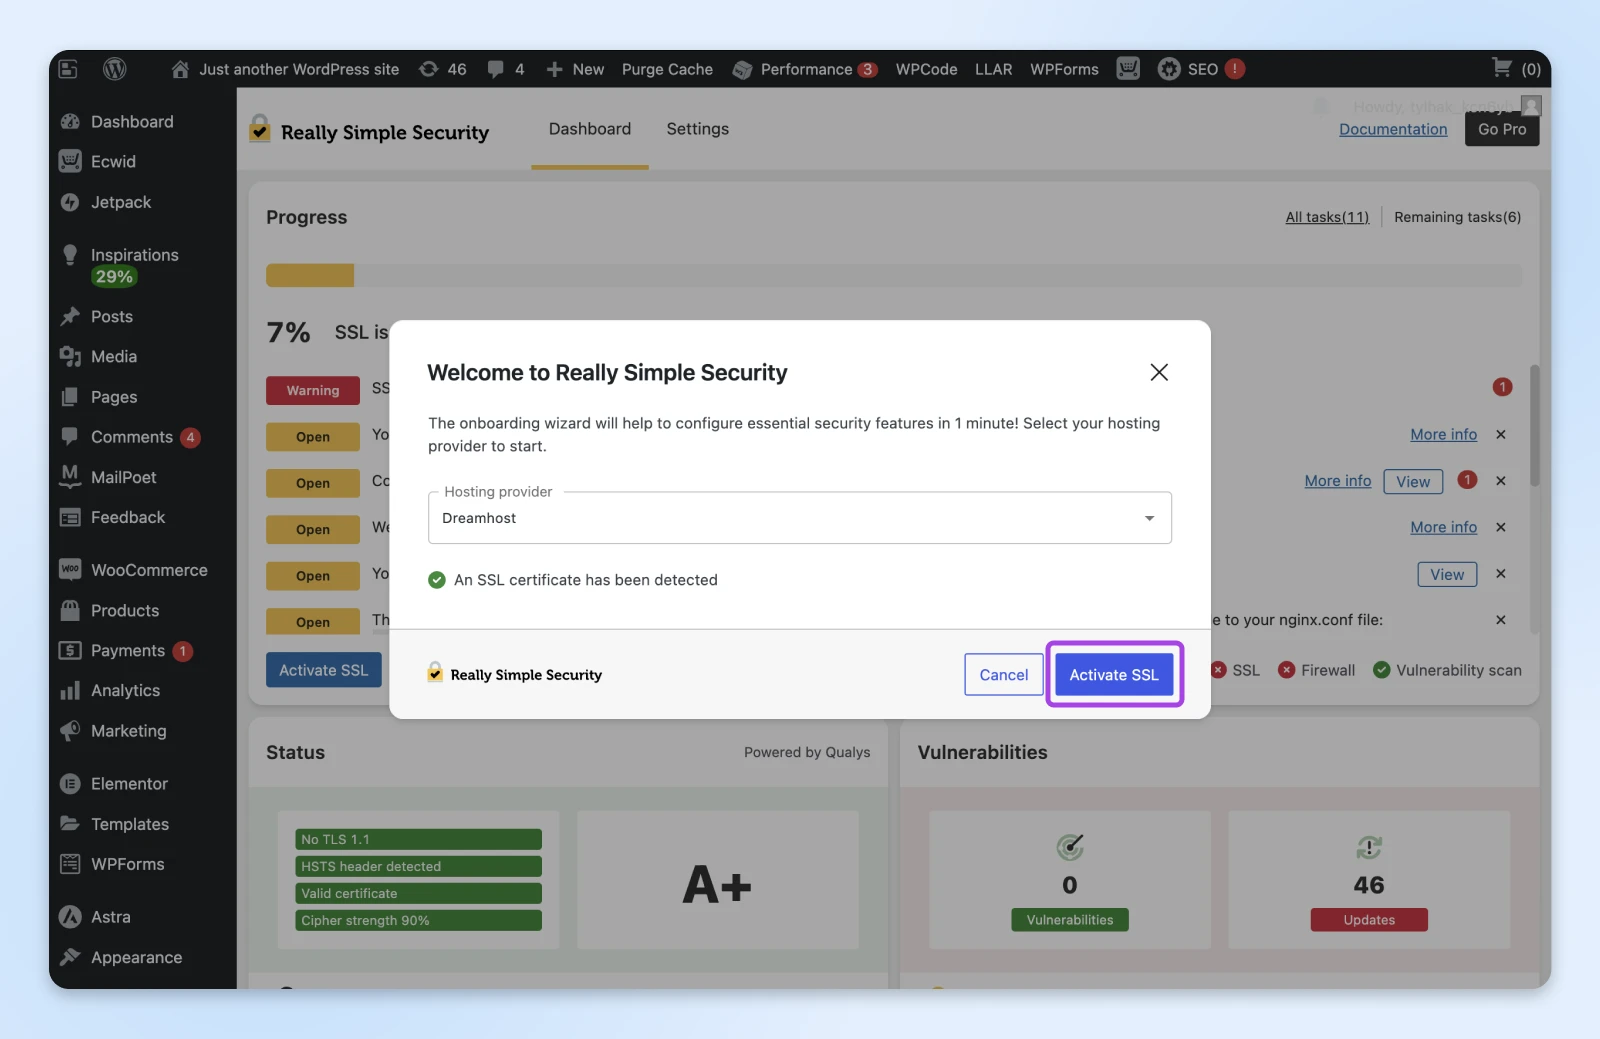
Click that button, and the plugin will install and activate your certificate.
If you haven’t yet added SSL/TLS via your web host, you’ll see a message confirming this. You will need to visit your host’s dashboard or control panel, and follow their specific guidelines for adding your certificate.
During the installation process, the tool will keep you updated on the status, including any tasks you need to deal with.
Option 2: Use the DreamHost Control Panel
The DreamHost Control Panel makes it easy to purchase and activate an SSL/TLS certificate. You can use a similar process to add a third-party certificate.
In your Control Panel, add the SSL/TLS certificate, along with your private key and the certificate signing request. If you have an intermediate certificate, add that here as well.
All these details must come from the same CA and be purchased at the same time. Otherwise, they won’t be compatible.
Also, make sure you throw in all the details, including the lines…
—–BEGIN CERTIFICATE—–
and
—–END CERTIFICATE—–
…at the start and end, respectively.
If the SSL/TLS certificate is valid and you’ve entered everything correctly, it will now be active on your site.
You can test to ensure the process has worked correctly by using the method we showed you earlier.
All look good? You’ve successfully installed SSL/TLS on your WordPress site!
Are There Risks in Switching Your Site to HTTPS?
Eh, not really. The risks of switching to HTTPS are minimal, and the benefits far outweigh any potential drawbacks.
The only real risk is that your site could be temporarily unavailable during the process. But this is usually a minor issue that can be resolved quickly.
That said, there are some things to be aware of when moving from HTTP to HTTPS. The best way to ensure a safe, smooth transition is to plan ahead.
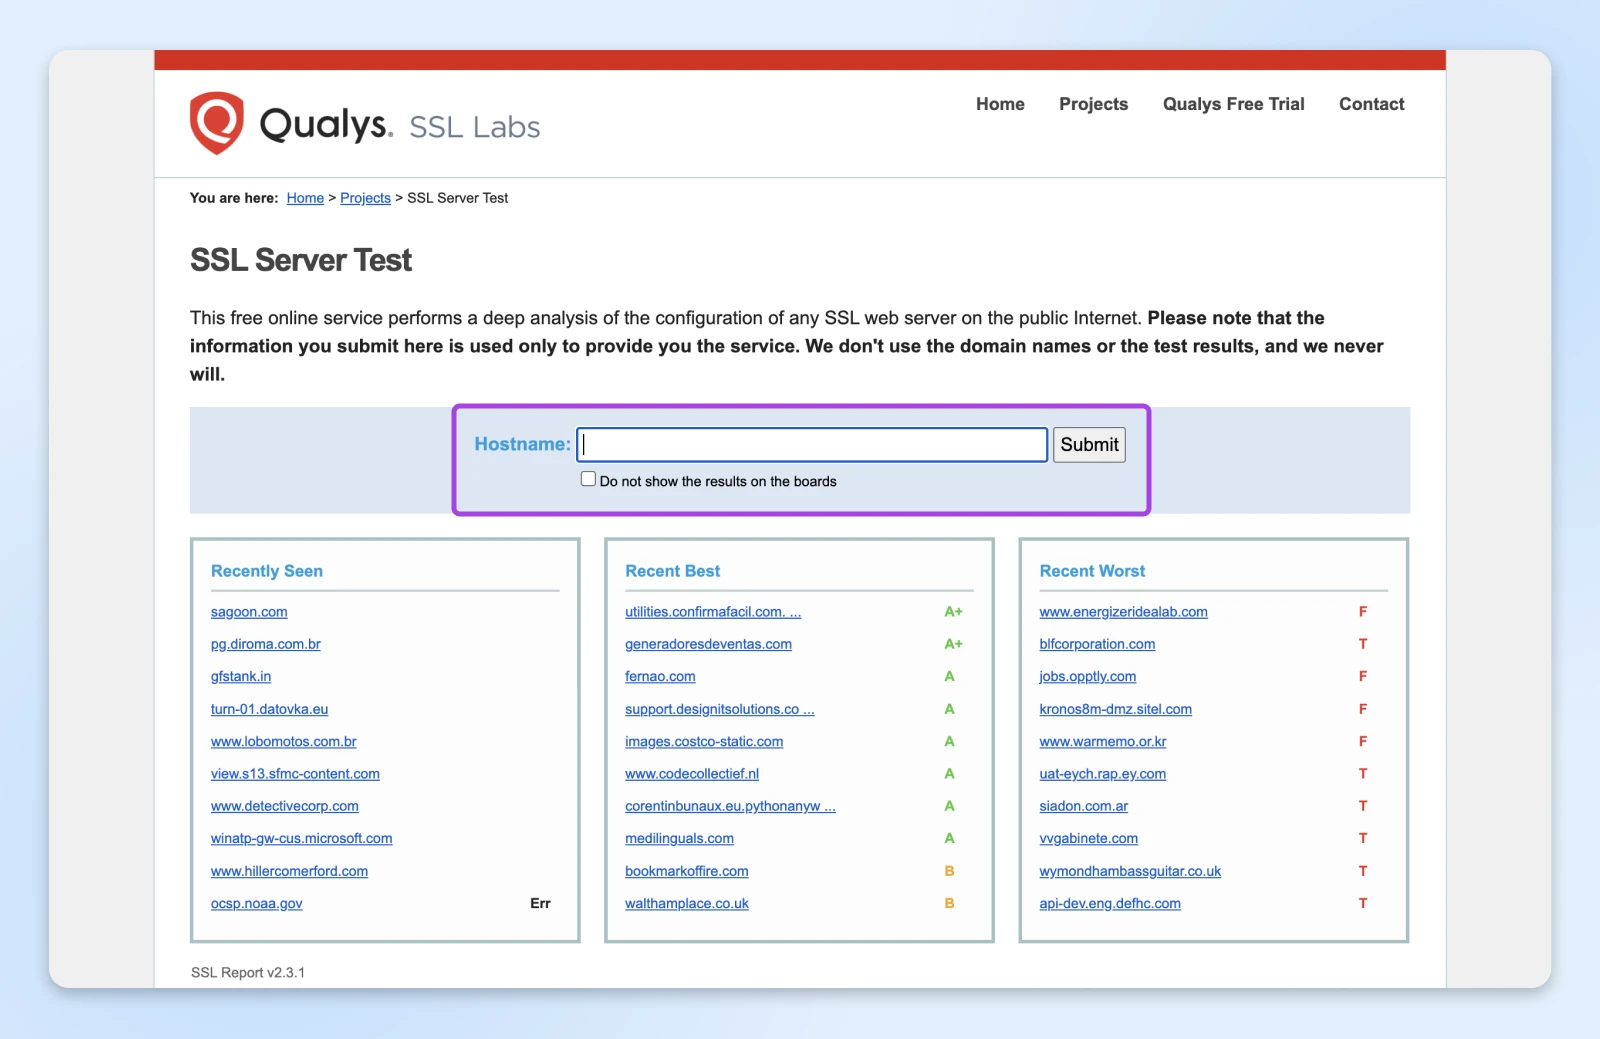
Before you begin the migration process, check that your purchased SSL certificate is working. You can do that by using the SSL Labs testing tool.
Next, add a 301 redirect on every HTTP URL, pointing to its HTTPS equivalent. This ensures that browsers won’t get lost.
For search engine optimization (SEO) purposes, update your XML sitemap with your shiny new HTTPS URLs. It’s also important to update all of your internal links, and any external links you have control over that point to your site.
We also recommend using the help of a developer or WordPress expert to assist in the migration process — just to iron out any problems.
Finally, after the migration is complete, check that your HTTPS version is connected to your Google Analytics and Search Console accounts.
Upgrading Your Website Security
Adding SSL/TLS to your website is an important step toward securing your site. But don’t get too comfortable. There’s more to do!
Cybersecurity is constantly shifting. To stay one step ahead of the game, you need to be proactive. That means being informed about security issues and using new ways to protect your site.
Let’s take a look at some of the most important emerging trends:
1. AI-Powered Attacks
In the right hands, artificial intelligence (AI) is a powerful tool. In other circumstances, it becomes a weapon.
Hackers are now using AI to automate attacks, allowing them to find vulnerabilities faster and exploit them with less effort.
That means everything from Distributed Denial-of-Service (DDoS) attacks to cross-site scripting and SQL injection attacks. AI is also used to personalize phishing attacks, making them more convincing and effective.
DDoS Attack
DDoS means Distributed Denial of Service. It’s an attack that tries to make a system or network unavailable by flooding it with traffic from multiple sources.
Staying informed about these evolving tactics is crucial for maintaining robust website security. It’s also a good idea to set up a web application firewall (WAF).
2. Increased Regulation
With the introduction of the General Data Protection Regulation (GDPR), the California Consumer Privacy Act (CCPA), and other data privacy regulations, there is now increased scrutiny on how website owners collect and use personal data.
This means you need to pay more attention to implementing security measures, following best practices, being transparent about data collection practices, and providing users with control over their data.
3. The Growing Threat of Ransomware
Ransomware is a type of malware that encrypts your data and demands a ransom for its release. In some cases, it can take over your entire website.
Malware
Malware is a type of malicious software that is specifically designed to cause harm to the victim’s computer or server. Most commonly, it’s used to access private information or to hold files at ransom.
Ransomware attacks are becoming more common and more sophisticated, targeting businesses of all sizes. Strong website security measures, including regular backups and robust incident response plans, are essential for mitigating this threat.
Ransomware can also affect your customers. SSL/TLS authentication makes it easier for them to verify that your site is genuine and not a potential source of malware.
Secure Your WordPress Website
Keeping your website secure can feel like a constant and confusing battle. But when the reward is earning the trust of potential customers, all that effort is worth it.
You can protect yourself and your users by adding an SSL/TLS certificate to your site and forcing secure connections through HTTPS. While there are several types of certificates to choose, finding the right option shouldn’t be difficult once you identify what level of security you need.
With DreamHost, setting up SSL/TLS is really easy. Our plans also come with great security features, including a free website scanner and malware remover tool. And if you don’t fancy dealing with cybersecurity tasks every day, our managed plans can take a lot off your plate!
Sign up to get access to these security enhancements today!

Protect Your Website with DreamShield
Our premium security add-on scans your site weekly to ensure it is free of malicious code.
Did you enjoy this article?


