Hello printmaking friends! I’m back with another DIY stamping idea for you. I’ve been on a pattern-making kick since I started Collage Club in May. Each month, I am making a postcard to go with the theme. It’s been so fun and inspiring to get back to my pattern-making roots, and it has forced me to take time out to make stuff. Keep reading and learn how you, too, can craft some easy-to-make handmade foam stamps and create your own satisfying patterns!

Watch my Instagram reel of the process behind making this print.
What I love about this project is that you don’t need any fancy materials to make something that looks so professional. I just used sticky-back craft foam, some bases like cardboard, wood, and cork, and then made sure to have some nice paper. I did use printmaking inks, but you can do this with acrylics (you might have to work a little faster as they can dry more quickly) or even tempera paint.

[ I am a participant in affiliate programs designed to provide a means for bloggers to earn small fees at no cost to you by linking to Amazon.com and affiliated sites. ]
Supplies needed to print with handmade foam stamps:
~ Craft foam sheets with sticky backing
~ Pencil
~ Scissors
~ Cardboard, wood scraps, big jar lids, or big corks for a base
~ Mixed-media large format paper (this one is good, I used 12×18 watercolor paper because that’s what I had, but if you are just printing and not using watercolor, then a mixed-media paper is better)
~ Printmaking ink (I like Blick 5oz tubes the best)
~ Brayers (4-inch)
~ Trays or any flat, non-porous surface for inking

Making handmade foam stamps
I actually didn’t take any photos making this set of stamps, but I have other photos because the process is always the same. You just draw shapes on the paper backing (or just freestyle), then cut them out and stick them onto the base. It’s that easy. If I’m using cardboard as a base, I usually cut around the shape to decrease the surface area around the foam. Inky rollers will deposit onto the base if there is too much open space. Printmaking is inherently error-prone, which is what makes it so charming, so I don’t mind when smudges happen, but I will also try and prevent it as much as possible, so trimming is part of my process. Of course, this is not possible with wood or plastic, but cardboard is more pliable and just picks up ink easier than a hard surface. But still, try and match the size of the foam shape to the size of the solid base if you are using wood or lids or corks.

The printing process:
1. Make your stamps. I made my circle stamp, then decided to measure and make a grid. I usually eyeball all my patterns, but for some reason, this time I wanted something more even. But you definitely don’t have to make a grid.
2. Choose your palette. I chose primaries for this pattern because that was the theme for July’s collage club. It made sense to choose yellow, the lightest color, as the bottom color and then layer the darker colors on top. Whatever palette you choose, just choose the lightest color for the circles.
3. Roll our ink onto your tray, creating a layer of ink that makes a sticky sound when rolling. Then roll the ink onto the foam shape, turn it over onto the paper, and press evenly all around. The ink didn’t transfer completely from the circle stamp — I think I needed more ink and to push down harder — but I don’t mind the unevenness. Again, printmaking will always be imperfect, which is what I love about it.

4. Add more colors with the smaller stamps. I designed two leaf shapes to make the design more dynamic. I eyeballed placement on all the smaller stamps. I was tempted to add an extender to make the colors more translucent so that you could see more of the shapes underneath when layering. I probably would have if I had any! I think with primaries, this could be especially cool to do.

I used two different-sized hole punches to make the center of the flower shape.

6. Assess your print to see if it needs anything else. I decided to make one more small leaf stamp and go back in to add a few more shapes. I just saw too much white space, and it needed a little something.

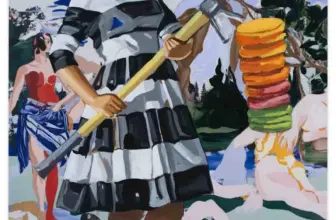
I loved this finished piece; it’s one of my favorites. It feels very Merimekko, an icon of mine when I was in art school. This print is an ode to those bold, colorful Finnish designs. I had postcards printed to include in my collage club packets. I want to come back to primary colors again this year. They are just so happy and playful.

Here was my final collage club July packet that I sent to members. Check out the galleries to see what members have been making!

I’ve really been loving this monthly collage challenge myself, and feel like I am finally getting into a groove combining magazine pages with pattern and shapes.
xo Bar
– – – – – – – – – – – – – – –
Did you like this post? Here are more printmaking ideas!