
This is an easy, no-knead sourdough bread recipe that is perfect for beginners and advanced bread bakers! It is for anyone who wants to make a chewy sourdough bread with minimal effort.

Whether this is your first foray into sourdough bread or you consider yourself an expert, I have all the tools, tips and tricks you need to make a successful, and easy, loaf of sourdough bread on your first try! No special equipment, no determining when the dough is properly mixed, and no stress. Just time, a little patience, and trust. Trust in yourself, your sourdough starter and me.
This recipe is similar in approach to my sourdough bread recipe, but it doesn’t use any whole wheat flour. This allows for a more open crumb and sour flavor. I love my whole wheat sourdough bread recipe for a 100% whole wheat option. If you want the speed of commercial yeast, make my no knead dutch oven bread recipe instead! There is a reason it is the most popular recipe on GVD!
Why This is the Best No-Knead Sourdough Recipe
- Starting the gluten off strong. This recipe uses a higher percentage of flour in relation to the water for the sourdough starter build. The resulting starter will have a stronger gluten network because there is more flour (protein) and a lower hydration means the flour is less dispersed, thus facilitating gluten development. Giving the starter more food (flour) will also kickstart the fermentation. Bonus.
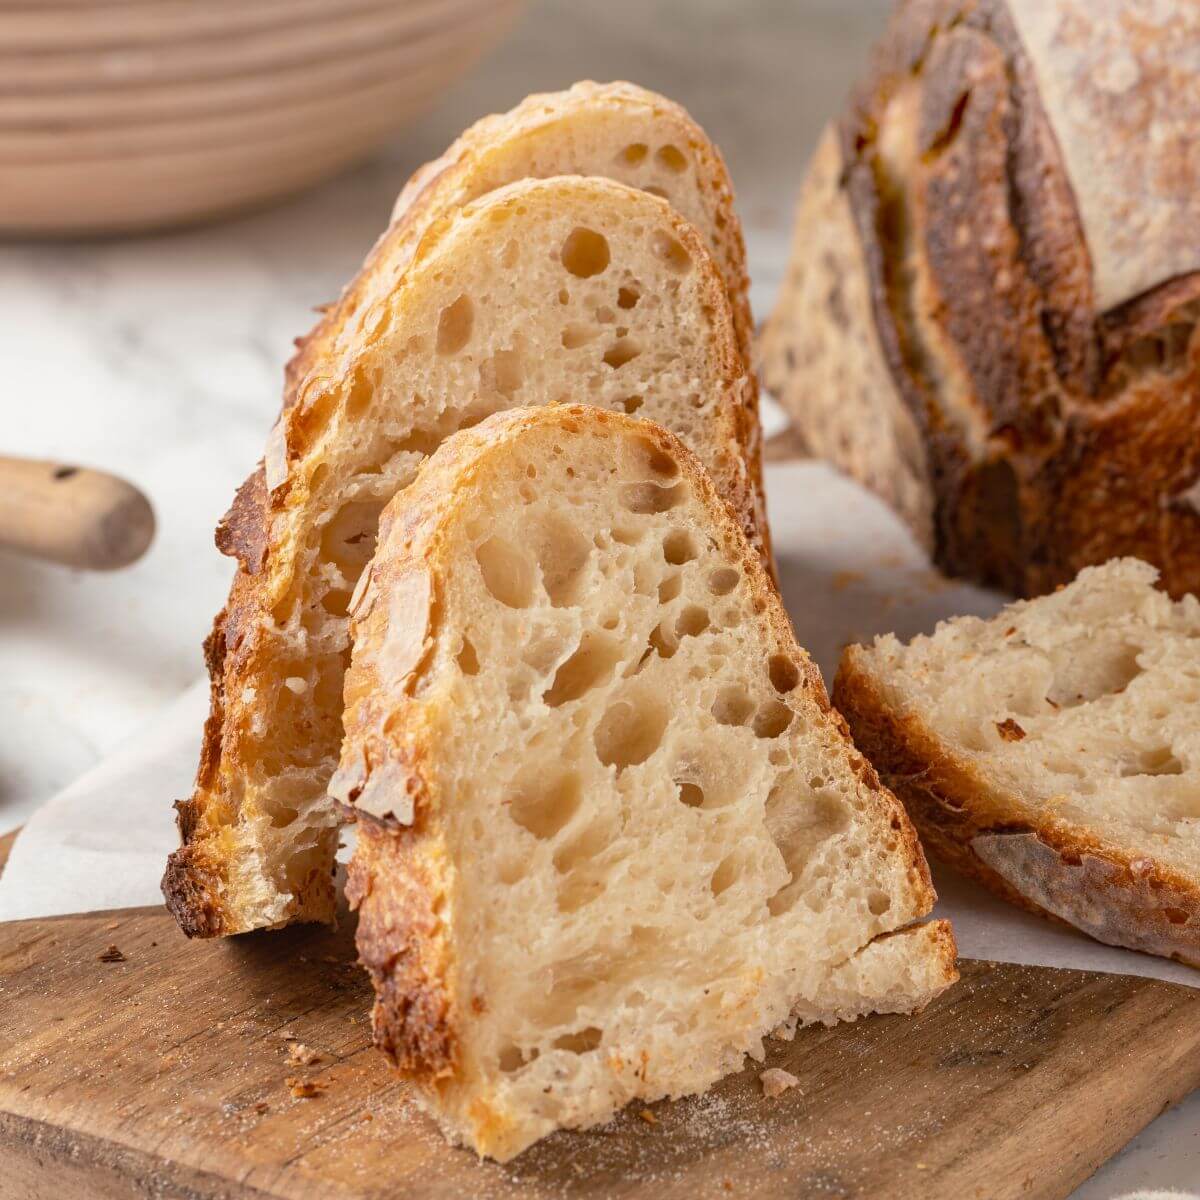
- Soft, chewy, open crumb! Bread flour has more available protein to create a strong gluten network, and a high-hydration (89%) will allow that network to stretch and retain those big air pockets.
- Crusty, crunchy crust with minimal effort!
- Only two sets of stretch and folds needed! Time and the ingredients do the rest of the work for the gluten development.

Professional Tips for Making this Simple Sourdough
- Size matters! I finally bought a 4.5 quart Dutch oven for home testing, and proved what I long suspected. A smaller Dutch oven will produce a taller loaf with a more open crumb. I hypothesized that it would more effectively trap the steam and, thus, delay the crust formation longer to get more rise. I was correct!
- The primary measurements are in grams. This is intentional because it is the most accurate and consistent way to make bread. I have included cup measurements because I understand there are people still resistant to this more professional approach. I’ll just drop a link to my favorite kitchen scale as a not-so-subtle hint.
- A bowl scraper and bench scraper are two different tools. A bowl scraper is rounded and flexible. Its purpose is to conform to the sides of the bowl and scrape down the sides. In this recipe, particularly in the beginning, it is essential for being an extension of your hand for folding. A bench scraper is metal and stiff. It is for scraping the work surface, dividing dough, and helping shape.
- Remember the keys to gluten formation. Time, activation (kneading, folding), temperature and flour protein content. You don’t have to employ all of these components but you must combine several for a successful sourdough. This recipe relies on more time, higher protein content, and less activation. Try this easy sourdough bread recipe, which relies on more activation and less time.
Ingredients & Substitutions

- Mature Sourdough Starter: Before you make your first loaves, you will need a mature, active sourdough starter. If you have no idea what I’m talking about, start with my sourdough starter recipe and then read the in’s and out’s on how to feed sourdough starter, which also covers storage, discard and troubleshooting.
- Water: Some swear by using distilled water in bread making, but I use tap water in my home, in the restaurants where I was a pastry chef and in culinary school. Granted all have NYC tap water, which some argue is special. You do what makes you comfortable.
- All-Purpose Flour: I use all-purpose flour for the sourdough levain build purely out of habit. You can use bread flour and the gluten will develop even faster!
- Bread Flour: Bread flour typically has a protein content between 12-13% and will make a more elastic, chewier sourdough than one made with all-purpose flour. Due to the high-hydration of 89%, I would not recommend substituting all-purpose for bread flour in this recipe.
- White Rice Flour: I always use white rice flour for dusting the proofing baskets or linen-lined bowls. It doesn’t absorb the moisture and becomes gummy like glutenous flour and it will help the dough release easily from the basket.
- Time: One of the essential ingredients in this recipe is time. I am working on a no knead sourdough bread recipe that can be made in 1 day. I know! Breaking all the rules. Stay tuned. If you want quick sourdough in the meantime, make this sourdough focaccia recipe while you wait!
See the recipe card for full information on ingredients and quantities.
Possible Variations
- Changing the types of flour: Due to higher hydration in this sourdough, you can comfortably substitute up to 20% of the bread flour for whole-wheat flour, rye flour, or any other flour of your choosing. Do understand that every type of flour has different hydration requirements and it will impact the final flavor, texture and difficulty of manipulation.
- Incorporate some mix-ins: Take a page from my no knead rosemary garlic bread and add your favorite herbs and spices, or from my cinnamon raisin sourdough bread recipe and incorporate dried fruits and nuts, or add olives or other savory additions like in this sun-dried tomato olive bread.
How to Make No Knead Sourdough Bread: Step by Step
A simple, step-by-step guide to making no-knead sourdough bread. Further details and measurements can be found in the recipe card below.
Two Days Before Mixing Dough:
If your sourdough starter has been in the refrigerator, take her (or him) out of the fridge and let it sit at room temperature for 2-12 hours.
Step 1: Feed the starter using a typical sourdough ratio 1 part flour, 1 part water and 10g of starter. If your starter has been sitting and needs a bit of reviving, you can add an extra starter as cheap insurance.
Day Before Mixing Dough:
Step 2: Approximately 10-12 hours before you would like to mix your bread dough, feed the starter. Place a clean starter jar on a kitchen scale. Tare the scale so it reads “0”, then to the jar add grams of your fed starter, 100 grams of water at room temperature and 124 grams of flour. Stir the mixture vigorously until no dry bits of flour remain, then cover the starter jar loosely with a lid. Leave the levain in a warm place (such as the oven with the light turned on) for approximately 10-12 hours, until it has at least doubled in size.
Don’t stress too much about it reaching its “peak.” This recipe takes so long to develop gluten, that your wild yeast will have plenty of time to catch up!
Mix the Dough (Day 1):
Step 3: In a medium or large mixing bowl, add the amount of active sourdough starter in the recipe “For the bread dough,” and room temperature water. Incorporate the starter and water as best you can with your hands, trying to break up as many lumps as possible.
You can simply combine all the ingredients in the large bowl and mix but you will end up with unincorporated pieces of the starter that will never fully mix into the dough. The stiff levain and “no knead” aspect of this recipe makes this step necessary for proper incorporation.
Step 4: Add bread flour and kosher salt to the starter mixture and continue mixing with your hands. The dough is very wet and sticky at this point so using your fingers like a whisk will be easier than any other tool. Remove as much dough from your hands as possible, cover with plastic wrap or a clean tea towel and set in a warm spot to proof until the first fold.
Step 5: Approximately 5-6 hours later, fold the dough using the help of a bowl scraper or large rubber spatula. Use a bowl scraper like an extension of your hand, scrape down one side of the bowl, under the dough, and pull it back out and stretch it over itself. Repeat with the other 3 sides. The dough will still be wet and feel really loosie goosie. Stop stressing. Trust. Cover with plastic wrap and place in the refrigerator.
I write the times of each step on the plastic wrap in sharpie marker. This way I can keep track of a 4 day process without losing any sleep.
Day 2
Step 6: Approximately 15-18 hours later, perform another set of stretches and folds on all 4 sides of the dough like the day before. I give mine a good stretch and shake on each side before folding across just to maximize the gluten formation. Mine had enough gluten at this point that made the bowl scraper unnecessary, but I do use it to clean the sides of the bowl so there won’t be dried bits of dough. Cover and place back in the refrigerator.
Step 7: Approximately 6 hours later, remove the plastic wrap, toss some flour on top of the dough because this is the stickiest part. Generously dust the countertop with flour, scrape the dough from the bowl using your bowl scraper, and dump out onto the floured countertop. Fold each of the four corners into the center and flip seam-side down onto the surface.
Step 8: Using both hands, dipped in a little flour, pull the dough round towards you, rotate 90° and repeat until the top of the dough is pulled tight and the round boule sits tall on the counter. Towards the end of this process the dough might start sticking to your hands. Simply dip in flour and continue.
Step 9: Flip the dough upside down (seam side up) into a bread proof basket (banneton) dusted with rice flour, cover with plastic wrap and place back in the refrigerator.
You can shape the dough as late as 9 hours after your last fold, but I find the longer it has to proof after shaping, the better the oven spring and the more open the crumb.
Day 3
Step 10: Approximately 15 hours later, remove the proof basket from the refrigerator and allow it to proof in a warm spot for 2-4 hours prior to baking.
Proofing at room temperature is technically optional but it will give you the best open crumb structure and the tallest loaf.
Step 11: Approximately 2 hours later, preheat the oven to 450°F conventional or 425°F convection (with fan) with the Dutch oven inside (including the top). [See Recipe Notes or FAQ section for instructions on how to bake without a Dutch Oven.]
Step 12: Cut a piece of parchment slightly larger than the bottom of your Dutch oven. Once the oven has preheated, remove the plastic wrap from the top of the basket and gently loosen the edges of the dough from the basket using floured fingers. Turn the dough out of the basket onto a piece of parchment paper.
Step 13: Score the top with a razor blade. I recommend a square on the top, with overlapping edges, which will allow the bread to rise up as well as out.
Since we allowed this bread to proof at room temperature, it will be more difficult to score and it is not the time to attempt decorative patterns.
Step 14: Working efficiently but carefully, remove the Dutch oven from the hot oven. Close the oven door and remove the top of the Dutch oven. Using the edges of the parchment paper, pick up the bread dough and place in the Dutch oven with care not to touch the sides! Replace the top and place pot back in the oven. Bake in a preheated oven for 30 minutes.
Step 15: After 30 minutes remove the top of the Dutch oven and close the oven door. Lower the oven temperature to 400°F conventional or 375°F convection (with fan). Continue baking until the exterior of the bread is a dark golden brown, approximately an additional 45 minutes.
Step 16: Remove the bread from the Dutch oven and cool completely on a wire cooling rack. You can either dump it out, carefully remove it with your hands, or use large tongs. This makes a delightfully crusty loaf of bread. Cut with a serrated knife. Even the sharpest knife will gum up the crumb of a high-hydration sourdough like this one.
Sample Bread Baking Schedule
The night before
9:45 PM: Mix the sourdough starter build according to the recipe.
Day 1
8:30 AM: Mix the dough, cover and set in a warm spot to bulk-ferment.
1:45 PM: Fold the dough using the help of a bowl scraper or large rubber spatula. Cover and place in the refrigerator to continue bulk-fermentation.
Day 2
9:00 AM Fold the dough using the help of a bowl scraper or large rubber spatula. Mine had enough gluten at this point that made the bowl scraper unnecessary, but I do use it to clean the sides of the bowl so there won’t be dried bits of dough. Cover and place back in the refrigerator.
3:30 PM Shape the loaf into a boule (round) and turn upside down (seam side up) into a bread proof basket (banneton) dusted with rice flour, cover and place back in the refrigerator.
You can shape the dough as late as 6:30 PM but I find the longer it has to proof after shaping, the better the oven spring and the more open the crumb.
Day 3
6:15 AM Remove the proof basket from the refrigerator and allow it to proof in a warm spot for 2-4 hours prior to baking. This is technically optional but it will give you the best open crumb structure and rise.
8:15 AM Preheat the oven to 450°F conventional or 425°F convection (with fan) with the Dutch oven inside (including the top).
8:45 AM Flip the dough out of the basket onto a piece of parchment paper. Score the top with a razor blade.
8:45 AM Carefully remove the Dutch oven from the hot oven. Close the oven door and remove the top of the Dutch oven. Using the edges of the parchment paper, pick up the bread dough and place in the Dutch oven with care not to touch the sides! Replace the top and place back in the oven. Bake in a preheated oven for 30 minutes.
9:15 AM Remove the top of the Dutch oven and close the oven door. Lower the oven temperature to 400°F conventional or 375°F convection (with fan). Continue baking until the exterior of the bread is a dark golden brown, approximately an additional 45 minutes.
10:00 AM Remove the bread from the Dutch oven and cool completely on a wire cooling rack.
Professional Chef Tip
It is imperative that you allow the loaf to cool completely due to the high-hydration of 89%. During the cooling process, steam is released from the bread and will make it less sticky. Also cutting it too early will compress the crumb and make a gummy mess. Still delicious, so don’t throw it out, but consider yourselves warned!
Frequently Asked Questions
To maintain the crunchy crust, store at room temperature, cut side down on a cutting board. It will gradually lose moisture but it will store well at room temperature for up to a week. You can also store well wrapped in the freezer, however, I like to slice my bread before freezing.
If you haven’t sliced the loaf yet, but would like to rewarm it for serving, preheat an oven to 400° F. Place the loaf directly onto the oven rack and bake until heated through. It will take about 15-20 minutes. You can also toast a slice at a time. Reheating a partially sliced loaf will dry it out on one side.
The best oven-spring, most open crumb and crusty crust will occur if baked in a Dutch oven or Challenger bread pan, but you can also preheat a baking sheet on the center rack and a large roasting pan on the bottom of the oven. When ready to bake, place the parchment paper with the scored loaf directly on the hot baking sheet and pour at least 2 quarts of hot water into the baking pan on the bottom. Close the door as quickly as possible. Release the steam after 30 minutes by opening the door.
There is no wrong way to serve sourdough bread. Serve it as an appetizer with dips or salted butter; serve it with soup or red chili; or as a side to a hearty salad or slow cooker Italian meatballs. Serve leftover sourdough bread toasted with butter, jam or as avocado toast. Upgrade any sandwich or cube it for a tomato olive panzanella salad! Cut your sourdough, toss with olive oil and a little salt and toast for croutons to sprinkle in this 30 minute healthy Italian wedding soup!

If you enjoyed this recipe, please leave a star rating and let me know how it goes in the comments below! I love hearing from you and your comments make my day!
This is an easy, no-knead sourdough bread recipe that is perfect for beginners and advanced bread bakers! It is for anyone who wants to make a chewy sourdough bread with minimal effort.
For the sourdough starter build:
Prevent your screen from going dark
Two Days Before Mixing Dough:
-
If your sourdough starter has been in the refrigerator, take her (or him) out of the fridge and let it sit at room temperature for 2-12 hours. Feed the starter using a typical sourdough ratio 1 part flour, 1 part water and 10g of starter. If your starter has been sitting and needs a bit of reviving, you can add an extra starter as cheap insurance.
Day Before Mixing Dough:
-
Approximately 10-12 hours before you would like to mix your bread dough, feed the starter. Place a clean starter jar on a kitchen scale. Tare the scale so it reads “0”, then to the jar add grams of your fed starter, 100 grams of water at room temperature and 124 grams of flour. Stir the mixture vigorously until no dry bits of flour remain, then cover the starter jar loosely with a lid. Leave the levain in a warm place (such as the oven with the light turned on) for approximately 10-12 hours, until it has at least doubled in size.
Mix the Dough (Day 1):
-
In a medium or large mixing bowl, add the amount of active sourdough starter in the recipe “For the bread dough,” and room temperature water. Incorporate the starter and water as best you can with your hands, trying to break up as many lumps as possible.
-
Add bread flour and kosher salt to the starter mixture and continue mixing with your hands. The dough is very wet and sticky at this point so using your fingers like a whisk will be easier than any other tool. Remove as much dough from your hands as possible, cover with plastic wrap or a clean tea towel and set in a warm spot to proof until the first fold.
-
Approximately 5-6 hours later, fold the dough using the help of a bowl scraper or large rubber spatula. Use a bowl scraper like an extension of your hand, scrape down one side of the bowl, under the dough, and pull it back out and stretch it over itself. Repeat with the other 3 sides. The dough will still be wet and feel really loosie goosie. Stop stressing. Trust. Cover with plastic wrap and place in the refrigerator.
Day 2
-
Approximately 15-18 hours later, perform another set of stretches and folds on all 4 sides of the dough like the day before. I give mine a good stretch and shake on each side before folding across just to maximize the gluten formation. Mine had enough gluten at this point that made the bowl scraper unnecessary, but I do use it to clean the sides of the bowl so there won’t be dried bits of dough. Cover and place back in the refrigerator.
-
Approximately 6 hours later, remove the plastic wrap, toss some flour on top of the dough because this is the stickiest part. Generously dust the countertop with flour, scrape the dough from the bowl using your bowl scraper, and dump out onto the floured countertop. Fold each of the four corners into the center and flip seam-side down onto the surface.
-
Using both hands, dipped in a little flour, pull the dough round towards you, rotate 90° and repeat until the top of the dough is pulled tight and the round boule sits tall on the counter. Towards the end of this process the dough might start sticking to your hands. Simply dip in flour and continue.
-
Flip the dough upside down (seam side up) into a bread proof basket (banneton) dusted with rice flour, cover with plastic wrap and place back in the refrigerator.
Day 3
-
Approximately 15 hours later, remove the proof basket from the refrigerator and allow it to proof in a warm spot for 2-4 hours prior to baking.
-
Approximately 2 hours later, preheat the oven to 450°F conventional or 425°F convection (with fan) with the Dutch oven inside (including the top). [See Recipe Notes or FAQ section for instructions on how to bake without a Dutch Oven.]
-
Cut a piece of parchment slightly larger than the bottom of your Dutch oven. Once the oven has preheated, remove the plastic wrap from the top of the basket and gently loosen the edges of the dough from the basket using floured fingers. Turn the dough out of the basket onto a piece of parchment paper.
-
Score the top with a razor blade. I recommend a square on the top, with overlapping edges, which will allow the bread to rise up as well as out.
-
Working efficiently but carefully, remove the Dutch oven from the hot oven. Close the oven door and remove the top of the Dutch oven. Using the edges of the parchment paper, pick up the bread dough and place in the Dutch oven with care not to touch the sides! Replace the top and place pot back in the oven. Bake in a preheated oven for 30 minutes.
-
After 30 minutes remove the top of the Dutch oven and close the oven door. Lower the oven temperature to 400°F conventional or 375°F convection (with fan). Continue baking until the exterior of the bread is a dark golden brown, approximately an additional 45 minutes.
-
Remove the bread from the Dutch oven and cool completely on a wire cooling rack. You can either dump it out, carefully remove it with your hands, or use large tongs. This makes a delightfully crusty loaf of bread. Cut with a serrated knife. Even the sharpest knife will gum up the crumb of a high-hydration sourdough like this one.
- Yield – 1 loaf
- Presentation – The best oven-spring, open crumb and crusty crust will occur if baked in a Dutch oven or Challenger bread pan, but you can also preheat a baking sheet on the rack and a large roasting pan on the bottom of the oven. Place the parchment paper with the scored loaf directly on the hot baking sheet and pour at least 2 quarts of hot water into the baking pan on the bottom. Close the door as quickly as possible. Release the steam after 30 minutes by opening the door.
- Variations – During the final set of folds, incorporate mix-ins like herbs, olives, nuts, dried fruit or chocolate chips. Incorporate spices into the dough when adding the flour and salt.
- Storage – To maintain the crunchy crust, store at room temperature, cut side down on a cutting board. It will gradually lose moisture but it will store well at room temperature for up to a week. You can also store well wrapped in the freezer, however, I like to slice my bread before freezing.
Serving: 1sliceCalories: 179kcalCarbohydrates: 36gProtein: 6gFat: 1gSaturated Fat: 0.1gPolyunsaturated Fat: 0.3gMonounsaturated Fat: 0.1gSodium: 294mgPotassium: 48mgFiber: 1gSugar: 0.1gVitamin A: 1IUCalcium: 8mgIron: 1mg


