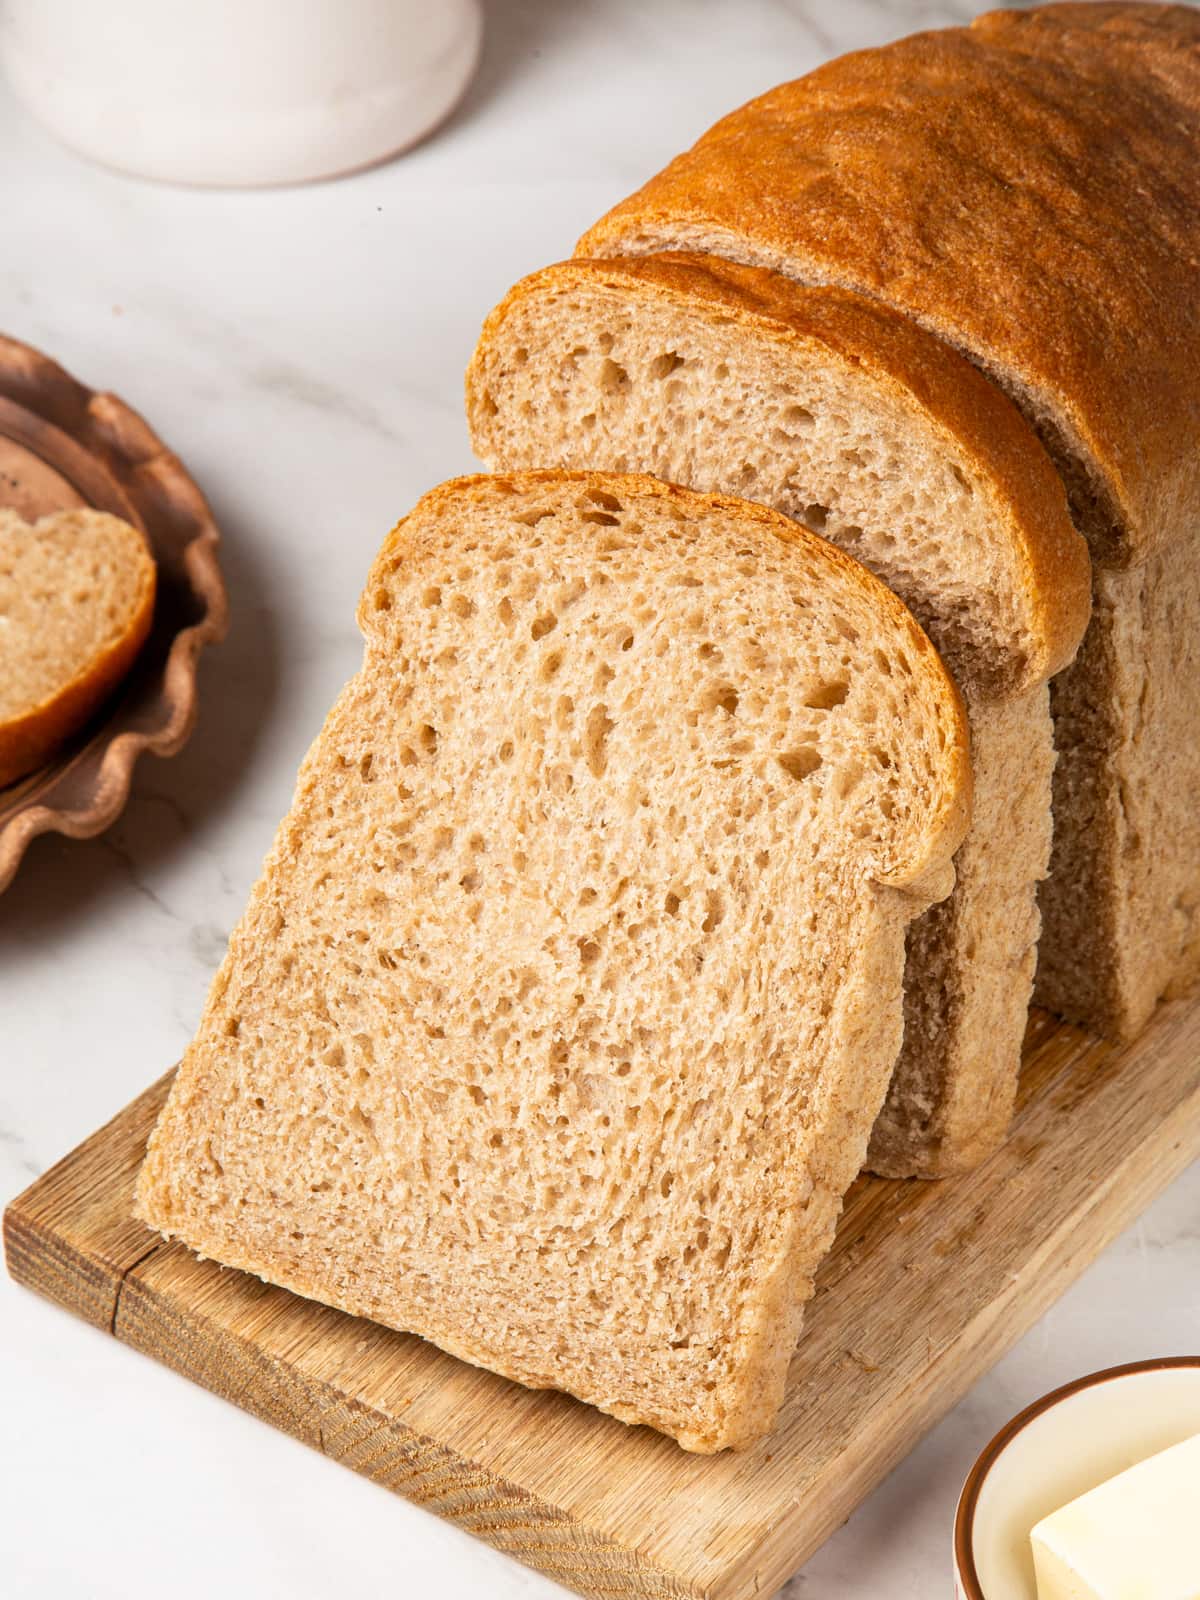
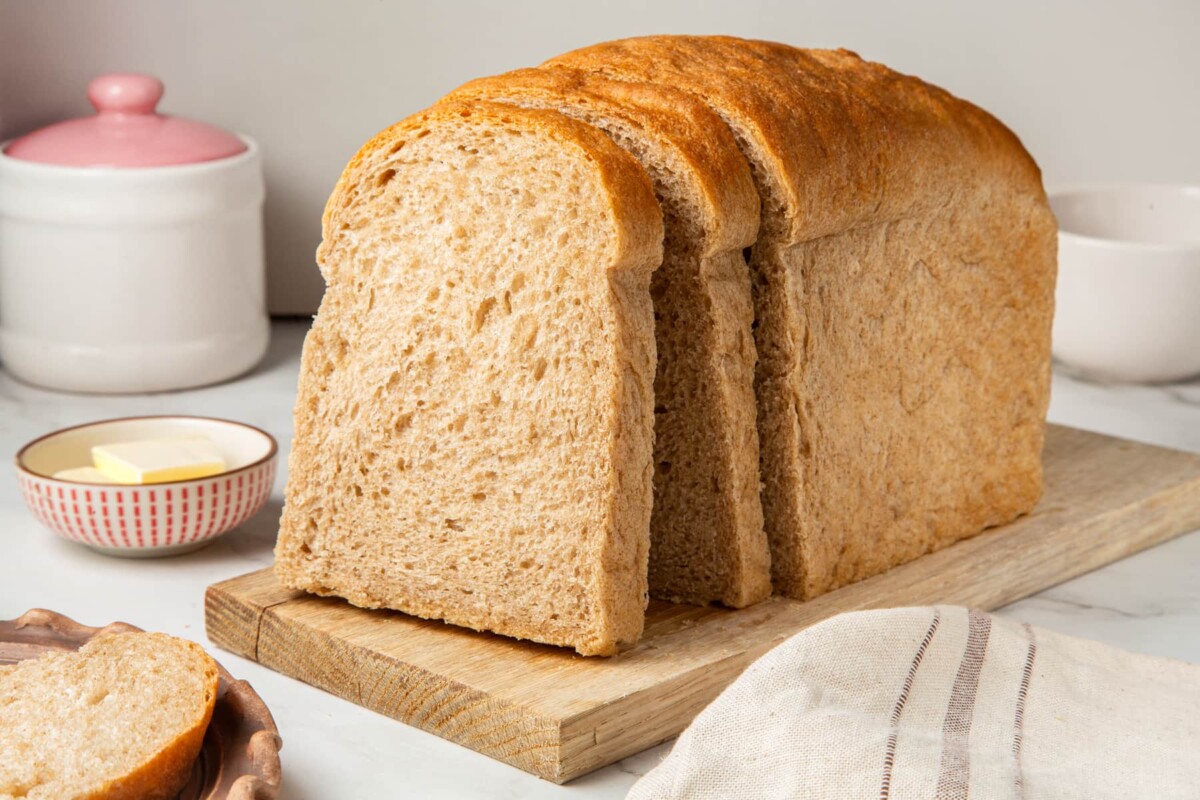
This easy rye bread recipe has a soft, dense crumb, a lightly crisp crust, and balanced rye flavor. Using medium rye and bread flour, it makes two great sandwich loaves in just over 2 hours. The flavor is distinct but not overpowering—perfect for sandwiches, toast, or hearty soups.
Proof Time
1 hour 15 minutes
Total Time
1 hour 58 minutes
Difficulty
Moderate, but very approachable. Similar to making standard sandwich bread.
Calories *
196 kcal per serving
Technique
Bloom yeast, mix the flours, salt, oil, and water into dough. Knead, proof, shape two logs, proof again, and bake.
Flavor Profile
Balanced rye flavor with a soft, dense, sliceable crumb and a lightly crunchy crust.
* Based on nutrition panel
Why This is the Best
- Authentic rye flavor without being overpowering. The balance of medium rye flour to bread flour creates a loaf with genuine rye character and earthy flavor that’s approachable for everyday eating. It’s not as assertive as pumpernickel bread, but it has enough personality to elevate any sandwich.
- Soft, dense crumb that’s perfect for sandwiches. This rye bread slices cleanly and holds its shape beautifully, whether you’re making a classic Reuben, pastrami sandwich, or simple avocado toast. The texture is substantial without being heavy or crumbly.
- Simple ingredient list and straightforward technique. No caraway seeds unless you want them, no complicated sourdough starter, no special shaping techniques. Just mix, rise, shape, and bake. If you’ve made my whole wheat bread or white sandwich bread, this recipe will feel very familiar.
- Makes two loaves—one to enjoy now and one to freeze or gift. I love recipes that yield multiple loaves! Keep one in the freezer for quick sandwiches and toast, or share the extra loaf with neighbors. This bread also makes wonderful homemade croutons for soup and stew recipes or reuben dip.
I’ve been perfecting this rye bread for years, and it’s become my go-to recipe when I want that authentic deli-style sandwich bread. Unlike 100% rye breads that can be quite dense and crumbly, this recipe uses just the right ratio of rye to wheat flour to give you all that wonderful rye flavor while maintaining a soft, sliceable texture.
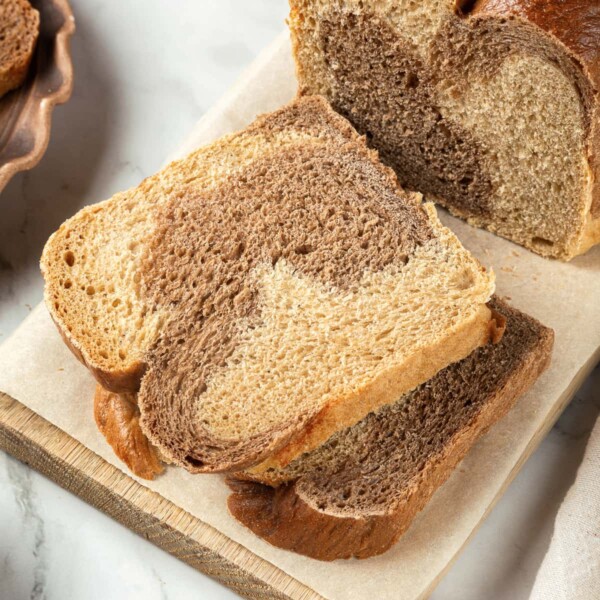
It reminds me of the marble rye bread from my favorite New York delis, but without all the fuss of braided rye bread!
The best part? This dough is forgiving and straightforward. If you can make sandwich bread, you can absolutely make this rye bread. The slightly dense crumb holds up beautifully in sandwiches without falling apart, and it makes excellent toast.
Ingredients & Substitutions
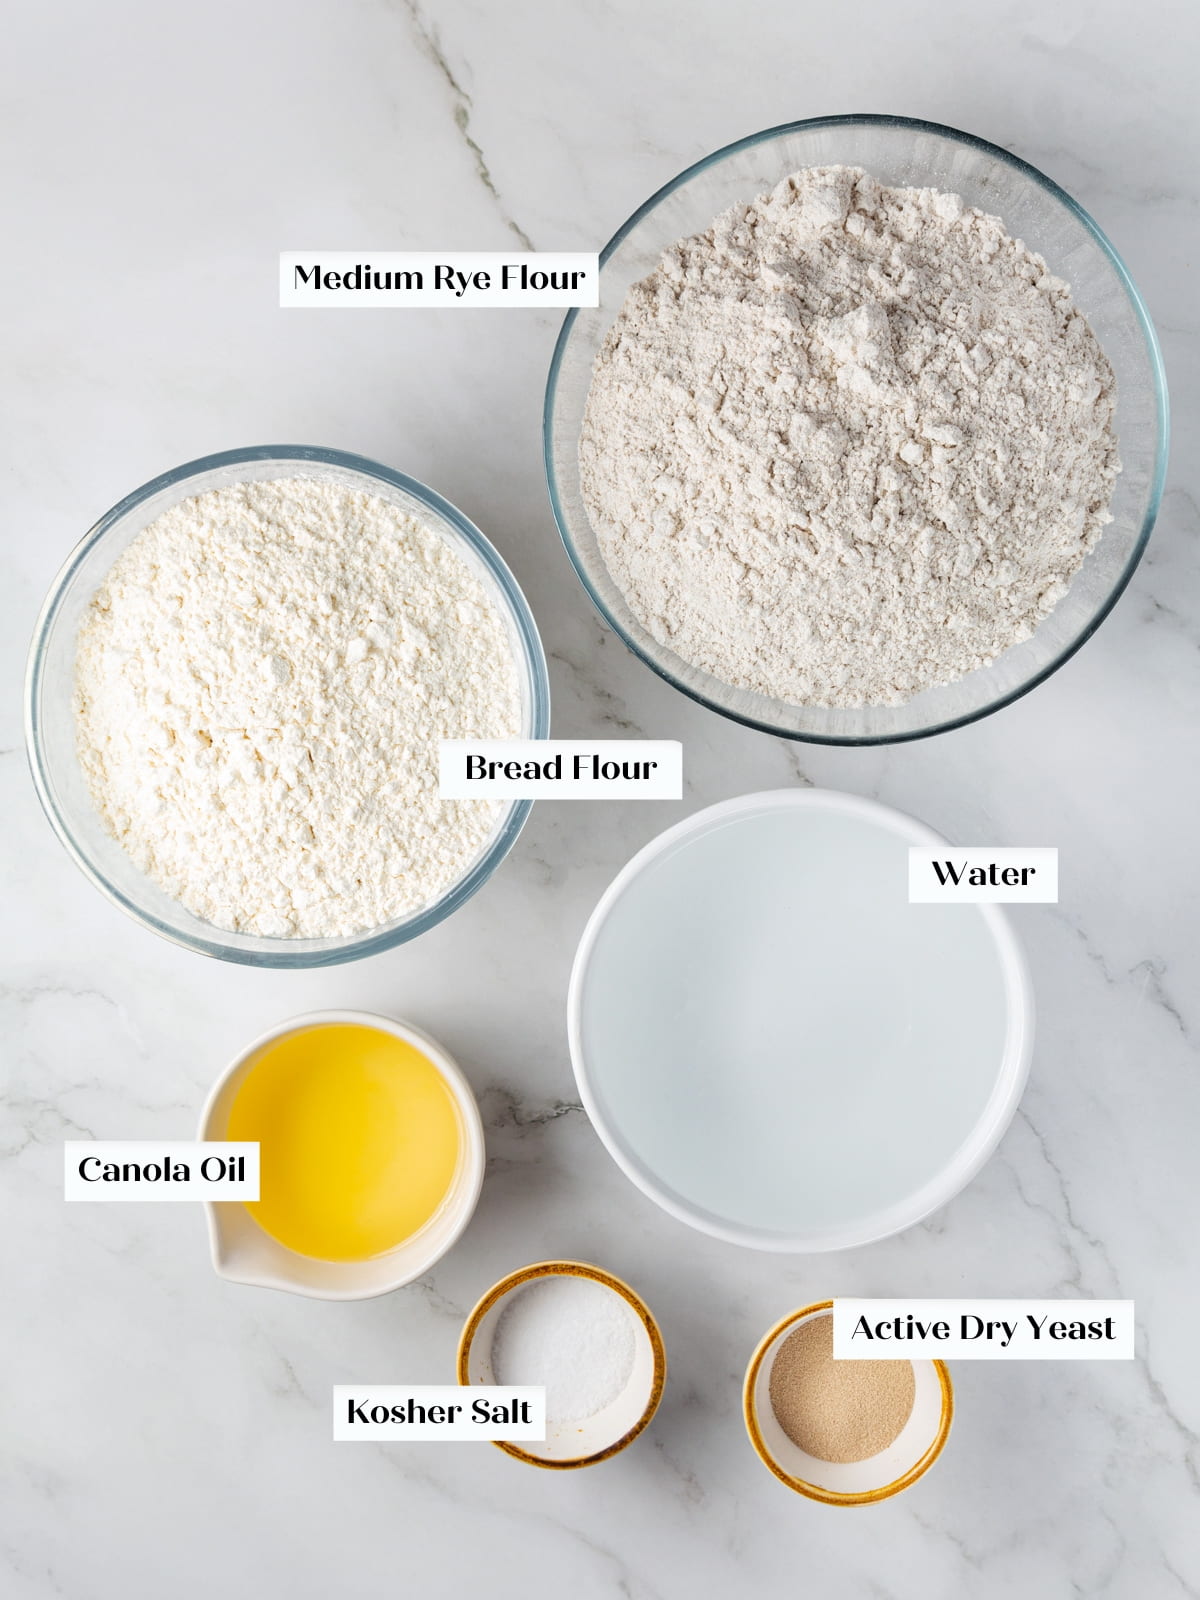
- Medium Rye Flour: This is the star ingredient! I use medium rye flour because it provides excellent rye flavor with a finer texture than whole rye or dark rye flour. The rye flour percentage in this recipe (about 50%) gives authentic flavor while maintaining a soft, sliceable texture.
- Here’s the important science: rye flour contains the gluten protein gliadin but not glutenin—the protein that creates elasticity in dough. That’s why we need wheat flour alongside the rye. You could use light rye flour for a milder taste, or increase to dark rye for a more robust flavor, though the texture will be denser. This is similar to the flour combination I use in my marble rye bread.
- Bread Flour: The higher protein content in bread flour is essential for structure in this recipe. It provides the glutenin that rye flour lacks, creating the elastic network that traps gas and allows the bread to rise.
- You could substitute all-purpose flour, but the bread will have a slightly softer, less chewy texture. Don’t use all-purpose if you want to increase the rye percentage—the structure won’t support it.
- Active Dry Yeast: I prefer active dry yeast in this recipe for a slower, more consistent rise that gives the rye flavor time to develop. You can substitute instant yeast if that’s what you have—just add it directly with the flour (no blooming needed) and watch the proof times, as they’ll be about 25-30% faster.
- Kosher Salt: Salt is crucial in bread baking—it strengthens the gluten network, controls fermentation, and enhances flavor. I always use kosher salt for its clean taste and easy measurement. If using table salt or fine sea salt, reduce to about 2½ teaspoons total.
- Canola Oil: A small amount of oil enriches the dough, creating a softer crumb and extending shelf life. You can substitute vegetable oil, olive oil, or even melted butter for a richer flavor. Unlike my brioche loaf, this bread doesn’t need much fat—just enough to keep it tender.
- Water: Lukewarm water (around 110°F) activates the yeast and hydrates the flour. Rye flour absorbs water differently than wheat flour, which is why the dough might seem perfect during mixing but could become sticky during proofing if overly hydrated. This recipe has been tested to get the hydration just right.
See the recipe card for full information on ingredients and quantities.
Variations
- Add caraway seeds for classic Jewish deli-style rye. Stir in 2-3 tablespoons of caraway seeds with the flour for that traditional rye bread flavor. If you love caraway, check out my pumpernickel bread recipe which features them prominently.
- Make it into dinner rolls. Divide the dough into 16-20 pieces and shape into balls like my sweet potato dinner rolls. Place in a greased 9×13 pan and bake at 375°F for 18-22 minutes. Perfect alongside dutch oven pot roast or beef stew!
- Create a marbled loaf. Divide the dough in half. Add 2 tablespoons cocoa powder dissolved in 2 tablespoons water to one half and knead until incorporated. Then braid or swirl the light and dark doughs together like my marble rye bread for a stunning presentation.
- Add mix-ins for extra flavor and texture. Fold in dried cranberries and walnuts, or sunflower seeds and flax seeds for a heartier loaf. You could also add a tablespoon of molasses or honey with the water for a slightly sweeter, darker bread similar to my raisin walnut pumpernickel.
Professional Tips for Rye Bread
- Your stand mixer might struggle with this recipe—and that’s okay! This makes a large batch of fairly stiff dough, which can strain smaller stand mixers.
- If your mixer is laboring or feels hot, stop and let the dough rest for 10 minutes. This allows the flour to hydrate and gluten to develop passively, giving your mixer’s motor a break. Then continue kneading on medium for 3 minutes. My 5-quart KitchenAid handled it, but it was working hard!
- Don’t rely on the windowpane test with rye dough. Because rye flour lacks the glutenin protein that creates elasticity, the dough won’t form clean windowpanes like you’d get with white sandwich bread or brioche. The dough should feel soft and supple, with some elasticity, but the panes will break easily. Just go by the kneading time—5 minutes at medium-low speed is perfect.
- Skip the pre-shape to avoid tearing the surface. Unlike recipes for same day sourdough bread or French bread, this rye bread dough doesn’t benefit from pre-shaping. The gluten structure is more delicate, and pre-shaping can cause surface tears. Just divide and go straight to final shaping.
- There’s minimal oven spring, so proof adequately! Unlike wheat breads that get a final rise in the oven, rye bread has limited oven spring due to its weaker gluten structure. The dough can’t support the expansion of larger air bubbles, so they escape through the top crust, leaving a characteristic freckled appearance. Make sure your dough has risen above the rim of the pan during final proof—what you see is pretty much what you’ll get after baking.
- The crumb will be denser than wheat bread—and that’s perfect! If you’re used to the open, airy crumb of no-knead Dutch oven bread or sourdough focaccia, this rye bread will look quite different. The dense, even crumb is exactly what you want—it slices beautifully and holds up to sandwich fillings without falling apart.
How to Make Homemade Rye Bread
Use these instructions to make the perfect rye bread every time! Further details and measurements can be found in the recipe card below.
Step 1: Bloom the yeast. In the bowl of a stand mixer, combine yeast and warm water. Whisk or stir with a fork and allow to sit undisturbed for 5-10 minutes, or until foamy (photo 1).
Step 2: Add rye flour, bread flour, kosher salt, and oil to the stand mixer bowl. Fit with the dough hook attachment and mix on low to incorporate until a cohesive dough forms (photo 2).
Step 3: Knead the dough. Once a dough forms, increase the speed to medium-low and knead for 5 minutes. If your mixer is struggling, stop and let the dough rest for 10 minutes to hydrate the flour, then continue kneading on medium for 3 minutes. The dough should feel soft and supple (photo 3).
Step 4: First rise. Remove dough from the mixer and place in a lightly oiled large bowl for the first rise or bulk proof. Flip the dough to coat the top with oil, then cover with a kitchen towel or plastic wrap. Let the dough rise in a warm spot for 45 minutes, or until doubled (photo 4).
Step 5: Start shaping. Divide the dough into two pieces, approximately 900g each. Working one piece at a time, take the side furthest from you and fold it down to the center. Rotate the dough 180 degrees and repeat by folding the other side down towards the center (photos 5 & 6).
Step 6: Thumb-fold shaping. Perform 2 thumb folds by wrapping the dough around the thumb of your left hand and sealing the edge with the heel of your right hand. Start this motion towards the right side and gradually move left, rolling and sealing as you go. The first thumb fold will not fully close the dough log. Perform one more thumb fold to fully create a cylinder or log shape (photos 7 & 8).
Step 7: Place the log-shaped dough seam-side down in an 8-9 inch loaf pan sprayed with non-stick cooking spray. Repeat with the second piece of dough (photo 9).
Step 8: Final proof. Cover loosely with plastic wrap and allow to proof in a warm spot for 30-45 minutes, or until the dough has risen above the edge of the loaf pan in most places. Remember, there’s minimal oven spring, so make sure it’s adequately proofed.
Step 9: Bake. While the dough is in its final proof, preheat the oven to 375°F conventional (no fan). Bake in a preheated oven for 28-30 minutes until the crust is a light golden brown or an instant-read thermometer reaches 185°F.
Step 10: Cool completely. Remove the loaves from the oven and turn out immediately onto a cooling rack to cool completely before slicing (photos 10 & 11).
Recipe FAQs
Store cooled rye bread in an airtight container or zip-top bag at room temperature for up to 5 days. The crust will soften over time, but the bread will stay fresh.
For longer storage, slice the loaf and freeze individual slices or half-loaves wrapped in plastic wrap and placed in freezer bags for up to 3 months. Toast frozen slices directly from the freezer, or thaw at room temperature for sandwiches. This is exactly how I store my whole wheat sandwich bread too!
Yes! Mix the ingredients in a large bowl until a shaggy dough forms, then turn out onto an unfloured surface. Knead by hand for 8-10 minutes until the dough feels soft and supple. It will be quite stiff at first, so be patient and use your body weight to work the dough. Let it rest for a few minutes halfway through if your arms get tired!
This is completely normal! Rye flour lacks glutenin (the protein that creates elasticity), so the gluten network can’t support large air bubbles or dramatic oven spring. The bubbles that do form escape through the top crust, creating that characteristic freckled appearance. This is also why you get a denser, more compact crumb—which is exactly what you want for slicing and sandwich-making.
You could increase the rye flour slightly (up to 6 cups rye, 3 cups bread flour), but be aware that the texture will become denser and more crumbly. The structure will also be weaker, making it harder to slice cleanly. For a stronger rye flavor without sacrificing texture, I recommend trying dark rye flour instead of medium rye, or adding a tablespoon of molasses. If you want 100% rye, try my German-style rye bread instead.
Rye bread is incredibly versatile! Use it for classic deli sandwiches like Reubens, pastrami, or corned beef. Toast it and top with cream cheese and smoked salmon for breakfast. Serve slices alongside beef stew, borscht, or split pea soup. Or simply enjoy it toasted with butter and a sprinkle of flaky sea salt!

Recommended Bread Recipes


If you enjoyed this recipe, please leave a star rating and let me know how it goes in the comments below! I love hearing from you and your comments make my day!
Prevent your screen from going dark
-
In bowl of stand mixer, combine yeast and warm water. Whisk and let sit 5-10 minutes until foamy.
-
Add rye flour, bread flour, salt, and oil. Mix with dough hook on low until cohesive dough forms.
-
Increase speed to medium-low and knead 5 minutes. If mixer struggles, rest dough 10 minutes, then knead 3 more minutes on medium.
-
Place in lightly oiled bowl, flip to coat, cover, and let rise 45 minutes until doubled.
-
Divide into two pieces (about 900g each). Fold opposite sides to center.
-
Perform 2 thumb folds to create log shape, rolling and sealing from right to left.
-
Place seam-side down in two greased 8-9 inch loaf pans.
-
Cover and let rise 30-45 minutes until dough rises above pan edge.
-
Preheat oven to 375°F. Bake 28-30 minutes until light golden brown or internal temperature reaches 185°F.
-
Remove from oven, turn out onto wire rack, and cool completely before slicing.
Technique: Rye won’t windowpane, so rely on feel. Skip pre-shaping to prevent tears, and proof fully since oven spring is minimal.
Variations: Add 2–3 tablespoons caraway for deli style. Shape into 16–20 rolls and bake for 18–22 minutes. Try cranberries and walnuts or sunflower and flax for a heartier loaf.
Storage: Store in airtight container at room temperature up to 5 days. Freeze sliced loaves wrapped in plastic wrap and freezer bags for up to 3 months. Toast from frozen or thaw at room temperature.
Calories: 196kcal, Carbohydrates: 32g, Protein: 5g, Fat: 5g, Saturated Fat: 0.4g, Polyunsaturated Fat: 2g, Monounsaturated Fat: 3g, Trans Fat: 0.02g, Sodium: 390mg, Potassium: 110mg, Fiber: 3g, Sugar: 0.3g, Vitamin A: 0.4IU, Vitamin C: 0.002mg, Calcium: 10mg, Iron: 1mg
Nutrition information is automatically calculated, so should only be used as an approximation.
 Like this recipe? Rate & comment below!