

In this blog post, I am going to take you through the steps that I used to get a Raspberry Pi automatically posting data from my Tilt Hydrometer to Brewfather.

As most of you may know already, having an insight into the specific gravity of your beer can help you understand the progress of your brews and whether or not there are any potential issues. I recently purchased a Tilt Hydrometer to keep a track of my brews and I have to say that I am really impressed with this little device. A Tilt Hydrometer is a free-floating digital hydrometer and thermometer for continuous real-time monitoring. It takes no time to set up and gives me accurate gravity readings. Most of all, it helps me easily determine when my beer is finished without having to take a sample from the fermenter every time.
Previously, I used to wait a full 2 weeks and check the final gravity of the beer, but now I am able to see instantly if my beer has reached final gravity and if it is ready for packaging.
The great thing about the Tilt Hydrometer is that you simply need to use the app on your Android/Apple device and it will connect wirelessly via Bluetooth and ping through the data to software of your choice. The only downside of this is that you need to go to your mobile device, open up the app and connect every so often to see the gravity. Whilst this only takes a few seconds, it does mean that you need to physically be within Bluetooth range of your fermenter to take a reading.
Being a Software Engineer by trade, I thought there must be a way to automate this. It turns out there is! In this blog post, I am going to take you through the steps that I used to get a Raspberry Pi automatically posting data from my Tilt to Brewfather.
Getting Set Up
In this article, we are going to run through the steps to get a Raspberry Pi running with Tilt Pi installed on it. Tilt Pi is like a local server that uses Bluetooth to log Tilt readings on a regular cadence. For example, I have set mine up to run every 15 minutes and log data to Brewfather. The best thing about it is that once it is up and running, I can access this data from anywhere and I don’t need to be near my fermenter.
Before we get started you will need a few things:
- A Tilt Hydrometer
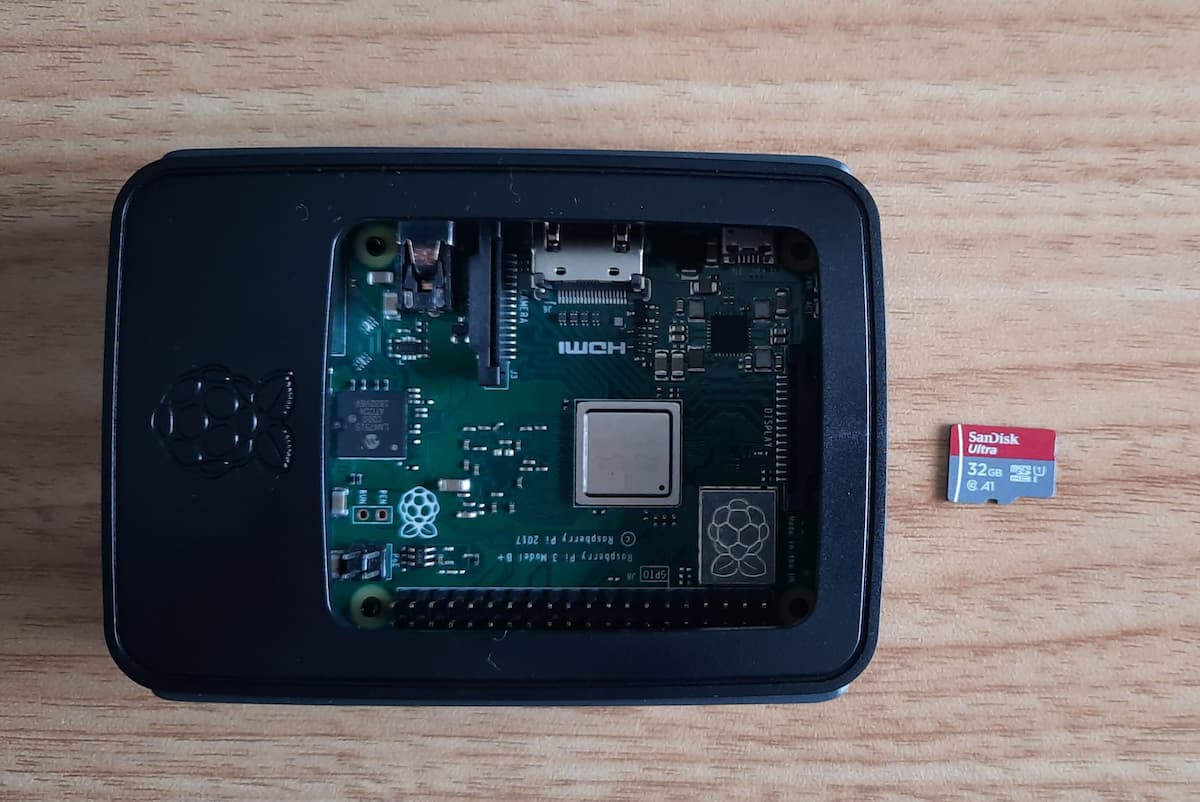
- A Raspberry Pi (I used a Raspberry Pi 3 B+ for this example)
- A MicroSD card for the Raspberry Pi
- A USB power cable to power the Raspberry Pi
The diagram below will hopefully give you an idea of what we are trying to achieve.
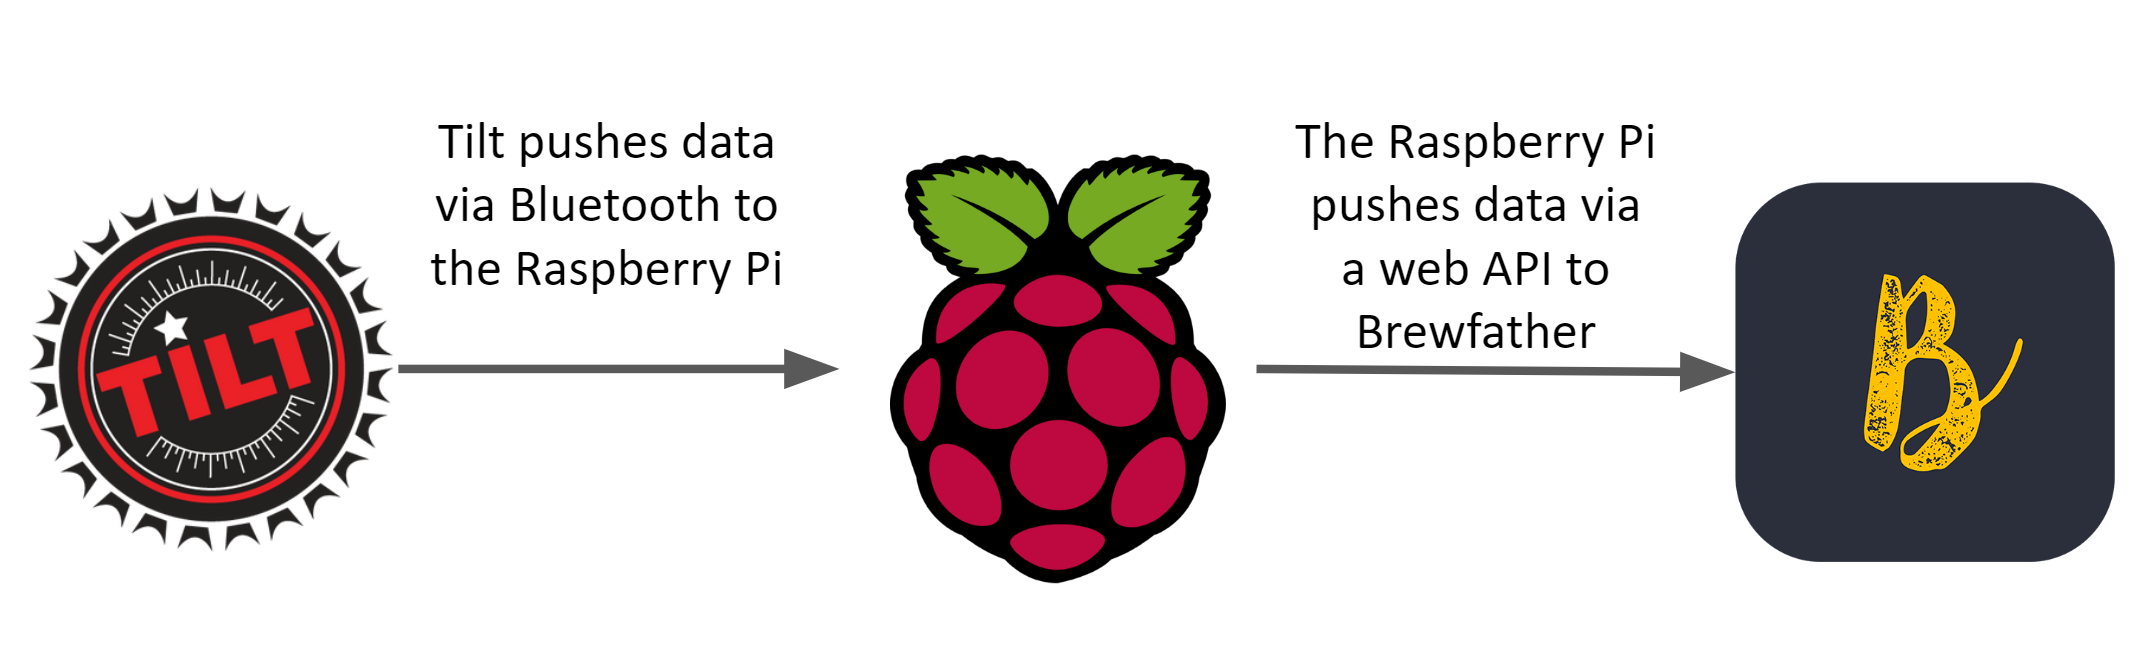
The Raspberry Pi will act as a Headless server which means you won’t connect it to a monitor. It will be used to collect data via Bluetooth and post it to the Brewfather servers. That way, you set up the Raspberry Pi somewhere near your fermenter and leave it to do it’s thing.
Next, you’ll need to follow the steps listed on the Tilt website to get started. I won’t list out what is written on their site as it will contain the most up to date version of the documentation and may be subject to change.
If you follow the steps listed on the Tilt Pi website, within 2 minutes of set up, your Tilt Pi will detect your Tilt hydrometer and send an email with a link to your cloud log and a link to your Tilt Pi dashboard within your local WiFi network.
The Tilt team have also created a very helpful set of Youtube videos to get you started with TiltPi if you get stuck.
Up and Running
Now that your Tilt Pi is up and running, you should be able to access your Tilt Pi dashboard by typing http://tiltpi.local:1880/ui in your web browser. From this dashboard, you’ll be able to configure where you want to start posting your data to. I am a long time fan of Brewfather as a brewing software, and I use it to display all of the data from my Tilt Hydrometer. That said, you can use a brewing software of your choice.
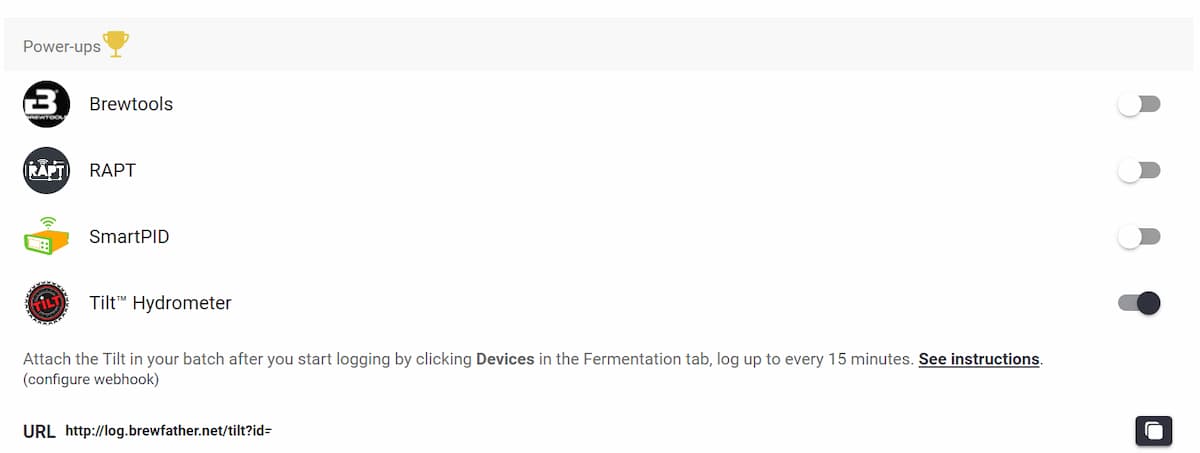
In order to enable this feature in Brewfather, head over to Settings -> Power Ups and enable Tilt Hydrometer. You’ll be presented with a Webhook URL that you’ll need to copy and add to your Tilt Pi in the dashboard.
Then go into the Fermentation tab of your batch and click Devices. After your Tilt has done its first logging to Brewfather it will appear in the device list.
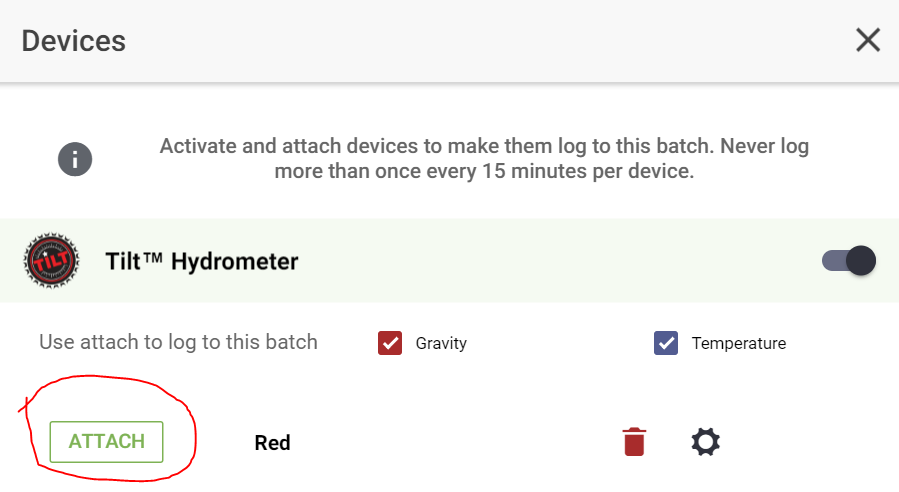
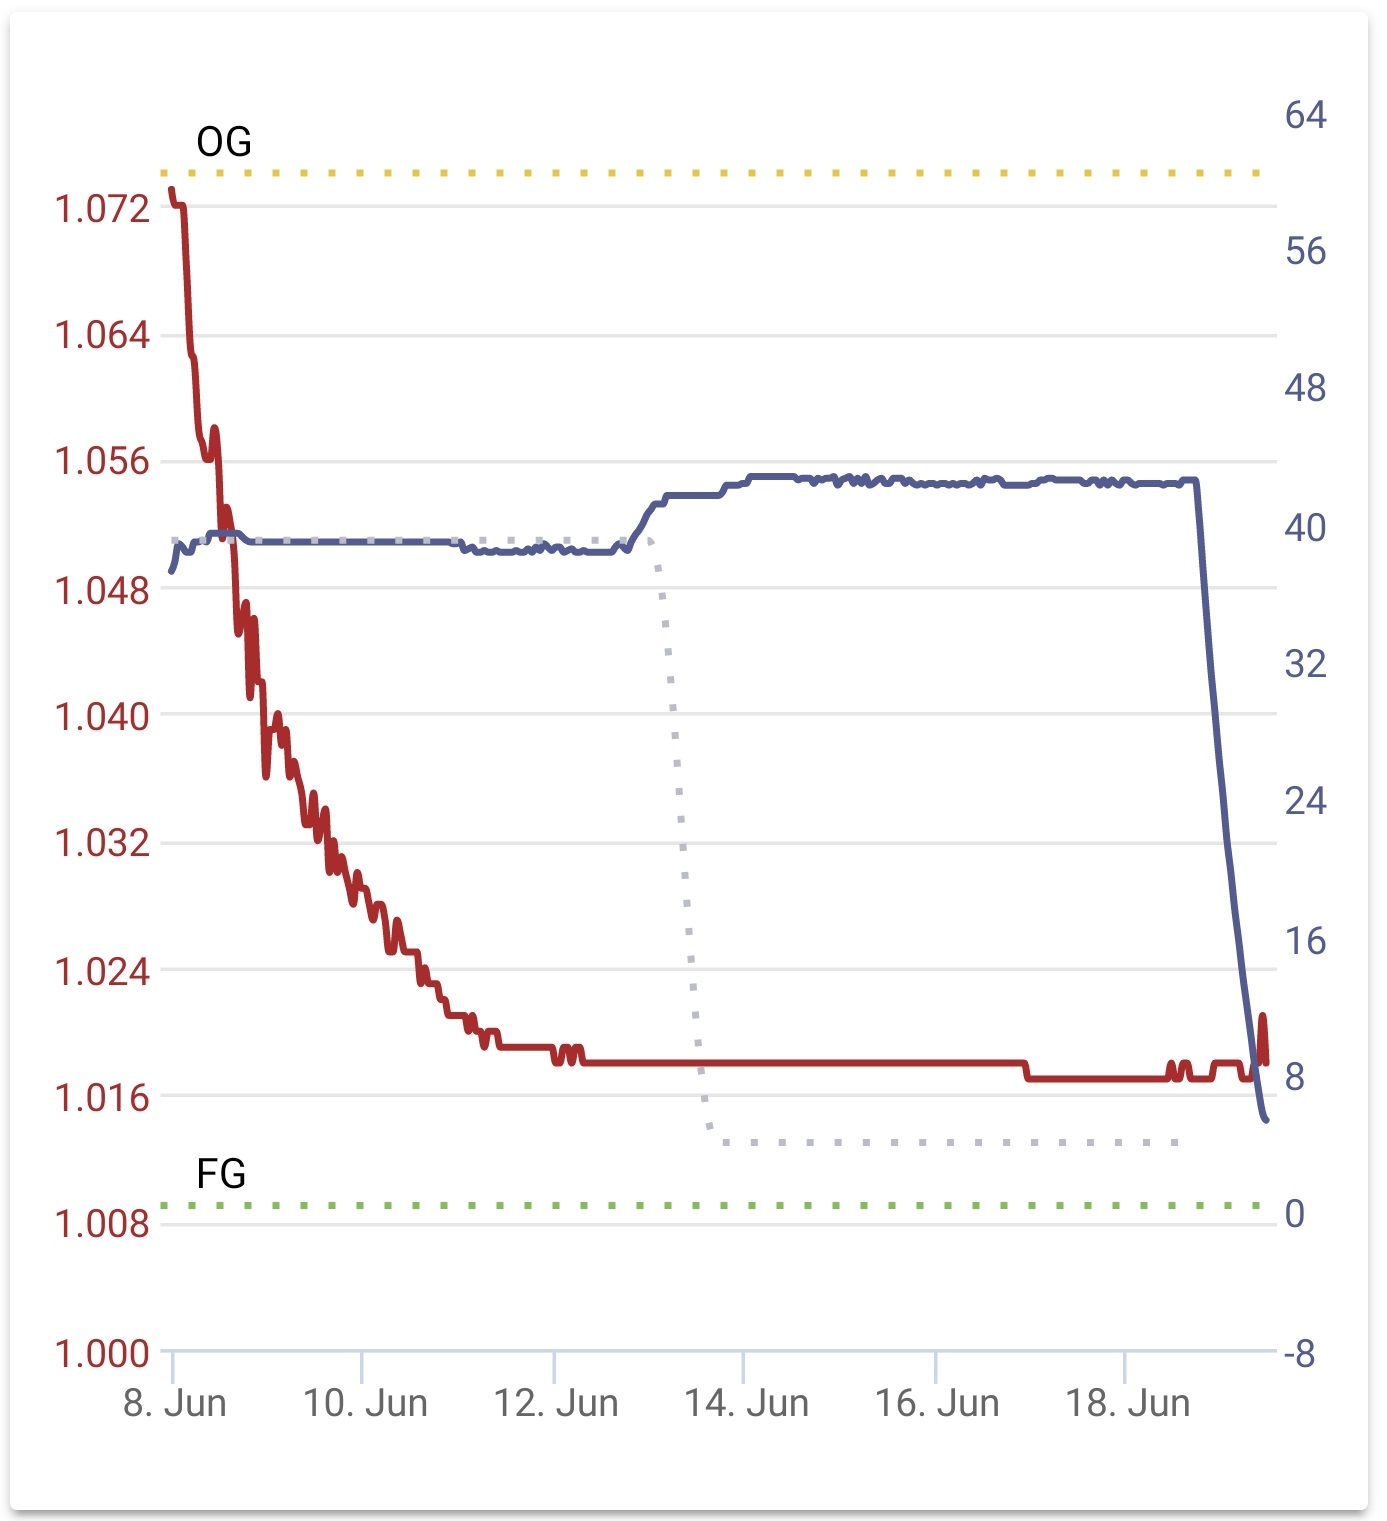
Click the ATTACH button to make it log to this batch. Wait 15-30 minutes for your Tilt to log the next time. With that in place, you should see something similar to the image below.
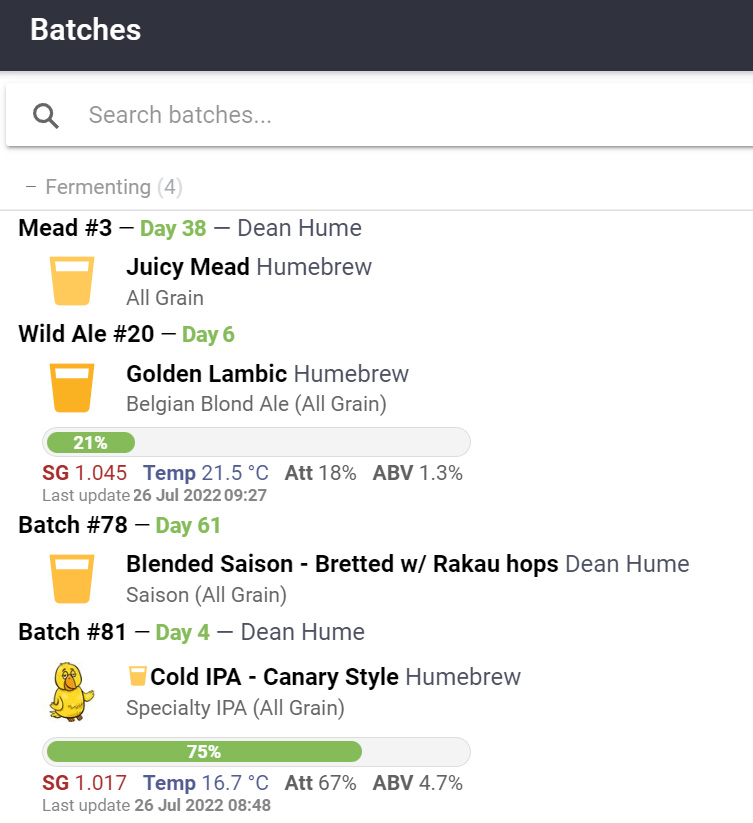
If you have multiple Tilt Hydrometers, Brewfather also allows you to see how all of your batches are progressing at a glance.
I don’t need to be near my fermenter to see how the fermentation is progressing. I can simply access Brewfather on the go and see the status update.
If you get stuck at all, I recommend following the docs on the Brewfather website for the most up to date information on how to set up your Tilt Pi and start logging information to Brewfather.
Summary
Both the Tilt Hydrometer and the Tilt Pi work very well together. I’ve been really impressed with how useful this up-to-date information has helped my brewing process. I no longer wait a full 2 weeks until a batch is complete, I now rely on a stable Final Gravity for a few days before packaging. This often means that I am able to go from grain to glass a lot faster than normal. The great thing about this whole setup is that you don’t need to spend a lot of money – many of the cheap Raspberry Pi’s will work just great.
If you aren’t familiar with Raspberry Pi’s and how to use them, it can take a little getting used to, but it is definitely a fun experiment to get up and running. I hope you enjoy!


