
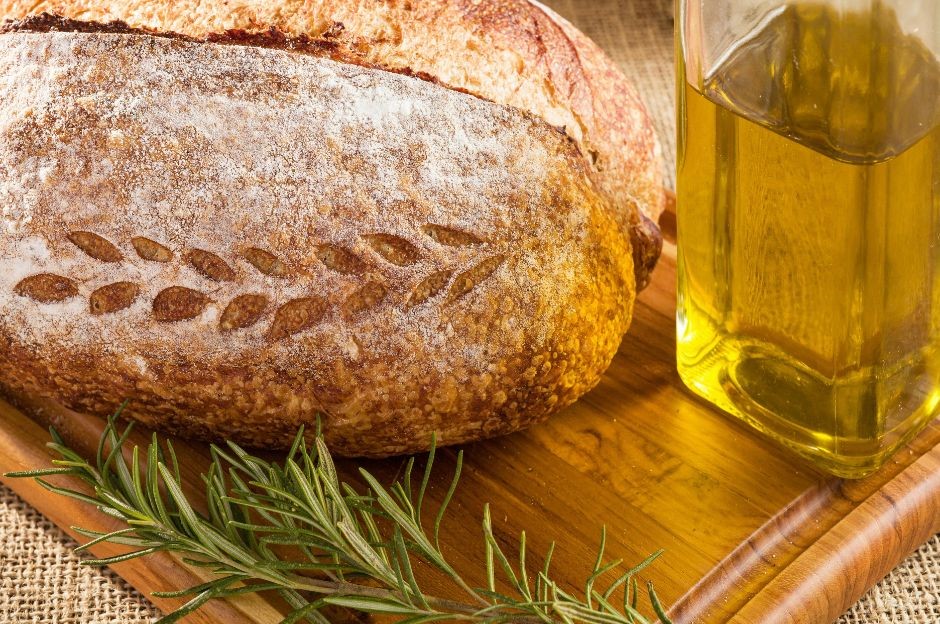
Mastering homemade sourdough bread intimidates many aspiring bakers. Dense, flat loaves and failed starters discourage even enthusiastic home cooks. This simple sourdough bread recipe cuts through the confusion, offering straightforward techniques that deliver that perfect crusty exterior and tangy, airy interior—without specialized equipment or years of experience. Whether you’ve tried and failed before or are completely new to sourdough, these foolproof steps will transform your kitchen into an artisanal bakery.

Table of Contents
Ingredients
A simple sourdough bread doesn’t require many ingredients, but each plays a crucial role in creating that perfect loaf with a crackling crust and tender, tangy interior. Here’s what you’ll need:
- 400g all-purpose flour
- 100g whole wheat flour
- 350g filtered water
- 100g active sourdough starter
- 10g salt (about 1.5 teaspoons)
The quality of your ingredients matters, especially your sourdough starter which should be active and bubbly before using. For best results, use unbleached flour and filtered water at room temperature. Your starter’s strength directly impacts the bread’s rise and flavor, so make sure it’s been fed 4-6 hours before mixing your dough.
Equipment
While you don’t need fancy equipment to make delicious sourdough bread, having the right tools will make your baking journey much easier. Here’s what you’ll need:
- Digital scale
- Instant-read thermometer
- Large mixing bowl
- Bowl scraper
- Bench knife
- Banneton (proofing basket)
- Dutch oven
- Bread lame
- Baking stone/steel
Making & Maintaining the Sourdough Starter
Creating a sourdough starter is like capturing wild magic from the air around you. Mix 50g whole wheat flour with 50g filtered water in a clean jar. Leave it loosely covered in a warm spot (70-75°F) for 24 hours.
For the next week, “feed” your starter daily by discarding half and adding fresh flour and water. You’ll start seeing bubbles by day 3—that’s fermentation at work! Your starter should double in size between feedings after 7-10 days.
Once established, feed room-temperature starters once daily. For longer storage, refrigerate your starter where it can last 1-2 weeks between feedings. When planning to bake, feed twice daily for a day beforehand for maximum activity.
Troubleshooting tips: If your starter seems sluggish, try feeding it rye flour. A liquid layer on top (called “hooch”) just means it’s hungry—stir it in or pour it off before feeding. For a starter that won’t rise, find a warmer spot in your kitchen.
Don’t waste the discard from feedings—use it for pancakes, crackers, or waffles. With patience and consistent care, your starter will develop complex flavors and could last for years or even decades.
Related: The Ultimate Guide to Whole Wheat Sourdough Bread
Mixing & Bulk Fermentation
Start with autolyse – simply mix flour and water, then rest for 30 minutes. This helps develop gluten and makes your dough easier to work with. It’s like giving your flour time to wake up and stretch before the real work begins.
Once rested, add your bubbly starter and salt. Instead of aggressive kneading, sourdough benefits from gentle stretch and folds – pull the dough up and fold it over itself from all four sides. Repeat this process every 30 minutes for 2-3 hours, building strength while preserving air bubbles.
The bulk fermentation that follows is where flavor develops. Unlike commercial yeast breads, sourdough rises slowly, increasing about 50% in volume rather than doubling. This typically takes 4-5 hours at room temperature (72°F), but your kitchen conditions might differ. Mark your container with a rubber band to track progress.
Your properly fermented dough will feel alive – slightly jiggly with a rounded dome and bubbles visible at the edges. Temperature plays a crucial role – warmer speeds fermentation, cooler slows it down. This patience during bulk fermentation rewards you with that distinctive sourdough flavor and perfect texture.

Shaping & Final Proofing
Once bulk fermentation is complete, it’s time to shape your dough. Start with pre-shaping – turn your dough onto a lightly floured surface and form it into a rough circle. Let it rest for 20-30 minutes to relax the gluten.
For final shaping, use the coil fold technique to create surface tension. Gently pull the dough’s edges toward the center, treating it delicately to preserve those air bubbles you’ve developed. Your movements should be confident but gentle.
After shaping, place your dough seam-side up in a well-floured banneton for final proofing. The proofing temperature dramatically affects timing – at 75°F, allow 2-3 hours, while cooler kitchens need 4-5 hours. For deeper flavor, proof in the refrigerator for 12-24 hours.
The poke test is your friend – press your finger about ½ inch into the dough. If it springs back slowly leaving a slight indentation, it’s ready to bake. If it springs back completely, it needs more time. If the indentation remains, you’ve overproofed.
Proper dough structure ensures your bread will rise upward with a beautiful “ear” along the score line rather than spreading outward in the oven.
Related: Spelt Sourdough Bread 101: From Starter to Loaf
Baking the Bread
The final step in your sourdough journey transforms your dough into a beautiful loaf with a crackling crust and tender crumb. Here’s how to achieve bakery-quality results at home:
- Preheat your oven to 500°F with a Dutch oven inside, then reduce to 450°F when adding dough
- Score your loaf with a sharp blade just before baking – a simple cross or slash will help control expansion
- Create steam by using a lidded Dutch oven or placing ice cubes in a pan at the bottom of your oven
- Bake covered for 25-30 minutes to trap steam and achieve maximum “oven spring”
- Remove the lid for the final 15-20 minutes to develop a golden-brown crust through the Maillard reaction
- Resist cutting into your bread too soon – wait at least an hour to allow the crumb to set properly
- Test for doneness by tapping the bottom (it should sound hollow) or checking that the internal temperature reaches 205-210°F
Cooling & Storing
Your patience faces one final test after baking – proper cooling is essential for perfect texture. Place your bread on a wire rack for at least an hour to cool completely. This time allows residual heat to finish its work, setting the crumb structure and distributing moisture evenly.
Cut too soon and you’ll find yourself with a gummy, dense texture. Wait until completely cool before using your bread knife to slice into that perfect loaf.
Sourdough stays fresh longer than commercial bread thanks to its natural acidity, but good storage helps. For the first day, wrap in a clean kitchen towel to preserve the crust while keeping the interior moist. For 2-3 days, store cut-side down on a cutting board – this protects the exposed surface while letting the crust breathe.
After day three, slice and freeze in an airtight container. Frozen sourdough keeps well for up to three months. Toast slices straight from the freezer, no thawing needed. For whole loaves, thaw at room temperature then refresh in a 350°F oven for 10 minutes.
Even stale bread transforms beautifully into French toast, bread pudding, or pan-fried croutons that elevate any salad.
Troubleshooting Common Sourdough Challenges
Why Is My Sourdough Dense?
Ended up with a brick instead of that airy loaf? It’s usually underfermentation, rough handling, or weak dough structure. Make sure your bulk ferment completes properly – look for that 50% volume increase and bubbles at the edges. And be gentle when shaping! Think of your dough like a cloud – guide it, don’t squash it.
Dough hydration matters too. In dry kitchens, you might need more water than recipes suggest. Aim for around 75-80% hydration for that open, lacy crumb.
My Sourdough Isn’t Rising
Check your starter first – it should at least double within 4-6 hours after feeding. Room temperature makes a huge difference too. Winter baking might need to double the fermentation time compared to summer. Try using your oven with just the light on as a warm spot for your dough.
The flour type affects the rise as well. For stronger dough, add 5-10% bread flour or a splash of rye, which fermentation loves.
Control Your Fermentation
Temperature is your secret weapon. Keep notes on your kitchen temperature and how fermentation progresses – you’ll soon develop an intuitive sense of timing for your unique environment. When in doubt, give it more time rather than rushing.
From Starter to Slice
Creating wonderful sourdough bread relies on a well-maintained, active starter that bubbles with life. Always handle your dough gently during mixing and shaping to maintain those beautiful air pockets that create the perfect texture. Monitor your kitchen temperature carefully since it directly affects how quickly or slowly your dough develops its distinctive flavor. If you encounter dense bread or slow rises, adjust your fermentation time or handling technique. You now have all the essential knowledge to bake amazing sourdough at home!
FAQs – A Simple Sourdough Bread Recipe
What is the secret to good sourdough bread?
The secret to good sourdough bread is patience and maintaining a healthy starter. Allow for proper fermentation time (8-24 hours), use quality ingredients, maintain consistent temperatures, and develop proper shaping techniques. The long fermentation process develops complex flavors and textures that make sourdough special.
What are the ingredients in easy sourdough bread?
Easy sourdough bread requires just four essential ingredients: flour (bread or all-purpose), water, salt, and an active sourdough starter. No commercial yeast needed. Optional add-ins include seeds, nuts, dried fruits, or herbs for flavor variations, but the simplicity of the basic recipe is what makes sourdough so accessible.
What is the biggest mistake you can make with your sourdough starter?
The biggest mistake with sourdough starter is neglecting regular feedings. An unfed starter becomes weak, develops off-flavors, or dies completely. Other common errors include using chlorinated water, keeping it at inconsistent temperatures, or using sealed containers that prevent gas exchange. Consistent feeding schedules maintain starter viability and strength.
Is sourdough healthier for you than regular bread?
Sourdough is generally healthier than regular bread. The fermentation process breaks down gluten, making it easier to digest. It also lowers the bread’s glycemic index, creates prebiotic compounds that support gut health, and increases mineral availability. Many people with mild gluten sensitivities can tolerate sourdough better than conventional bread.


