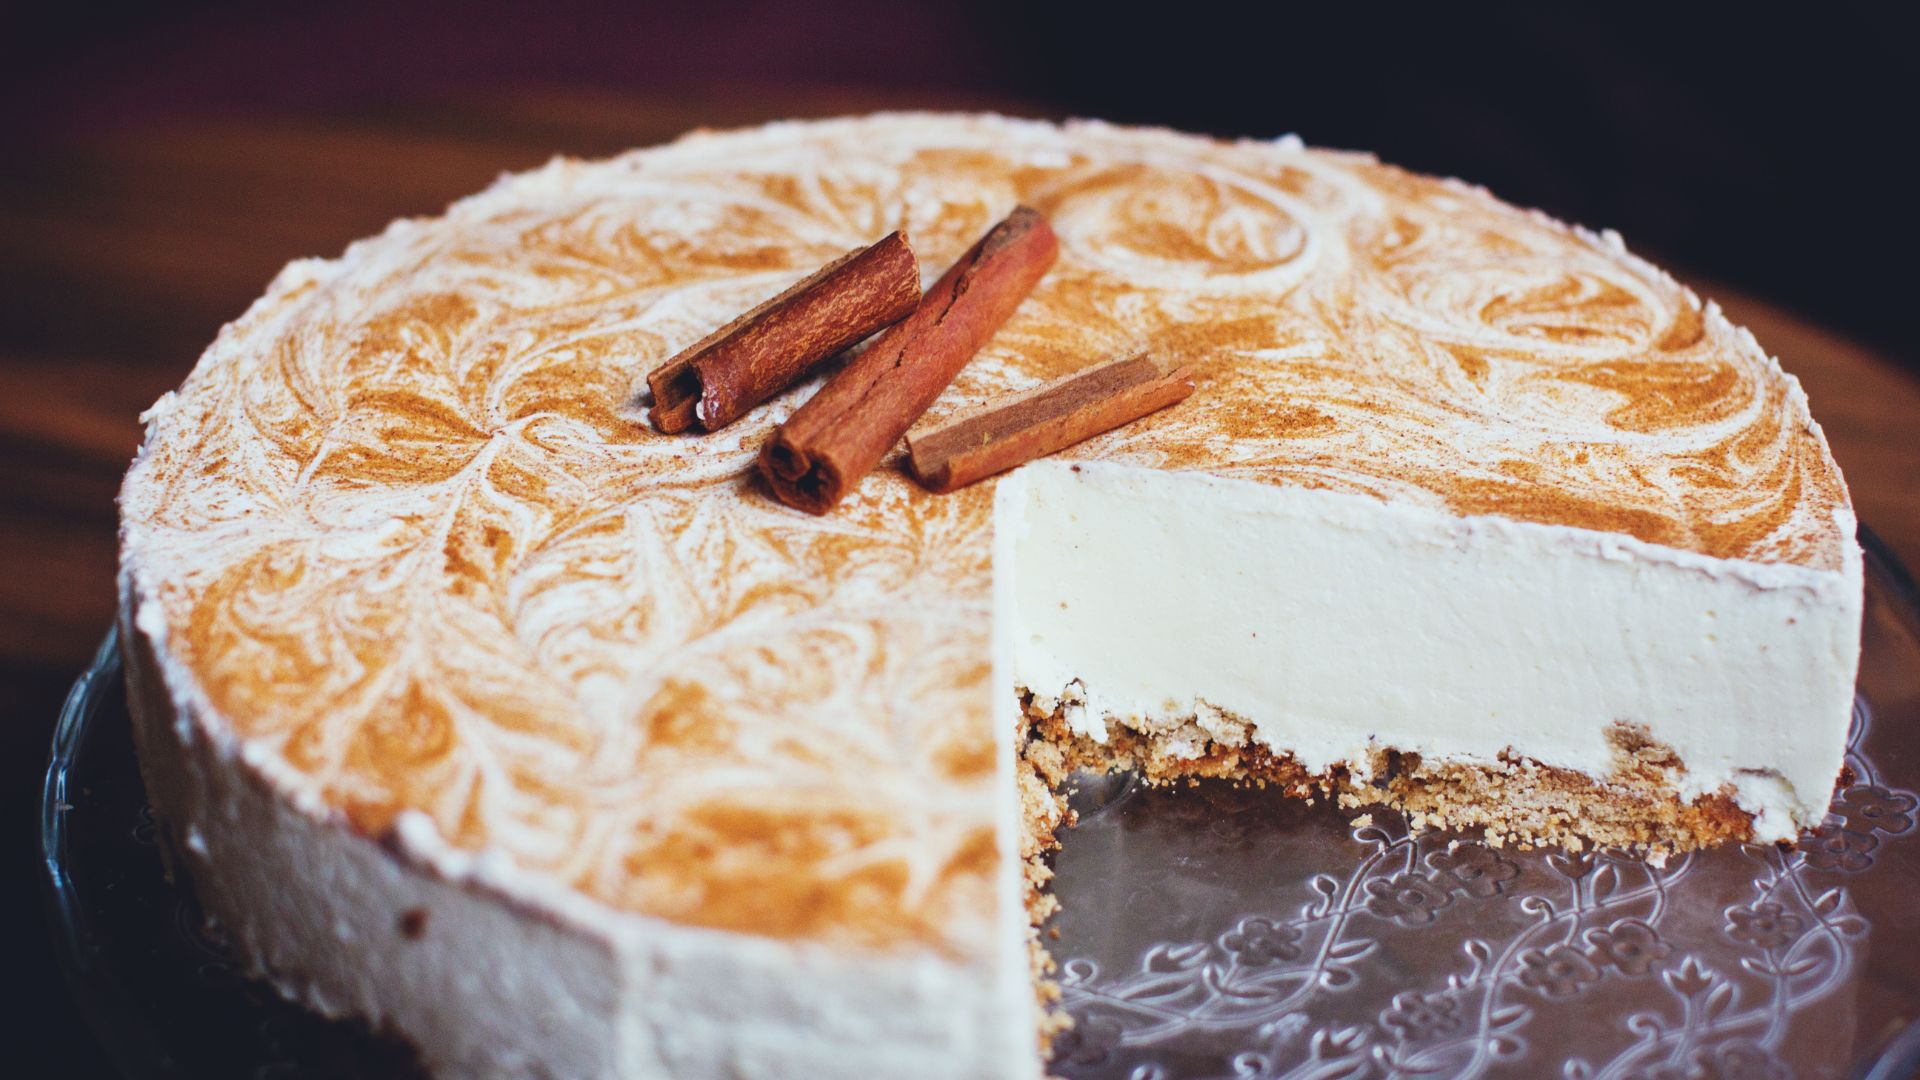
This cinnamon roll cheesecake combines the warm, swirled perfection of a cinnamon roll with the rich, creamy decadence of New York-style cheesecake. The result is a dessert that’s about to become your new obsession—and the star of every gathering.
This isn’t just another cheesecake recipe with a sprinkle of cinnamon on top. Picture layers of silky cream cheese filling swirled with ribbons of buttery cinnamon sugar, all nestled on a perfectly spiced graham cracker crust and topped with that iconic cream cheese glaze that makes cinnamon rolls irresistible.
While this showstopper looks like it came straight from a high-end bakery, it’s completely achievable in your kitchen.
Table of Contents
Ingredients
32 oz cream cheese, room temperature
1 cup granulated sugar
¾ cup brown sugar
4 large eggs
1 cup sour cream
2 tsp vanilla extract
2 tbsp ground cinnamon
1½ cups graham cracker crumbs
6 tbsp melted butter
Making cinnamon roll cheesecake isn’t rocket science, but having the right gear makes the difference between wrestling with your dessert and gliding through the process like a pro. A springform pan is non-negotiable—it’s the only way you’re getting that delicate cheesecake out intact. Your stand mixer with a paddle attachment is your best friend here, creaming that cream cheese to silky perfection without whipping in too much air. You’ll want a large roasting pan for that water bath—your crack-prevention insurance policy. Wrap that springform pan in aluminum foil like you’re protecting precious cargo, because water seeping in would be a real party pooper.
Preparing the Crust
Prep your workspace: Preheat your oven to 325°F and generously grease your 9-inch springform pan with butter or cooking spray. Line the bottom with parchment paper for easy removal later.
Create the crumbs: Pulse graham crackers in a food processor until you have fine, even crumbs. No food processor? Place crackers in a sealed bag and crush with a rolling pin until fine. You’ll need about 1½ cups of crumbs.
Mix the dry ingredients: Combine crumbs with 2 tbsp brown sugar and 1 tsp ground cinnamon in a large bowl. Whisk together to distribute evenly.
Add the butter: Pour in 6 tbsp melted butter and mix with a fork until the mixture resembles wet sand and holds together when squeezed. If it’s too dry, add an extra tablespoon of melted butter.
Press the crust: Transfer the mixture to your prepared pan and press firmly into the bottom and halfway up the sides. Use the flat bottom of a measuring cup to create an even, compact layer.
Bake to perfection: Bake for 10-12 minutes until the crust is set and lightly golden. The edges should look slightly toasted.
Cool completely: Remove from oven and set aside to cool while you prepare the cheesecake filling. This prevents the filling from melting when poured over a hot crust.
Prepare the cinnamon swirl: In a medium bowl, mix ¾ cup brown sugar, 2 tablespoons flour, and 1 tablespoon ground cinnamon using a fork. Add 4 tbsp melted butter and mix until everything comes together into a sandy, crumbly mixture. The flour helps keep the cinnamon filling from just melting into the cheesecake filling. Set aside.
Start the cheesecake batter: Using a stand mixer with a paddle attachment, beat 32 oz of room temperature cream cheese and 1 cup of granulated sugar on medium-high speed for about 2 minutes until smooth and creamy. Scrape bowl sides frequently to ensure no lumps remain.
Add wet ingredients: Add ½ cup sour cream and 1 tsp vanilla extract, beating until fully combined. The mixture should be exceptionally smooth and creamy at this point—this is your foundation for that perfect cheesecake texture.
Incorporate eggs carefully: Add 3 large eggs one at a time, beating on medium speed after each addition until just incorporated. After the final egg, stop mixing immediately to avoid over-mixing, which causes cracks.
Layer the first third: Pour one-third of the cheesecake batter over your cooled crust and spread evenly. Sprinkle one-fourth of the cinnamon filling over the batter.
Continue layering: Add another third of batter, then another fourth of cinnamon mixture. Repeat once more, creating distinct layers that’ll give you gorgeous ribbons in every slice.
Create the swirl: Use a toothpick or knife to gently swirl the cinnamon mixture throughout the layers—don’t mix completely or you won’t see the beautiful swirl pattern. This technique creates those Instagram-worthy marbled effects that make each slice a masterpiece.
Layering & Swirl Technique
Layer and swirl in thirds: Pour one-third of cheesecake batter over the cooled crust, sprinkle one-third of cinnamon mixture on top, then use a toothpick to lightly swirl. Repeat this process two more times for distinct layers.
Master the swirl technique: Use the back of a spoon or toothpick to spread and swirl the cinnamon mixture throughout the cheesecake layer—don’t mix it in completely or you won’t see it, just swirl it around a little.
Control your movements: Keep the movements simple and controlled, creating just enough motion to form the pattern without completely blending the topping into the cheesecake. Sprinkle the mixture gently in smaller crumbs and use a toothpick to lightly swirl for added support.
Final swirl on top: Drizzle the remaining cinnamon swirl on top, using a knife or toothpick to drag along the surface of the cheesecake to make a swirl design. Be careful not to put lines too close together, as they’ll spread during baking.
Release air bubbles: Before placing the cheesecake into the oven, pick up and drop the cake pan on the counter 3 times to release any air bubbles. This prevents cracks and ensures a smooth surface.
Baking the Cheesecake
Prep the water bath: Wrap your springform pan bottom in two layers of heavy-duty aluminum foil, ensuring complete coverage to prevent leaks. Place the wrapped pan in a large roasting pan and position both on your oven rack before adding water.
Add the water safely: Bring a large pot or kettle of water to boil. Carefully pour the boiling water into the roasting pan until it reaches about halfway up the sides of the springform pan. The water creates a humid environment that prevents the cheesecake surface from drying out and cracking.
Bake at the right temperature: Preheat your oven to 325°F and bake for 60-75 minutes. Resist opening the oven door during baking—this can cause dramatic temperature fluctuations that lead to cracks or sinking.
Test for proper doneness: Look for firm edges and about a 2-inch diameter in the center that still jiggles when you tap the pan. The internal temperature should reach 145°F. Don’t worry if it seems slightly underdone—the cake finishes setting as it cools.
Cool gradually in the oven: Turn off the oven and crack the door open slightly. Let the cheesecake cool down slowly in the oven with the door ajar for at least an hour, remaining in that humid environment.
Complete the cooling process: Remove from oven and water bath carefully. Run a knife around the inside edge to loosen the crust from the sides, preventing cracks as it contracts. Cool completely at room temperature before refrigerating for at least 4 hours or overnight.
A cream cheese glaze provides the essential topping that completes your cinnamon roll cheesecake. The delicate balance of sweetness from the sugar and a slight tang from the cream cheese is complemented by the smooth, creamy texture. This glaze replicates the traditional icing found on authentic cinnamon rolls while perfectly complementing the rich cheesecake base.
Beat 4 oz softened cream cheese with ½ cup butter until creamy, then gradually blend in 2 cups powdered sugar and 2 tablespoons heavy cream until smooth and fluffy. All ingredients must be at room temperature to prevent lumps and ensure proper consistency. A slight tweak in the amount of liquid added can take it from drizzling consistency to piping consistency.
Application timing is crucial for cheesecake. The cheesecake should be completely cooled and chilled before applying the glaze to prevent melting and maintain a clean presentation. Pipe the frosting in a spiral design over the top of the cheesecake using a piping bag or a plastic bag with a corner cut off, mimicking the appearance of a cinnamon roll. Add a light dusting of ground cinnamon for enhanced presentation and flavor that ties together the cinnamon swirl within the cheesecake.
Serving & Storage Tips
After cooling to room temperature, refrigerate promptly—cheesecake shouldn’t sit out longer than two hours. Wrap tightly with plastic wrap or aluminum foil to prevent drying and odor absorption. Properly stored cheesecake lasts 3-4 days in the refrigerator.
For serving, remove from the fridge 30 minutes beforehand for optimal flavor. Use a warm, clean knife for neat slices, wiping between cuts.
Freezing extends storage up to 2 months. Wrap in two layers of plastic wrap plus heavy-duty foil to prevent freezer burn. Thaw overnight in the refrigerator—never at room temperature, which causes condensation and soggy crusts.
You Just Mastered Cinnamon Roll Cheesecake
You just leveled up your dessert game big time with this cinnamon roll cheesecake masterpiece. With your springform pan skills and that killer layering technique, you’re creating those Instagram-worthy swirls that’ll blow everyone’s minds. The water bath trick keeps things crack-free, and that cream cheese glaze is pure magic.
You’ve turned what seemed like Mission Impossible into your new signature dessert. Store it right, serve it with confidence, and watch people lose their minds over every single bite. Time to own your new title as the dessert legend in your crew.
Prep the water bath: Wrap your springform pan bottom in two layers of heavy-duty aluminum foil, ensuring complete coverage to prevent leaks. Place the wrapped pan in a large roasting pan and position both on your oven rack before adding water.
Add the water safely: Bring a large pot or kettle of water to boil. Carefully pour the boiling water into the roasting pan until it reaches about halfway up the sides of the springform pan. The water creates a humid environment that prevents the cheesecake surface from drying out and cracking.
Bake at the right temperature: Preheat your oven to 325°F and bake for 60-75 minutes. Resist opening the oven door during baking—this can cause dramatic temperature fluctuations that lead to cracks or sinking.
Test for proper doneness: Look for firm edges and about a 2-inch diameter in the center that still jiggles when you tap the pan. The internal temperature should reach 145°F. Don’t worry if it seems slightly underdone—the cake finishes setting as it cools.
Cool gradually in the oven: Turn off the oven and crack the door open slightly. Let the cheesecake cool down slowly in the oven with the door ajar for at least an hour, remaining in that humid environment.
Complete the cooling process: Remove from oven and water bath carefully. Run a knife around the inside edge to loosen the crust from the sides, preventing cracks as it contracts. Cool completely at room temperature before refrigerating for at least 4 hours or overnight.
Notes
Beat 4 oz softened cream cheese with ½ cup butter until creamy, then gradually blend in 2 cups powdered sugar and 2 tablespoons heavy cream until smooth and fluffy. All ingredients must be at room temperature to prevent lumps and ensure proper consistency. A slight tweak in the amount of liquid added can take it from dipping consistency to piping consistency.