Remember those perfectly fluffy cupcakes from your favorite bakery with that subtle tang and incredible texture that made you wonder what their secret was? Get ready to recreate that magic in your kitchen with sourdough cupcakes that’ll make everyone think you’ve been hiding your pastry chef skills.
These aren’t ordinary cupcakes – the sourdough starter adds incredible depth of flavor and creates an amazingly moist, tender crumb. Plus, it’s the perfect way to use up that sourdough discard that’s been sitting in your fridge.
Table of Contents
Ingredients
For the Cupcakes:
2 cups all-purpose flour
1 teaspoon baking soda
1/2 teaspoon salt
1/2 cup sourdough discard
3/4 cup granulated sugar
1/2 cup unsalted butter, softened
2 large eggs
1 teaspoon vanilla extract
1 cup buttermilk
1/4 cup vegetable oil
For the Cream Cheese Frosting:
8 oz cream cheese, softened
1/2 cup unsalted butter, softened
4 cups powdered sugar
1 teaspoon vanilla extract
2-3 tablespoons heavy cream
Pinch of salt
This recipe makes 18-20 standard cupcakes using simple pantry staples. The magic lies in the sourdough discard, which provides natural fermentation flavors that create complexity without overwhelming sweetness. Room temperature ingredients are crucial for proper mixing and achieving that perfect, even crumb structure. Your sourdough discard should be active but not overly sour – discard that’s 3-7 days old works best, providing tang without bitterness that could compete with the other flavors.
Step-by-Step Recipe
Prepare your workspace: Preheat oven to 350°F and line cupcake tins with paper liners. This temperature ensures even baking without dried-out tops or soggy bottoms. Room temperature ingredients mix more easily and create better texture, so take your eggs, butter, and dairy out about an hour before baking.
Mix dry ingredients: Whisk flour, baking soda, and salt in a medium bowl, ensuring even distribution to prevent pockets of overly salty or bitter spots in your finished cupcakes. The baking soda reacts with the natural acids in the sourdough discard to create lift and tenderness.
Cream butter and sugar: Beat softened butter and granulated sugar until light and fluffy, about 3-4 minutes with an electric mixer. This incorporates air that creates the tender crumb structure. The mixture should be pale and increased in volume – don’t rush this step as it’s crucial for texture.
Add eggs and vanilla: Beat in eggs one at a time, mixing well after each addition to ensure proper emulsification. Add vanilla extract and mix until just combined. The eggs provide structure and richness, while the vanilla enhances all the other flavors.
Incorporate sourdough discard: Mix in the sourdough discard until fully incorporated – this adds the signature tang and creates incredible moisture retention. The natural acids also tenderize the gluten, resulting in a softer cupcake.
Alternate wet and dry ingredients: Add flour mixture in three additions, alternating with buttermilk in two additions, beginning and ending with flour. Mix just until combined after each addition – overmixing develops gluten and creates tough, dense cupcakes. The buttermilk adds additional tang and reacts with the baking soda for extra lift.
Finish the batter: Stir in vegetable oil until just combined. The oil adds moisture and helps create that bakery-style tender crumb that stays fresh longer than butter-only cupcakes.
Fill and bake: Divide batter evenly among cupcake liners, filling each about 2/3 full. This prevents overflow while ensuring full, domed tops. Bake for 18-22 minutes, rotating pans halfway through for even browning.
Cool completely: Let cupcakes cool in pans for 5 minutes, then transfer to wire racks. Complete cooling is essential before frosting – warm cupcakes will melt your beautiful cream cheese frosting into a puddle.
Pro tip: Don’t overfill the liners or open the oven door during the first 15 minutes of baking – this prevents collapsed centers and ensures even rising throughout.
Preheat your oven to 350°F – this temperature gives you perfectly domed tops without scorching those delicate edges. Bake for 18-22 minutes, rotating your pans halfway through to ensure even browning. Your kitchen will start smelling like a professional bakery around the 15-minute mark.
Recognizing Doneness Like a Pro
You’re looking for golden tops that spring back when lightly touched. A toothpick inserted in the center should come out with just a few moist crumbs – completely clean means they’re overbaked. The cupcakes should pull slightly away from the liner edges and feel set but not hard.
Convection Oven Adjustments
For convection ovens, reduce the temperature to 325°F and start checking for doneness at 16 minutes. The circulating air cooks faster and can dry out delicate cupcakes, so watch for those visual cues – golden tops and springy texture – rather than relying solely on timing.
Cooling
Cool in pans for 5 minutes to prevent breaking, then transfer to wire racks. Complete cooling prevents condensation that makes the bottoms soggy and ensures your frosting stays put.
Frosting Options
Classic cream cheese frosting provides the perfect tangy complement to sourdough cupcakes, with its smooth richness balancing the subtle fermented flavors while adding a luxurious mouthfeel that makes every bite memorable.
Vanilla buttercream offers sweet simplicity that lets the sourdough flavors shine, creating a familiar comfort that appeals to all ages while providing the classic cupcake experience everyone expects.
Chocolate ganache creates an indulgent contrast with the tangy cupcake base, delivering rich cocoa intensity that transforms these treats into sophisticated desserts worthy of special occasions.
Lemon cream cheese frosting amplifies the natural tang with bright citrus notes that create a refreshing, bakery-quality finish – add lemon zest and juice to your cream cheese base for vibrant flavor.
Cinnamon buttercream delivers warm spice notes that complement the fermented flavors beautifully, creating cozy fall vibes that make these cupcakes perfect for autumn gatherings.
Maple cream cheese frosting combines sweet maple syrup with tangy cream cheese for a sophisticated flavor profile that celebrates the natural fermentation characteristics of sourdough.
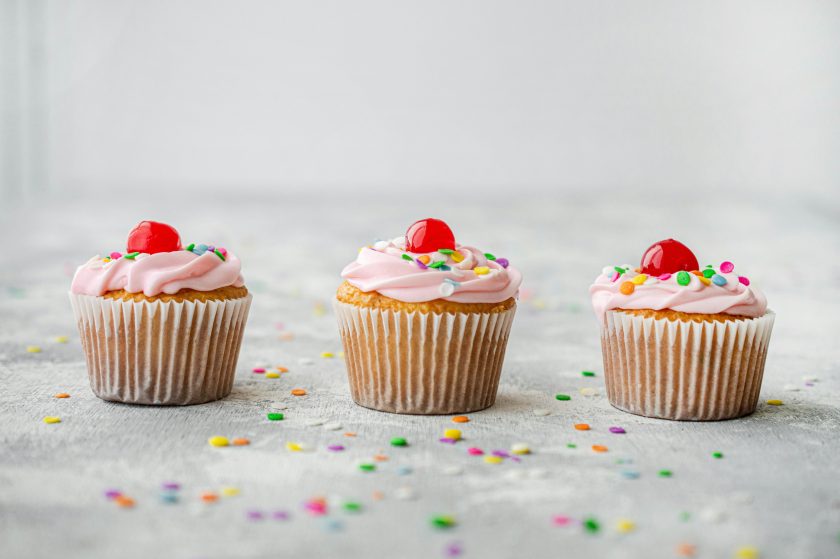
Frosting and Decoration
Make the cream cheese frosting: Beat softened cream cheese and butter until smooth and fluffy, about 3-4 minutes. Gradually add powdered sugar, beating until well combined. Add vanilla, salt, and cream, beating until you achieve the perfect spreading consistency.
Achieve the perfect consistency: The frosting should hold its shape but spread easily. Too thick? Add cream one tablespoon at a time. Too thin? Add more powdered sugar gradually until you reach the right texture.
Frosting application techniques: Use an offset spatula for smooth, professional-looking tops, or pipe with a star tip for bakery-style swirls. Work with completely cooled cupcakes to prevent melting.
Key Decoration Tips:
Fill piping bags just before use to prevent softening
Create height and dimension with confident piping motions
Add sprinkles, edible flowers, or fruit garnishes while the frosting is fresh
Consider flavor-matching decorations like lemon zest or cinnamon dusting
Store decorated cupcakes in the refrigerator if your kitchen is warm
These sourdough cupcakes are best enjoyed fresh, but will stay delicious stored properly at room temperature for up to three days, or refrigerated for up to one week. The key is preventing air exposure, which dries out the tender crumb that makes these cupcakes so special. Store unfrosted cupcakes in airtight containers at room temperature, and frosted cupcakes in the refrigerator.
Sourdough cupcakes are incredibly freezer-friendly. You can freeze unfrosted cupcakes for up to 3 months – wrap individually in plastic wrap, then place in freezer bags. For ultimate convenience, freeze frosted cupcakes on a baking sheet until solid, then transfer to airtight containers. They’ll maintain their quality for up to 2 months.
To serve frozen cupcakes, thaw at room temperature for 2-3 hours. Unfrosted cupcakes can be refreshed in a 300°F oven for 5 minutes to restore that just-baked texture. Frosted cupcakes are best thawed slowly in the refrigerator overnight, then brought to room temperature before serving for the best texture and flavor.
You’re Now a Cupcake Wizard!
There you have it – your ticket to cupcake greatness! These sourdough cupcakes blow store-bought stuff out of the water. You’ve got all the tricks now: room temperature ingredients for perfect mixing, that ideal 350°F bake, and how to achieve bakery-quality crumb. Whether going classic with cream cheese frosting or getting creative with seasonal flavors, you’re officially a cupcake wizard.
The best part? Make a batch and freeze them for those moments when you need an impressive dessert fast. Once you taste these homemade beauties with their incredible tang and moisture, you’ll never go back to artificial-tasting store versions. Time to get baking!
FAQs
Are sourdough muffins healthier than regular muffins?
Yes, sourdough muffins offer several health benefits over regular muffins. The fermentation process breaks down some gluten and phytic acid, making nutrients more bioavailable and easier to digest. The natural acids also help lower the glycemic index, leading to more stable blood sugar levels. Plus, you’re getting beneficial probiotics from the starter.
What does sourdough do to cake?
Sourdough transforms cake by adding a subtle, tangy flavor that enhances sweetness without overwhelming it. The natural acids tenderize the crumb, creating an incredibly moist, fluffy texture. The fermentation also adds complexity and depth to the flavor profile, while the starter’s enzymes help break down proteins for a more tender final product.
Prepare your workspace: Preheat oven to 350°F and line cupcake tins with paper liners. This temperature ensures even baking without dried-out tops or soggy bottoms. Room temperature ingredients mix more easily and create better texture, so take your eggs, butter, and dairy out about an hour before baking.
Mix dry ingredients: Whisk flour, baking soda, and salt in a medium bowl, ensuring even distribution to prevent pockets of overly salty or bitter spots in your finished cupcakes. The baking soda reacts with the natural acids in the sourdough discard to create lift and tenderness.
Cream butter and sugar: Beat softened butter and granulated sugar until light and fluffy, about 3-4 minutes with an electric mixer. This incorporates air that creates the tender crumb structure. The mixture should be pale and increased in volume – don’t rush this step as it’s crucial for texture.
Add eggs and vanilla: Beat in eggs one at a time, mixing well after each addition to ensure proper emulsification. Add vanilla extract and mix until just combined. The eggs provide structure and richness, while the vanilla enhances all the other flavors.
Incorporate sourdough discard: Mix in the sourdough discard until fully incorporated – this adds the signature tang and creates incredible moisture retention. The natural acids also tenderize the gluten, resulting in a softer cupcake.
Alternate wet and dry ingredients: Add flour mixture in three additions, alternating with buttermilk in two additions, beginning and ending with flour. Mix just until combined after each addition – overmixing develops gluten and creates tough, dense cupcakes. The buttermilk adds additional tang and reacts with the baking soda for extra lift.
Finish the batter: Stir in vegetable oil until just combined. The oil adds moisture and helps create that bakery-style tender crumb that stays fresh longer than butter-only cupcakes.
Fill and bake: Divide batter evenly among cupcake liners, filling each about 2/3 full. This prevents overflow while ensuring full, domed tops. Bake for 18-22 minutes, rotating pans halfway through for even browning.
Cool completely: Let cupcakes cool in pans for 5 minutes, then transfer to wire racks. Complete cooling is essential before frosting – warm cupcakes will melt your beautiful cream cheese frosting into a puddle.
Notes
Pro tip: Don’t overfill the liners or open the oven door during the first 15 minutes of baking – this prevents collapsed centers and ensures even rising throughout.