Recently, I received an email from Alan asking about sourdough rolls. He wrote: “I would like to make sourdough rolls (not soft with oil/butter included), do you have a video or instructions for that? Or should I just use bread dough in small balls?”
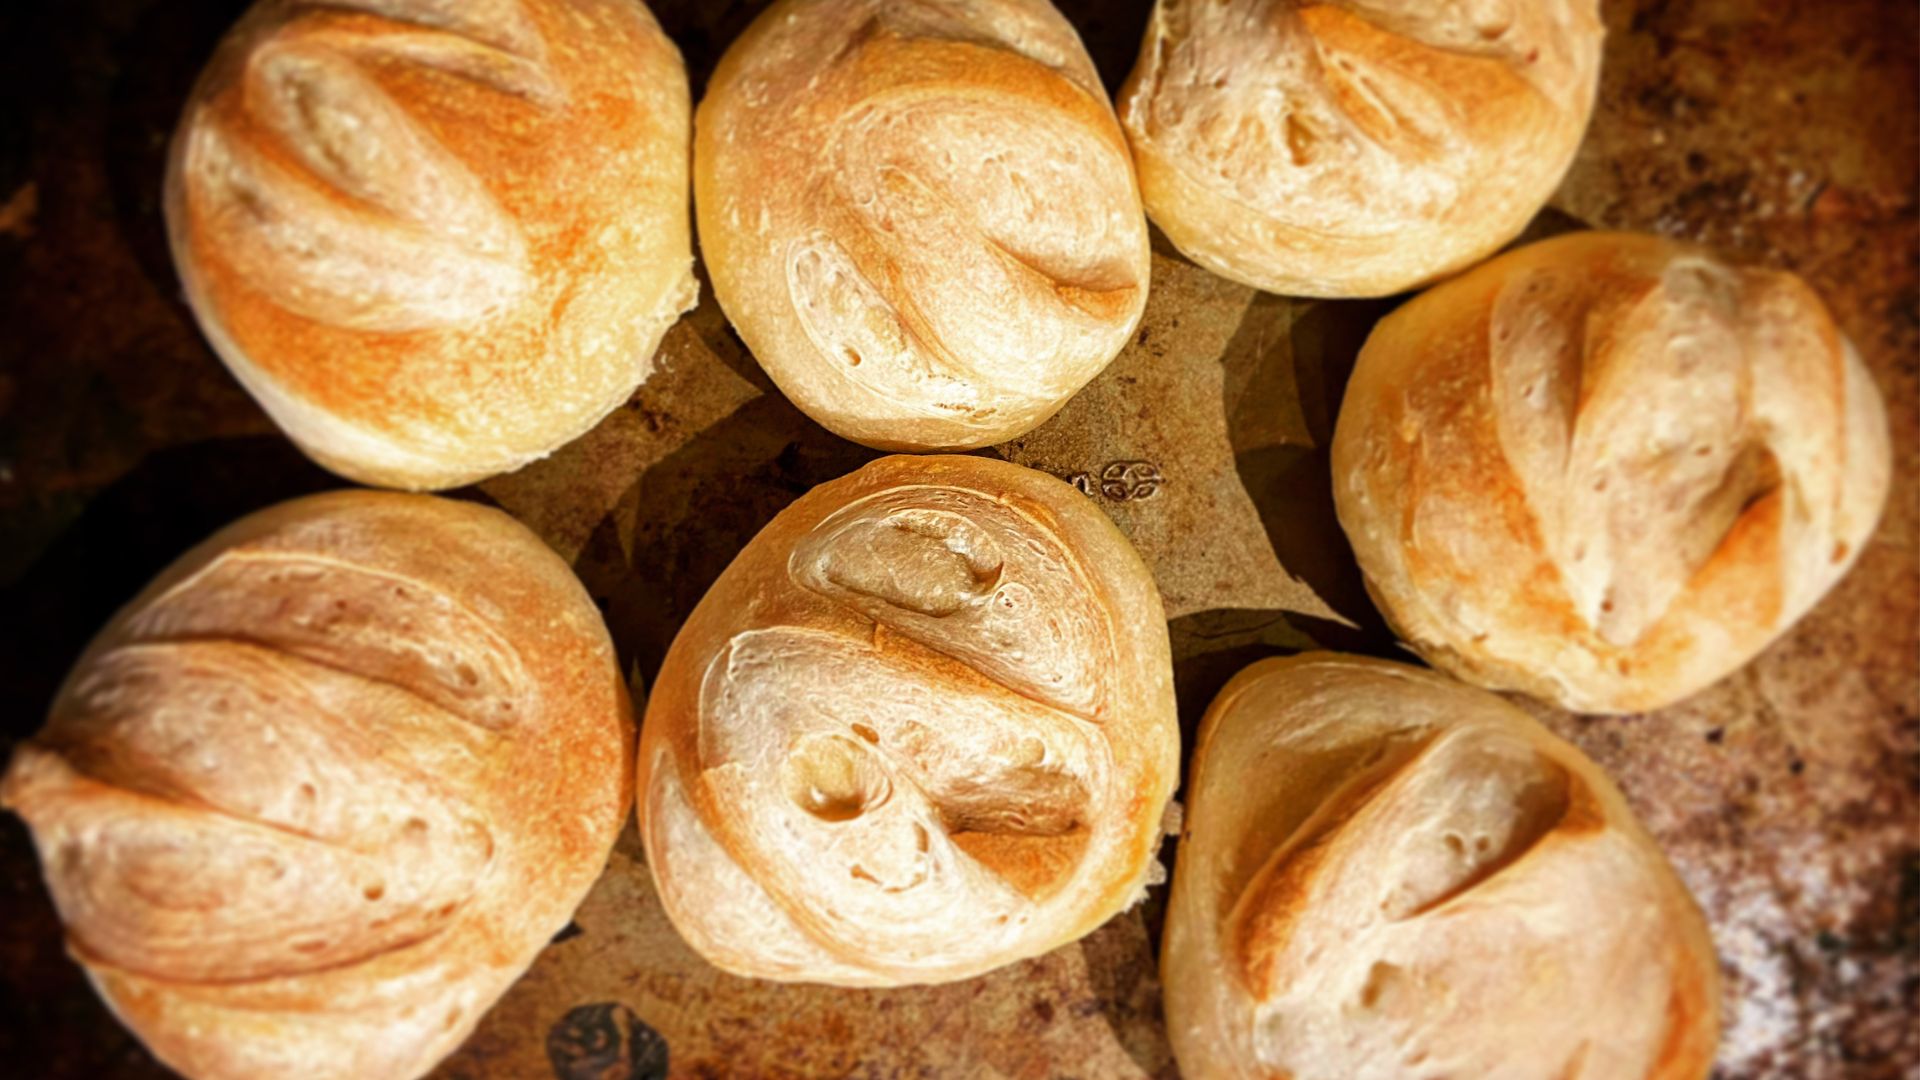
Alan’s question (thanks, Alan!) hits on a topic that many might find interesting. Maybe you’re not a fan of too-soft rolls? Maybe you want your sourdough in smaller amounts? It’s possible to simply portion out bread dough, but there are some techniques to get that crusty roll with a tender, open crumb structure inside.
Table of Contents
How to Get Crusty Sourdough Rolls without Fats
Two things you’ll need before staring are patience and attention to detail.
Unlike enriched dough rolls that contain fats like butter or oil, these rolls rely on proper fermentation and hydration to develop their structure. The process takes longer than commercial yeast rolls, but the depth of flavor and amazing texture are worth every minute.
Your Steps to Success
The Starter
Your sourdough starter should be at peak activity, typically 4-6 hours after feeding at room temperature. A strong starter is crucial for proper fermentation and that distinctive sourdough flavor.
Look for a starter that has doubled in size and shows plenty of bubbles on the surface.
Autolyse
Don’t skip this step! Allowing the flour and water to rest before adding the starter and salt helps develop the gluten structure and makes the dough easier to handle.
This step also contributes to better flavor development.
Bulk Fermentation
During bulk fermentation, your dough develops flavor and strength.
Watch for signs of fermentation like small bubbles forming and the dough becoming more elastic. The dough should increase in volume by about 50% before shaping.
Shaping Technique
Proper shaping is more important that you’d think for crusty rolls.
Each roll should be shaped with surface tension, which will help create that satisfying crust. Think of it as creating a tiny boule – the same principles apply.
Follow My Kitchen Tips
Temperature Control
When you maintain proper dough temperature (75-78°F/24-26°C):
Your fermentation will progress at an ideal pace
The starter will produce balanced flavors rather than excessive sourness
Gluten development will occur consistently
You’ll get predictable proofing times
Proper Hydration
Measure water accurately and handle high-hydration dough correctly so that:
Your crust will develop that coveted crackling texture
The crumb will show an open, honeycomb structure
The rolls will have better oven spring
You’ll achieve that translucent, gelatinized crumb appearance
Starter Management
When your starter is truly at peak activity:
Your dough will ferment evenly and predictably
You’ll get maximum flavor development
The rolls will achieve proper volume
You’ll see consistent oven spring
Gluten Development
Developing gluten properly through stretch and folds means:
Your rolls will hold their shape during proofing
The crust will have attractive blisters
The crumb structure will be even and well-developed
You’ll achieve better scores and ears during baking
Steam Creation
Create proper steam during baking so these happen:
Your crust will develop that beautiful mahogany color
The rolls will achieve maximum oven spring
You’ll get the satisfying crackle when cooling
The crust will have the right thickness and texture
Scoring Technique
Score at the right depth and angle:
Your rolls will open up beautifully in the oven
You’ll get attractive patterns on the crust
The expansion will be controlled and even
The rolls will have better overall shape
Cooling Patience
Proper cooling equals:
The texture will be perfect for slicing
The crumb will set properly
The crust will develop its characteristic crackle
The flavor will be fully developed
Bakery-Style Crusty Sourdough Rolls Recipe
Total time: 8-12 hours
Yield: 8-10 rolls
Ingredients
400g bread flour
280g water (70% hydration)
80g active sourdough starter (100% hydration)
8g salt
Equipment
mixing bowl
bench scraper
baking stone (optional)
spray bottle for steam
How to Make
Autolyse (1 hour)
Mix flour and water until no dry flour remains
Cover and rest for 1 hour
Mix (10 minutes)
Add starter and salt to autolysed dough
Mix until well incorporated
Develop initial gluten structure through slap and folds or stretch and folds
Bulk Fermentation (4-6 hours at 75°F/24°C)
Perform 4 sets of stretch and folds during the first 2 hours
Allow to ferment until dough has increased by 50% in volume
Look for small bubbles on surface
Divide and Shape (15 minutes)
Divide dough into 80g portions
Pre-shape into tight balls
Rest 15 minutes uncovered
Final shape with good surface tension
Final Proof (2-3 hours or overnight in refrigerator)
Place shaped rolls on parchment-lined baking sheet
Cover with damp cloth or plastic wrap
Proof until rolls pass the poke test
Bake (25-30 minutes)
Preheat oven to 450°F/230°C with baking stone if available
Score rolls
Create steam in oven
Bake until deep golden brown
Cool completely on wire rack
Notes
Best eaten same day, or freeze for up to 3 months
Pay attention to dough temperature throughout the process. Ideal dough temperature after mixing should be 75-78°F (24-26°C) for optimal fermentation.
Serving Suggestions
These crusty rolls shine in so many settings.
Create an unforgettable breakfast by splitting them and using them for eggs Benedict – the crusty exterior holds up beautifully to hollandaise sauce while the tender interior soaks up the egg yolk.
For lunch, they make exceptional sandwiches, particularly for Vietnamese Banh Mi where the contrast between the crusty exterior and fresh, crisp vegetables creates a delightful textural experience.
For dinner, warm them slightly and serve alongside hearty soups or stews. The crusty exterior is great for dipping, while the open crumb structure captures broth beautifully. They’re particularly excellent with dishes like bouillabaisse or beef bourguignon.
Sourdough Roll Pairings
These rolls pair exceptionally well with aged cheeses – try them with a 24-month aged comté or a sharp cheddar. The tanginess of the sourdough complements the complex flavors in aged cheese wonderfully.
For a light summer meal, serve them alongside a charcuterie board with cured meats, cornichons, and whole-grain mustard.
For wine pairings, their robust flavor profile stands up well to full-bodied reds like Cabernet Sauvignon or Syrah. If you prefer white wine, try them with an oaked Chardonnay that can match their complexity.
Let’s Answer Some Common Questions
Why aren’t my rolls crusty enough?
The secret to a crackling crust is steam during baking. While professional ovens inject steam, you can mimic this by:
Tossing ice cubes onto a preheated sheet pan to create steam.
Placing a pan of hot water in the bottom of your oven.
Can I make these ahead?
Yes!
After shaping, refrigerate the rolls for up to 24 hours.
Cold fermentation enhances flavor development.
Before baking, let the rolls come to room temperature.
Why did my rolls spread instead of rise?
This often happens due to under-developed gluten or over-proofing.
There should be proper gluten development by performing stretch and folds during bulk fermentation.
Keep a close eye on proofing time; if the dough feels overly soft or sluggish, it’s better to bake slightly under-proofed than over-proofed.
My rolls are dense with few holes. What went wrong?
Several factors could contribute:
Your starter wasn’t active enough – ensure it doubles within 4-6 hours of feeding
Insufficient bulk fermentation time – look for 50% volume increase and bubble development
Dough was too cold – maintain 75-78°F for optimal fermentation
Over-handling during shaping – be gentle to preserve gas bubbles
Under-proofing – final proof should show visible growth and pass the poke test
The bottom of my rolls is burned. How can I prevent this?
Try these:
Double up your baking sheets
Place an empty baking sheet on a lower rack as a heat shield
Lower your oven temperature by 25°F after the first 10 minutes
Use parchment paper instead of directly on the baking sheet
Ensure your oven isn’t running hot with an oven thermometer
Why don’t my rolls have those nice blisters on the crust?
Crust blisters develop from:
Proper cold fermentation (try an overnight proof in the fridge)
Adequate hydration (maintain 70-75% hydration)
Correct steam at the start of baking
Not over-handling during shaping
My rolls are too sour. How can I adjust the flavor?
Feed your starter more frequently before baking
Use a younger starter (4-6 hours after feeding instead of 8-12)
Reduce bulk fermentation time slightly
Use cooler water in your mix
Limit acid development by avoiding very warm temperatures
The rolls stuck to my baking sheet/parchment. Help?
Use fresh parchment paper, not wax paper
Ensure proper proofing – overproofed dough tends to stick
Dust proofing surface lightly with rice flour
Don’t let shaped rolls proof too long in a humid environment
If using a baking stone, pre-heat it thoroughly
My scoring isn’t creating nice patterns or ears. What’s wrong?
Successful scoring requires:
A very sharp blade (change razor blades frequently)
Confidence and speed in your cuts (hesitation leads to dragging)
Proper dough strength (weak dough won’t hold scoring)
The right angle (30-45 degrees for ears)
Adequate surface tension from shaping
Not letting the surface dry out during proofing
Can I freeze these rolls?
Yes, with proper technique:
Freeze fully baked and completely cooled rolls
Double wrap in plastic and foil or vacuum seal
Freeze for up to 3 months
Thaw at room temperature, then refresh in a 350°F oven for 5-10 minutes
Don’t freeze unbaked rolls as this can damage the yeast structure
Mix and Rest: Combine flour and water until fully hydrated, then cover and rest for 1 hour.
Incorporate Starter and Salt: Add starter and salt, mix well, and build gluten with slap-and-folds or stretch-and-folds.
Bulk Fermentation: Let the dough ferment for 4-6 hours at 75°F (24°C), performing 4 sets of stretch-and-folds in the first 2 hours. Ferment until the dough rises by 50% and shows surface bubbles.
Divide and Shape: Divide into 80g portions, pre-shape into balls, rest uncovered for 15 minutes, and then shape with good surface tension.
Final Proof: Place rolls on parchment-lined trays, cover, and proof for 2-3 hours or refrigerate overnight until they pass the poke test.
Bake: Preheat oven to 450°F (230°C), score the rolls, create steam, and bake for 25-30 minutes until golden brown. Cool on a wire rack.
Notes
Ideal dough temperature after mixing should be 75-78°F (24-26°C) for optimal fermentation.

 81")
 82")
 83")
 84")
 85")


