
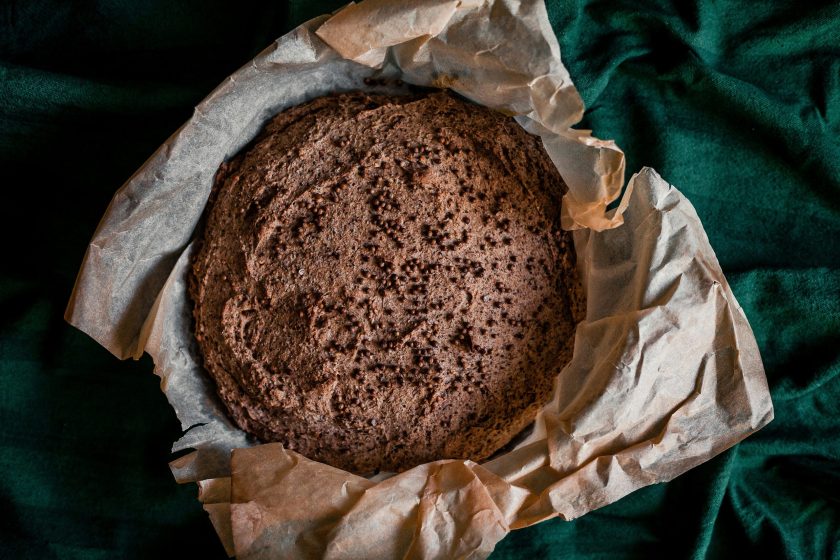
Tired of baking the same old sourdough? Let’s kick things up a notch with this chocolate and cherry sourdough bread that’ll make your taste buds dance. Sure, regular sourdough is great, but imagine biting into a warm slice loaded with melty dark chocolate chunks and juicy cherries. This isn’t just another bread recipe – it’s a game-changing chocolate and cherry sourdough bread that combines classic techniques with exciting flavors.

Table of Contents
Ingredients
- 400g bread flour
- 100g whole wheat flour
- 350g filtered water (80-85°F)
- 100g active sourdough starter (100% hydration)
- 30g cocoa powder (Dutch-processed)
- 150g dark chocolate chunks (65-70% cocoa)
- 125g dried cherries
- 10g fine sea salt
Tips for Selecting Ingredients
Let’s talk about what matters: First off, your flour choice – King Arthur or Bob’s Red Mill bread flour are excellent options, with the protein content (12-13%) that’ll give your loaf the strength it needs. For cocoa powder, stick with Dutch-processed varieties like Valrhona or Guittard – they’ll give you a richer chocolate flavor without making your dough too acidic.
When it comes to chocolate, this is no place to skimp. Skip the chocolate chips (they contain stabilizers that affect how they melt) and instead roughly chop a good-quality chocolate bar. Callebaut, Ghirardelli, or even Trader Joe’s Pound Plus dark chocolate are solid choices. For dried cherries, look for ones without added sugar – the natural tartness creates an amazing contrast with the chocolate. Montmorency cherries are ideal if you can find them.
One final note about salt – fine sea salt is best here because it distributes evenly throughout the dough. If you’re using kosher salt instead, increase the amount by about 20% to account for the different crystal size. Whatever you do, avoid iodized table salt – it can leave a metallic taste that’ll throw off all those lovely chocolate and cherry flavors.
Related: How to Make Chocolate Sourdough Bread
Must-Have Equipment
- Dutch Oven (5-6 quart) – for creating steam and perfect crust
- Proofing basket (9-inch banneton) – for shaping and proofing the dough
- Metal bench scraper – for handling and dividing dough
- Oven thermometer – for accurate temperature control
- Digital kitchen scale – for precise measurements
- Large mixing bowl – for mixing and bulk fermentation
- Bowl scraper – for getting dough out of bowls
- Bread lame – for scoring the dough
Nice-to-Have Equipment
- Spray bottle – for adding moisture during baking
- Dough whisk – for easier mixing
- Proofing container – for bulk fermentation
- Linen couche – for lining the banneton
- Cooling rack – for proper air circulation after baking
Preparing the Sourdough Starter
Building a Strong Foundation
Getting your starter in peak condition is crucial for this chocolate-cherry loaf. You’ll want your starter bubbling with activity to power through all those delicious add-ins. About 12-18 hours before mixing your dough, take your refrigerated starter and feed it with equal parts flour and water (100% hydration). A good feeding ratio is 1:2:2 (starter:flour:water) – so for this recipe, mix 50g starter with 100g bread flour and 100g water at around 75°F.
Finding the Sweet Spot
Timing is everything when working with wild yeast. Your starter should be at its peak – usually 4-6 hours after feeding at room temperature (around 70-75°F). Look for a starter that’s doubled in size, has a slightly domed surface, and smells pleasantly tangy. Drop a spoonful in water – if it floats, you’re ready to rock. If your kitchen runs cold, pop your starter in the oven with just the light on. Too warm, and those wild yeast buddies will burn through their food too quickly.
Troubleshooting Your Starter
Listen, even experienced bakers hit snags with their starters sometimes. If yours seems sluggish, try feeding it with 10% whole rye flour – those wild yeast organisms love rye. Getting too much hooch (that dark liquid on top)? Your starter’s hungry – increase your feeding ratio to 1:3:3. For this enriched dough with cocoa powder, you want your starter particularly vigorous, so don’t hesitate to give it an extra feeding cycle if it’s not showing enough oomph. The fermentation time might be a bit longer than usual due to the cocoa powder, so patience is your friend here.
Mixing the Dough
The Power of Autolyse
Start by combining your bread flour, whole wheat flour, and filtered water in your large bowl until no dry spots remain. Cover and let rest for an hour. This autolyse period allows the flour to fully hydrate, making your dough easier to handle and develop structure.
Building the Base Dough
Once your starter is at peak activity and the autolyse is complete, incorporate your bubbly starter, sea salt, and cocoa powder into the dough. Use wet hands to combine everything with a gentle pinching motion until well integrated.
The Art of Gentle Kneading
Perform stretch and folds every 30 minutes for the first 2 hours. This technique is particularly important with this enriched dough, as the cocoa powder can affect gluten development. Between sets, keep the dough at 75-80°F. You’ll notice improved strength and elasticity with each set.
Adding the Mix-ins
After the initial 2 hours of folds, when the dough shows good development, incorporate the chocolate chunks and dried cherries. Spread them across the surface and gently work them in, followed by two more sets of stretch and folds, 30 minutes apart. This ensures even distribution while maintaining the dough structure.
Reading Your Dough
The finished dough should be glossy and moderately elastic, with small bubbles beginning to form. The entire process typically takes 3-4 hours, but look for proper development rather than strictly following time. Cooler temperatures or the addition of cocoa powder may require extending the fermentation period.

Bulk Fermentation & Shaping
Finding the Sweet Spot for Fermentation
Now that your chocolate cherry-studded dough is fully mixed, we’re moving into the bulk fermentation phase. Transfer your dough to a clear, straight-sided container and mark its starting level with a rubber band. What we’re looking for here is that lovely, steady rise that tells us fermentation is humming along. Unlike regular sourdough, this enriched dough will show a more subtle expansion – aim for about a 30-40% increase in volume.
You’ll know you’ve hit the sweet spot when the dough’s surface shows a scatter of bubbles and takes on an almost pillowy quality. Give it a gentle poke – if it slowly springs back but leaves a slight indentation, you’re in the money. Don’t worry if you see some chocolate chunks creating little mountains under the surface – that’s all part of this loaf’s rustic charm.
The Art of Gentle Shaping
Time to transform this bubbly mass into a loaf that’s ready for its final rise. Lightly flour your work surface (emphasis on lightly – too much flour here can cause the seams to separate during baking). Using your bench scraper, guide the dough onto the counter with the smooth side down. This is where you’ll need a delicate touch – those chocolate chunks and cherries love to burst through the surface if you’re too aggressive.
For the pre-shape, lift each corner and fold it into the center, like you’re wrapping a present. Let this round rest uncovered for about 20 minutes – this relaxation period is crucial for achieving that final, picture-perfect shape. For the final shaping, flip your rested round smooth side up. Working from the top, gently pull the dough toward you, creating surface tension without squeezing out those precious pieces of chocolate and fruit. Roll it up, seam side up into your well-floured banneton.
Scoring for Success
After the final proof, when your dough feels airy but still structured, it’s time for the grand finale. Turn your proofed loaf onto a piece of parchment and grab your lame. Here’s a pro tip: the chocolate chunks can catch on your blade, so score with confidence and speed. A deep slash (think Grand Canyon, not kiddie pool) gives those chunks and cherries room to peek through during baking without exploding out the sides.
Baking the Bread
The Perfect Setup and Steam
Start by preheating your oven to 500°F with the Dutch oven inside – give it a full 45 minutes to get properly hot. This high initial temperature is crucial for achieving a proper oven spring. When you’re ready to bake, carefully transfer your scored loaf on its parchment paper into the screaming-hot Dutch oven. Put the lid on immediately to trap steam, which helps the crust stay flexible while the bread expands. The chocolate chunks might peek through your score marks during this process – that’s perfectly fine.
The Bake and Cool
After 20 minutes, lower the temperature to 450°F and remove the lid. This is when the real transformation happens. Over the next 20-25 minutes, watch as your loaf develops a deep, chocolate-colored crust and those cherries near the surface begin to caramelize. You’ll know it’s done when the bottom of the loaf sounds hollow when tapped. If the chocolate chunks on top start getting too dark, simply tent the loaf with foil.
Once baked, exercise patience and let your loaf cool completely on a wire rack for at least 2 hours. This cooling period is non-negotiable – it allows the chocolate chunks to set properly and helps the moisture distribute evenly throughout the crumb. Cutting into the loaf too soon will result in a gummy texture, undoing all your hard work.
Master Your Chocolate and Cherry Sourdough Bread
Creating the perfect chocolate cherry sourdough comes down to selecting premium ingredients like Dutch-processed cocoa and hand-chopped dark chocolate, plus understanding the key techniques that make it special. Keep your starter happy and nail that fermentation timing, and you’ll end up with a seriously impressive loaf. Trust us – the combo of chocolate and cherries is going to blow your mind. With this game plan in your back pocket, you’re all set to nail this chocolate cherry sourdough. Time to show off those baking skills!


