
Bland store-bought donuts just don’t cut it anymore. This sourdough donut recipe takes the classic treat to a whole new level. Many home bakers get stressed about making donuts—the complicated steps, the deep-frying drama—but it doesn’t have to be that way. The sourdough difference gives these treats amazing flavor complexity and a lighter texture that just can’t be matched. Plus, using your existing sourdough starter makes these donuts easier to digest and they stay fresh way longer. Whether you’re already a sourdough fan or just someone who loves a killer donut, this sourdough donut recipe will change your baking game.

Table of Contents
Ingredients & Substitutions
- 500g all-purpose flour (organic, unbleached preferred)
- 200g active sourdough starter (fed 4-6 hours before use)
- 60g unsalted butter, softened
- 3 large eggs, room temperature
- 100g granulated sugar
- 240ml whole milk, slightly warmed
- 1 teaspoon vanilla extract
- 1/2 teaspoon ground nutmeg
- 1 teaspoon salt
- Vegetable oil for frying (about 2 quarts)
Your flour choice dramatically impacts the final texture. While all-purpose works beautifully, bread flour delivers extra chewiness thanks to its higher protein content. Organic, unbleached flours produce noticeably better flavor and create that perfect marriage with your starter. For a whole grain twist, substitute up to 25% of your white flour with whole wheat for a nutty complexity that complements the sourdough tang.
The sourdough starter should be at peak activity — bubbly, doubled in size, and pass the float test. This usually happens 4-6 hours after feeding, depending on your kitchen’s temperature. If you’re short on the starter, you can stretch what you have by feeding it and waiting a bit longer.
For those with dietary restrictions, several substitutions work wonderfully. Can’t do dairy? Coconut oil makes a surprisingly delicious substitute for butter, imparting a subtle tropical note that pairs beautifully with sourdough’s tanginess. Plant-based butter alternatives work too, just look for ones without excessive water content.
If you’re avoiding eggs, a mixture of 1/4 cup applesauce and 1 tablespoon cornstarch can replace each egg, though your donuts might be slightly denser. For a gluten-free version, a good quality cup-for-cup gluten-free blend can work, but add a tablespoon of psyllium husk powder to help with structure.
Related: Easy Sourdough Pumpkin Donuts for Fall
Preparing the Sourdough Starter
For donut-making, you need a particularly active starter with lots of wild yeast doing its fermentation magic. About 12-18 hours before the donut day, take your refrigerated starter and wake it up. Feed it equal parts flour and water (by weight), then let it do its thing at room temperature. For extra oomph, give it a second feeding 4-6 hours before mixing your dough (50g starter + 100g flour + 100g water).
Your starter is ready when it’s doubled in size, looks bubbly, and passes the float test – drop a small spoonful in water and it should float!
Starter looking sluggish? Try warming it up to 75-80°F (near the stove works great), add a pinch of rye flour to your feeding, or switch to filtered water if you suspect chlorine is the culprit.
Don’t toss that starter discard! Save it for pancakes, crackers, or sourdough chocolate cake instead. When your starter smells pleasantly tangy with yogurt-like notes and looks like a bubbling cauldron, you’re all set to make those killer donuts everyone will rave about.
Making the Dough
Here’s how to create that perfect sourdough donut dough:
- Combine your bubbly starter with warm milk and whisked eggs in a large bowl
- In a separate bowl, cream the butter and sugar until just combined
- Add the butter mixture to your wet ingredients along with vanilla and nutmeg
- Mix in your flour and salt until everything comes together
You’re looking for a soft, slightly sticky dough that feels alive in your hands. Unlike regular bread dough, sourdough donuts need higher hydration – tacky but not glue-like. Too sticky? Add flour tablespoon by tablespoon. Too dry? A splash more milk works wonders.
While stand mixers make this job easy (about 5 minutes on medium-low), hand kneading creates a connection with your dough. Work it for 8-10 minutes until it feels like a baby’s cheek – soft, supple, and slightly giving when poked. Don’t over-knead! We want some gluten development but not a bread-tight structure.
Place your dough in a lightly oiled bowl, cover with a damp kitchen towel, and let it rise for 3-4 hours (or overnight in the fridge for more tang). The dough should nearly double, looking puffy and full of life.
Related: Baked Sourdough Donuts Recipe
Fermentation & Proofing
This is where your sourdough donuts develop their character! After mixing, your dough needs time to ferment – a longer process than with commercial yeast, but so worth it. The bulk fermentation should last 3-5 hours at room temperature or overnight in the fridge for extra tang.
Look for a 50-75% increase in volume and a few bubbles on the surface. Try the poke test – if your finger leaves a slight dent that slowly springs back, you’re golden!
Ambient temperature makes a huge difference in how those fermentation gases develop. Aim for 75-78°F for the perfect balance of flavor and texture. Too cold? Your donuts will take forever. Too warm? They’ll ferment too quickly without developing flavor. No fancy proofing box? Your oven with just the light on works great!
After shaping, the final proof takes 1-3 hours at room temperature. They’re ready to fry when they wobble gently like water balloons when you nudge the tray. For overnight convenience, refrigerate shaped donuts for 8-12 hours, then let them sit at room temperature for 30 minutes before frying. Remember – you can’t rush fermentation, but you can over-ferment!
Shaping the Donuts
Turn your dough onto a lightly floured surface and grab your rolling pin. Roll the dough to about ½-inch thickness – not too thin or you’ll lose that pillowy texture everyone loves.
For perfect rounds, use a 3½-inch biscuit cutter for the outer circle and a 1-inch cutter for the center hole. Press straight down without twisting to maintain those clean edges that rise beautifully. A dough scraper is invaluable for transferring your delicate circles to parchment-lined trays.
Don’t have proper cutters? No problem! Drinking glasses and bottle caps work in a pinch. For a more rustic approach, try hand-shaping: divide the dough into 2-ounce balls, then poke your finger through the center and gently widen the hole.
Whichever method you choose, aim for uniformity so they cook evenly. And those scraps? Gather them up, let them rest for 10 minutes, then re-roll for extra donuts.
Frying vs. Baking
There’s something magical about watching sourdough rings transform in hot oil, but baking offers a worthy alternative. For authentic donut shop flavor, deep-frying delivers that irresistible crispy-outside, pillowy-inside contrast when done right.
Keep your oil between 350-365°F using grapeseed, peanut, or refined coconut oil. A heavy Dutch oven works beautifully, but don’t crowd it – fry 2-3 donuts at a time for about 2-3 minutes per side until golden amber.
Not feeling the hot oil? Baking at 375°F for 12-15 minutes creates delicious results with less mess. A light butter brush helps develop that golden crust, though the texture becomes more bread-like than traditional donuts.
Fried versions give you that classic experience, while baked ones are lighter on calories and won’t leave your kitchen smelling like a fryer for days. Your sourdough base works beautifully either way. Remember that baked donuts benefit from slightly higher hydration dough to prevent dryness during the longer cooking process.
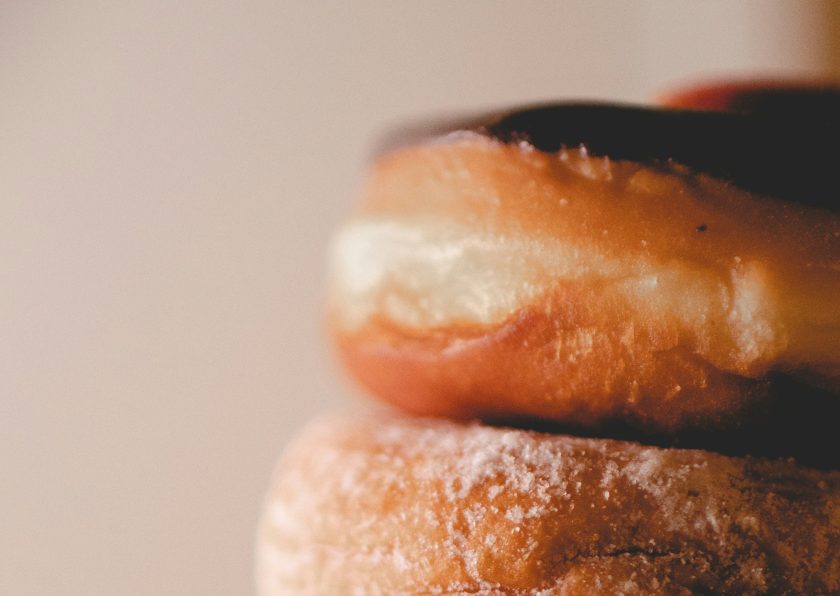
Glazing & Toppings
Classic Glazes
A simple vanilla glaze forms the foundation of donut finishing: combine 2 cups sifted powdered sugar, ¼ cup milk, and 1 teaspoon vanilla extract. Apply to slightly warm donuts for optimal adhesion. For the chocolate glaze, melt 4 ounces of quality chocolate with 3 tablespoons of butter, then incorporate 1 cup of powdered sugar and sufficient milk for proper consistency. Maple glaze offers another option: blend pure maple syrup with powdered sugar and a pinch of salt to complement the sourdough tang.
Flavor Combinations
Elevate standard glazes with flavor infusions such as cardamom, orange blossom water, or espresso powder. Fruit glazes provide seasonal variety—reduce ½ cup fresh berries with sugar until concentrated, strain, then incorporate into powdered sugar base. Brown butter glaze delivers caramelized notes that enhance the donut’s flavor profile.
Beyond Glazes: Creative Toppings
Textural elements transform glazed donuts into gourmet creations. Toasted coconut flakes, crushed freeze-dried berries, and candied citrus zest offer contrasting textures and flavors. Chopped nuts, cacao nibs, or crushed pretzels provide crunch. Apply toppings while the glaze remains tacky for proper adhesion. Remember that sometimes a simple finish best highlights the complex sourdough flavor you’ve developed through the fermentation process.

Donut Revolution: The Sourdough Way!
Sourdough donuts offer incredible flavor that conventional recipes can’t match, as the active starter creates an extraordinary taste through natural fermentation. Choose deep-fried for a crispy texture or baked for a healthier option, experiment with different flours to create your perfect donut. You can try various glazes from classic vanilla to creative flavor combinations. Start your sourdough journey today and enjoy these delicious, tangy treats!
FAQs – The Ultimate Sourdough Donut Recipe
Is sourdough good for donuts?
Yes, sourdough is excellent for donuts. It creates a more complex flavor profile with a pleasant tanginess that balances the sweetness. Sourdough donuts also have a lighter, airier texture and better chew. The natural fermentation process makes them easier to digest and extends their shelf life compared to conventional donuts.
What is the difference between sourdough donuts and regular donuts?
Sourdough donuts use a natural fermentation process with wild yeast instead of commercial yeast. They have a distinctive tangy flavor, lighter texture, and a more complex taste profile. Sourdough donuts take longer to prepare due to fermentation time but are easier to digest, have better quality, and develop a more nuanced flavor with a perfect crumb structure.
What is the best flour for sourdough donuts?
Bread flour is ideal for sourdough donuts because its higher protein content (12-14%) provides the necessary structure and chewiness. For a softer texture, use a mix of bread flour and all-purpose flour. Organic, unbleached flour produces the best results, as it contains more natural enzymes that support fermentation and enhance flavor development.


