
Learn how to compost at home, what to compost (and what to skip!), plus tips for collecting food waste and dealing with problems. Create amazing soil for your garden!

Each year, our family enjoys having a vegetable garden on our homestead. For most families, that means considering how much space you have versus what you want to grow, and strategic planting to ensure the plants get enough sun and water to produce a nice harvest.
Grocery-budget-conscious families may also consider what the most expensive produce to buy in their area is and try to grow it instead to maximize savings.
My family is a little different, though. The first thing we do before any plants or seeds go into our garden is tend to the compost pile to create nutrient-rich compost to add to our garden soil. This guide will teach you all things composting!
WHAT IS COMPOST?
Before we start, you might be asking, “What is compost and why do I want it?”
Compost is a mixture of all kinds of organic matter, like food scraps and outdoor material (leaves, grass clippings, etc.), that breaks down into nutrient-rich soil that you can add to your existing garden to help your plants grow better. It’s basically nature’s way of recycling!
As microbes break down the organic materials in your compost, it heats up. That’s good! The warmth keeps the action happening. The ideal internal temperature for a compost pile is between 130 and 140 degrees, which will happen without much effort on your part, even in cooler weather. Turning the compost monthly helps everything break down evenly.
WHY SHOULD YOU COMPOST?
Aside from the environmental benefits of composting, which breaks down organic materials and transforms them into rich, fertilizing soil…composting is also:
- Free. Think pricey, organic-rich soil you’d have to pay big bucks for. When you invest a little time learning how to compost, it’s all yours, for free!
- Fun for the kids. You’ll win the best mom or dad award when you let your kids sift through the finished and half-finished compost and see what creatures have made their homes there. It’s got all the makings of a winning science fair project!
- Composting reduces your household trash. Instead of decomposing organic greens and brown materials sitting in the trash can for up to a week, the kitchen scraps can start decomposing right away in the compost pile.
- Foolproof. Your garden plants may wither and die, but composting at home is hard to mess up. You dump in your organic matter and forget about it until it’s time to harvest the rich, crumbly results of your labor (or lack thereof!). That’s my kind of project!

BASIC SUPPLIES FOR COMPOSTING
To start composting at home, you’ll need:
- A pail for the kitchen to collect scraps
- Compost bin (optional)
- Spot in the yard for a compost pile or compost pit
HOW TO COMPOST: GETTING STARTED
Getting started composting is SUPER easy. Once you’ve got your basic supplies, you’re ready to start.
- Pick a spot for your indoor compost pail. I keep mine under my kitchen sink.
- Tell your family the plan. You might want to leave the pail out on the counter or near the garbage can for a couple of weeks to help everyone remember not to throw away those apple cores and banana peels. After a while, it will become second nature for everyone.
- Pick a spot for your outdoor compost pit or compost bin. You want it to be close enough to the house that it’s not a big deal to carry the pail out every day. Ours is right next to our vegetable garden.
USING A WORM COMPOST BIN
Some people choose to start vermicomposting, or using worms (red wigglers specifically), to help speed up the composting process in a worm bin. It can be a store-bought one or just a big Tupperware bin.
Worm composting is done by adding vegetable scraps, fruit scraps, green materials, and dried leaves to a bin of soil and allowing the worms to digest the organic material as it passes through their bodies while they move and wiggle around. A worm compost bin needs to be between 59 and 77 degrees, so you may need to insulate it or keep it inside depending on the climate where you live.
If you have a compost pit in the yard, earthworms will usually find their way to it naturally.

WHAT CAN YOU PUT IN A COMPOST BIN?
For the best compost, you want a mixture of carbon-rich browns (yard waste) and nitrogen-rich greens (food scraps), plus air circulation and a small amount of water. Smaller pieces will break down faster than large items.
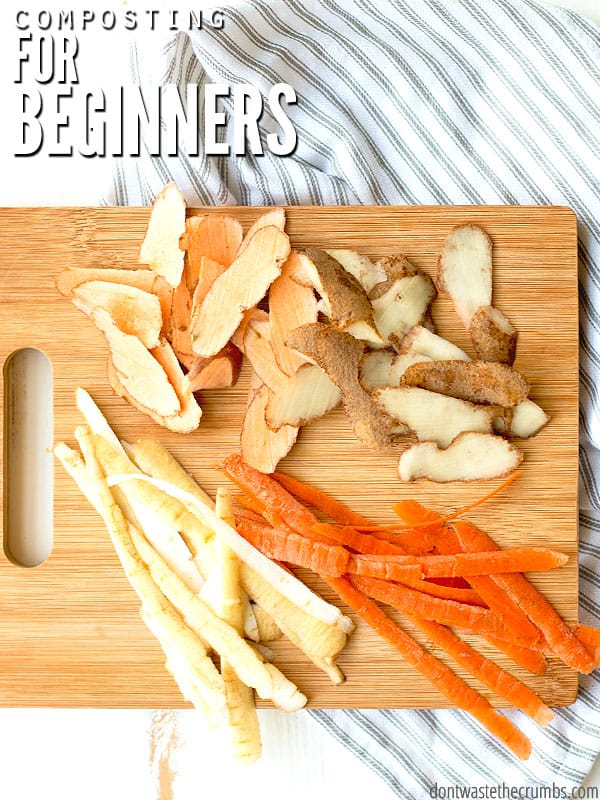
- Kitchen waste – Mainly produce trimmings. Think onion skins, celery roots (if you’re not re-growing them or saving them for Chicken Stock), apple cores, banana peels, and potato peels, to name a few.
- Coffee grounds
- Used tea bags
- Fresh grass clippings
- Dead leaves
- Straw
- Sawdust
- Garden waste
DON’T COMPOST THESE THINGS:
- Pits from stone fruits like peaches or avocados – they won’t break down well
- Meat or bones (use these to make stock instead!)
- Leftovers that aren’t primarily plant material
- Tougher plant material from your garden like branches, stalks, or wood chips (it takes too long to break down)
- Yard waste that has been treated with pesticides or chemical fertilizer
- Weed seeds and roots – you might inadvertently spread them to your garden soil
- Diseased plants – again, you don’t want to spread that to your garden!

COMPOST HOW-TO
Once you’re set up, follow this compost how-to guide to keep your compost going.
- Start collecting compostable material and add it to your pile.
- Empty your pail into the pile (or compost bin) daily. It’s the perfect chore for the kiddos!
- Turn your compost pile. Every month or so, grab your pitchfork or a shovel and mix your pile up a bit. This helps speed up the decomposition process, heats your pile, and keeps away any unwanted pests and weeds. Note: If you are using a compost bin, you’ll just turn it inside the bin.
- Harvest your finished compost. Over time, the material at the bottom of your pile (or compost bin) will start to look like the nicest, richest soil you’ve ever seen. When you don’t see any more recognizable kitchen scraps, the compost is ready to be used.
- Harvest your compost from the bottom of your pile (or bin) once or twice a year. Whatever isn’t yet ready just goes back into the pile to continue breaking down.
- Spread your finished compost on your garden beds or use it in container gardens.
Note: You probably don’t want to bring your fresh compost into the house since it will likely be home to many little critters.
POTENTIAL PROBLEMS WITH COMPOSTING
What issues can you run into when you start composting? Let’s talk about them.
- Odor. Before we started composting, my husband was concerned it would be a smelly, fly-attracting affair. But that was never really a problem. Ours tends to have a nice earthy smell from all the good bacteria.
- If your pile does start to stink, it might have too much moisture. Just give it a quick turn and add some grass clippings or dry leaves if available.
- Insects. We have a large lawn, so I keep a separate pile of cut grass and toss in a handful or two over the top of any food scraps that are attracting bugs.
- Wash out your indoor compost pail when it gets icky (about every other day for us).
- Not Enough Space. Composting only requires 9 square feet of space, or less if you choose a smaller space-saving bin. And since it’s just about the easiest garden task you can undertake, it’s an excellent use of your yard space.
- Animals. Depending on where you live, raccoons or rodents may be attracted to your composting pit.
- We haven’t had problems, but if you anticipate them, you can either get an animal-resistant compost bin or turn your layer pile more regularly (a hot pile isn’t as attractive to animals).
- Messy. Some people think composting is messy, but it’s no worse than taking out the trash. Plus, you don’t have that food rotting in the garbage can waiting for garbage pickup.

FAQS FOR COMPOSTING PITS
Is home composting easy?
Yes! As an accompaniment to gardening, it’s a very worthwhile routine that is fun for the whole family!
How long does it take to compost?
Different organic materials take different lengths of time to transform into compost. Food waste is quicker than twigs or sticks. Paper from coffee filters or tea bags takes longer than organic waste. The bottom of the pile or bin will break down first, so this is why it is important to turn the pile monthly.
Can I put moldy fruit in my compost?
Yes! You can add moldy vegetables and fruit to your compost. Mold cells are microorganisms that take care of decomposition.
Can you compost dairy products?
Yes, and no. Dairy, such as cheese, is high in fat which can slow down the composting process. It also doesn’t have a lot of material that will compost. If you mix dairy with dry material it can be blended into compost.
What is a composting tumbler?
A compost tumbler is a handy bin with a handle that you can turn by cranking the handle around, making turning the compost even easier. You can find them in a garden supply shop or online. These are especially helpful for people with limited space, and they tend not to smell or attract insects.
Can you compost in cold weather?
Yes and no. You can continue to add to your compost pit or compost bin over the winter. If it’s too cold outside (below freezing), your compost may not break down very quickly or at all. However, once the temperature heats up again, the composting process will pick back up. Keep your pile covered with grass clippings to avoid pests until it warms back up.
MORE GARDENING TIPS
Fight Inflation Workshop!
Sign up for my FREE Fight Inflation Workshop and learn simple strategies to save money, even with rising food costs!


