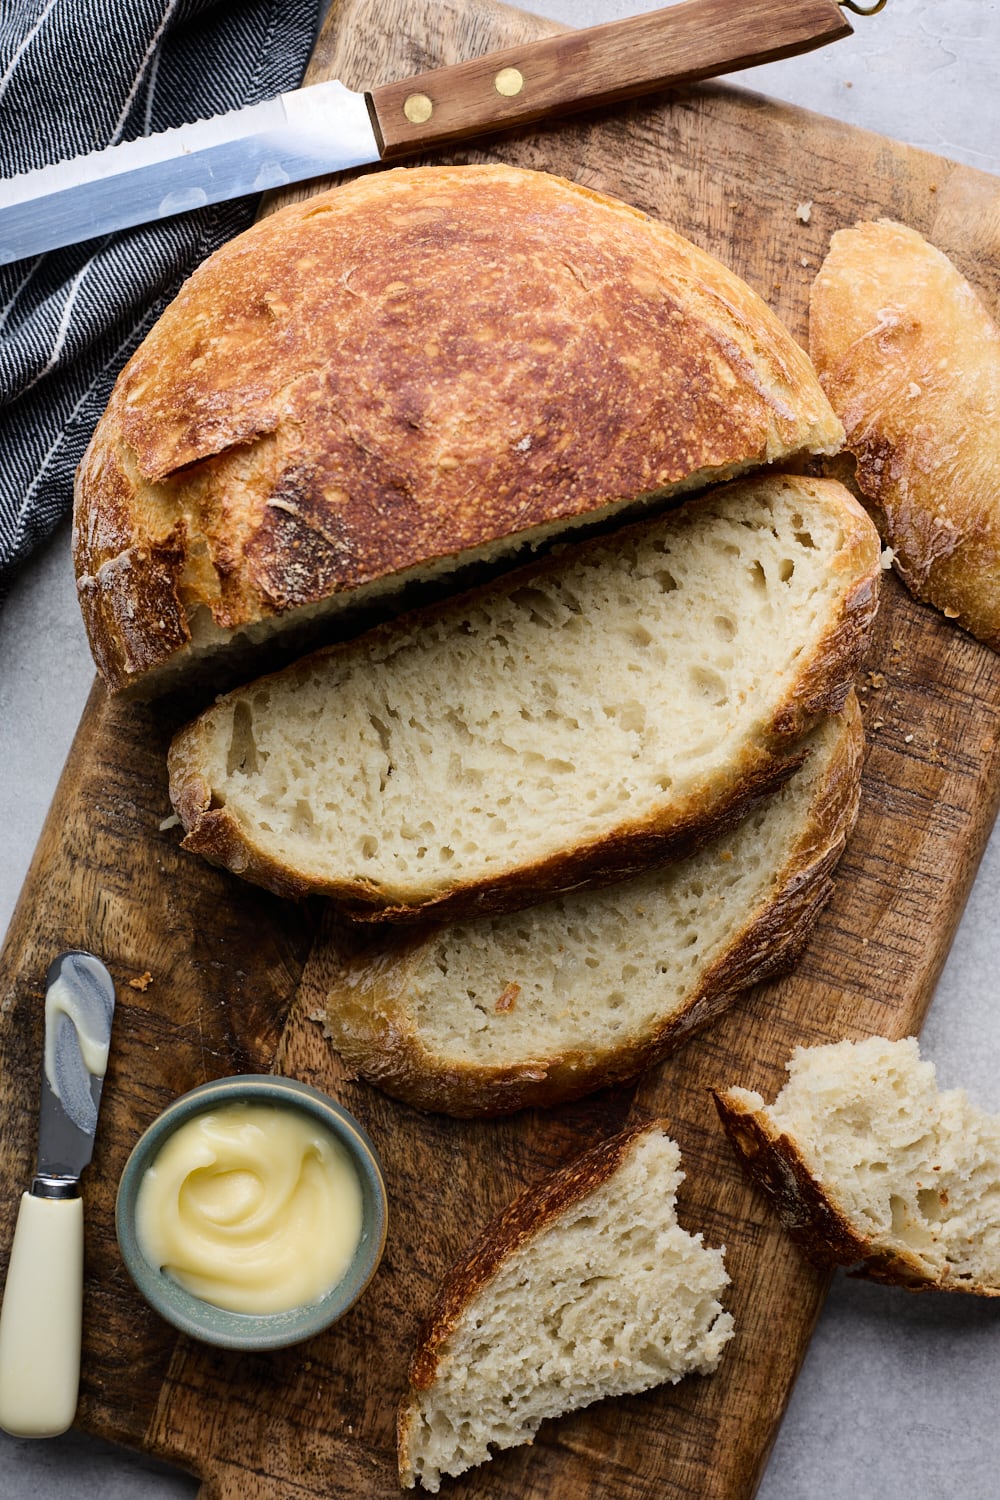
This No Knead Bread recipe is my absolute favorite recipe for homemade bread that is tender on the inside with a nice crusty exterior. It’s so perfect with soups, stews, sandwiches and even fresh toast. There’s nothing like tearing into a freshly baked loaf like this. It’s the easiest yeasted bread you will ever make – I would even call it a no fail bread as well. Simply follow the easy instructions and get a perfectly rounded golden loaf every time. The perfect bread for beginners or lazy bread bakers like me!

Why You Will Love This No Knead Dutch Oven Bread Recipe
- Easy steps
- Simple ingredients
- Just a 3 hour rise
- No kneading required – simply stirring ingredients
- Very forgiving recipe – difficult to mess up
- Crispy exterior with tender crumb
No Knead Bread Recipe Ingredients
- FLOUR: Plain all purpose flour is what I use all the time but this recipe will work with whole wheat flour and bread flour too or even half and half of either.
- SALT: I use plain table salt or sea salt
- YEAST: For this recipe I use Rapid Yeast or Instant yeast. I end to use the dry yeast since that is typically what I always have on hand.
- WATER: The water must be hot for this recipe – not burning hot but hotter than warm. I always use a thermometer for this recipe. As long as the temperature is between 125-130 degrees F you are good. I tend to use hot tap water and just microwave it for a few seconds at a time to get it to the perfect warmth. (I realize the temp may seem high but it works every single time. Make sure your yeast is not expired!)
- EXTRA ADD INS: Feel free to fold in some raisins dried cranberries, chopped candied ginger, fresh herbs like rosemary, & thyme, olives, garlic, nuts, and seeds after the first proof.
How To Make No Knead Dutch Oven Bread:
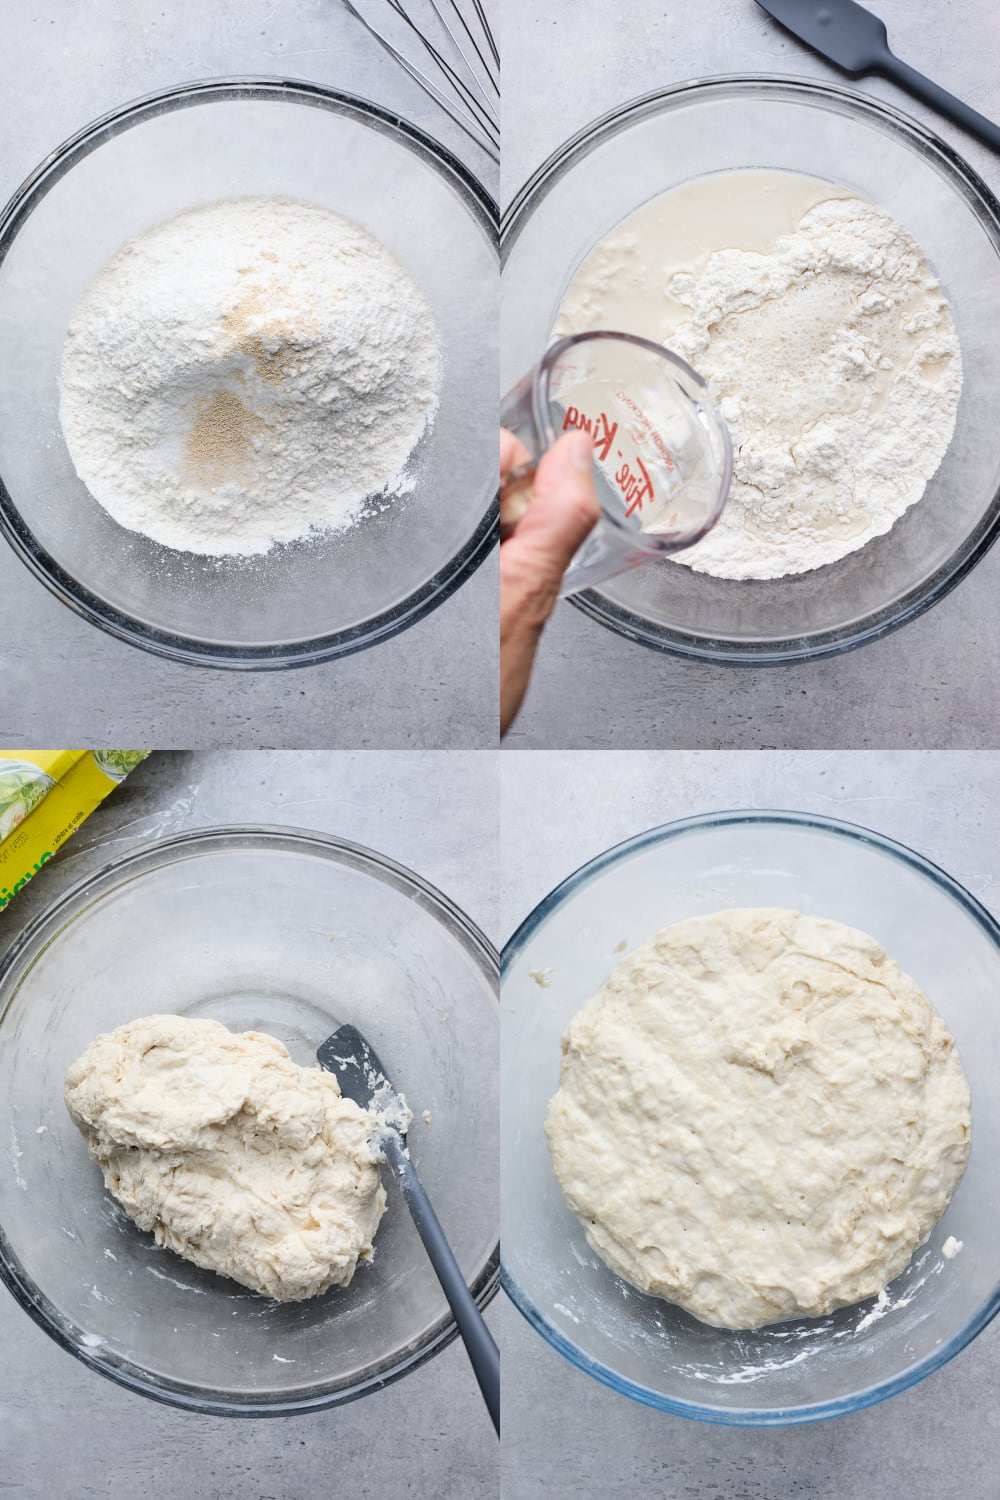
- Whisk Dry Ingredients: Flour, yeast, and salt in a large bowl
- Stir in Water: Stir the water into the flour mixture really well scraping down the sides and bottom of the bowl to incorporate all of the flour
- Cover & Allow to Rise: Cover bowl with plastic wrap and let sit at room temperature for 3 hours til it’s just about double in size and bubbly on top.
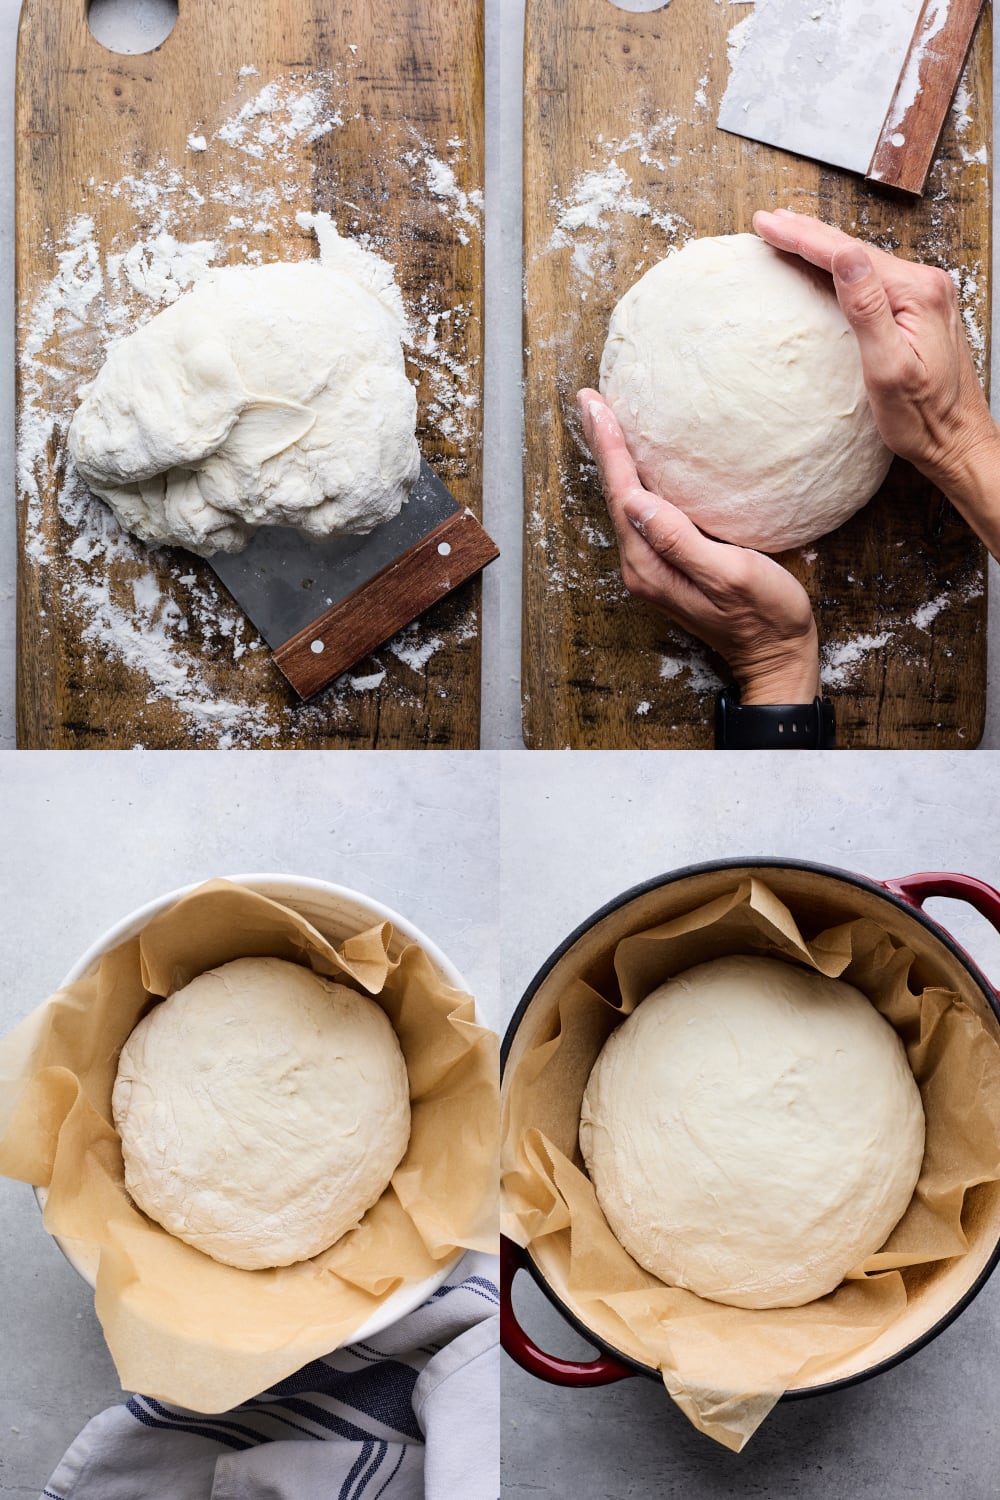
- Fold Dough: Scrape dough onto floured surface and fold it onto its self 9-10 times then shape into ball tucking the edges underneath it to create round ball if needed
- Transfer to Lined Bowl: Line a bowl with a piece of parchment paper and transfer dough ball into the middle of it and then cover with towel
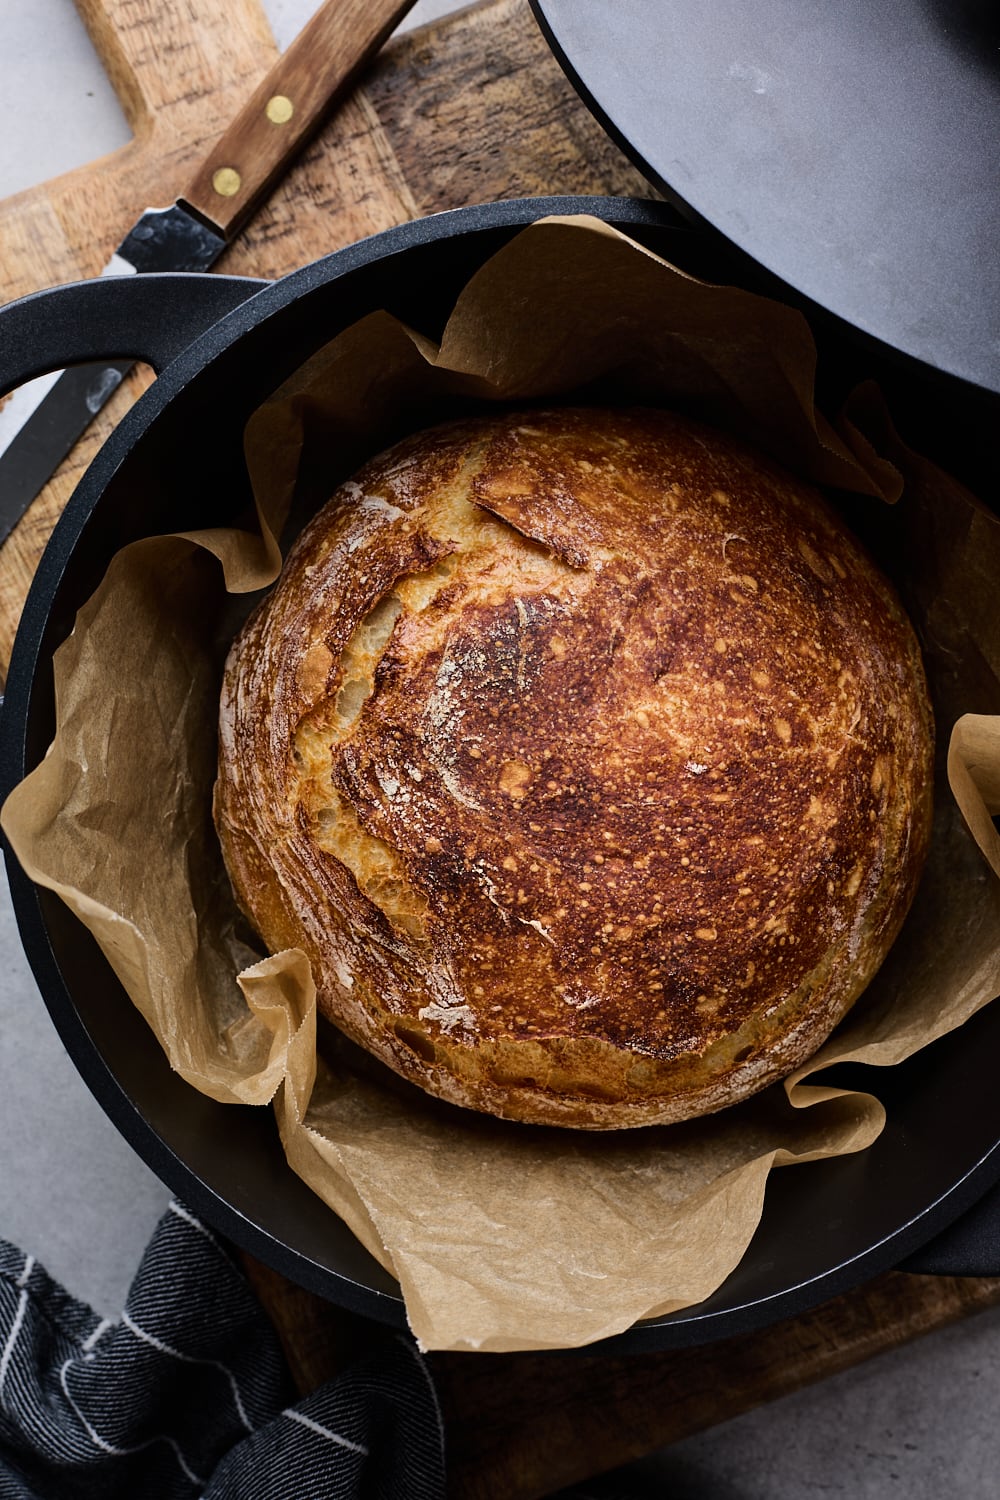
- Preheat Oven: Place Dutch oven in the middle of cold oven. Turn oven on and preheat to correct temperature while your dough does its second rise
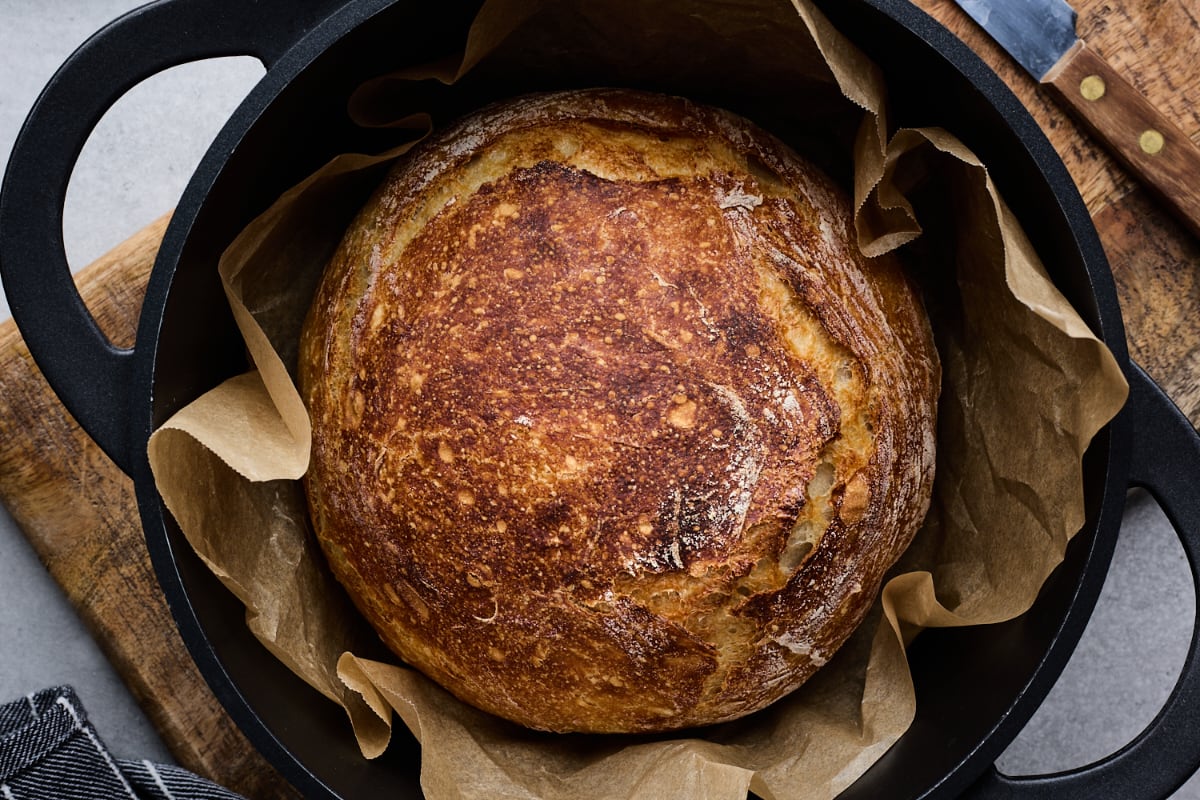
- Bake Bread: Remove hot dutch oven from oven with oven gloves and remove lid, lift dough from bowl with the parchment paper and place in dutch oven. Place lid back on and transfer to oven and bake with lid for 30 mins then 10-15 mins with lid removed.
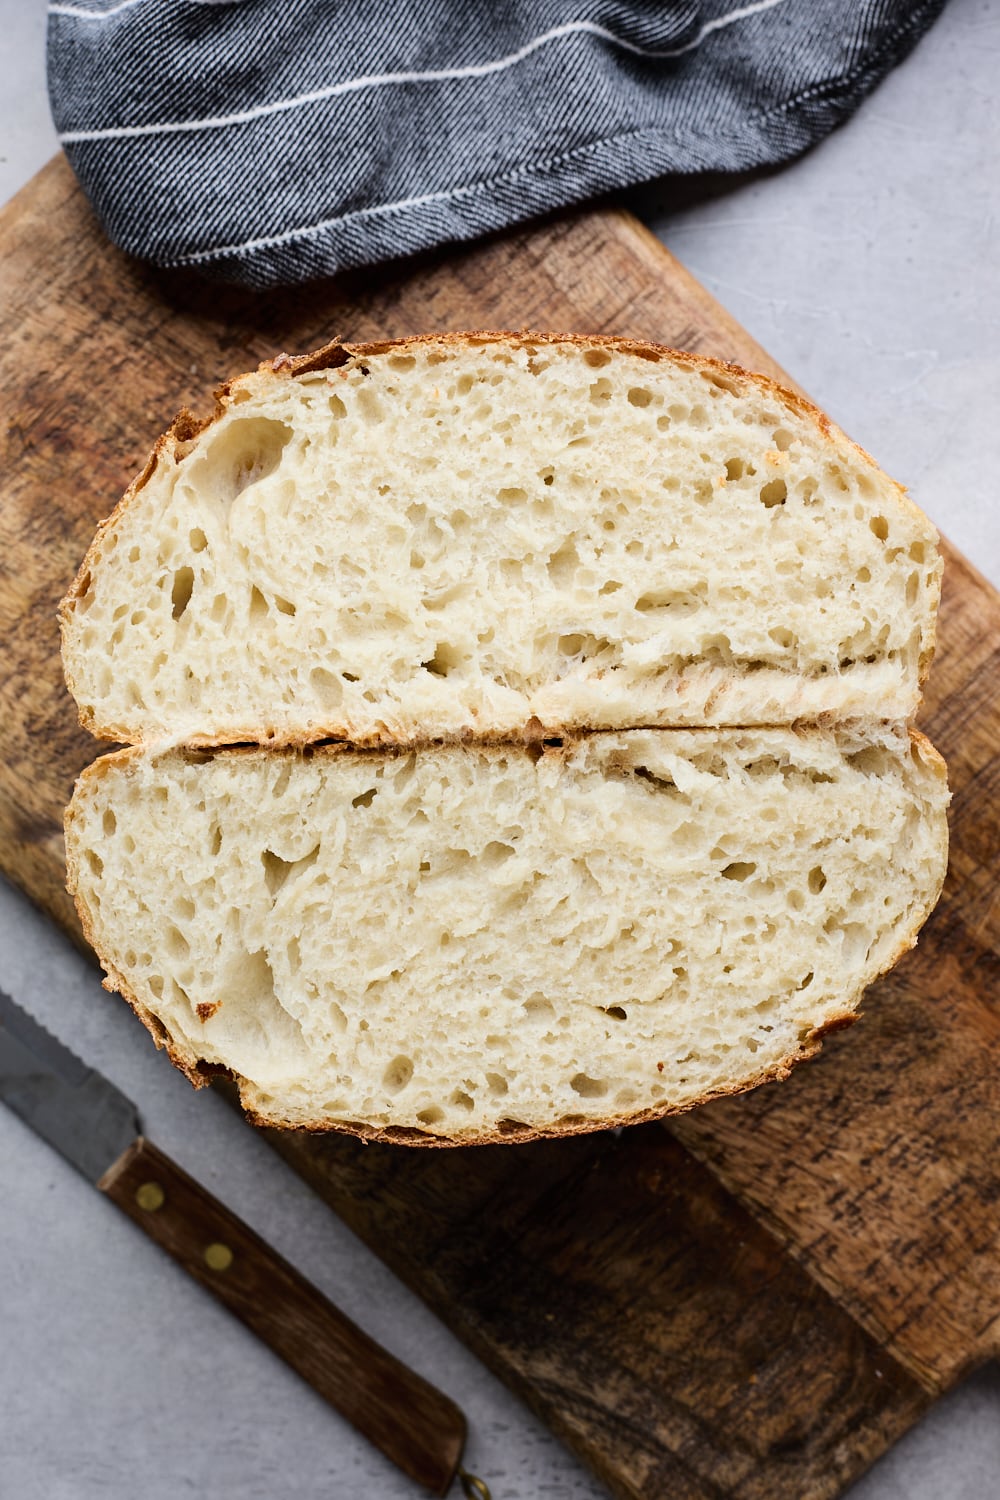
- Cool: Turn out bread on a wire rack and cool completely before you slice it.
TIPS to Ensure You Bake a Great Loaf
- Ensure that you are using a thermometer for measuring the water temperature
- Make sure your oven is preheated to the proper temp otherwise your bread will need to take longer to bake than written in recipe – I also use my oven thermometer to ensure the oven temp is calibrated.
- No dutch oven no problem: use an oven-safe pan with tight-fitting lid. Use a cast iron skillet/ cast iron pot with lid, stainless steel pot with lid, corning ware or pyrex baking dish with lid (ensure they can endure the high temps), roasting pan with lid, or even pizza stone with stainless steel bowl as a lid. Anything you use must be oven safe, can handle the high temperatures and can hold at least 3½ t 5½ qts or 9-10 inch deep pot
- Fluff flour or aerate it using a whisk or a fork in bag or in jar before measuring (no need to sift) to help ensure accurate measuring and that the flour is’nt packed. I don’t usually use a scale – just my standard measuring cups and this recipe turns out every single time!
- Use a meat probe/thermometer if you are unsure if bread is done to make sure it’s 207F or 96C to confirm it’s finished baking.
- You need to let the loaf cool completely, at least 15-60 mins before slicing. The dough keeps baking even after you take it out of the oven and to ensure a lovely fluffy crumb, you need to let it cool.
Trouble Shooting No Knead Bread
- This is a super forgiving dough – too stiff, add water. Too wet, add flour. If your dough is too dry after mixing climate can be a factor – if your kitchen is like our place and has super dry air you might need to adjust water. Feel free to mix in a little more water a tablespoon at a time until it’s a mildly loose dough, then cover it and let it rise. I have found this recipe very forgiving. I don’t weigh my flour but I do loosen it up or aerate/fluff it with a fork before measuring.
- The top surface of the bread usually cracks or splits on its own but you can slash it just before it goes in the oven.
- Dough not rising? Move it to a warmer place especially if your kitchen is colder than room temperature. I would say this doesn’t happen often but maybe only if my kitchen is super cold.
No Knead Bread Storage & Freezing
- STORAGE: This bread is great fresh for 2 days, then after that it is better warmed or toasted. Keep in an airtight container or ziplock bag.
- FREEZING: Once Bread is completely cool, wrap tight in plastic wrap and place in an airtight container or bag in the freezer and freeze for up to 3 months.
Recipe
Servings: 1 Loaf
Prep Time: 10 mins
Bake Time: 45 mins
Non Active Time: 3½ hours for proofing
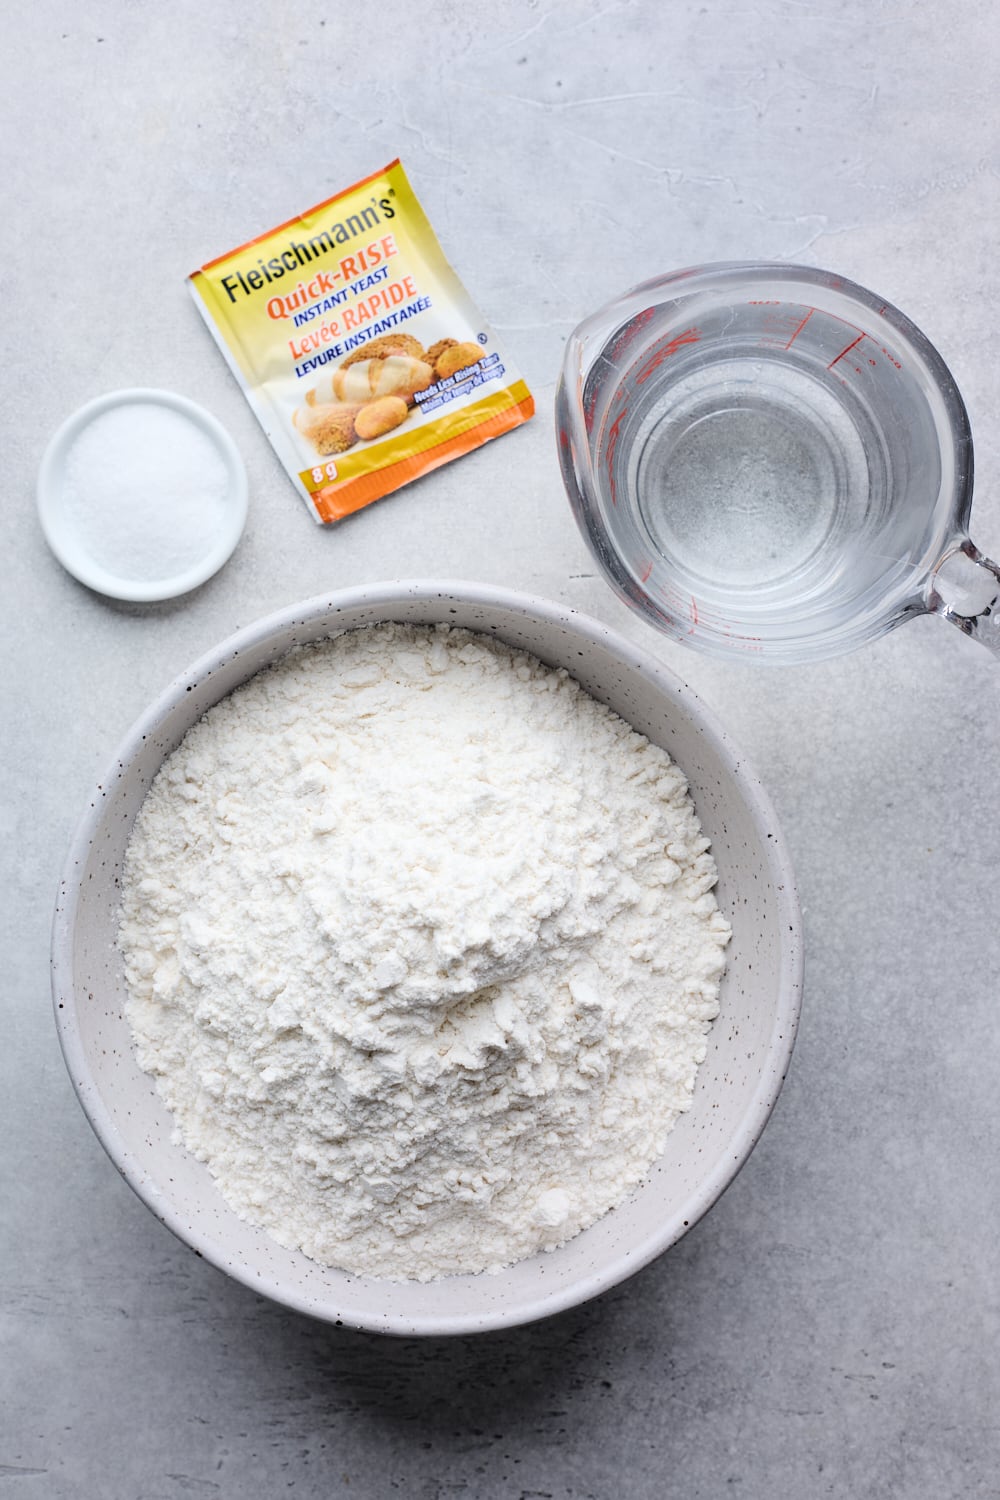
Ingredients
- 3 cups all-purpose flour (aerate flour before measuring)
- ¼ teaspoon instant yeast /Rapid Rise
- 1½ teaspoons salt
- 1½ cups hot water, not boiling or scalding (approximately 125-130°F)
Directions
- In a large mixing bowl whisk together flour, yeast and salt until well combined.
- Stir in water with a wooden spoon or spatula until it’s well combined or until flour is absorbed and you have a sticky and shaggy dough. I like to really scrape the bottom and sides of the bowl clean.
- Cover bowl with plastic wrap and let stand at room temperature and allow dough rise for 3 hours. After 3 hours dough will become puffy just about double size (not quite double), jiggles when you shake it and bubbly on the top.
- Transfer dough onto a well-floured surface and sprinkle dough with a little flour. The dough will be sticky. Using a dough scraper fold dough over 10-12 times incorporating it into the flour you dusted on the surface & shape into a rough ball.
- Place into a parchment paper-lined bowl (make sure paper is unwaxed and oven safe) and cover with a clean towel. Let stand on counter top for about 35 minutes and until oven is preheated.
- While bread is resting, place 5½ quart Dutch oven with lid in cold oven and preheat oven with pan in it to 450°F. (Ensure every part of your dutch oven is oven proof – if the knob on lid is plastic wrap the handle in a double layer of wet paper towels and then cover the towels with a double layer of foil before placing in oven).
- When oven reaches 450°F carefully using oven gloves, remove Dutch oven from oven and remove lid. Uncover dough and carefully transfer to hot Dutch oven, with parchment paper beneath. Cover Dutch oven and return to oven using oven gloves, and bake bread for 30 minutes.
- After 30 minutes, remove lid and slip off parchment paper. Return dutch oven uncovered, to oven and bake10 – 15 more minutes or until bread is deep golden brown and finished baking.
- Turn out bread onto cooling rack and allow to cool at least 15 minutes before slicing.
Recipe Notes
- Once the second rise is complete and you transfer the dough into lined bowl- you can leave it as is for up to 1-2 hours but not really much more than that. So if you end up having to leave the house unexpectedly don’t stress -after the first rise you are good.
- Ensure you bake the bread on middle or close to the middle rack of the oven, not on the lowest rack as it could cause the bottom of the bread to over bake
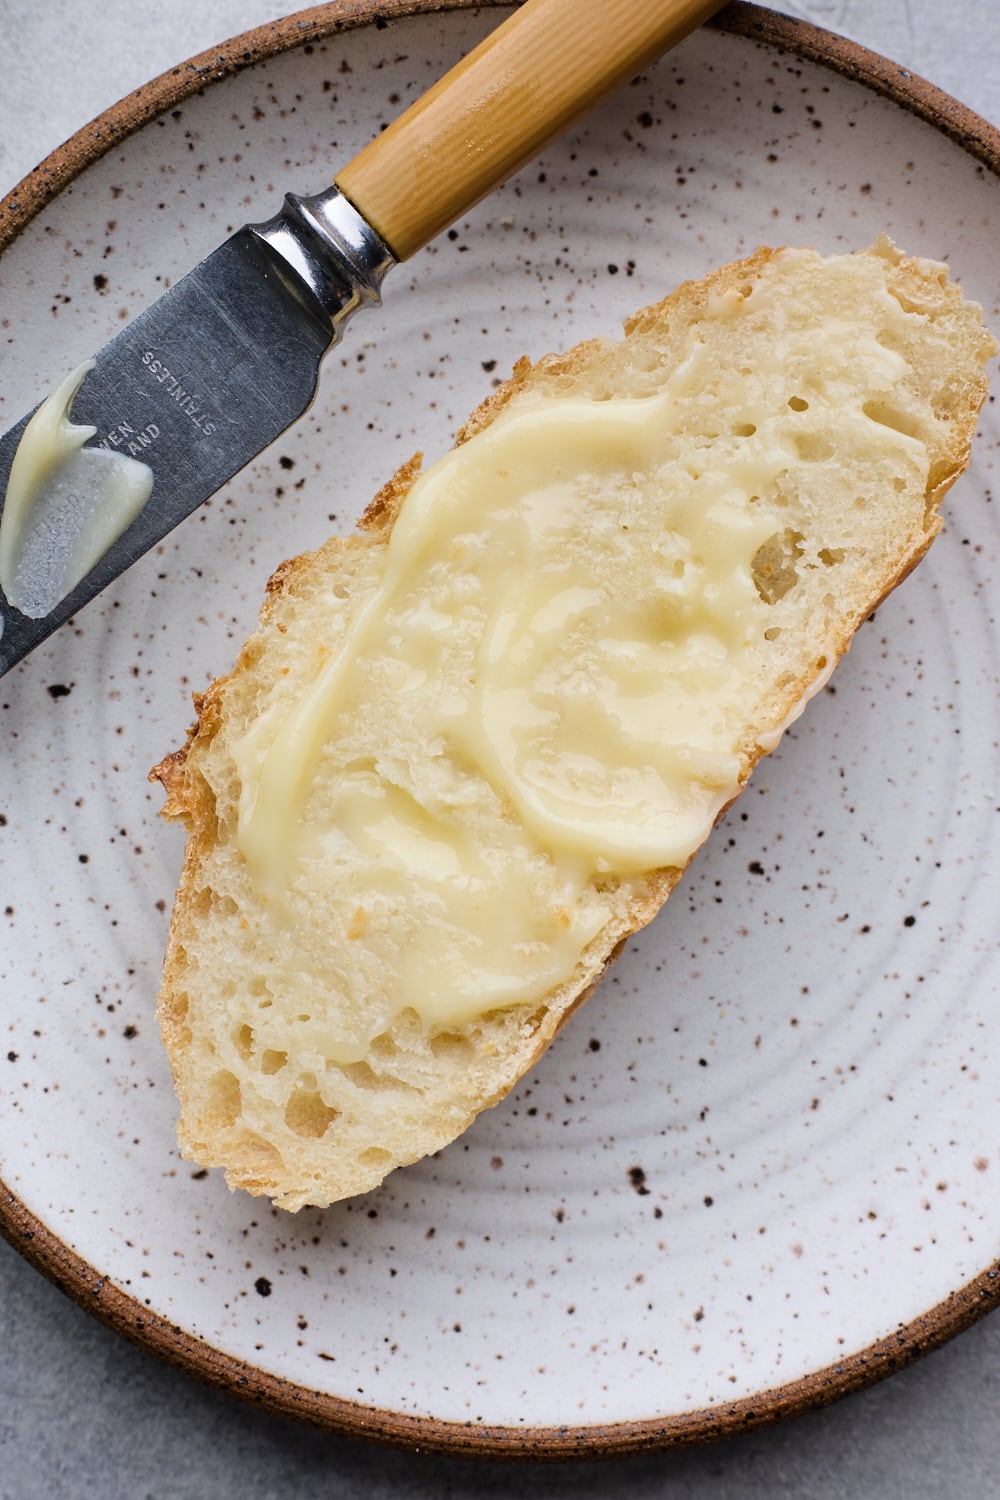
- We love this bread with soups stew, sandwiches, slathered with honey butter or plain butter with honey and cinnamon or with cheese.
- Make sure to read tips and trouble shooting sections of blog post before you get started ensurea perfect bake up every time.