
This Oreo Icebox Cake is the dessert you’ll want to make all summer long. It’s an easy make-ahead dessert and you don’t ever have to turn on your oven.

With just six ingredients and less than thirty minutes, you can make this no-bake dessert. The hardest part is waiting a few hours for the refrigerator to do its magic and tranform the ingredients into a magical cake.
This Oreo Icebox Cake is a take on the retro dessert made by combining sweetened whipped cream and chocolate cookies. Icebox cakes became popular when the electric icebox was introduced and various recipes for the cakes were promoted to encourage the adoption of the new appliance.
The most popular recipe was on the back of the package of Nabisco’s Famous Chocolate Wafers. Sadly, Nabisco discontinued the cookies in 2023, creating a panic among those who loved the icebox cake. In addition, the Nabisco cookies were essential for making a chocolate cookie pie crust.
I have actually made my own chocolate wafer cookies and they are delicious, however, it’s a lot more work. I have also heard that the Deweys brand is a good substitute.
Fortunately, you don’t have to limit yourself to chocolate wafers. All you need are some crispy cookies and sweetened whipped cream to make an ice box cake. Layer the cookies and the cream and refrigerate for several hours. The cookies will soften from the moisture in the cream to create a sliceable dessert.

Ingredients You Will Need for This Icebox Cake:
Oreo Cookies: You will need about 50 Oreos, typically a large family-sized package. If you like, you can try a different flavor of Oreo.
Cream Cheese.
Whipping Cream.
Confectioner’s Sugar.
Vanilla Extract.
Berries: Such as raspberries, blueberries, blackberries, and/or strawberries.
To Assemble This Icebox Cake:
First, beat the cream cheese in the bowl of a stand mixer or with a hand mixer. Beat in the confectioner’s sugar and then one cup of the heavy cream and the vanilla. Then, beat in the rest of the cream until you have stiff peaks.
Next, spread some of the whipped cream mixture over the bottom of your dish.

Then, place a layer of Oreos on top. Be sure to break up some cookies to fill in any gaps.

After that, spread another layer of the whipped cream over the Oreos and then place the berries on top of the whipped cream.

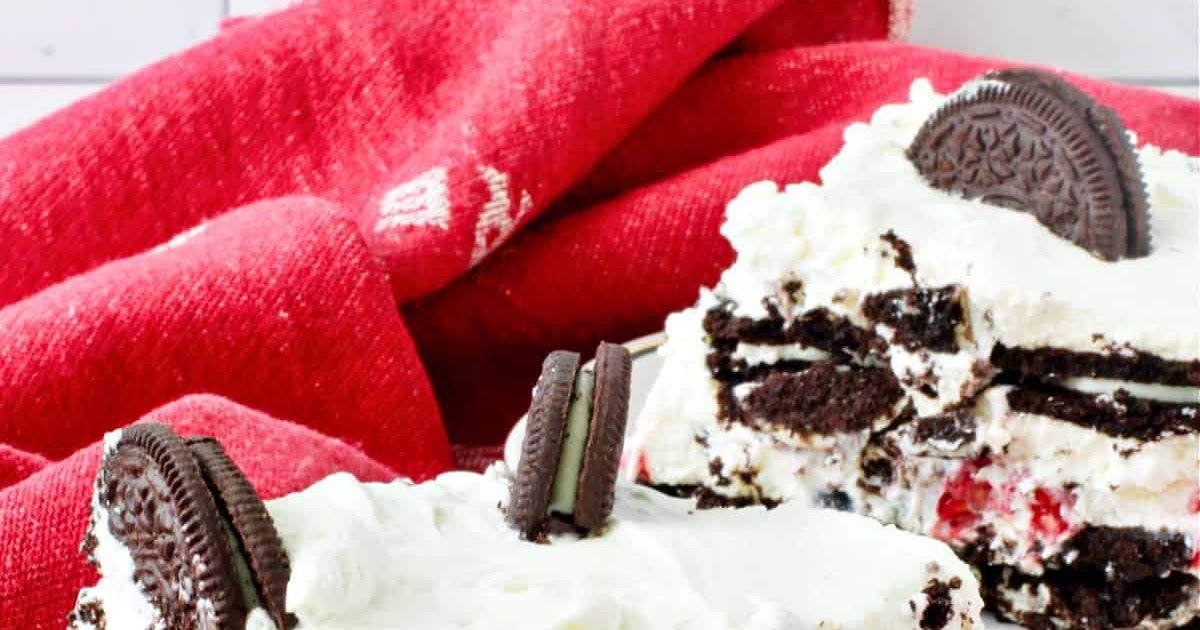
Spread another layer of the whipped cream over the fruit layer and then add another layer of Oreos and a final layer of whipped cream. Cover everything with plastic wrap and refrigerate for at least four hours.
When you are ready to serve the cake, you can garnish it with halved or broken Oreos, cookie crumbs, and/or some of the fruit if you like.
To make the cake easier to cut, you can place it in the freezer about 30 minutes before slicing. This helps maintain the layers.

This summer, do give this icebox cake a try. It’s wonderful for an Independence Day get-together. No baking!
For more no-bake desserts, be sure to try a mango float, an icebox cake from the Phillippines that uses Graham crackers, a Big Ice Cream Taco, or a sheetpan no-bake banana split cheese cake.
More Independence Day/National Day Recipes from the Sunday Funday Group:

Oreo Icebox Cake

Yield: 9 servings
Author: Karen Kerr
Prep time: 30 MinInactive time: 4 HourTotal time: 4 H & 30 M
This Oreo Icebox Cake is the dessert you’ll want to make all summer long. It’s an easy make-ahead dessert and you don’t ever have to turn on your oven.
Ingredients
- 8 ounce package of cream cheese, room temperature
- 1 cup confectioner’s sugar
- 1 tablespoon pure vanilla extract or vanilla bean paste
- 3 cups heavy cream, cold
- About 50 Oreo cookies, or one large package. You may have leftovers depending on how much you also use them for garnish.
- 2 six ounce packages of blueberries, raspberries, and/or blackberries, plus more for garnish.
Instructions
- In the bowl of a stand mixer or with a hand mixer, beat the cream cheese on low for two minutes, until smooth. With the mixer on low, beat in the confectioner’s sugar and then one cup of the heavy cream and the vanilla. On medium/high speed, beat in the rest of the cream until you have stiff peaks.
- Spread a heaping 1/2 cup of the whipped cream mixture over the bottom of a 9 inch square casserole dish.
- Place a layer of Oreos on top of the whipped cream. Be sure to break up some cookies to fill in any gaps.
- Spread 1 1/2 cups of the whipped cream over the Oreos and smooth it out to an even layer. Place a layer of the the berries on top of the whipped cream.
- Spread another 1 1/2 cups of the whipped cream over the fruit layer and then add another layer of Oreos and a final layer of the rest of the whipped cream. Smooth the whipped cream and cover everything with plastic wrap. Refrigerate for at least four hours.
- When you are ready to serve the cake, you can garnish it with halved Oreos, cookie crumbs, and some of the fruit if you like.
- To make the cake easier to cut, you can place it in the freezer about 30 minutes before slicing. This helps maintain the layers. Do not keep it in the freezer.
Nutrition Facts
Cholesterol (grams)
115 mg
Karen’s Kitchen Stories
icebox cake, Oreos
dessert
Recipe adapted from Pioneer Woman.


