Look, I get it. Most sourdough recipes out there want you to spend days babysitting your dough, planning your life around stretch-and-folds, and staying up until midnight to do your final shape. I’m a sourdough baker and lover, and I still totally understand.
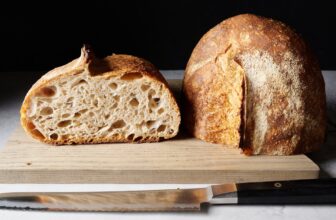
But what if I told you that you could make an absolutely killer loaf of sourdough bread in just 8 hours? I promise you – this isn’t one of those “quick” breads that sacrifices flavor for speed. This is the real deal: crusty exterior, chewy interior, and that subtle tang that makes sourdough so special. And guess what? You can start this in the morning and have fresh bread ready for dinner.
Table of Contents
Why This Recipe Works
Here’s the thing about sourdough – it doesn’t actually need 24+ hours to be delicious.
What it needs is good fermentation and proper technique. By using a larger proportion of active starter and maintaining a warm environment, we can speed up the process without compromising on flavor.
Plus, this recipe is super forgiving. Had to skip a stretch-and-fold because your kid needed attention? No worries. Room a bit cooler than ideal? Just give it an extra 30 minutes. Bread baking should fit into your life, not the other way around.
What You’ll Need
Before we dive in, let’s talk equipment. You don’t need anything fancy here – just a Dutch oven (or any heavy pot with a lid), a large bowl, and something to proof your dough in (a banneton is nice but a bowl lined with a well-floured kitchen towel works perfectly).
Oh, and you’ll need an active sourdough starter. If yours has been living in the fridge, make sure to feed it twice before baking to wake it up. Your starter should be doubling reliably and passing the float test – drop a spoonful in water, and it should float.
My Tips for Sourdough Success
Here are some real-talk tips that actually matter:
Temperature is everything. If your kitchen is cold, find a warm spot. I sometimes turn on my oven light and keep the dough nearby – it creates a perfect little warm pocket.
The poke test never lies. When you think your dough is ready to bake, poke it gently with a floured finger. If it springs back slowly and leaves a slight indentation, you’re good to go. If it springs back immediately, give it more time.
Don’t rush the cooling. I know it’s torture, but cutting into hot bread ruins the texture. Make yourself wait at least an hour. Trust me on this one.
8-Hour Sourdough Bread
This approachable sourdough recipe delivers a crusty, flavorful loaf in just 8 hours – great for bakers who want delicious homemade bread without an overnight wait. The result: a golden-brown artisan loaf with a tender, chewy crumb and subtle tang.
Ingredients
400g bread flour
100g whole wheat flour
350g warm water (90-95°F)
150g active sourdough starter (100% hydration)
10g sea salt
Schedule
8:00 AM – Mix and Initial Rest
In a large bowl, combine the flours and warm water. Mix until no dry flour remains. Cover and let rest for 30 minutes to hydrate the flour.
8:30 AM – Add Starter and Salt
Add the active starter and salt to the dough.
Using wet hands, pinch and fold the dough to fully incorporate the starter and salt.
Cover and let rest for 30 minutes.
9:00 AM – 11:00 AM – Stretch and Folds
Perform 4 sets of stretch and folds at 30-minute intervals.
Between each set, keep the dough covered at room temperature (75-78°F).
11:00 AM – 2:00 PM – Bulk Fermentation
Let the dough rise until it has increased in volume by about 50% and shows signs of fermentation (small bubbles visible through the bowl).
The dough should feel puffy and alive.
2:00 PM – Shape
Gently turn the dough onto a lightly floured surface.
Shape into a round boule or oval batard.
Place seam-side up in a floured banneton or bowl lined with a well-floured kitchen towel.
2:15 PM – 3:30 PM – Final Proof
Cover and let proof at room temperature for about 1-1.5 hours.
The dough is ready when it passes the poke test – it should slowly spring back when gently poked.
3:30 PM – Preheat
Place Dutch oven in the oven and preheat to 450°F (230°C).
4:00 PM – Bake
Turn dough onto parchment paper, score as desired.
Bake covered for 25 minutes.
Remove lid and bake for another 20-25 minutes until deep golden brown.
Cool completely on a wire rack (at least 1 hour) before slicing.
Recipe Notes
For best results, ensure your starter is at peak activity before using.
Room temperature significantly affects fermentation – adjust timing accordingly.
The dough should feel smooth and elastic after the stretch and folds.
Try Making It Your Own
This is an incredibly adaptable recipe. Some of my favorite variations happened by accident or experimentation. Lately, I’ve been obsessed with adding a handful of toasted walnuts and a drizzle of honey – it makes the most incredible breakfast toast.
Here’s how I love eating it:
Toasted and slathered with good butter and honey (my favorite breakfast)
As the base for the best grilled cheese you’ve ever had (pro tip: add caramelized onions)
Torn into chunks and served alongside soup
As crostini for holiday appetizers (people go crazy for these)
Base for avocado toast with everything bagel seasoning
Classic sandwich bread for BLTs
Other Customization Ideas
Seed and Nut Variations:
Add 100g toasted sunflower seeds
Mix in 80g chopped walnuts and 2 tbsp honey
Incorporate 75g pumpkin seeds and 2 tbsp sesame seeds
Flavor Additions:
Replace 50g water with olive oil for a softer crumb
Add 2 tbsp dried herbs (rosemary, thyme, oregano)
Mix in 3 cloves of roasted garlic
Fold in 100g soaked and dried cranberries
Flour Substitutions:
Replace 50g whole wheat with rye flour for earthier flavor
Use 50g spelt flour for nuttiness
Add 25g buckwheat flour for complexity
Texture Alternatives:
Roll crust in oats before baking
Brush with milk and top with seeds
Dust with rice flour for dramatic scoring contrast
Note: Adding ingredients may affect fermentation time and hydration – adjust water content accordingly when incorporating dry ingredients.
A Note on Timing
While this is an 8-hour recipe, don’t feel like you need to follow the timeline exactly.
The times I’ve listed are a guide, but your dough will tell you when it’s ready for the next step.
Some days it might take 7 hours, others 9.
That’s the beauty of sourdough – it’s alive, and once you learn to read its signs, you can work with it rather than fighting the clock.
Easy 8-Hour Sourdough Bread
Our goal here isn’t to make perfect bread (though this recipe will get you pretty close). The goal is to make bread that you love, that fits into your life, and that makes your kitchen smell amazing.
Have you tried this recipe? Let me know in the comments how it turned out! I love seeing your loaves!