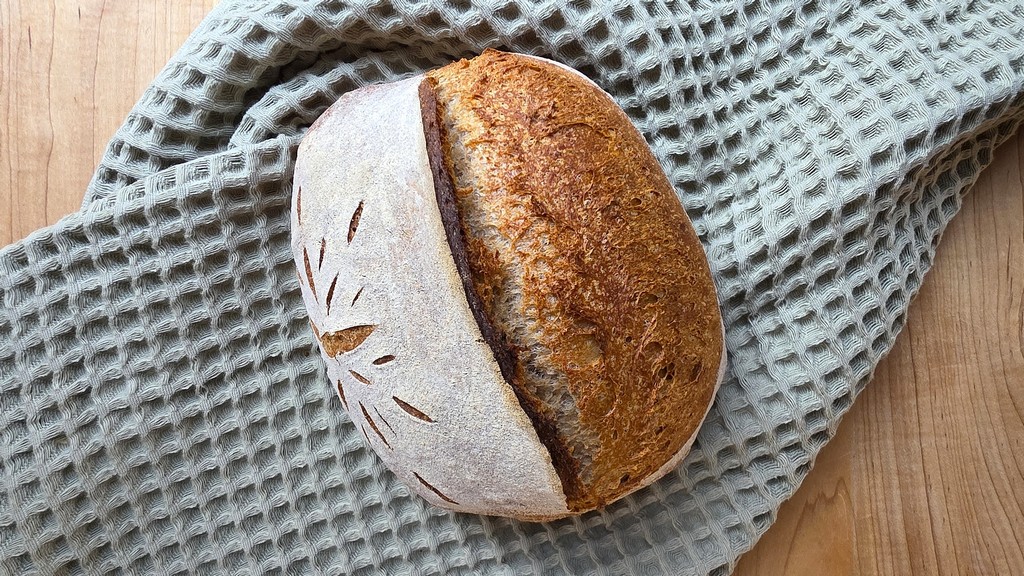
The 2020 blog post Slow Lazy Sourdough Bread revolutionized how I and many others think about sourdough starter maintenance and dough rising, essentially proving that faster ≠ better. Extra slow can be less stressful and beautiful and delicious. I tend to use this method around holidays when I have a lot of other food projects but want fresh bread too, and this year I made a how-to video that you can watch here (much of it applies to yeast as well).
While working on the video, I kept wondering if I could do this slow lazy method with instant yeast and just how little yeast should I use to use to get a 24-hour room temperature first rise of a dough. So this week I tested using very small amounts of instant yeast and found that in my cold winter kitchen (65-68°F) using 1/16 – 1/8 teaspoon, the dough doubled in 15 hours. At that point, I shaped it and let it proof both on the counter and in the refrigerator, adding another 9 hours to the process. Of course, this last stage of rising could have been shorter if all at room temperature or longer if all in the refrigerator. The quantity of yeast for the 15-hour dough is shown below in a measuring spoon, spread on a plate, and dissolving in water.
Incidentally, when I tried to stretch the first rise longer, using even less yeast (see photos below), the dough only expanded a few millimeters in 24 hours. Without yeast (or lactobacillus) proliferating in this dough to crowd out other microbes, I didn’t want to extend the time at room temperature much longer; I was concerned mold might form. To rescue this stalled dough, I dissolved one teaspoon instant yeast in a small amount of water, worked it into the dough, and had a loaf baked up within about four hours.
- Just a few yeast granules
- Rescued after 24 hours
- A bit overfermented/proofed
My thinking on the amount of yeast for this method is that using about 1/16 teaspoon (at the low end of the suggested range) would likely stretch the first rise to near 24 hours in cold kitchen temps like mine (under 70°) — or yield a 12-hour rise in a summer kitchen. I found that somewhere in between 1/16 and 1/8 teaspoon provided good timing in my currently cooler winter kitchen.
Note about Flour Selection and Applying this Method to other Recipes
I used bread flour and fresh milled whole grain hard red spring wheat flour in this recipe, but this method works with any bread recipe as long as it is “lean” (flour, water, salt) because additional fat, sugar and protein would further inhibit the yeast activity and change the timing. Also you might not want to use this method if the only flour in your dough is a really enzymatically active one like einkorn or rye, because protein breakdown might happen over such a long process.
The Slow Lazy Method with Instant Yeast
Using a very small amount of yeast allows for a slow, lazy process that nonetheless results in delicious and beautiful bread. This low stress method deepens the fermentation flavors, softens the bran in whole grain flours, and develops gluten passively.
Instructions
- Depending on your kitchen temperature, this dough can take 12-18 hours to rise (possibly even 24 hours in a cold kitchen and with 1/16 tsp yeast), so for most people, it makes sense to mix the dough in the evening. If it is not quite doubled the next day and you need to go somewhere, you can put the bowl in the refrigerator where it will rise more slowly. The same principle applies to the final proof: it can take 1-3 hours at room temperature or much longer if you use the refrigerator.
- In a large bowl, whisk the instant yeast into the water to dissolve it and ensure even distribution in the dough.
- Add the flours and salt and mix thoroughly. Clean the sides of the bowl, mark the level of the dough, and cover the dough.
- After about 20 minutes, give the dough a round of stretching and folding to neaten it up. The gluten strength will mostly be developed passively during the long rise.
- Check on the dough starting about 10 hours later — sooner if your kitchen is warmer than 70°F. At around 15 hours, my dough had doubled in a cool kitchen, 65-68°F.
- Transfer the dough to a lightly floured work surface and preshape it into a boule. Cover and let it rest about 15 minutes.
- Shape the dough to your preference (boule, batard, oblong loaf) and place it seam-side up in a proofing basket.
- If you prefer to bake same-day, let the dough proof at room temperature for 1-3 hours or until it has expanded and is puffy (see the photo gallery for before and after pics). You can also refrigerate the dough for a longer stretch / overnight. You don’t need to let the dough warm up before baking it.
- Preheat your oven and baking vessel to 500°F for 30 minutes.
- Flip the dough out of the proofing basket and onto a sheet of parchment paper or a silicone bread sling. Score and load the dough into your baking vessel and oven.
- Bake for 15 minutes at 500°F with the option to uncover and re-score your at the 7-minute mark and put the lid back on afterward.
- For a lighter, crispier crust, at the 15-minute mark, leave the lid on and reduce the oven temperature to 375°F and bake for 30-45 minutes more or until the internal temperature of the bread is over 205°F.
- For a darker, chewier crust, at the 15-minute mark, reduce the oven temperature to 450°F. Continue baking with the lid on for another 10 minutes. Remove the lid and bake 5-10 minutes more or until the internal temperature of the bread is over 205°F.
- Let the bread cool before you slice it.


![Homemade Sourdough Breadcrumbs [One Ingredient]](https://som2nynetwork.com/wp-content/plugins/phastpress/phast.php/c2VydmljZT1pbWFnZXMmc3JjPWh0dHBzJTNBJTJGJTJGc29tMm55bmV0d29yay5jb20lMkZ3cC1jb250ZW50JTJGdXBsb2FkcyUyRjIwMjUlMkYxMSUyRnNwb29uLW9mLXNvdXJkb3VnaC1icmVhZGNydW1icy0zMzZ4MjIwLmpwZyZjYWNoZU1hcmtlcj0xNzYzOTYyOTAwLTIxOTUyJnRva2VuPTRlYTJiYTZiZDY1OThmOTk.q.jpg)

