TL;DR:
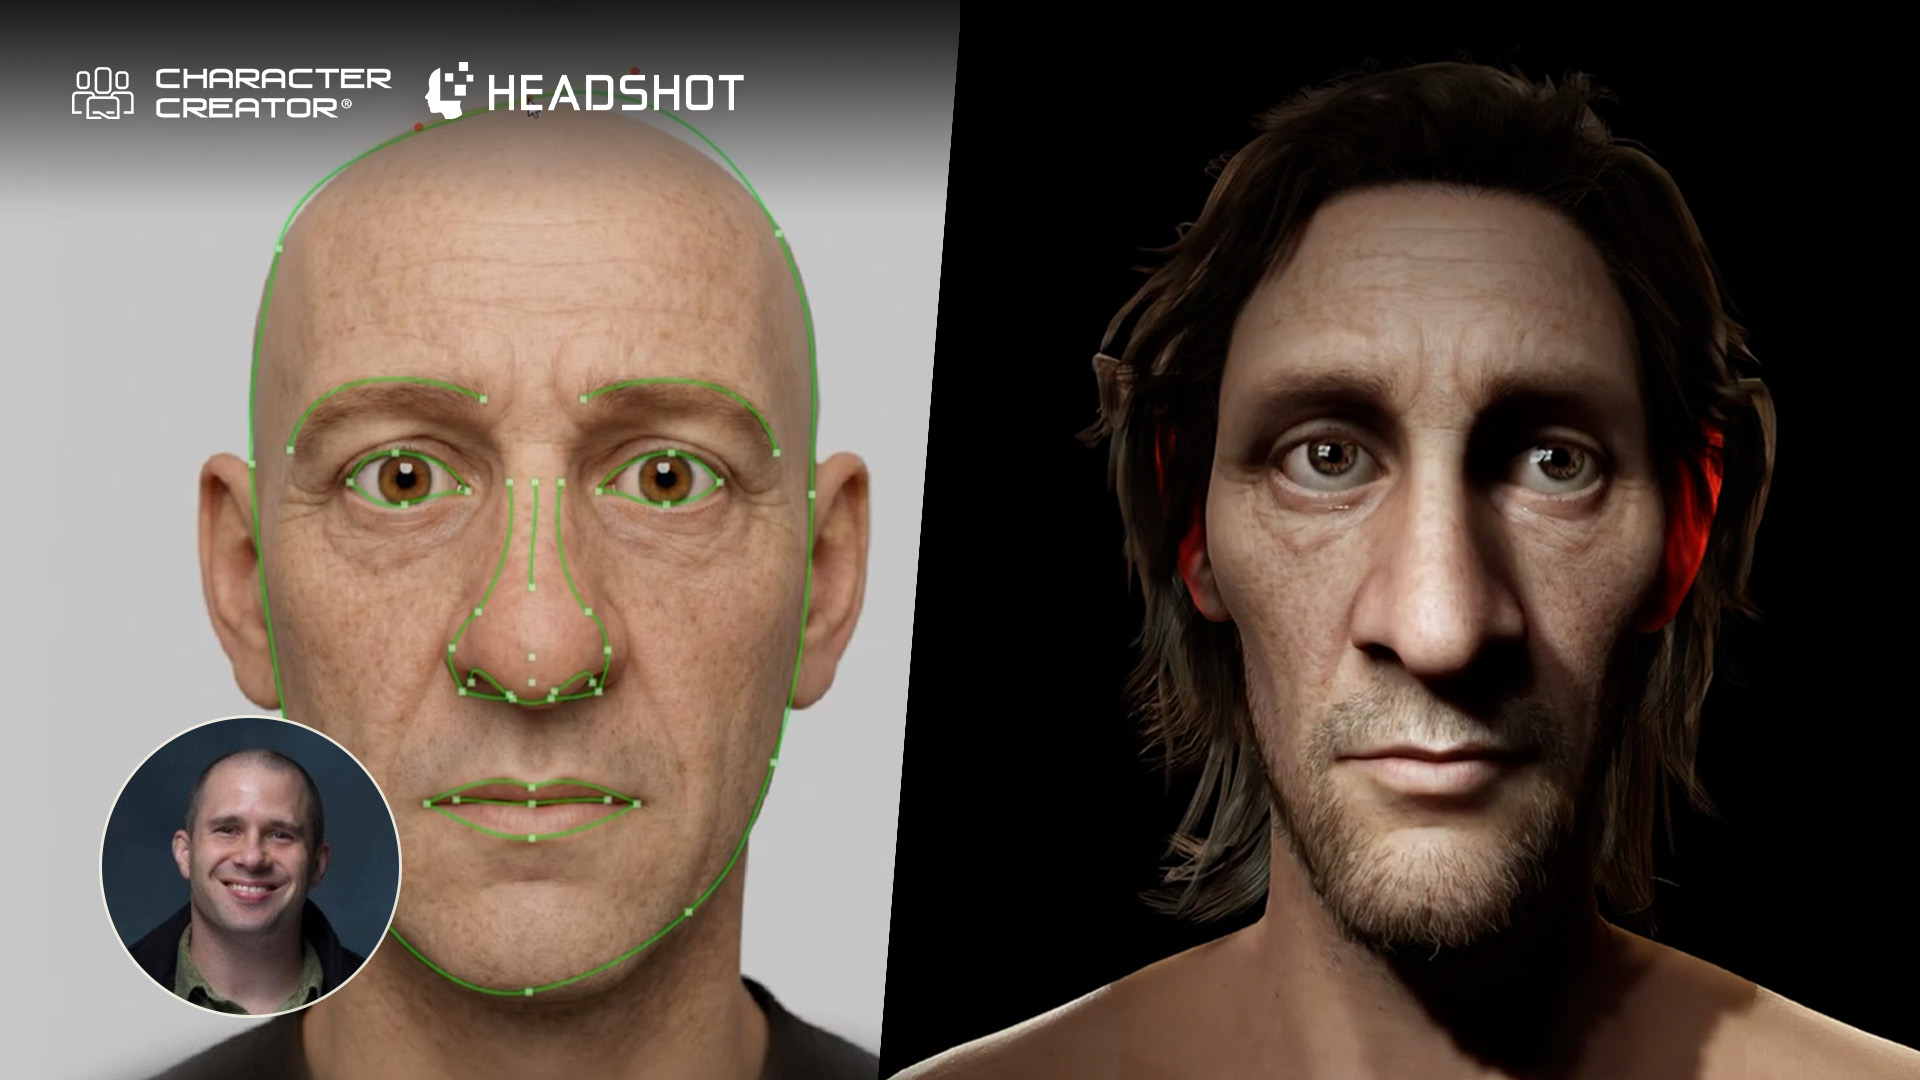
3D artist Jon Blalock demonstrates how to match 2D portraits to 3D meshes using Character Creator 5 with Headshot 3. The workflow, combined with built-in texture modification tools, ActorMIXER morphing, and automatic facial rigging, lets you rapidly build animation-ready realistic heads or caricatures from scratch.
Headshot 3 Plugin Overview
The Headshot 3 Plugin brings game-changing upgrades and powerful new features to Character Creator 5, building on the solid foundation of Headshot 2. Whether you are generating 3D heads from scratch or refining intricate facial details, Headshot 3 streamlines the AI-to-3D pipeline with unprecedented precision and flexibility.
Getting Started with the Headshot 3 Plugin
To kick off your character creation workflow, launch the plugin via Plugins > Headshot 3 > Headshot 3 Plugin. The intuitive interface immediately prompts you to load a front-facing image. You can craft custom source photos directly within Character Creator 5 using the integrated AI image generator. Simply enter a descriptive text prompt detailing the character face you envision (for example, a stylized medieval villager with exaggerated features).
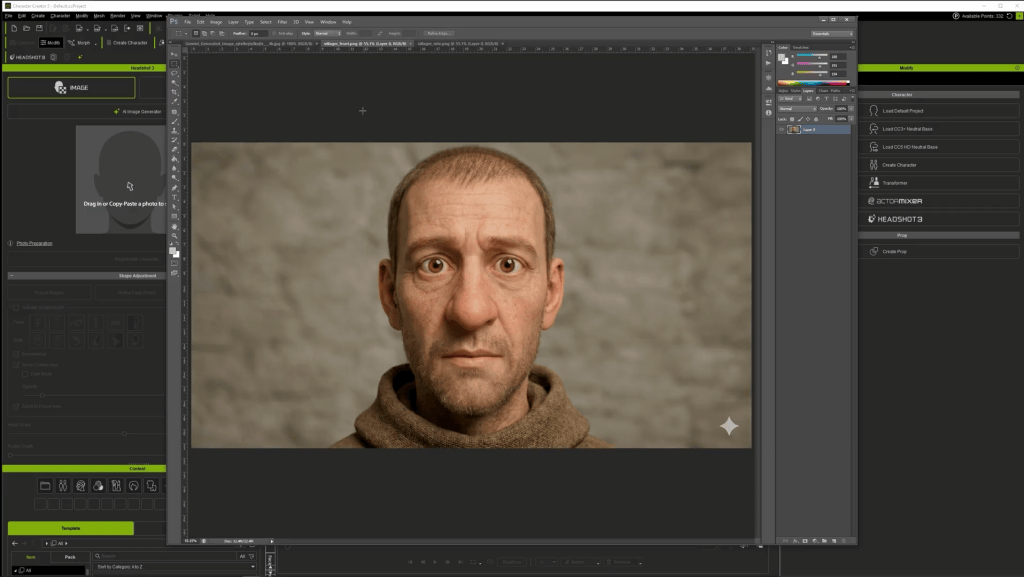
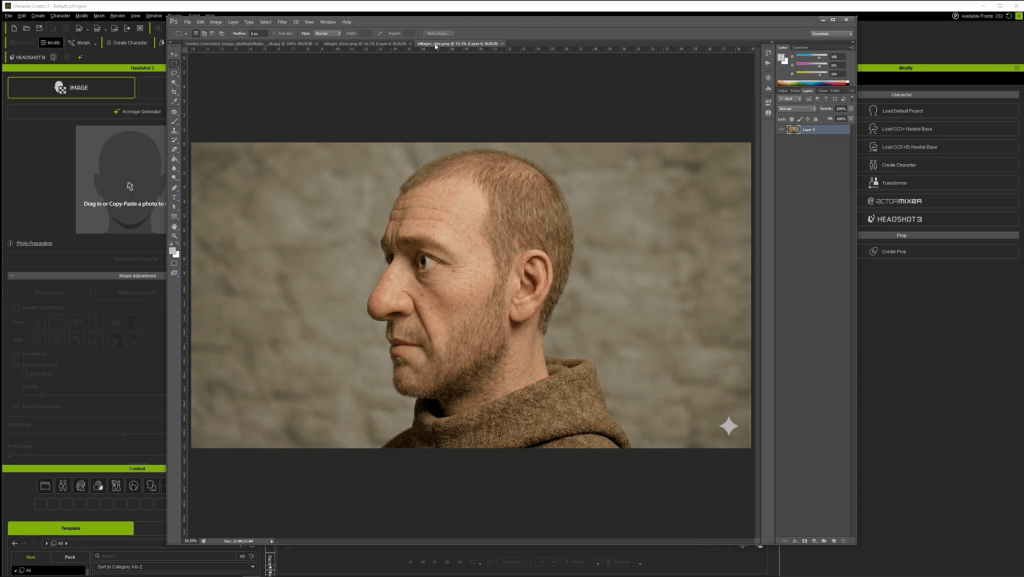
Image generation costs vary by resolution (15 credits for 2K, 30 credits for 4K). Powered by Reallusion’s cloud servers, the generator yields flat-lit source photos. This flat lighting is essential because minimal baked-in shadows ensure dynamic in-engine lighting reacts realistically across your final 3D character mesh.
Using External Images & Image Preparation
You are not limited to generating photos within the Headshot 3 Plugin. The images created using external AI tools like Gemini Pro or ChatGPT work seamlessly as well. If an external photo contains heavy shadows, stray hair, or facial hair, you can easily clean and prepare it using Headshot 3’s built-in modify tab.
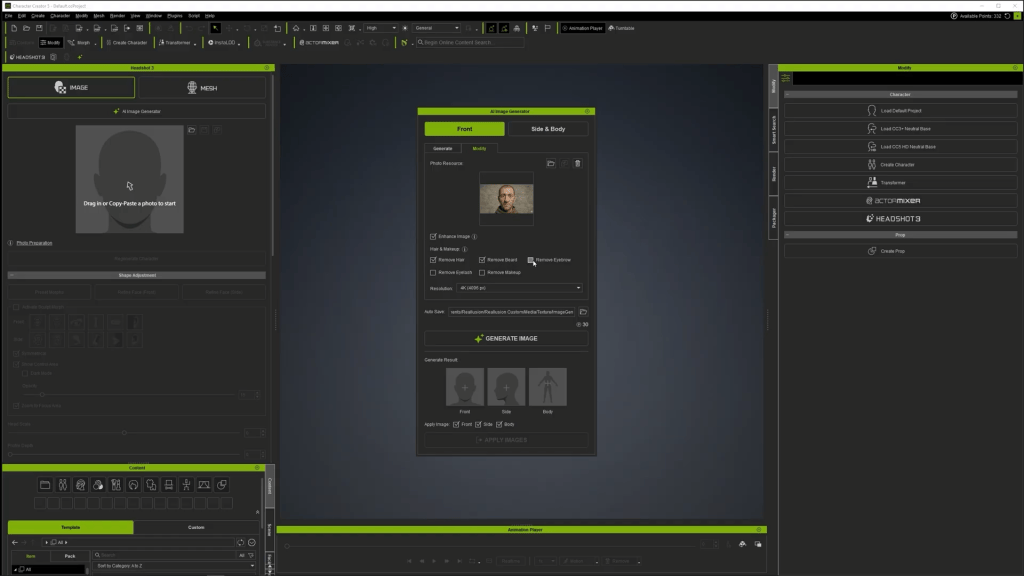
Simply drag your front-view image into the Modify panel and apply automated cleanup parameters to eliminate hair, beards, mustaches, or eyelashes. Generating a clean 4K base texture delivers a smooth surface foundation, giving you complete freedom to add modular mesh hair and 3D facial hair elements back onto your character later.
Initial Mesh Generation & Feature Matching
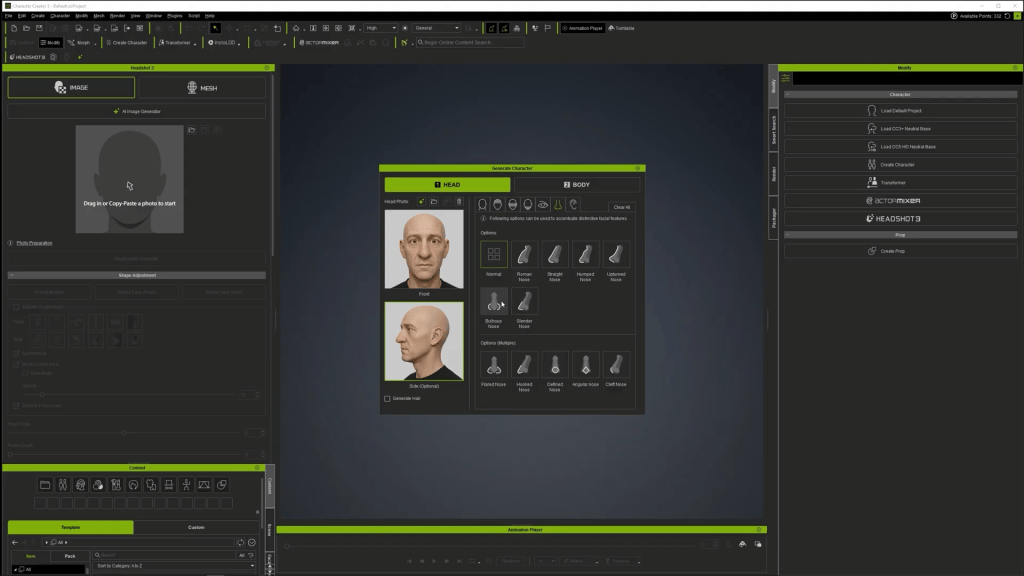
Once your front and profile (side) images are loaded into Headshot 3, guide the mesh generator by specifying key facial attributes.

- Face Shape: Oval, strong jawline, defined nose line, sharp or rounded chin.
- Facial Features: Eye bags, bulbous nose, defined front nose.
- Body Type: Male/Female, Adult, Normal physique.
After clicking the generate button, leverage the Image Matching tools to overlay and compare the generated 3D mesh against your reference photo using the opacity slider. For characters with distinct ocular proportions, adjust the Iris UV Radius slider to perfectly match the 3D iris scale to the photo.
Refining the Front Face Mesh
Click the refine face button to enter the fine-tuning workspace. This tool provides interactive landmark guides and Bézier control points to align geometric contours precisely with facial feature boundaries:
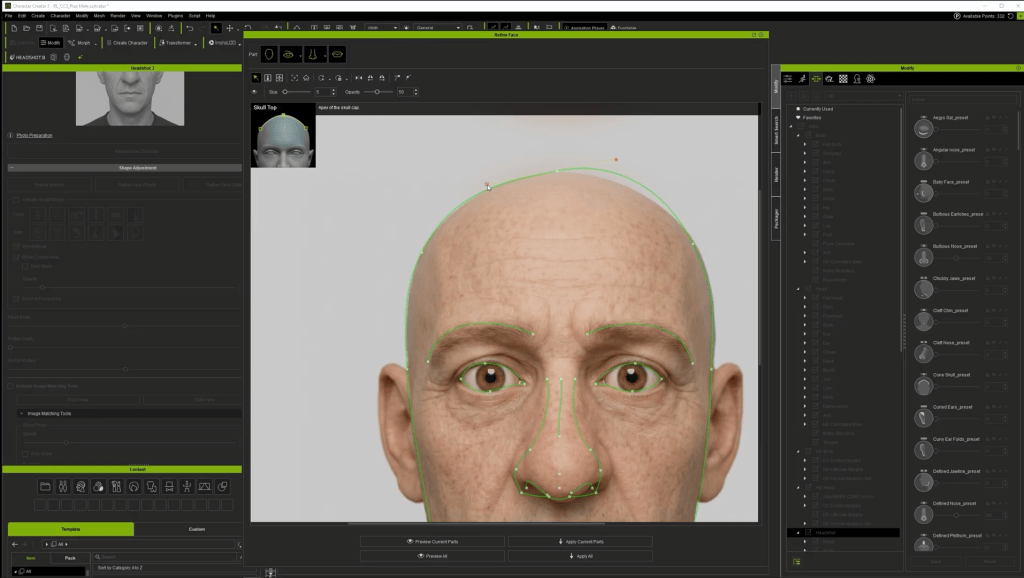
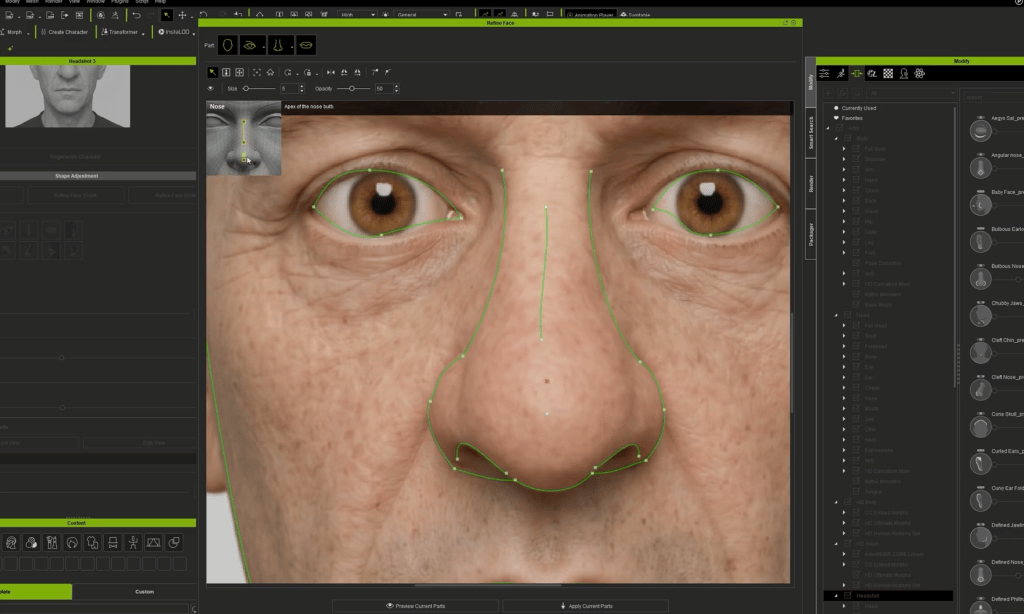
- Position main landmark points around the ear, jaw, skull base, nose, mouth, and eyes.
- Adjust the Bezier curves to match the facial curvature. Unlink curve handles if you need individual tangent control.
- Click Preview Current Parts to review the geometric overlay. Once satisfied, click Apply Current Parts.
Refining the Profile View & Best Practices
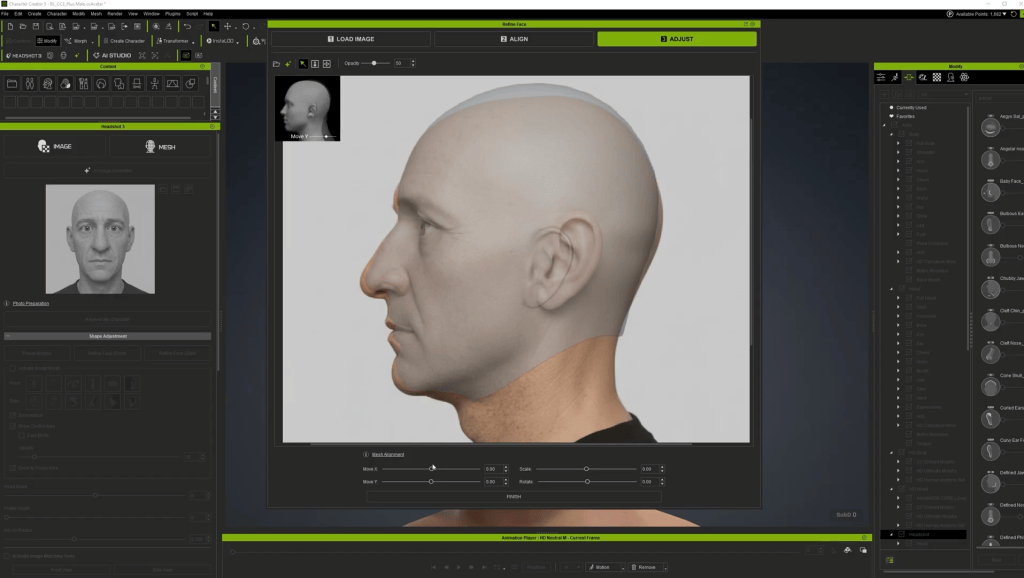
When setting up profile reference images, always use a true 100% profile image where the opposite eye is completely hidden. If your side photo shows even a hint of the far eye, re-generate a precise profile image using the AI generator rather than fitting against an angled photo.
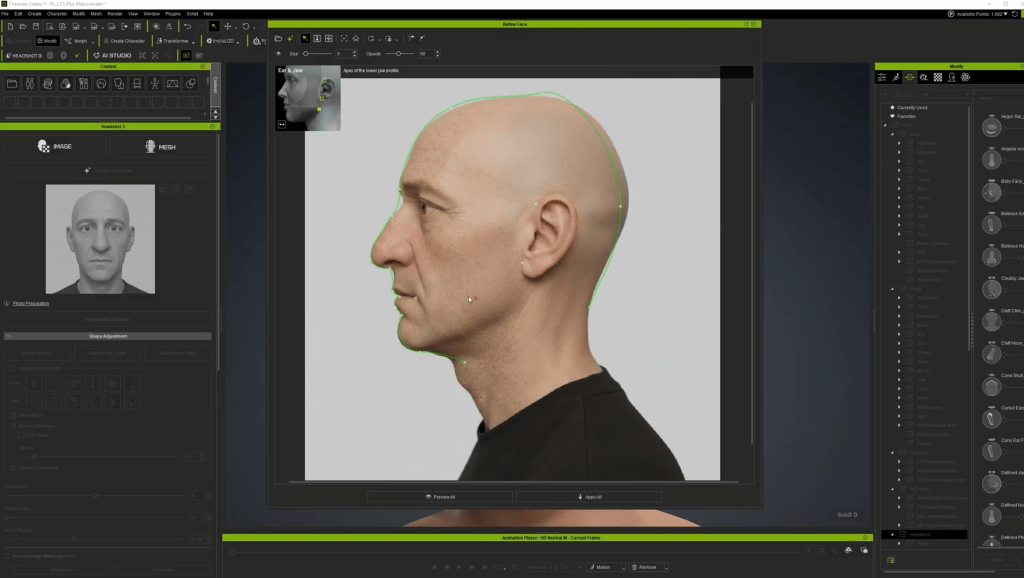
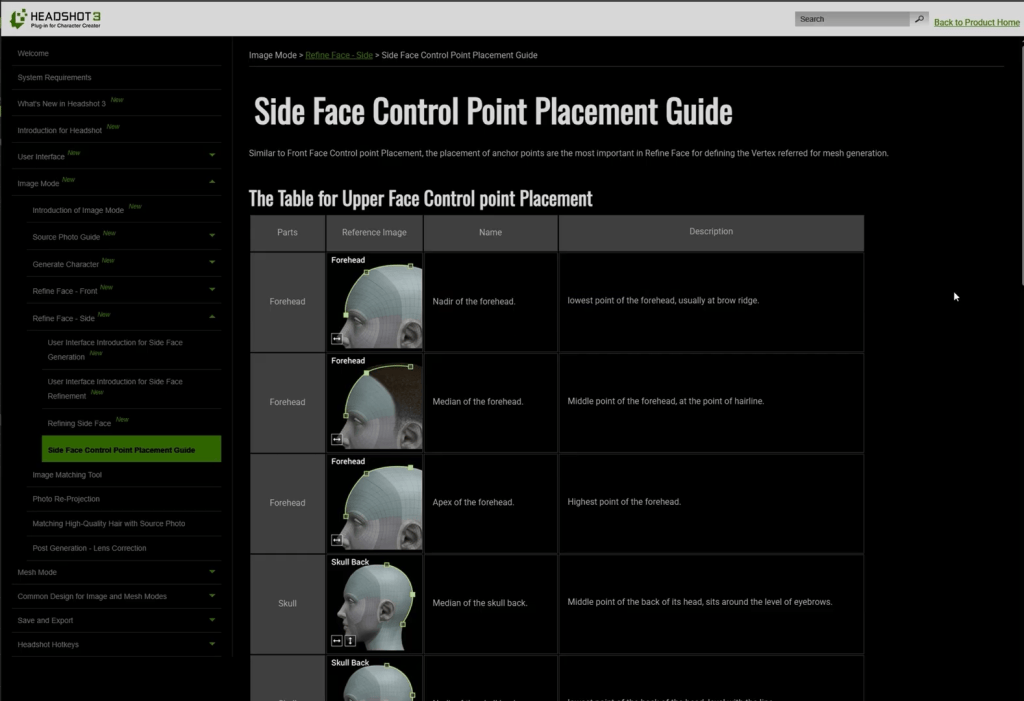
According to Reallusion best practices and my own testing, placing landmark points at exact anatomical positions takes priority over adjusting Bézier curves. Consult the online Headshot 3 manual for precise point definitions (such as aligning the “median of the skull back” point horizontally with the eyebrows). Once completing the pointing for the eye corners, mouth corners, ear boundaries, and jawline, adjust position and scale. Then, use the preview to see the mesh, and click Apply All. This will ensure the best result for getting the head shape correct.
Stylizing Characters with ActorMIXER
To turn a realistic mesh into a stylized caricature, open the ActorMIXER plugin and load in the HD Caricature Mixer Pack. For my stylized 3D character, I found it quite helpful to use the existing content pack!
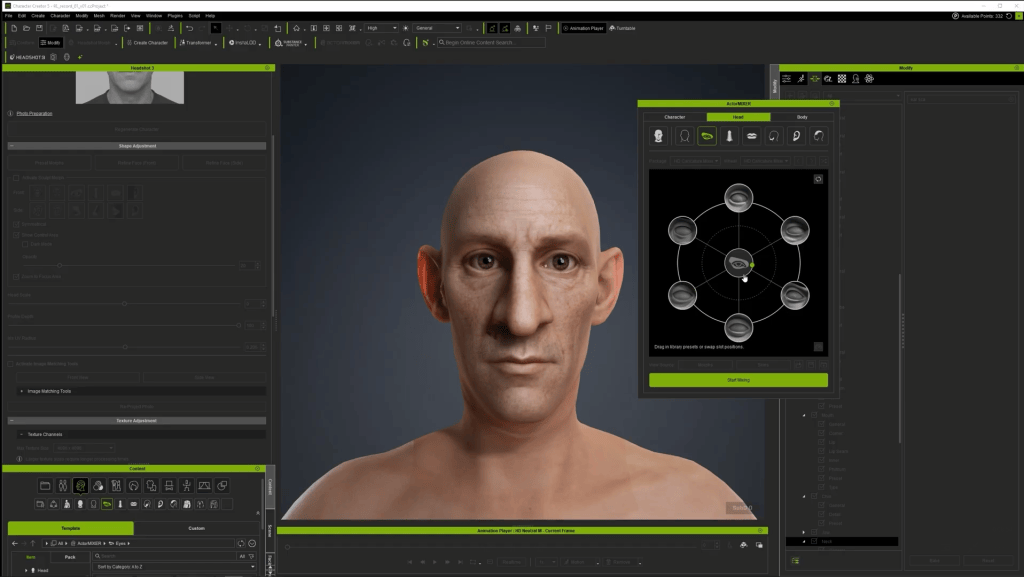
- Blend build proportions across head, eye, nose, and jaw sections to add caricature elements without over-distorting the head.
- Adjust body proportions to match the stylized head.
- If mixing causes a distorted neck, select the actor morphs and adjust the Neck Length slider.
“HD Caricature Mixer is a pack that I like a lot, because it almost applies to any stylized characters. It is really flexible, and gives you the proportions of all kinds of different body build.”
Jon Blalock — Digital Artist & Educator
Adding Facial Details, Eye Corrections & Expressions
For facial hair, I use the Beard & Brows Builder pack to apply modular sideburns, mustache, and sparse beard layers.

- Eyeball Alignment: Adjust Eyeball Depth, Eyeball Width, and Eyeball Height morph sliders so the eyes look directly forward without clipping through the eyelids.
- Eye Blink Correction: Test eye closure using the blink tool. If the eyelids do not meet completely, go to Character > Correct Eye Blink.
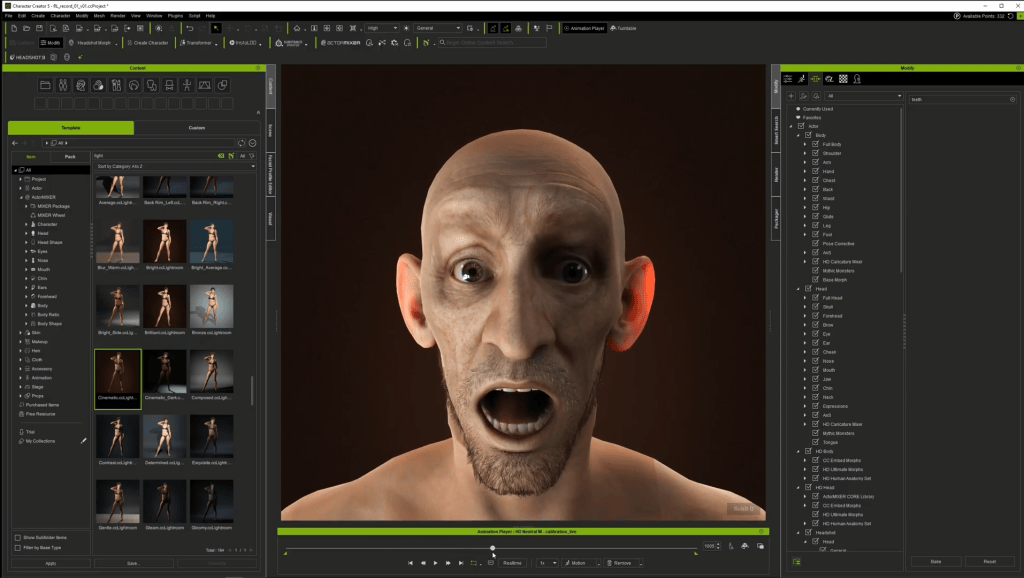
- Lighting: Apply cinematic lighting presets (Content > Item > Light > Cinematic Light) to evaluate dynamic shadows and material highlights on your finished character.
As for the facial animation & teeth depth, I tested the performance by using Motion > Facial Rig > Dramatic Male. If upper or lower teeth poke through the lips during facial expressions, adjust the Teeth Upper Depth morph to pull them back.
Conclusion
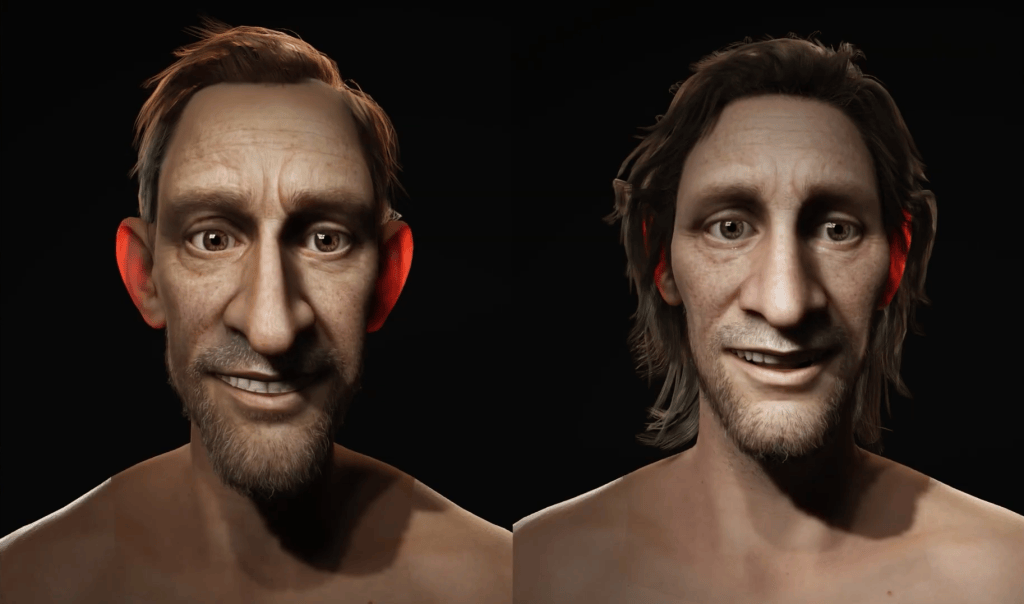
The Headshot 3 Plugin equips digital artists with an unrivaled toolkit for turning 2D portraits into fully animation-ready 3D avatars. By combining AI image generation, robust mesh-fitting controls, and seamless integration with ActorMIXER and Character Creator 5, you can dramatically accelerate your character production pipeline while maintaining full artistic control.

John Blalock
John’s background and education are in the traditional visual effects pipeline, mainly as a Compositor. Over the years, he has worked at visual effects studios such as Rhythm & Hues, and game company Sony PlayStation.
While he enjoyed those studio experiences, he found a greater love in passing along what he had learned. He has taught in the college education sector in Southern California for over 12 years, including the Academy of Art University.”
He has been entranced by their possibilities and integration with other tools, such as iClone and Character Creator, ever since. John is also co-founder of the YouTube channel AsArt and also runs a tutorial-based channel, JohnnyHowTo. He would love for you to stop by and join him on his adventures!
Frequently Asked Questions (FAQ)
Q: Can I use photos created with third-party AI generators like Midjourney, ChatGPT, or Gemini?
A: Yes! Headshot 3 accepts external images. If your source image contains baked-in shadows or unwanted hair, try to regenerate it with an AI prompt, and always mention that the character’s face should be fully lit for best results. This will give you a good start in achieving a reliable image for the later AI 3D head.
Q: Why is flat-lit lighting so important for source photos?
A: Flat lighting eliminates directional shadows on the base diffuse texture, allowing Character Creator‘s dynamic lights and shaders to render realistic highlights and shadows in real-time without visual artifacts.
Q: How do I fix teeth or eye clipping during facial animation testing?
A: You can adjust the eyeball depth, width, and height morph sliders to ensure proper eyelid contact. For teeth clipping, use the “Teeth Upper/Lower Depth morphs”, or run the correct eye blink tool under the Character menu.
Read Next: