

Tired of manually sifting through hours of audio to find key insights? This guide teaches you to build an AI-powered chatbot that transforms recordings – meetings, podcasts, interviews—into interactive conversations. Using AssemblyAI for precise transcription with speaker labels, Qdrant for fast data storage, and DeepSeek-R1 via SambaNova Cloud for smart responses, you’ll create a RAG tool that answers questions like “What did [Speaker] say?” or “Summarize this segment.” Let’s turn your audio into a searchable, AI-driven dialogue by building a RAG system with AssemblyAI, Qdrant, and DeepSeek-R1.
Learning Objectives
- Leverage AssemblyAI API to transcribe audio files with speaker diarization, converting conversations into structured text data for analysis.
- Deploy Qdrant Vector Database to store and efficiently retrieve embeddings of transcribed audio content using HuggingFace models.
- Implement RAG with DeepSeek R1 model via SambaNova Cloud to generate context-aware chatbot responses.
- Build a Streamlit Web Interface for users to upload audio files, visualize transcripts, and interact with the chatbot in real time.
- Integrate End-to-End Workflow combining audio processing, vector storage, and AI-driven response generation to create a scalable audio-based chat application.
This article was published as a part of the Data Science Blogathon.
What is AssemblyAI?
AssemblyAI is your go-to tool for turning audio into actionable insights. Whether you’re transcribing podcasts, analyzing customer calls, or captioning videos, its AI-powered speech-to-text engine delivers pinpoint accuracy, even with accents or background noise.
What is SambaNova Cloud?
Imagine running massive open-source models like DeepSeek-R1 (671B) up to 10x faster — and without the usual infrastructure headaches.

Instead of relying on GPUs, SambaNova UsesRDUs (Reconfigurable Dataflow Units), which unlock faster performance with:
- Massive in-memory storage — no constant reloading of models
- Efficient dataflow design — optimized for high-throughput tasks
- Instant model switching — switch between models in microseconds
- Run DeepSeek-R1 instantly — no complicated setup required
- Train and fine-tune on the same platform — all in one place
What is Qdrant?
Qdrant is a lightning-fast vector database built to supercharge AI applications, think of it as a search engine that finds needles in haystacks. Whether you’re building a recommendation system, image search tool, or chatbot, Qdrant specializes in similarity searches, quickly pinpointing the closest matches for complex data like text embeddings or visual features.

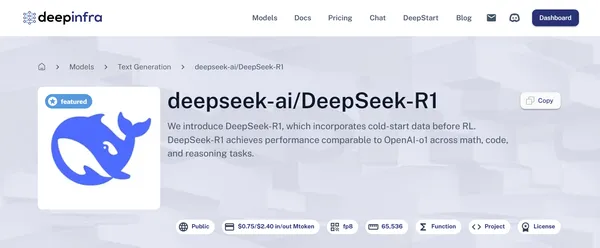
What is DeepSeek-R1?
Deepseek-R1 is a game-changing language model that blends human-like adaptability with cutting-edge AI, making it a standout in natural language processing. Whether you’re crafting content, translating languages, debugging code, or summarizing complex reports, R1 excels at understanding context, tone, and intent, delivering responses that feel intuitive rather than robotic. By prioritizing empathy and precision, Deepseek-R1 isn’t just a tool; it’s a glimpse into a future where AI communicates as naturally as we do.
Building the RAG Model with AssemblyAI and DeepSeek-R1
Now that you understand all the components, let’s dive into building our RAG. But before we do that, let’s quickly cover what you’ll need to get started.
1. Necessary Prerequisites
Below are the prerequisites required:
Clone the repository:
git clone https://github.com/karthikponna/chat_with_audios.git
cd chat_with_audios
Create and activate the virtual environment:
# For macOS and Linux:
python3 -m venv venv
source venv/bin/activate

# For Windows:
python -m venv venv
.\venv\Scripts\activate
Install Required Dependencies:
pip install -r requirements.txtSet Up Environment Variables:
Create a `.env` file and add your AssemblyAI and SambaNova API keys.
ASSEMBLYAI_API_KEY="your_assemblyai_api_key_string"
SAMBANOVA_API_KEY="your_sambanova_api_key_string"
Now lets start with the coding part.
2. Retrieval Augmented Generation
RAG merges large language models with external data to produce more accurate, context-rich answers. It fetches relevant information at query time, ensuring responses rely on real data instead of just model training.
2.1 Importing Necessary Libraries
Let’s create a file named rag_code.py. We’ll walk through the code step by step, starting with importing the necessary modules and orchestrating the code architecture using the Llama Index.
from qdrant_client import models
from qdrant_client import QdrantClient
from llama_index.embeddings.huggingface import HuggingFaceEmbedding
from llama_index.llms.sambanovasystems import SambaNovaCloud
from llama_index.llms.ollama import Ollama
import assemblyai as aai
from typing import List, Dict

from llama_index.core.base.llms.types import (
    ChatMessage,
    MessageRole,
)
2.2 Batch Processing and Text Embedding with Hugging Face
Here batch_iterate function splits a list of text into smaller chunks, making it easier to process large datasets. The EmbedData class then loads a Hugging Face embedding model, generates embeddings for each batch of text, and collects these embeddings for later use.
def batch_iterate(lst, batch_size):
    """Yield successive n-sized chunks from lst."""
    for i in range(0, len(lst), batch_size):
        yield lst[i : i + batch_size]

class EmbedData:

    def __init__(self, embed_model_name="BAAI/bge-large-en-v1.5", batch_size = 32):
        self.embed_model_name = embed_model_name
        self.embed_model = self._load_embed_model()
        self.batch_size = batch_size
        self.embeddings = []

    def _load_embed_model(self):
        embed_model = HuggingFaceEmbedding(model_name=self.embed_model_name, trust_remote_code=True, cache_folder="./hf_cache")
        return embed_model

    def generate_embedding(self, context):
        return self.embed_model.get_text_embedding_batch(context)

    def embed(self, contexts):

        self.contexts = contexts

        for batch_context in batch_iterate(contexts, self.batch_size):
            batch_embeddings = self.generate_embedding(batch_context)
            self.embeddings.extend(batch_embeddings)
2.3 Qdrant Vector Database Setup and Ingestion
- QdrantVDB_QB class initializes a Qdrant vector database by setting up key parameters like collection name, vector dimension, and batch size, and it connects to Qdrant while checking for an existing collection (creating one if needed).
- It efficiently uploads data by batching text contexts with their corresponding embeddings and then updating the collection’s configuration accordingly.
class QdrantVDB_QB:

    def __init__(self, collection_name, vector_dim = 768, batch_size=512):
        self.collection_name = collection_name
        self.batch_size = batch_size
        self.vector_dim = vector_dim

    def define_client(self):

        self.client = QdrantClient(url="http://localhost:6333", prefer_grpc=True)

    def create_collection(self):

        if not self.client.collection_exists(collection_name=self.collection_name):

            self.client.create_collection(collection_name=f"{self.collection_name}",

                                          vectors_config=models.VectorParams(size=self.vector_dim,
                                                                             distance=models.Distance.DOT,
                                                                             on_disk=True),

                                          optimizers_config=models.OptimizersConfigDiff(default_segment_number=5,
                                                                                        indexing_threshold=0),

                                          quantization_config=models.BinaryQuantization(
                                                        binary=models.BinaryQuantizationConfig(always_ram=True)),
                                         )

    def ingest_data(self, embeddata):

        for batch_context, batch_embeddings in zip(batch_iterate(embeddata.contexts, self.batch_size),
                                                    batch_iterate(embeddata.embeddings, self.batch_size)):

            self.client.upload_collection(collection_name=self.collection_name,
                                          vectors=batch_embeddings,
                                          payload=[{"context": context} for context in batch_context])

        self.client.update_collection(collection_name=self.collection_name,
                                      optimizer_config=models.OptimizersConfigDiff(indexing_threshold=20000)
                                     )
2.4 Query Embedding Retriever
- The Retriever class is designed to bridge the gap between user queries and a vector database by initializing with a vector database client and an embedding model.
- Its search method transforms a query into an embedding using the model, then performs a vector search on the database with fine-tuned quantization parameters to quickly retrieve relevant results.
class Retriever:

    def __init__(self, vector_db, embeddata):

        self.vector_db = vector_db
        self.embeddata = embeddata

    def search(self, query):
        query_embedding = self.embeddata.embed_model.get_query_embedding(query)


        result = self.vector_db.client.search(
            collection_name=self.vector_db.collection_name,

            query_vector=query_embedding,

            search_params=models.SearchParams(
                quantization=models.QuantizationSearchParams(
                    ignore=False,
                    rescore=True,
                    oversampling=2.0,
                )
            ),

            timeout=1000,
        )

        return result
2.5 RAG Smart Query Assistant
The RAG class integrates a retriever and an LLM to generate context-aware responses. It retrieves relevant information from a vector database, formats it into a structured prompt, and sends it to the LLM for a response. I am using SambaNovaCloud to access the LLM model through their API for efficient text generation.
class RAG:

    def __init__(self,
                 retriever,
                 llm_name = "Meta-Llama-3.1-405B-Instruct"
                 ):

        system_msg = ChatMessage(
            role=MessageRole.SYSTEM,
            content="You are a helpful assistant that answers questions about the user's document.",
        )
        self.messages = [system_msg, ]
        self.llm_name = llm_name
        self.llm = self._setup_llm()
        self.retriever = retriever
        self.qa_prompt_tmpl_str = ("Context information is below.\n"
                                   "---------------------\n"
                                   "{context}\n"
                                   "---------------------\n"
                                   "Given the context information above I want you to think step by step to answer the query in a crisp manner, incase case you don't know the answer say 'I don't know!'.\n"
                                   "Query: {query}\n"
                                   "Answer: "
                                   )

    def _setup_llm(self):

        return SambaNovaCloud(
                        model=self.llm_name,
                        temperature=0.7,
                        context_window=100000,
                    )

        # return Ollama(model=self.llm_name,
        #               temperature=0.7,
        #               context_window=100000,
        #             )

    def generate_context(self, query):

        result = self.retriever.search(query)
        context = [dict(data) for data in result]
        combined_prompt = []

        for entry in context[:2]:
            context = entry["payload"]["context"]

            combined_prompt.append(context)

        return "\n\n---\n\n".join(combined_prompt)

    def query(self, query):
        context = self.generate_context(query=query)

        prompt = self.qa_prompt_tmpl_str.format(context=context, query=query)

        user_msg = ChatMessage(role=MessageRole.USER, content=prompt)

        # self.messages.append(ChatMessage(role=MessageRole.USER, content=prompt))

        streaming_response = self.llm.stream_complete(user_msg.content)

        return streaming_response
2.6 Audio Transcription
Here Transcribe class initializes by setting the AssemblyAI API key and creating a transcriber. It then processes an audio file using a configuration that enables speaker labels, ultimately returning a list of dictionaries where each entry maps a speaker to their transcribed text.
class Transcribe:
    def __init__(self, api_key: str):
        """Initialize the Transcribe class with AssemblyAI API key."""
        aai.settings.api_key = api_key
        self.transcriber = aai.Transcriber()

    def transcribe_audio(self, audio_path: str) -> List[Dict[str, str]]:
        """
        Transcribe an audio file and return speaker-labeled transcripts.

        Args:
            audio_path: Path to the audio file

        Returns:
            List of dictionaries containing speaker and text information
        """
        # Configure transcription with speaker labels
        config = aai.TranscriptionConfig(
            speaker_labels=True,
            speakers_expected=2  # Adjust this based on your needs
        )

        # Transcribe the audio
        transcript = self.transcriber.transcribe(audio_path, config=config)

        # Extract speaker utterances
        speaker_transcripts = []
        for utterance in transcript.utterances:
            speaker_transcripts.append({
                "speaker": f"Speaker {utterance.speaker}",
                "text": utterance.text
            })

        return speaker_transcripts
3. Streamlit App
Streamlit is a Python library that transforms data scripts into interactive web apps, making it perfect for LLM-based solutions.
- The below code builds a user-friendly app that lets users upload an audio file, view its transcript, and chat accordingly.
- AssemblyAI transcribes the uploaded audio into speaker-labeled text.
- The transcript is embedded and stored in a Qdrant vector database for efficient retrieval.
- A retriever paired with a RAG engine generates context-aware chat responses using these embeddings.
- Session state manages chat history and file caching to ensure a smooth experience.
import os
import gc
import uuid
import tempfile
import base64
from dotenv import load_dotenv
from rag_code import Transcribe, EmbedData, QdrantVDB_QB, Retriever, RAG
import streamlit as st

if "id" not in st.session_state:
    st.session_state.id = uuid.uuid4()
    st.session_state.file_cache = {}

session_id = st.session_state.id
collection_name = "chat with audios"
batch_size = 32

load_dotenv()

def reset_chat():
    st.session_state.messages = []
    st.session_state.context = None
    gc.collect()

with st.sidebar:
    st.header("Add your audio file!")

    uploaded_file = st.file_uploader("Choose your audio file", type=["mp3", "wav", "m4a"])

    if uploaded_file:
        try:
            with tempfile.TemporaryDirectory() as temp_dir:
                file_path = os.path.join(temp_dir, uploaded_file.name)

                with open(file_path, "wb") as f:
                    f.write(uploaded_file.getvalue())

                file_key = f"{session_id}-{uploaded_file.name}"
                st.write("Transcribing with AssemblyAI and storing in vector database...")

                if file_key not in st.session_state.get('file_cache', {}):
                    # Initialize transcriber
                    transcriber = Transcribe(api_key=os.getenv("ASSEMBLYAI_API_KEY"))

                    # Get speaker-labeled transcripts
                    transcripts = transcriber.transcribe_audio(file_path)
                    st.session_state.transcripts = transcripts

                    # Each speaker segment becomes a separate document for embedding
                    documents = [f"Speaker {t['speaker']}: {t['text']}" for t in transcripts]

                    # embed data
                    embeddata = EmbedData(embed_model_name="BAAI/bge-large-en-v1.5", batch_size=batch_size)
                    embeddata.embed(documents)

                    # set up vector database
                    qdrant_vdb = QdrantVDB_QB(collection_name=collection_name,
                                          batch_size=batch_size,
                                          vector_dim=1024)
                    qdrant_vdb.define_client()
                    qdrant_vdb.create_collection()
                    qdrant_vdb.ingest_data(embeddata=embeddata)

                    # set up retriever
                    retriever = Retriever(vector_db=qdrant_vdb, embeddata=embeddata)

                    # set up rag
                    query_engine = RAG(retriever=retriever, llm_name="DeepSeek-R1-Distill-Llama-70B")
                    st.session_state.file_cache[file_key] = query_engine
                else:
                    query_engine = st.session_state.file_cache[file_key]

                # Inform the user that the file is processed
                st.success("Ready to Chat!")

                # Display audio player
                st.audio(uploaded_file)

                # Display speaker-labeled transcript
                st.subheader("Transcript")
                with st.expander("Show full transcript", expanded=True):
                    for t in st.session_state.transcripts:
                        st.text(f"**{t['speaker']}**: {t['text']}")

        except Exception as e:
            st.error(f"An error occurred: {e}")
            st.stop()

col1, col2 = st.columns([6, 1])

with col1:
    st.markdown("""
    # RAG over Audio powered by   and
""".format(base64.b64encode(open("assets/AssemblyAI.png", "rb").read()).decode(),
           base64.b64encode(open("assets/deep-seek.png", "rb").read()).decode()), unsafe_allow_html=True)

with col2:
    st.button("Clear ↺", on_click=reset_chat)

# Initialize chat history
if "messages" not in st.session_state:
    reset_chat()

# Display chat messages from history on app rerun
for message in st.session_state.messages:
    with st.chat_message(message["role"]):
        st.markdown(message["content"])

# Accept user input
if prompt := st.chat_input("Ask about the audio conversation..."):
    # Add user message to chat history
    st.session_state.messages.append({"role": "user", "content": prompt})
    # Display user message in chat message container
    with st.chat_message("user"):
        st.markdown(prompt)

    # Display assistant response in chat message container
    with st.chat_message("assistant"):
        message_placeholder = st.empty()
        full_response = ""

        # Get streaming response
        streaming_response = query_engine.query(prompt)

        for chunk in streaming_response:
            try:
                new_text = chunk.raw["choices"][0]["delta"]["content"]
                full_response += new_text
                message_placeholder.markdown(full_response + "▌")
            except:
                pass

        message_placeholder.markdown(full_response)

    # Add assistant response to chat history
    st.session_state.messages.append({"role": "assistant", "content": full_response})
and
""".format(base64.b64encode(open("assets/AssemblyAI.png", "rb").read()).decode(),
base64.b64encode(open("assets/deep-seek.png", "rb").read()).decode()), unsafe_allow_html=True)
with col2:
st.button("Clear ↺", on_click=reset_chat)
# Initialize chat history
if "messages" not in st.session_state:
reset_chat()
# Display chat messages from history on app rerun
for message in st.session_state.messages:
with st.chat_message(message["role"]):
st.markdown(message["content"])
# Accept user input
if prompt := st.chat_input("Ask about the audio conversation..."):
# Add user message to chat history
st.session_state.messages.append({"role": "user", "content": prompt})
# Display user message in chat message container
with st.chat_message("user"):
st.markdown(prompt)
# Display assistant response in chat message container
with st.chat_message("assistant"):
message_placeholder = st.empty()
full_response = ""
# Get streaming response
streaming_response = query_engine.query(prompt)
for chunk in streaming_response:
try:
new_text = chunk.raw["choices"][0]["delta"]["content"]
full_response += new_text
message_placeholder.markdown(full_response + "▌")
except:
pass
message_placeholder.markdown(full_response)
# Add assistant response to chat history
st.session_state.messages.append({"role": "assistant", "content": full_response})Run the app.py file in the terminal, with the below code, where you can upload an audio file and interact with the chatbot.
streamlit run app.pyYou can see the demo using the app here. And you can download the sample audio file from here.
Conclusion
We have successfully combined AssemblyAI, SambaNova Cloud, Qdrant, and DeepSeek to build a chatbot that uses Retrieval Augmented Generation over audio. The rag_code.py file manages the RAG workflow, while the app.py file provides a simple Streamlit interface. I want you to interact with this chatbot using different audio files, tweak the code, add new features, and explore the endless possibilities of audio-based chat solutions.
GitHub Repo: https://github.com/karthikponna/chat_with_audios/tree/main
Key Takeaways
- Leveraging AssemblyAI for audio transcription enables accurate speaker-labeled text, providing a solid foundation for advanced conversation experiences.
- Integrating Qdrant ensures rapid vector-based retrieval, offering quick access to relevant context for more informed responses.
- Applying a RAG approach combines retrieval and generation, guaranteeing answers grounded in actual data.
- Employing SambaNova Cloud for the LLM delivers robust language understanding, powering engaging, context-aware interactions.
- Using Streamlit for the user interface offers a straightforward, interactive environment, simplifying audio-based chatbot deployment.
The media shown in this article is not owned by Analytics Vidhya and is used at the Author’s discretion.
Frequently Asked Questions
A. RAG stands for Retrieval Augmented Generation. It fetches relevant data from a vector database, ensuring the chatbot’s answers are grounded in real context rather than just model predictions.
A. Simply change the embed_model_name in the EmbedData class to your preferred Hugging Face model, ensuring it supports text embedding.
A. Adjust the qa_prompt_tmpl_str in the RAG class to include any additional instructions or formatting needed for your application.
A. Qdrant provides efficient vector search, making it easy to quickly find relevant context within large sets of embedded text.
Hi! I’m Karthik Ponna, a Machine Learning Engineer at Antern. I’m deeply passionate about exploring the fields of AI and Data Science, as they constantly evolve and shape the future. I believe writing blogs is a great way to not only enhance my skills and solidify my understanding but also to share my knowledge and insights with others in the community. This helps me connect with like-minded individuals who share a curiosity for technology and innovation.
Login to continue reading and enjoy expert-curated content.


