

Imagine having a personal research assistant who not only understands your question but intelligently decides how to find answers. Diving into your document library for some queries while generating creative responses for others. This is what is possible with an Agentic RAG Using LlamaIndex TypeScript system.
Whether you are looking to create a literature analysis system, a technical documentation assistant, or any knowledge-intensive application, the approaches outlined in this blog post provide a practical foundation you can build. This blog post will take you on a hands-on journey through building such a system using LlamaIndex TypeScript, from setting up local models to implementing specialized tools that work together to deliver remarkably helpful responses.
Learning Objectives
- Understand the fundamentals of Agentic RAG Using LlamaIndex TypeScript for building intelligent agents.
- Learn how to set up the development environment and install necessary dependencies.
- Explore tool creation in LlamaIndex, including addition and division operations.
- Implement a math agent using LlamaIndex TypeScript for executing queries.
- Execute and test the agent to process mathematical operations efficiently.
This article was published as a part of the Data Science Blogathon.
Why Use TypeScript?
TypeScript offers significant advantages for building LLM-based AI application
- Type Safety: TypeScript’s static typing catches errors during development rather than at runtime.
- Better IDE Support: Auto-completion and intelligent suggestions make development faster
- Improve Maintainability: Type definition makes code more readable and self-documenting
- Seamless Javascript Integration: TypeScript works with existing Javascript libraries
- Scalability: TypeScript’s structure helps manage complexity as your RAG application grows.
- Frameworks: Vite, NextJS, etc well designed robust web frameworks that seamlessly connect with TypeScript which makes building AI-based web applications easy and scalable.
Benefits of LlamaIndex
LlamaIndex provides a powerful framework for building LLM-based AI applications.
- Simplified Data Ingestion: Easy methods to load and process documents on the device or the cloud using LlamaParse
- Vector Storage: Built-in support for embedding and retrieving semantic information with various integrations with industry-standard databases such as ChromaDB, Milvus, Weaviet, and pgvector.
- Tool Integration: Framework for creating and managing multiple specialized tools
- Agent Plugging: You can build or plug third-party agents easily with LlamaIndex.
- Query Engine Flexibility: Customizable query processing for different use cases
- Persistence Support: Ability to save and load indexes for efficient reuse
Why LlamaIndex TypeScript?
LlamaIndex is a popular AI framework for connecting custom data sources to large language models. While originally implementers in Python, LlamaIndex now offers a TypeScript version that brings its powerful capabilities to the JavaScript ecosystem. This is particularly valuable for:
- Web applications and Node.js services.
- JavaScript/TypeScript developers who want to stay within their preferred language.
- Projects that need to run in browser environments.
What is Agentic RAG?
Before diving into implementation, let’s clarify what it means by Agetntic RAG.
- RAG(Retrieval-Augmented Generation) is a technique that enhances language model outputs by first retrieving relevant information from a knowledge base, and then using that information to generate more accurate, factual responses.
- Agentic systems involve AI that can decide which actions to take based on user queries, effectively functioning as an intelligent assistant that chooses appropriate tools to fulfill requests.
An Agentic RAG system combines these approaches, creating an AI assistant that can retrieve information from a knowledge base and use other tools when appropriate. Based on the nature of the user’s question, it decides whether to use its built-in knowledge, query the vector database, or call external tools.
Setting Development Environment
Install Node in Windows
To install Node into Windows follow these steps.
# Download and install fnm:
winget install Schniz.fnm

# Download and install Node.js:
fnm install 22

# Verify the Node.js version:
node -v # Should print "v22.14.0".

# Verify npm version:
npm -v # Should print "10.9.2".
For other systems, you must follow this.
A Simple Math Agent
Let’s create a simple math agent to understand the LlamaIndex TypeScript API.
Step 1: Set Up Work Environment
Create a new directory and navigate into it and Initialize a Node.js project and install dependencies.
$ md simple-agent
$ cd simple-agent
$ npm init
$ npm install llamaindex @llamaindex/ollama
We will create two tools for the math agent.
- An addition tool that adds two numbers
- A divide tool that divides numbers
Step 2: Import Required Modules
Add the following imports to your script:
import { agent, Settings, tool } from "llamaindex";
import { z } from "zod";
import { Ollama, OllamaEmbedding } from "@llamaindex/ollama";
Step 3: Create an Ollama Model Instance
Instantiate the Llama model:
const llama3 = new Ollama({
  model: "llama3.2:1b",
});
Now using Settings you directly set the Ollama model for the system’s main model or use a different model directly on the agent.
Settings.llm = llama3;Step 4: Create Tools for the Math Agent
Add and divide tools
const addNumbers = tool({
  name: "SumNubers",
  description: "use this function to sun two numbers",
  parameters: z.object({
    a: z.number().describe("The first number"),
    b: z.number().describe("The second number"),
  }),
  execute: ({ a, b }: { a: number; b: number }) => `${a + b}`,
});
Here we will create a tool named addNumber using LlamaIndex tool API, The tool parameters object contains Four main parameters.
- name: The name of the tool
- description: The description of the tool that will be used by the LLM to understand the tool’s capability.
- parameter: The parameters of the tool, where I have used Zod libraries for data validation.
- execute: The function which will be executed by the tool.
In the same way, we will create the divideNumber tool.
const divideNumbers = tool({
  name: "divideNUmber",
  description: "use this function to divide two numbers",
  parameters: z.object({
    a: z.number().describe("The dividend a to divide"),
    b: z.number().describe("The divisor b to divide by"),
  }),
  execute: ({ a, b }: { a: number; b: number }) => `${a / b}`,
});
Step 5: Create the Math Agent
Now in the main function, we will create a math agent that will use the tools for calculation.
async function main(query: string) {
const mathAgent = agent({
tools: [addNumbers, divideNumbers],
llm: llama3,
verbose: false,
});
const response = await mathAgent.run(query);
console.log(response.data);
}
// driver code for running the application
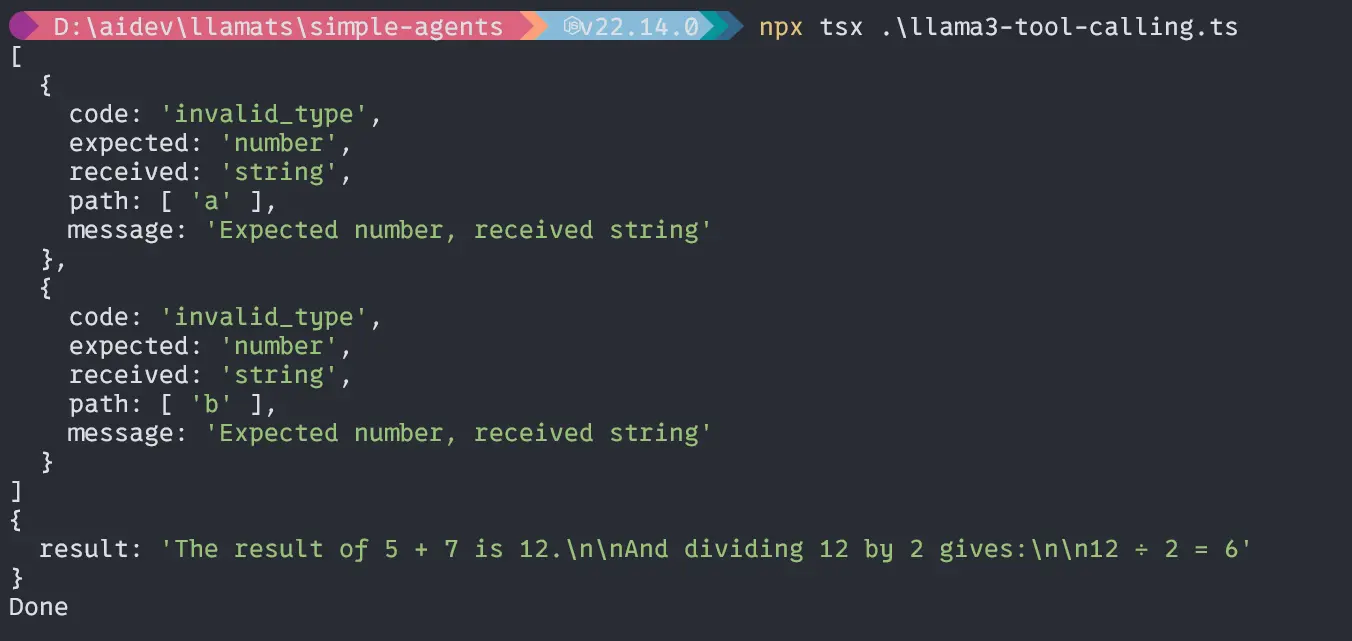
const query = "Add two number 5 and 7 and divide by 2"
void main(query).then(() => {
console.log("Done");
});If you set your LLM directly to through Setting then you don’t have to put the LLM parameters of the agent. If you want to use different models for different agents then you must put llm parameters explicitly.
After that response is the await function of the mathAgent which will run the query through the llm and return back the data.
Output
Second query “If the total number of boys in a class is 50 and girls is 30, what is the total number of students in the class?”;
const query =
  "If the total number of boys in a class is 50 and girls is 30, what is the total number of students in the class?";
void main(query).then(() => {
  console.log("Done");
});
Output
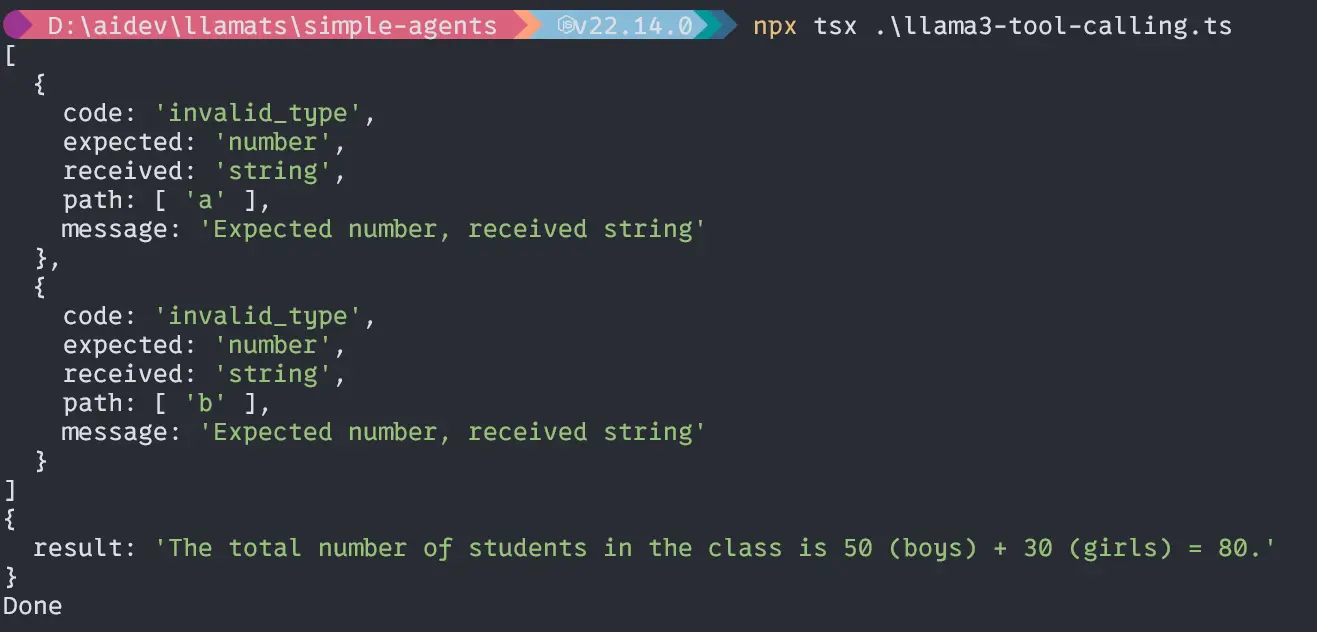
Wow, our little Llama3.2 1B model can handle agents well and calculate accurately. Now, let’s dive deep into the main part of the project.
Start to Build the RAG Application
To Set up the development environment follow the below instruction
Create folder name agentic-rag-app:
$ md agentic-rag-app
$ cd agentic-rag-app
$ npm init
$ npm install llamaindex @llamaindex/ollama
Also pull necessary models from Ollama here, Llama3.2:1b and nomic-embed-text.
In our application, we will have four module:
- load-index module for losing and indexing text file
- query-paul module for querying the Paul Graham essay
- constant module for storing reusable constant
- app module for running the application
First, create the constants file and Data folder
Create a constant.ts file in the project root.
const constant = {
  STORAGE_DIR: "./storage",
  DATA_FILE: "data/pual-essay.txt",
};

export default constant;
It is an object containing necessary constants which will be used throughout the application multiple times. It is a best practice to put something like that in a separate place. After that create a data folder and put the text file in it.
Data source Link.
Implementing Load and Indexing Module
Let’s see the below diagram to understand the code implementation.
Now, create a file name load-index.ts in the project root:
Importing Packages
import { Settings, storageContextFromDefaults } from "llamaindex";
import { Ollama, OllamaEmbedding } from "@llamaindex/ollama";
import { Document, VectorStoreIndex } from "llamaindex";
import fs from "fs/promises";
import constant from "./constant";
Creating Ollama Model Instances
const llama3 = new Ollama({
  model: "llama3.2:1b",
});

const nomic = new OllamaEmbedding({
  model: "nomic-embed-text",
});
Setting the System Models
Settings.llm = llama3;
Settings.embedModel = nomic;
Implementing indexAndStorage Function
async function indexAndStorage() {
  try {
    // set up persistance storage
    const storageContext = await storageContextFromDefaults({
      persistDir: constant.STORAGE_DIR,
    });

    // load docs
    const essay = await fs.readFile(constant.DATA_FILE, "utf-8");
    const document = new Document({
      text: essay,
      id_: "essay",
    });

    // create and persist index
    await VectorStoreIndex.fromDocuments([document], {
      storageContext,
    });

    console.log("index and embeddings stored successfully!");
  } catch (error) {
    console.log("Error during indexing: ", error);
  }
}
The above code will create a persistent storage space for indexing and embedding files. Then it will fetch the text data from the project data directory and create a document from that text file using the Document method from LlamaIndex and in the end, it will start creating a Vector index from that document using the VectorStoreIndex method.
Export the function for use in the other file:
export default indexAndStorage;Implementing Query Module
A diagram for visual understanding
Now, create a file name query-paul.ts in the project root.
Importing Packages
import {
  Settings,
  storageContextFromDefaults,
  VectorStoreIndex,
} from "llamaindex";
import constant from "./constant";
import { Ollama, OllamaEmbedding } from "@llamaindex/ollama";
import { agent } from "llamaindex";
Creating and setting the models are the same as above.
Implementing Load and Query
Now implementing the loadAndQuery function
async function loadAndQuery(query: string) {
  try {
    // load the stored index from persistent storage
    const storageContext = await storageContextFromDefaults({
      persistDir: constant.STORAGE_DIR,
    });

    /// load the existing index
    const index = await VectorStoreIndex.init({ storageContext });

    // create a retriever and query engine
    const retriever = index.asRetriever();
    const queryEngine = index.asQueryEngine({ retriever });

    const tools = [
      index.queryTool({
        metadata: {
          name: "paul_graham_essay_tool",
          description: `This tool can answer detailed questions about the essay by Paul Graham.`,
        },
      }),
    ];
    const ragAgent = agent({ tools });

    // query the stored embeddings
    const response = await queryEngine.query({ query });
    let toolResponse = await ragAgent.run(query);

    console.log("Response: ", response.message);
    console.log("Tool Response: ", toolResponse);
  } catch (error) {
    console.log("Error during retrieval: ", error);
  }
}
In the above code, setting the storage context from the STROAGE_DIR, then using VectorStoreIndex.init() method we will load the already indexed files from STROAGE_DIR.
After loading we will create a retriever and query engine from that retriever. and now as we have learned previously we will create and tool that will answer the question from indexed files. Now, add that tool to the agent named ragAgent.
Then we will query the indexed essay using two methods one from the query engine and the other from the agent and log the response to the terminal.
Exporting the function:
export default loadAndQuery;It is time to put all the modules together in a single app file for easy execution.
Implementing App.ts
Create an app.ts file
import indexAndStorage from "./load-index";
import loadAndQuery from "./query-paul";

function main(query: string) {
  console.log("======================================");
  console.log("Data Indexing....");
  indexAndStorage();
  console.log("Data Indexing Completed!");
  console.log("Please, Wait to get your response or SUBSCRIBE!");
  loadAndQuery(query);
}
const query = "What is Life?";
main(query);
Here, we will import all the modules, execute them serially, and run.
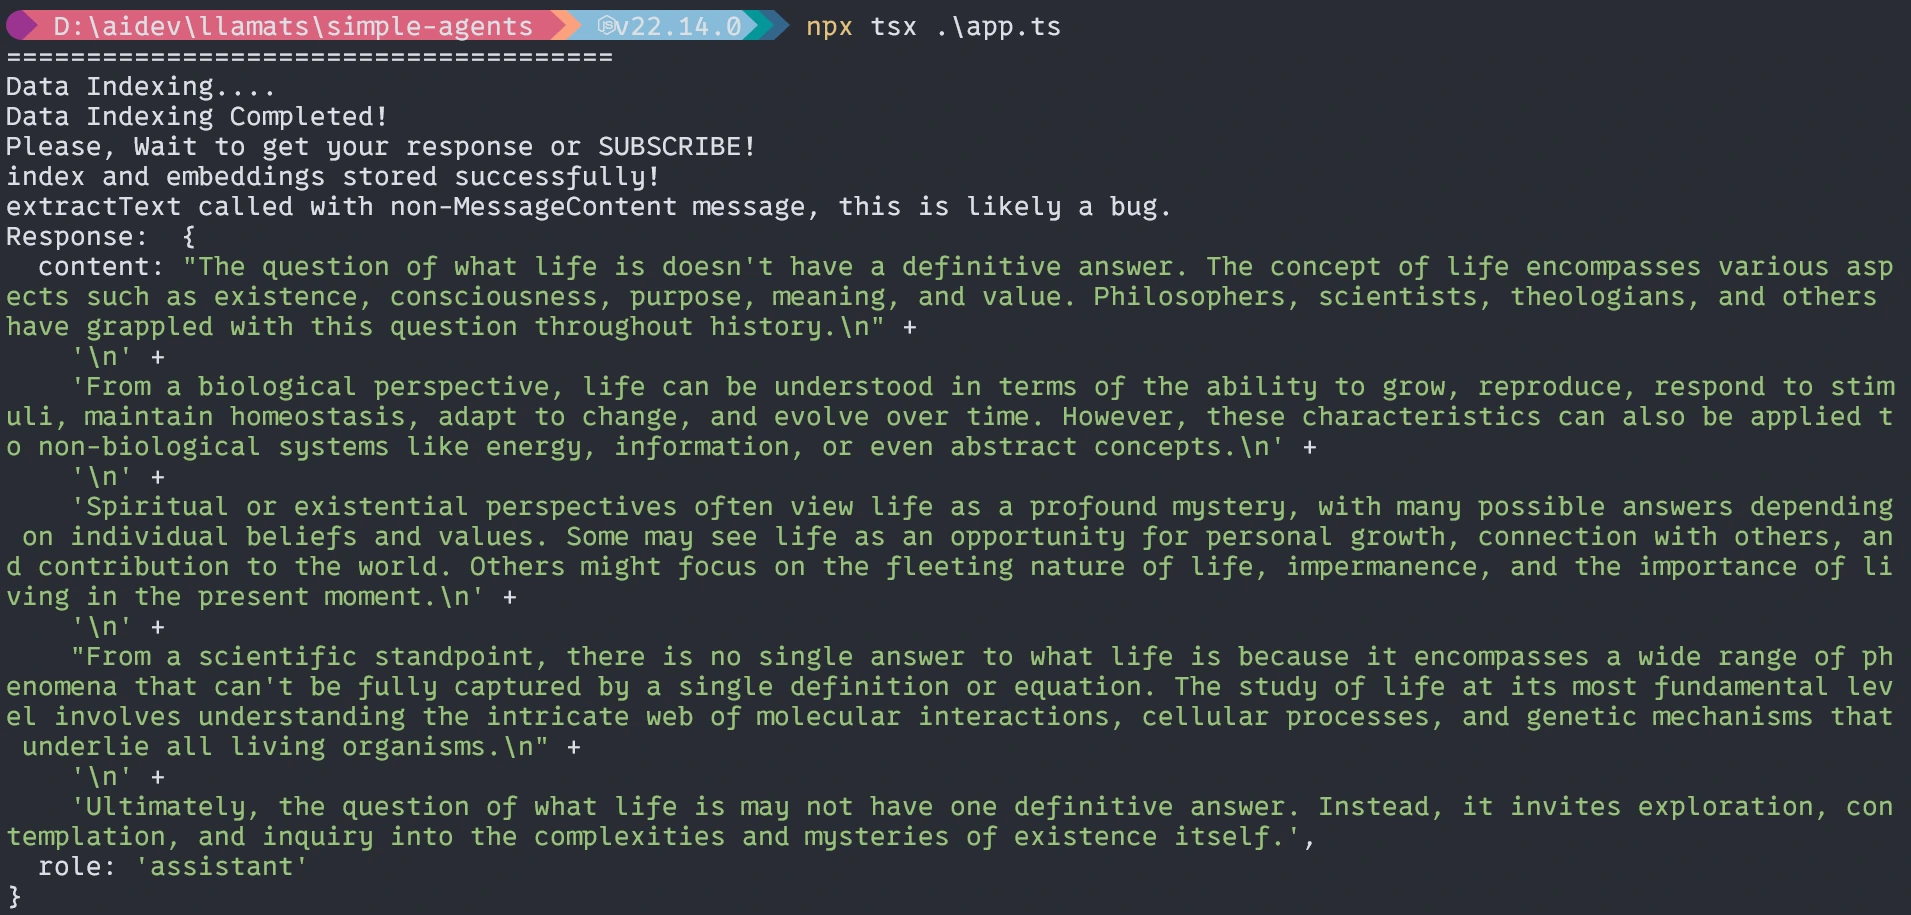
Running the Application
$ npx tsx ./app.tswhen it runs the first time three things will happen.
- It will ask for installing tsx, please install it.
- It will take time to embed the document depending on your systems(one time).
- Then it will give back the response.
First time running (Similar to it)
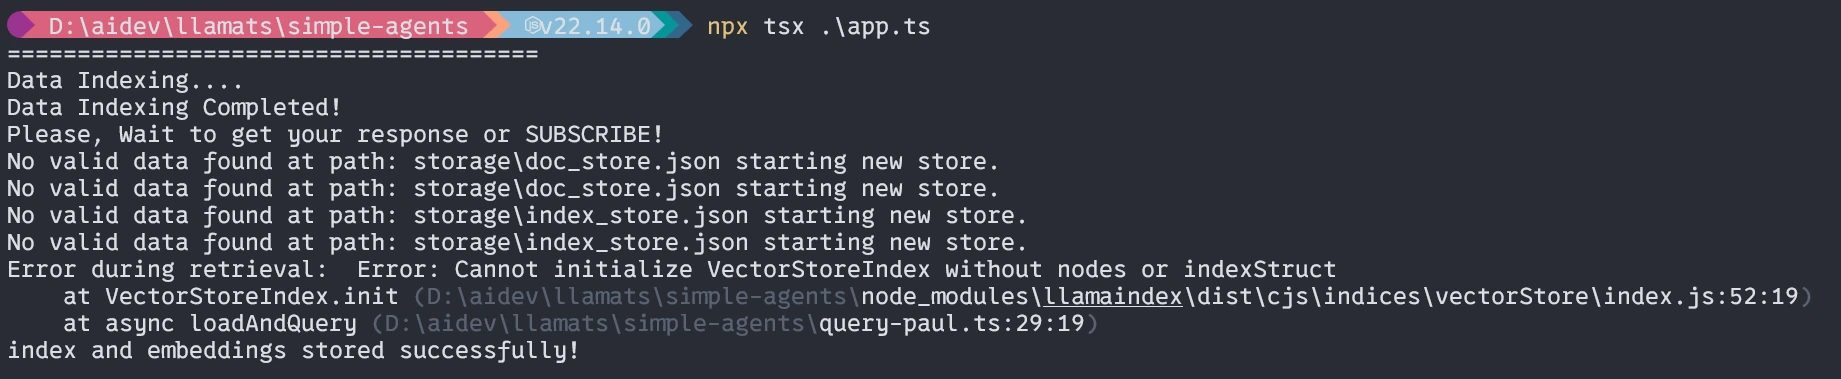
Without the agent, the response will be similar to it not exact.
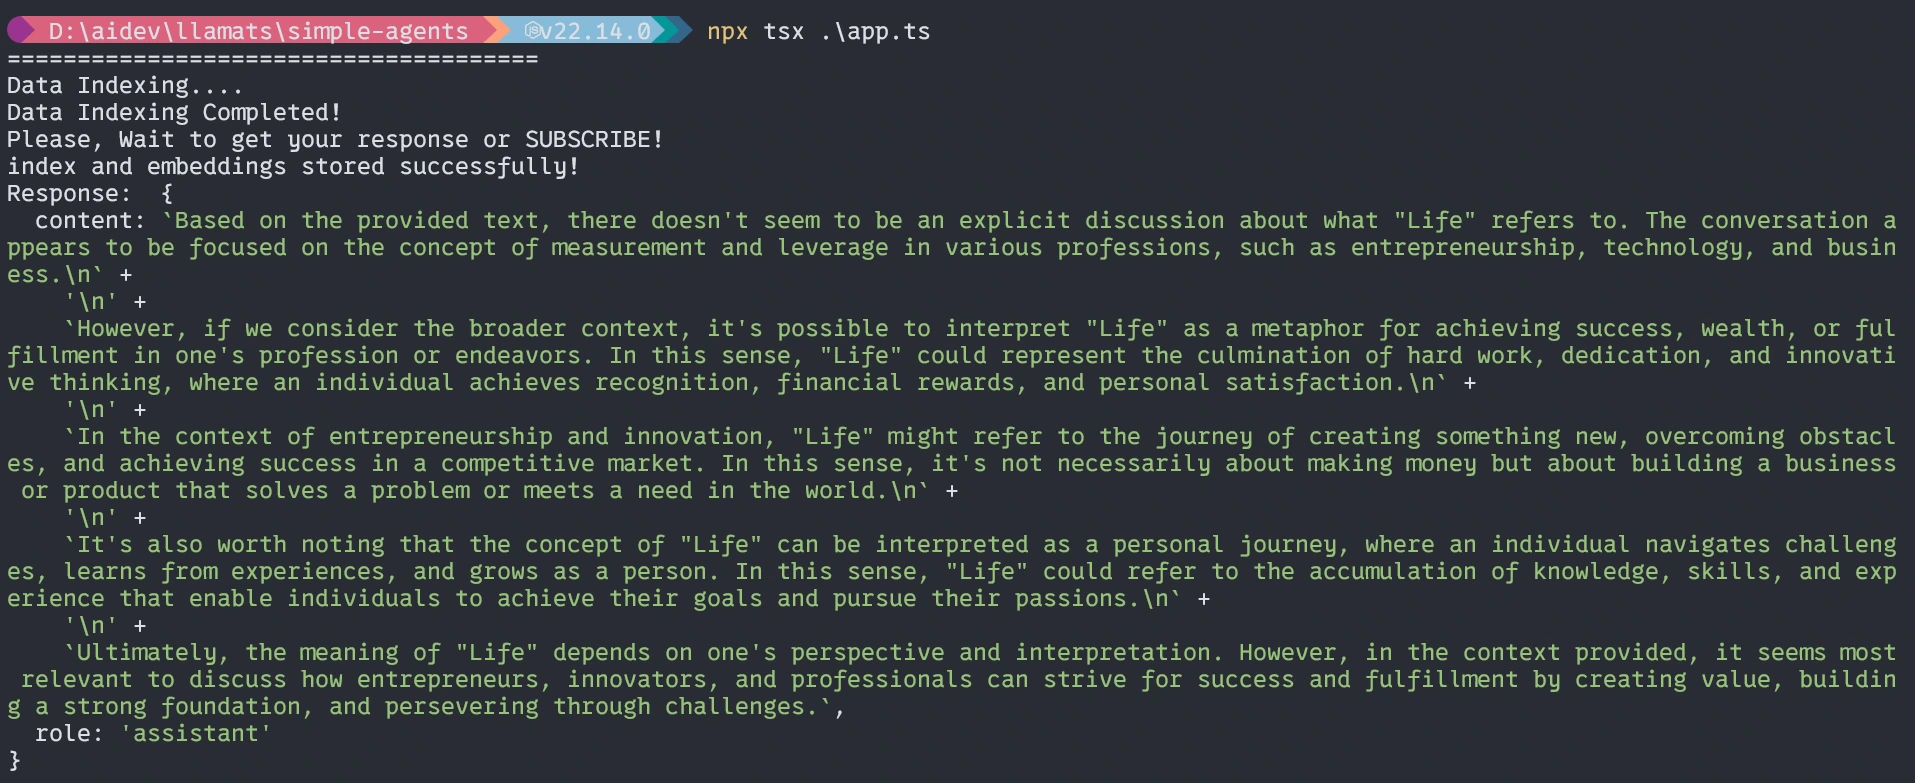
With Agents
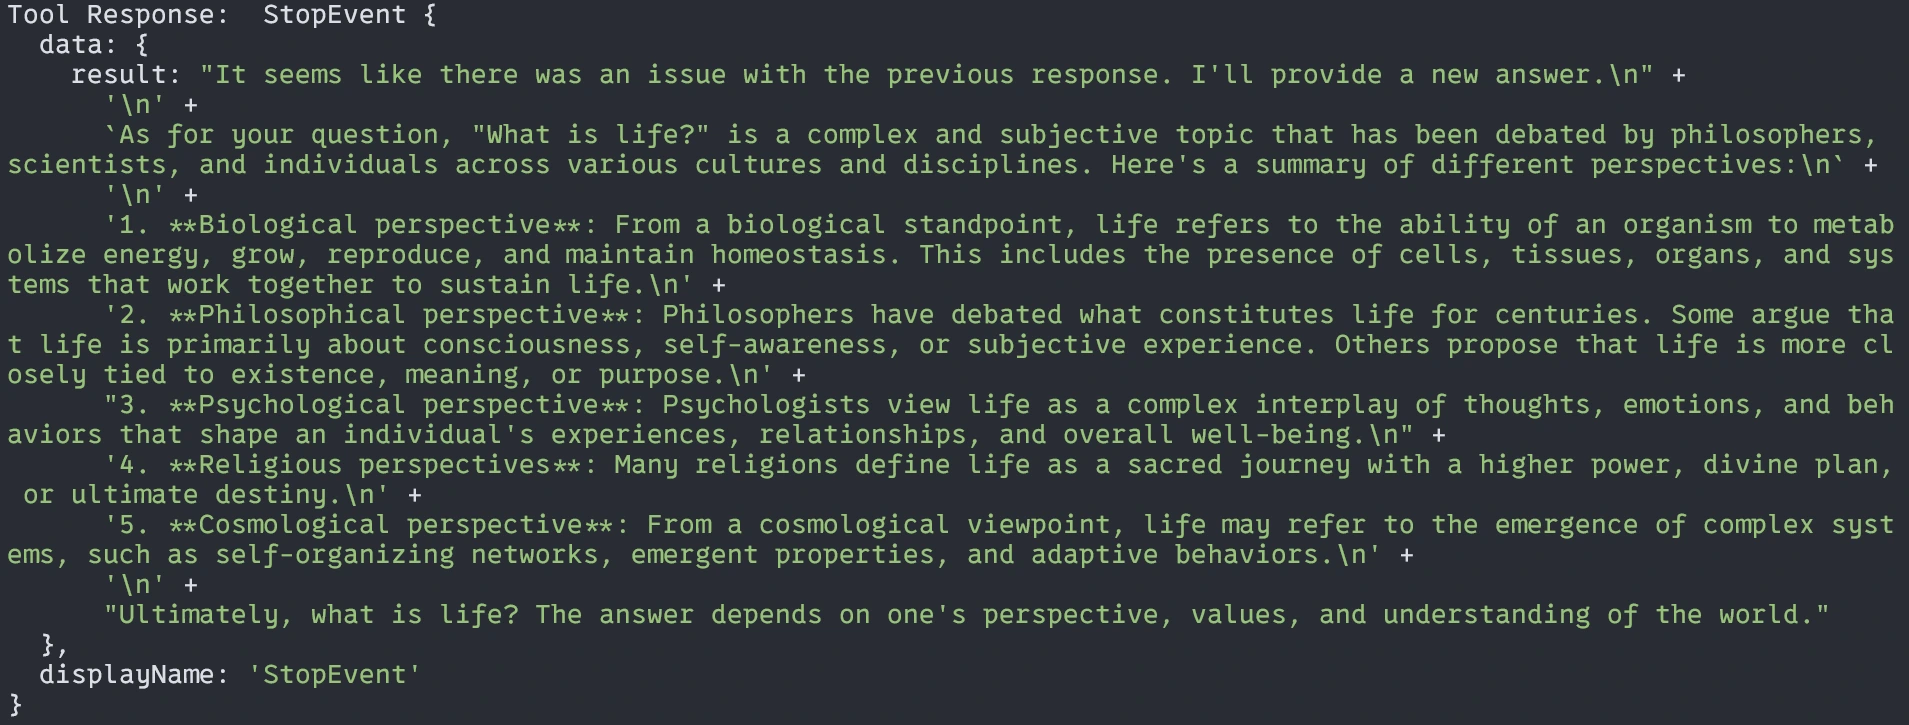
That’s all for today. I hope this article will help you learn and understand the workflow with TypeScript.
Project code repository here.
Conclusion
This is a simple yet functional Agentic RAG Using LlamaIndex TypeScript system. With this article, I want to give you a taste of another language besides Python for building Agentic RAG Using LlamaIndex TypeScript or any other LLM AI-based application. The Agentic RAG system represents a powerful evolution beyond basic RAG implementation, allowing for more intelligent, flexible responses to user queries. Using LlamaIndex with TypeScript, you can build such a system in a Type-safe, maintainable way that integrates well with the web application ecosystem.
Key Takeaways
- Typescript + LlamaIndex provides a robust foundation for building RAG systems.
- Persistent storage of embeddings improves efficiency for repeated queries.
- Agentic approaches enable more intelligent tool selection based on query content.
- Local model execution with Ollama offers privacy and cost advantages.
- Specialized tools can address different aspects of the domain knowledge.
- The Agentic RAG Using LlamaIndex TypeScript enhances retrieval-augmented generation by enabling intelligent, dynamic responses.
Frequently Asked Questions
A. You can modify the indexing function to load documents from multiple files or data sources and pass an array of document objects to the VectorStoreIndex method.
A. Yes! LlamaIndex supports various LLM providers including OpenAI, Antropic, and others. You can replace the Ollama setup with any supported provider.
A. Consider fine-tuning your embedding model on domain-specific data or implementing custom retrieval strategies that prioritize certain document sections based on your specific use case.
A. Direct querying simply retrieves relevant content and generates a response, while the agent approached first decides which tool is most appropriate for the query, potentially combining information from multiple sources or using specialized processing for different query types.
The media shown in this article is not owned by Analytics Vidhya and is used at the Author’s discretion.
A self-taught, project-driven learner, love to work on complex projects on deep learning, Computer vision, and NLP. I always try to get a deep understanding of the topic which may be in any field such as Deep learning, Machine learning, or Physics. Love to create content on my learning. Try to share my understanding with the worlds.
Login to continue reading and enjoy expert-curated content.


