Google is going all-in with Google Tag. We’ve already seen the consolidation effort through products like Google Analytics 4, and now Google is extending the merging of the tagging stack into Google Tag Manager, too.
I’m referring to the new Google Tag that has replaced Google Analytics 4 configuration tags in your Google Tag Manager containers.
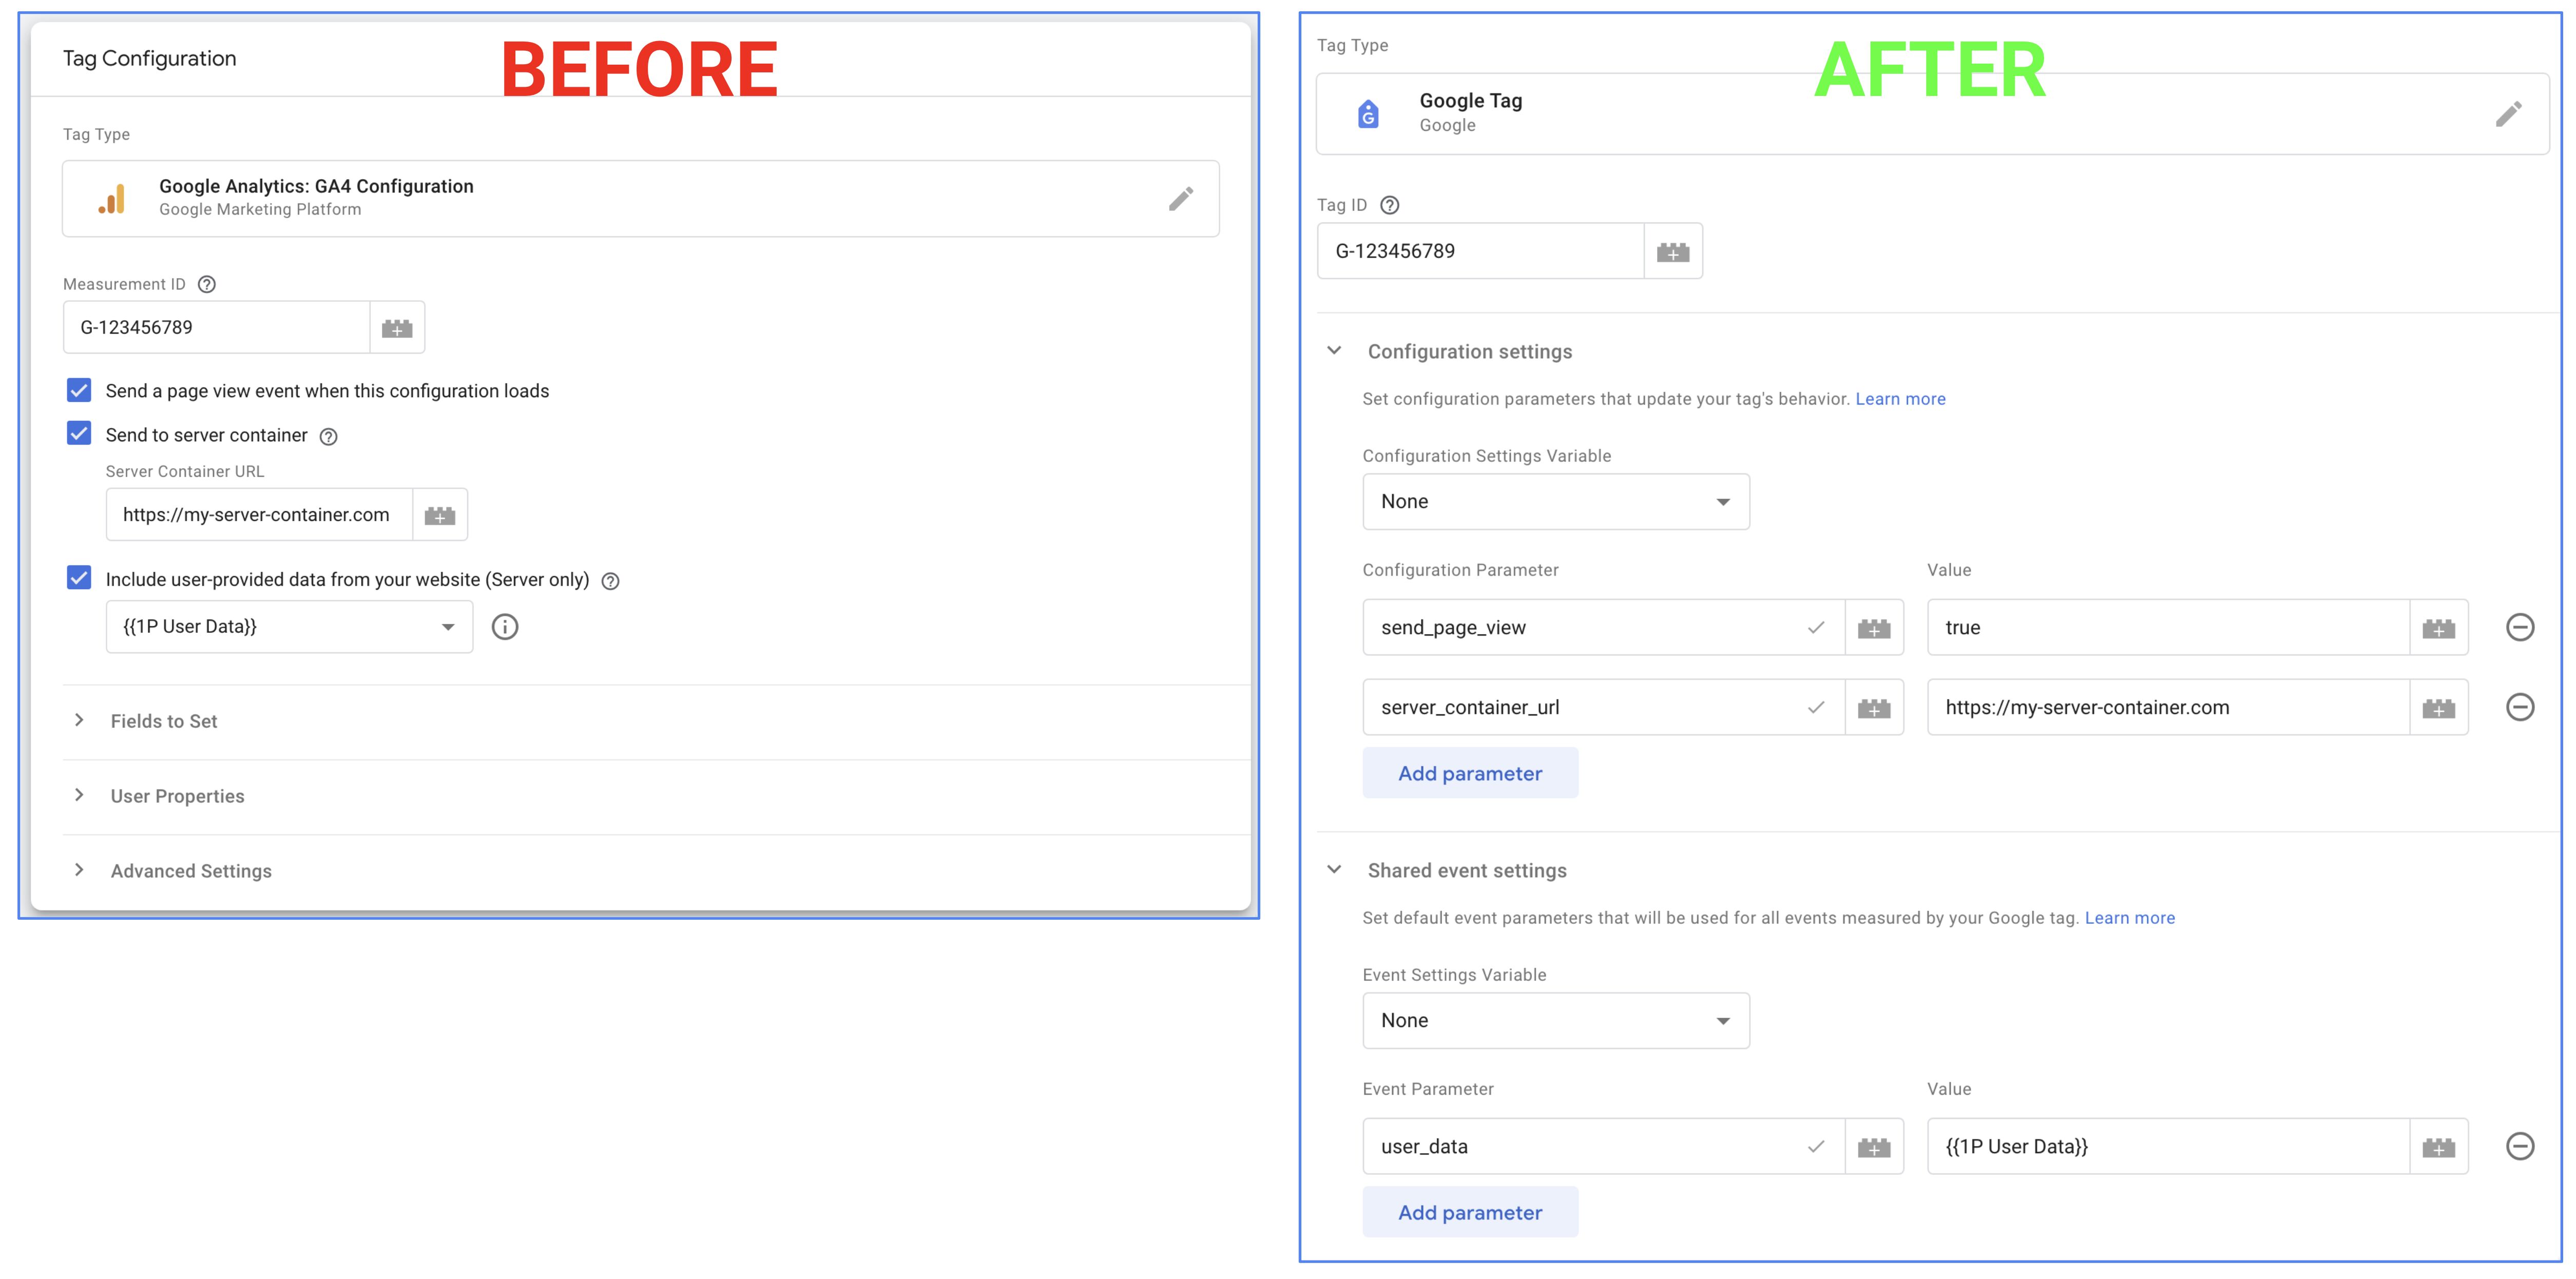
With this release, all your old GA4 configuration tags have been auto-migrated to the new Google Tag.
Functionality-wise, nothing has changed.
However, you’ll see that some of the settings you used to configure with UI toggles have now been replaced with key-value pairs in the settings list (more on this below).
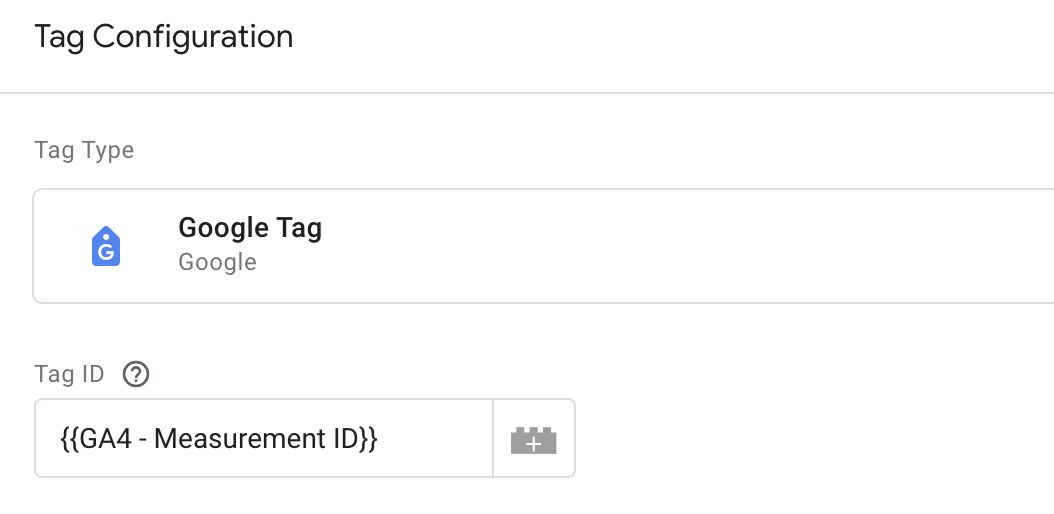
The Google Tag can load any supported product in the Google stack. The product is loaded by adding the Tag ID to the dedicated field.
The Google Tag also supports two new settings variables:
- Google Tag: Configuration Settings for loading configuration-specific settings with the Google Tag. Read more
- Google Tag: Event Settings for establishing fixed-value event parameters that will be used by all tags that reference this Google Tag. Read more
In this article, I’ll walk you through what to expect from the new Google Tag.
To echo my sentiments about these changes, I fully agree with my good friend Yehoshua Coren of Analytics Ninja fame:
Be sure to check out my article on the new settings variables, too, as well as the official Google Tag documentation.
X
The Simmer Newsletter
Subscribe to the Simmer newsletter to get the latest news and content from Simo Ahava into your email inbox!
Auto-migration
The migration is only relevant for Google Analytics 4 configuration tags that existed before the roll-out. Once the roll-out (and migration) is complete, all new product configurations will be done with just the Google Tag.
Leading up to the migration, you’ll see a banner like this in the Google Tag Manager user interface:
Once the migration is complete, the banner changes to this:
The migration itself includes the following things:
- Your Google Analytics 4: Configuration tags will be automatically migrated to Google Tags.
- The Send a page view event when this configuration loads toggle becomes a new configuration key named
send_page_viewwith the value eithertrueorfalse, depending on how you had it configured in the GA4 configuration tag. - The Send to server container toggle becomes a new configuration key named
server_container_urlwith the value from the GA4 configuration tag. - The Include user-provided data from your website (Server only) toggle becomes a new configuration key named
user_datawith the value set to the User-Provided Data variable from the GA4 configuration tag.
I really want to emphasize this point:
There are no functional differences between the old setup and the new setup upon the migration.
The biggest difficulty will be in maneuvering in this new user interface, trying to find what the new key names are for the fields that you used to toggle with user interface elements. And that’s hopefully something this article can help with.
How to configure the Google Tag
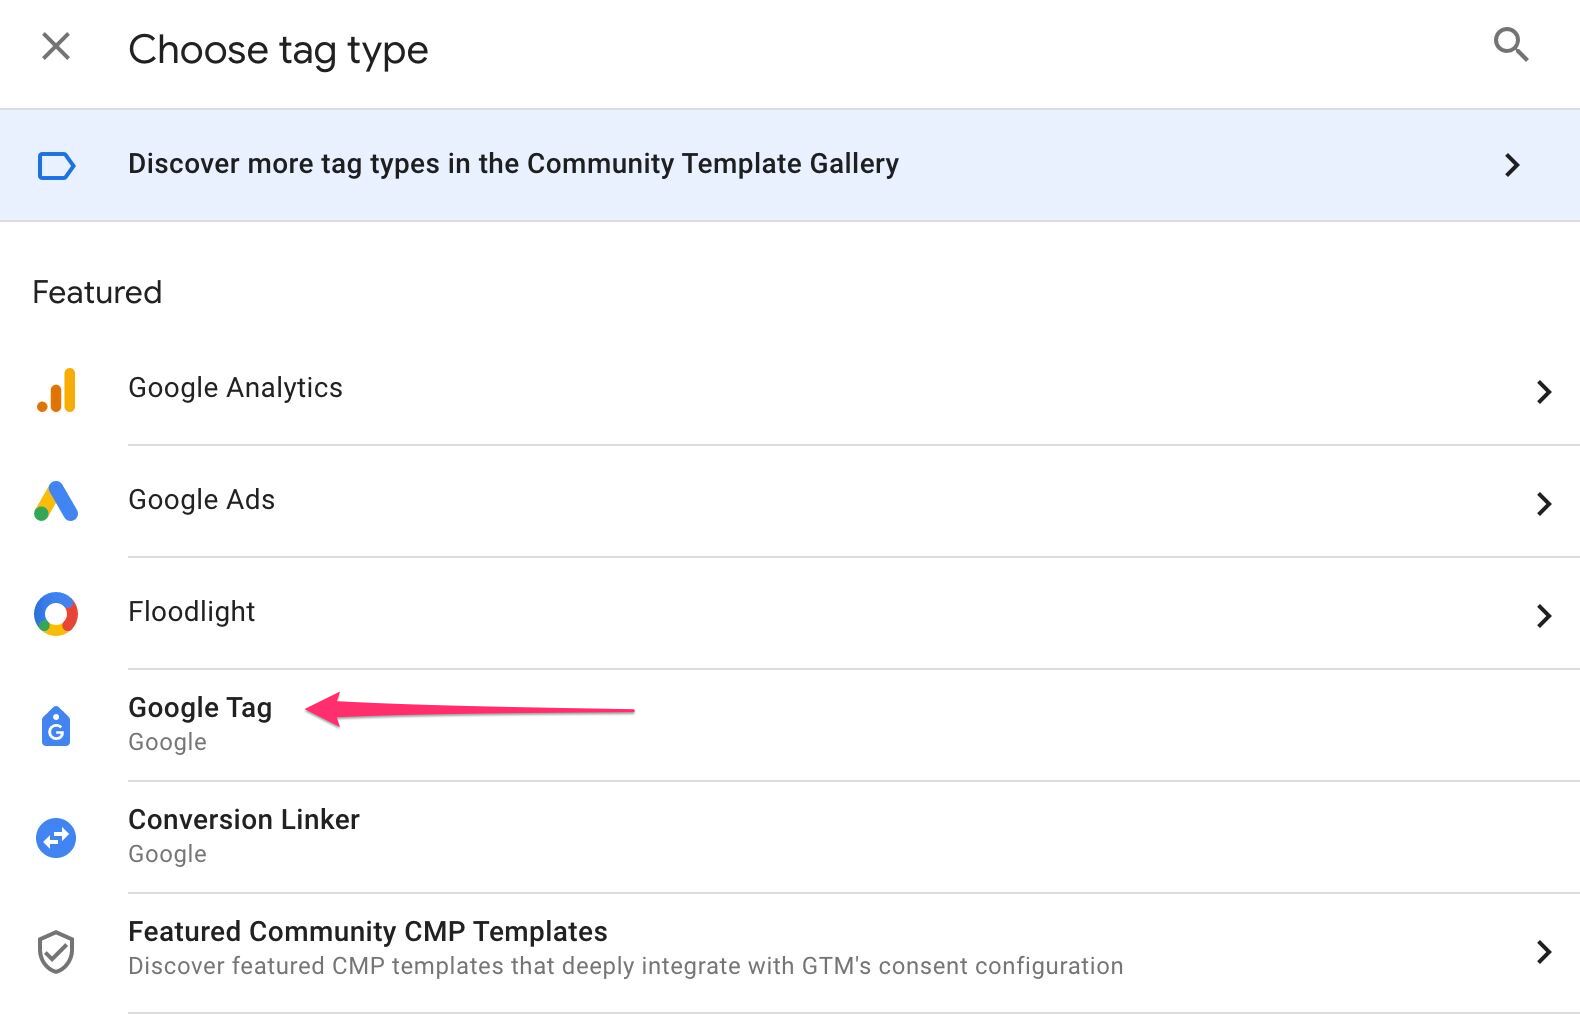
You can find the Google Tag type in the tag configuration menu.
To reduce clutter in the interface, tags related to individual Google products (such as Google Analytics and Google Ads) are now behind a secondary menu you can reach by clicking the product name in the main tag picker interface.
The Google Tag needs a Tag ID. This can be one of many different things, so I recommend you follow the documentation to find what your Tag ID is. For simplicity’s sake, if you’re configuring the Google Tag to load a GA4 configuration, you can use the Measurement ID of your GA4 data stream (G-XXXXXXXXXX).
Once you’ve added the Tag ID, you can proceed to add configuration settings as well as shared event settings across your product tags.
Configuration settings
Product-specific configurations can be added directly to the Google Tag under the Configuration settings heading.
I recommend loading the settings using a Google Tag: Configuration Settings variable, but you can also add (or override) individual parameters using the table fields.
Since the new configuration settings only accept key-value pairs of parameters, the settings that used to have dedicated UI toggles in the GA4 configuration tag have now been replaced with the following keys:
| Parameter name | Example | Description |
|---|---|---|
send_page_view |
false |
Whether to send a page_view event automatically when this Google Tag loads. |
server_container_url |
https://sst.mydomain.com |
The URL of your server container, if you want to divert this Google Tag’s traffic to your server-side GTM. |
First-party user data for Server containers and user properties for Google Analytics are configured with Shared event settings.
You can find the full list of supported configuration settings here.
Shared event settings
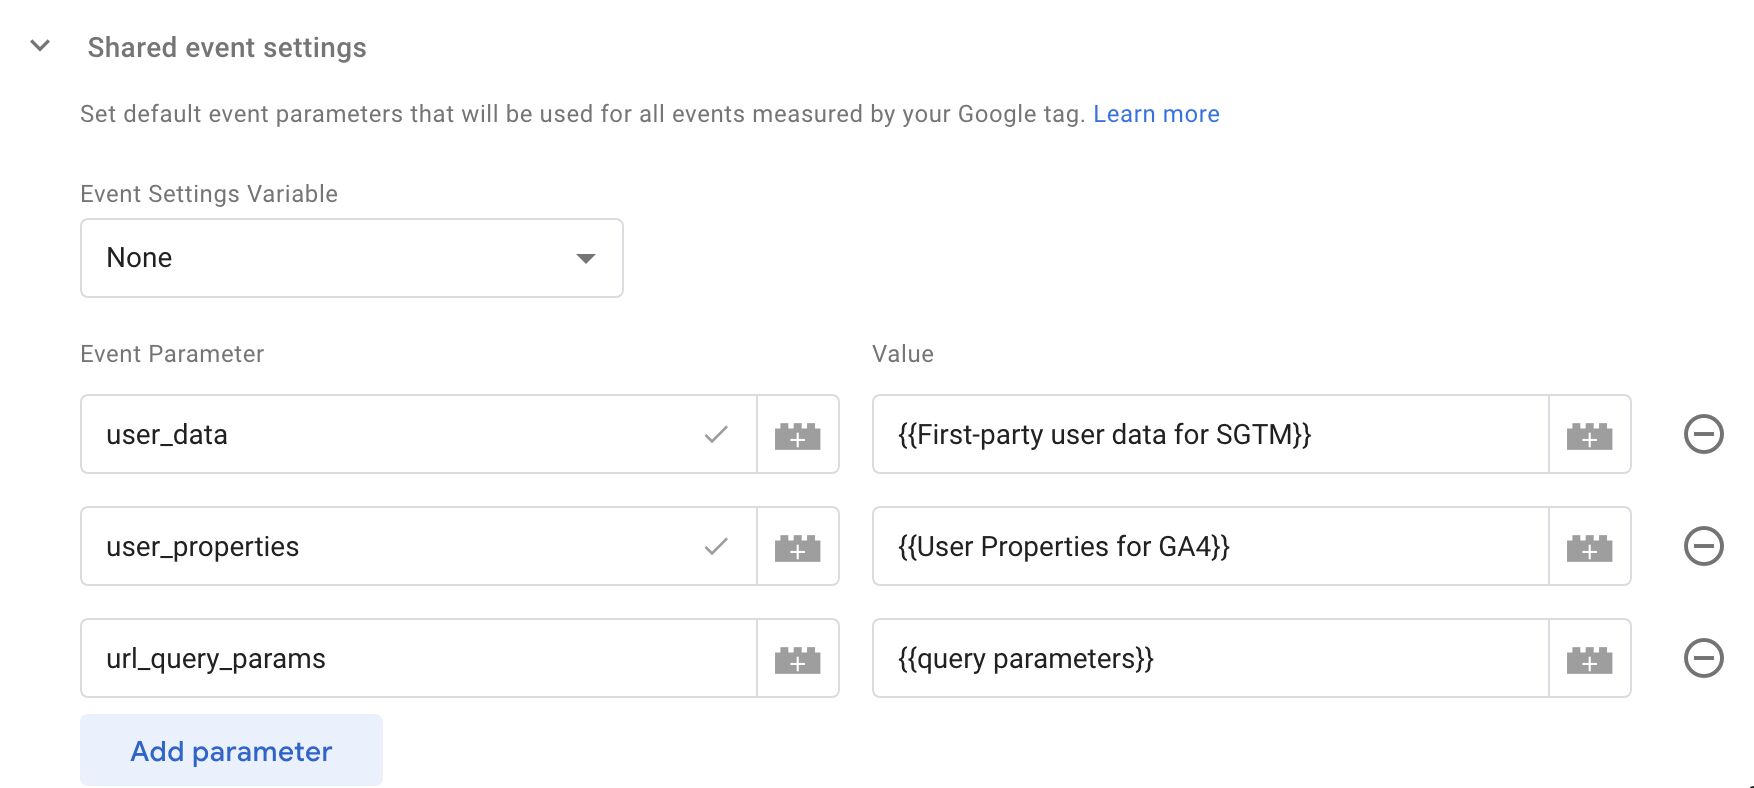
Shared event settings is where you can configure event parameters that any product tags that reference this Google Tag will make use of.
This includes custom event parameters (e.g. navigation_menu_id), predefined event parameters (e.g. currency) as well as custom settings that do not correspond with actual event parameters (e.g. user_properties and user_data).
In fact, there’s a lot of overlap between what you can set in Configuration settings and what you can set in Shared event settings. Ideally, you should follow the documentation to figure out what the predefined configuration settings and predefined event settings are.
As with configuration settings, I recommend loading shared event settings from a Google Tag: Event Settings variable. You can also add (or override) individual parameters using the table fields.
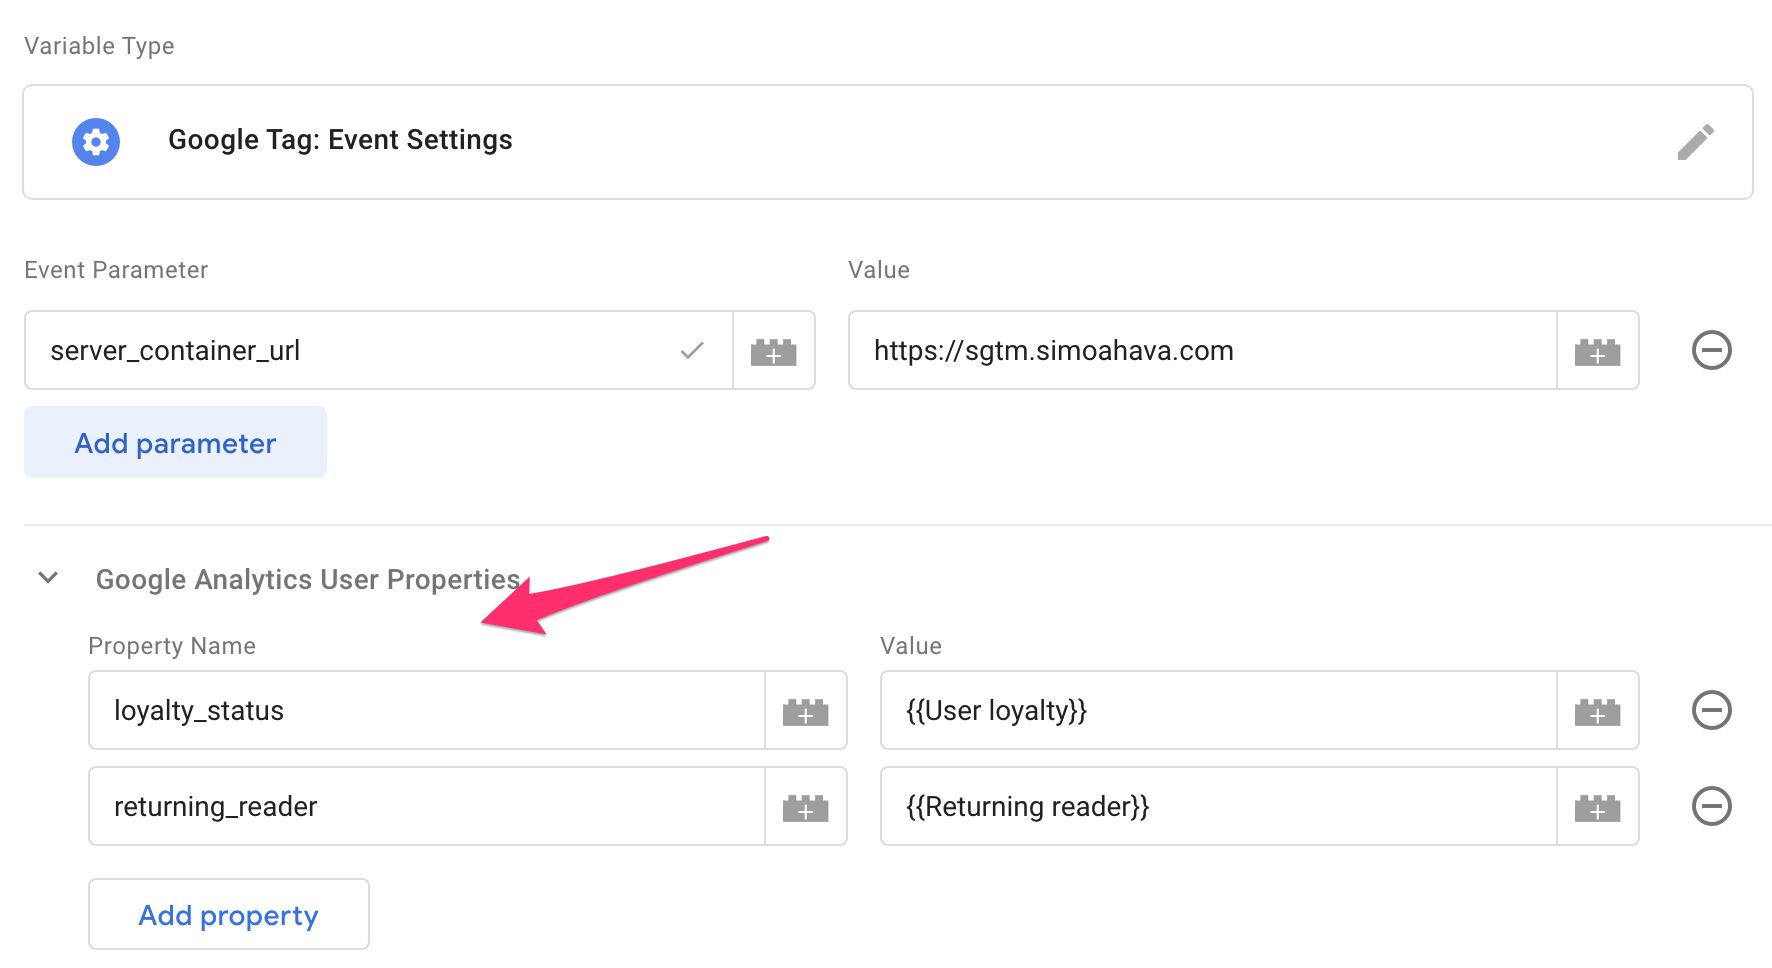
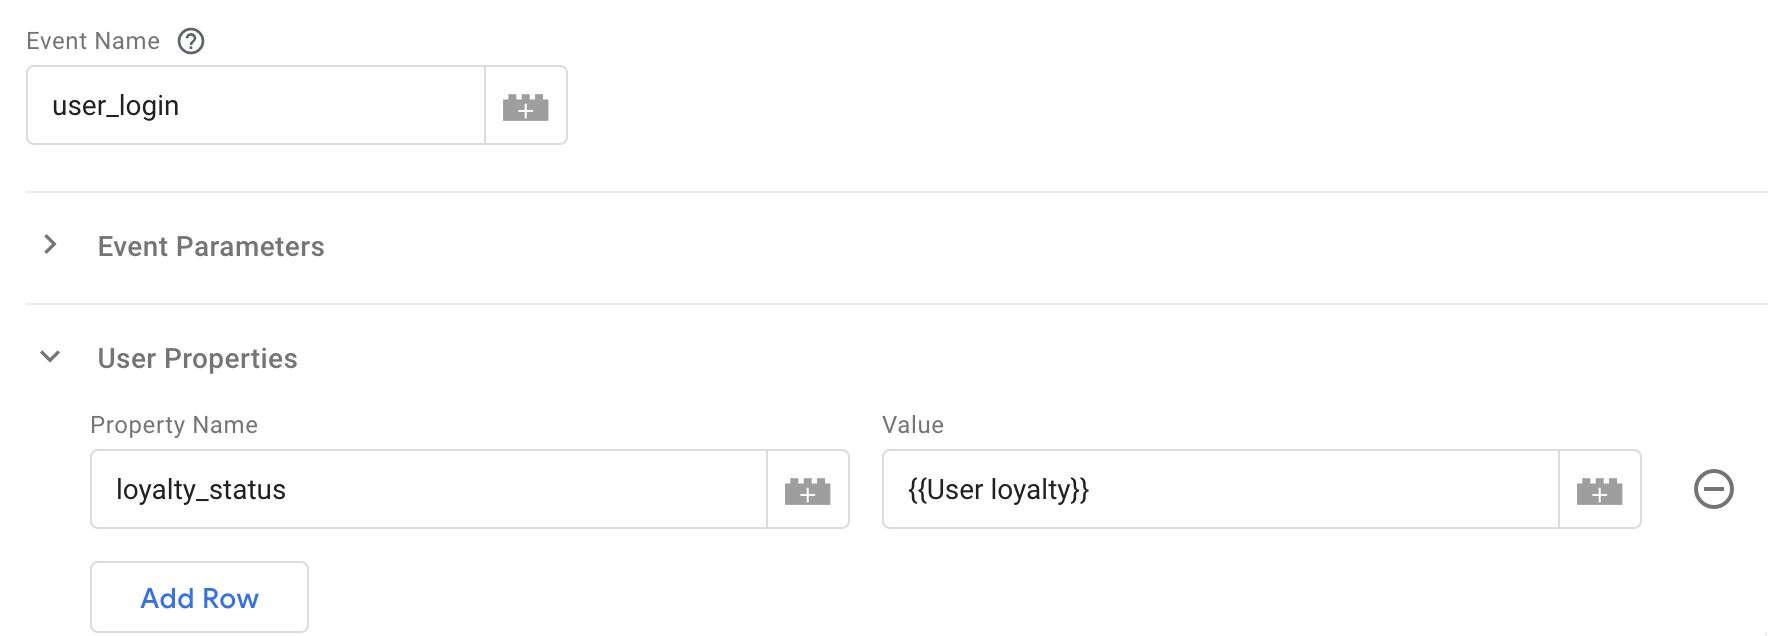
An additional perk of using a Google Tag: Event Settings variable is that the variable has a table for setting Google Analytics User Properties one by one instead of in bulk.
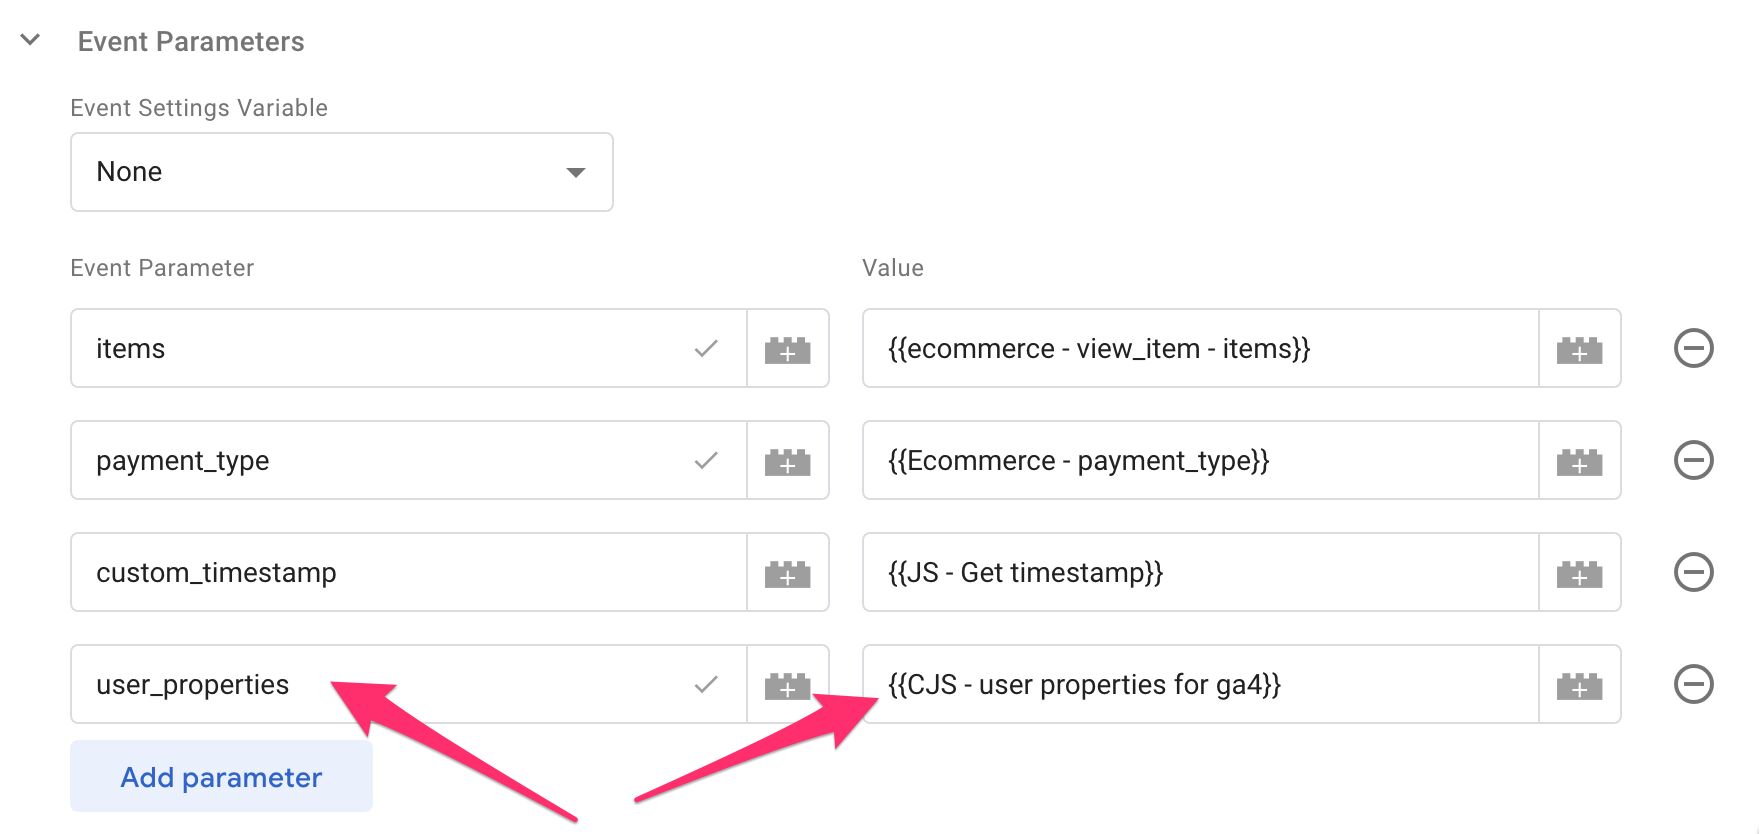
If you do want to add user properties in bulk (or with dynamic evaluation criteria), you can use the parameter user_properties set to a JavaScript object. Read this for an example.
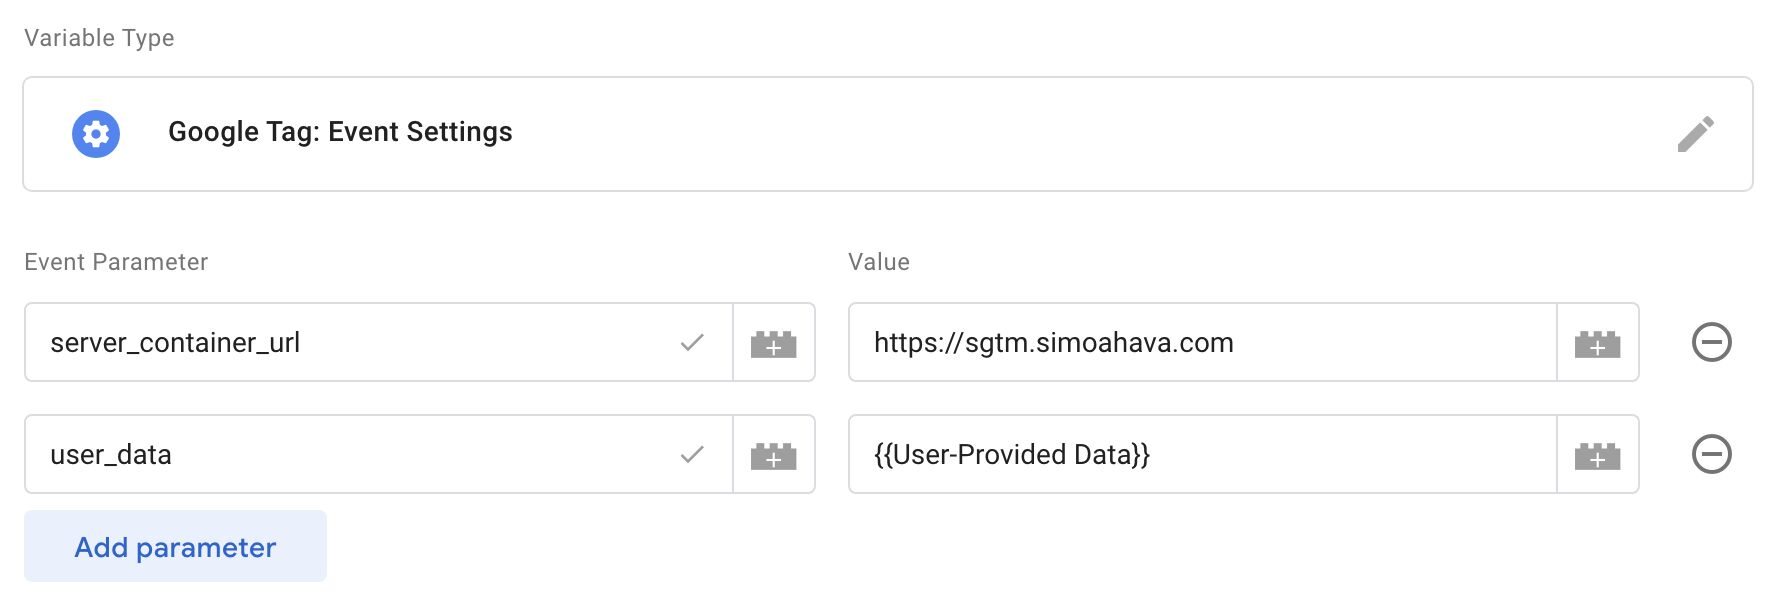
To add first-party user data (for Server containers), you need to add a new setting with the name user_data and set its value to a User-Provided Data variable.
As before, custom event parameters you add will be included in any events that fire after this Google Tag, as long as these event tags reference the Measurement ID loaded by the Google Tag.
Also as before, the values configured in the Google Tag will be fixed to the values when the Google Tag last fired. It’s thus not the right place to add any dynamic values such as hit timestamps or anything else where the value might change from one event to the next!
Event tag configuration
Even though this article is about the Google Tag, I think it’s useful to review how the Google Analytics 4 Event tag works, because there are some additional nuances especially with the advent of the new settings variables.
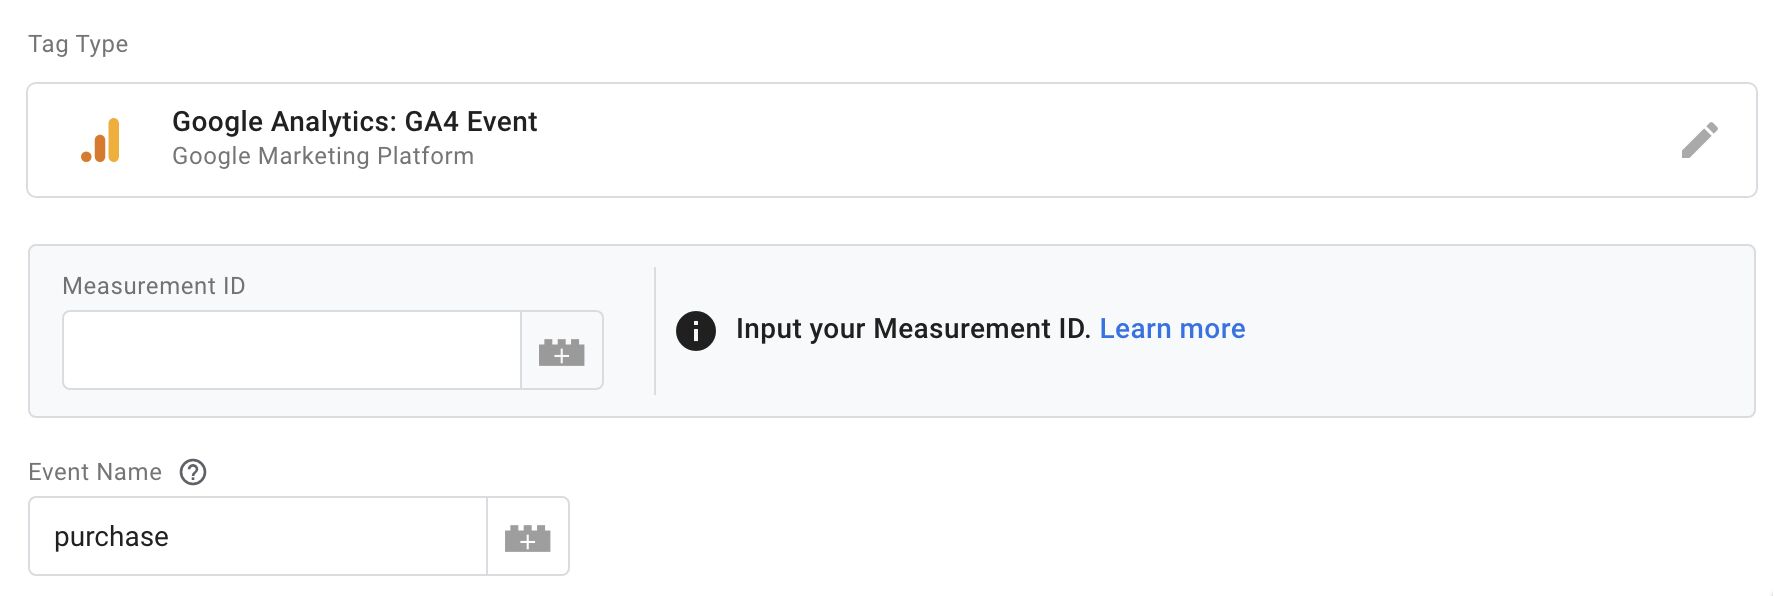
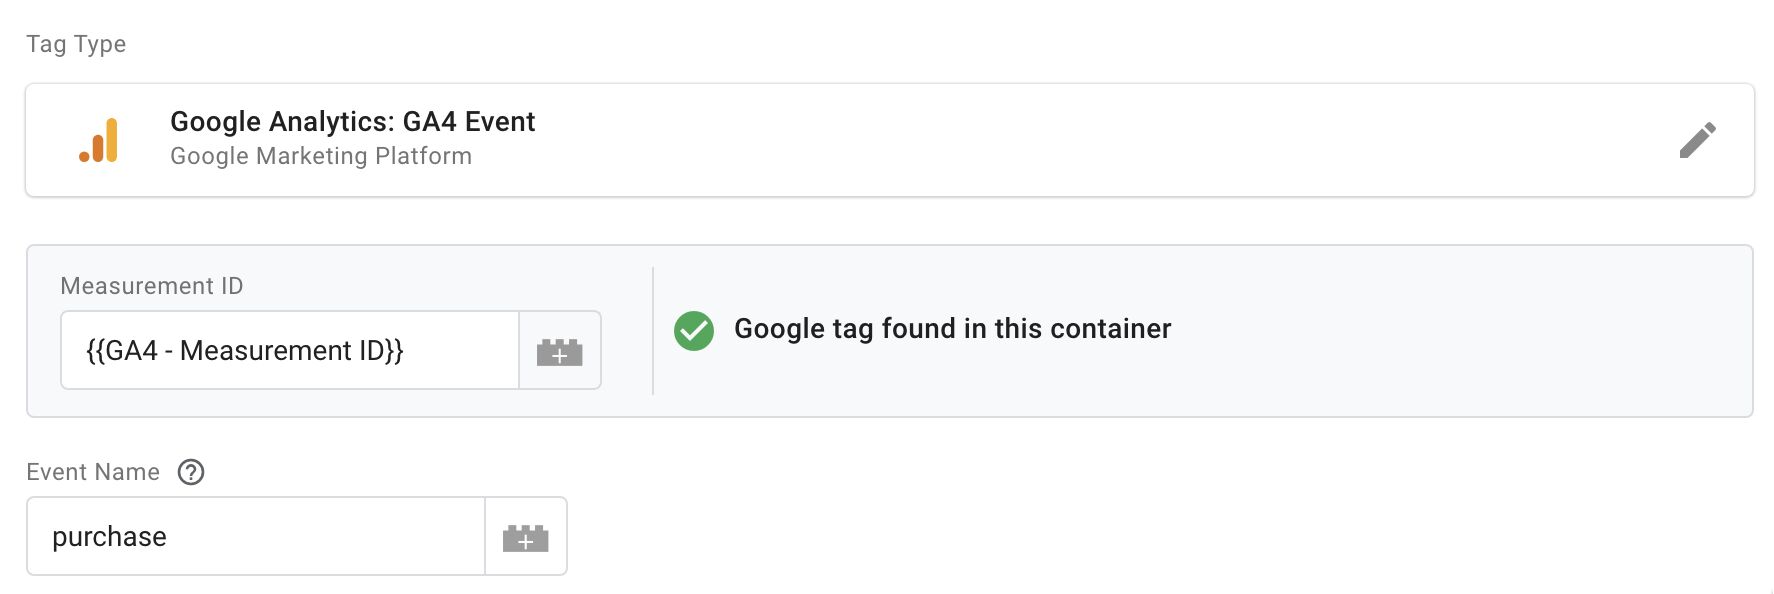
When you create a Google Analytics 4 Event tag, you’ll notice that the Measurement ID selector has changed, too.
This selector will automatically look through the container for a Google Tag that’s mapped with the same Measurement ID (it even works if you use a Constant variable for the Measurement ID!).
If you see a validation error for the Measurement ID, don’t worry. If you’re pulling the Measurement ID from a Lookup Table variable, for example, or if GA4 is loaded as an additional destination with the Google Tag, the validator won’t be able to match the ID from the event tag with what the Google Tag actually loads.
Add configuration settings to the Event tag(s)
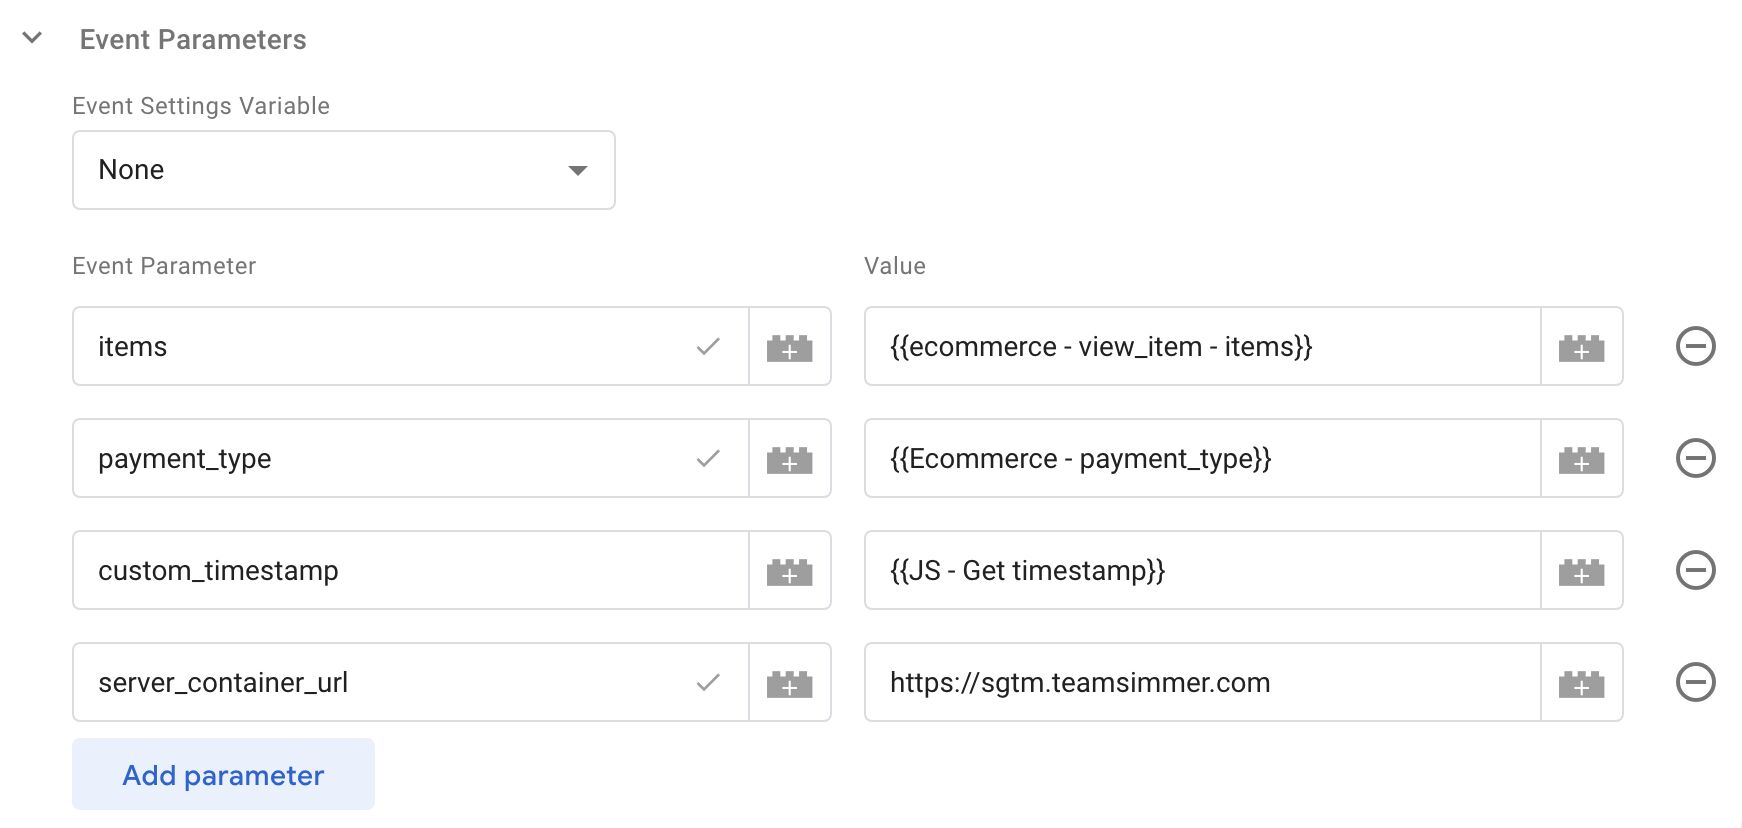
Under Event Parameters, you can add configuration settings as well.
This won’t necessarily work for all configuration settings – some of them, such as cookie settings, need to be established when the Google Tag first fires.
For example, I like to add the server_container_url (using an Event Settings variable unlike in the screenshot above!) to all my event tags to make sure that they will always send data to the Server container – even if I’ve inadvertently introduced a race condition with the Google Tag (see below).
One Google Tag per Tag ID per page!
One very important thing to remember about the Google Tag is that you should only ever have one single set of configurations per Tag ID active on the page at any given time.
Multiple configurations will override each other.
For example, if you first fire a Google Tag with the server_container_url setting, and shortly after another Google Tag (for the same Tag ID) without this setting, then the configuration without the server_container_url is the one that will apply to any events that fire later.
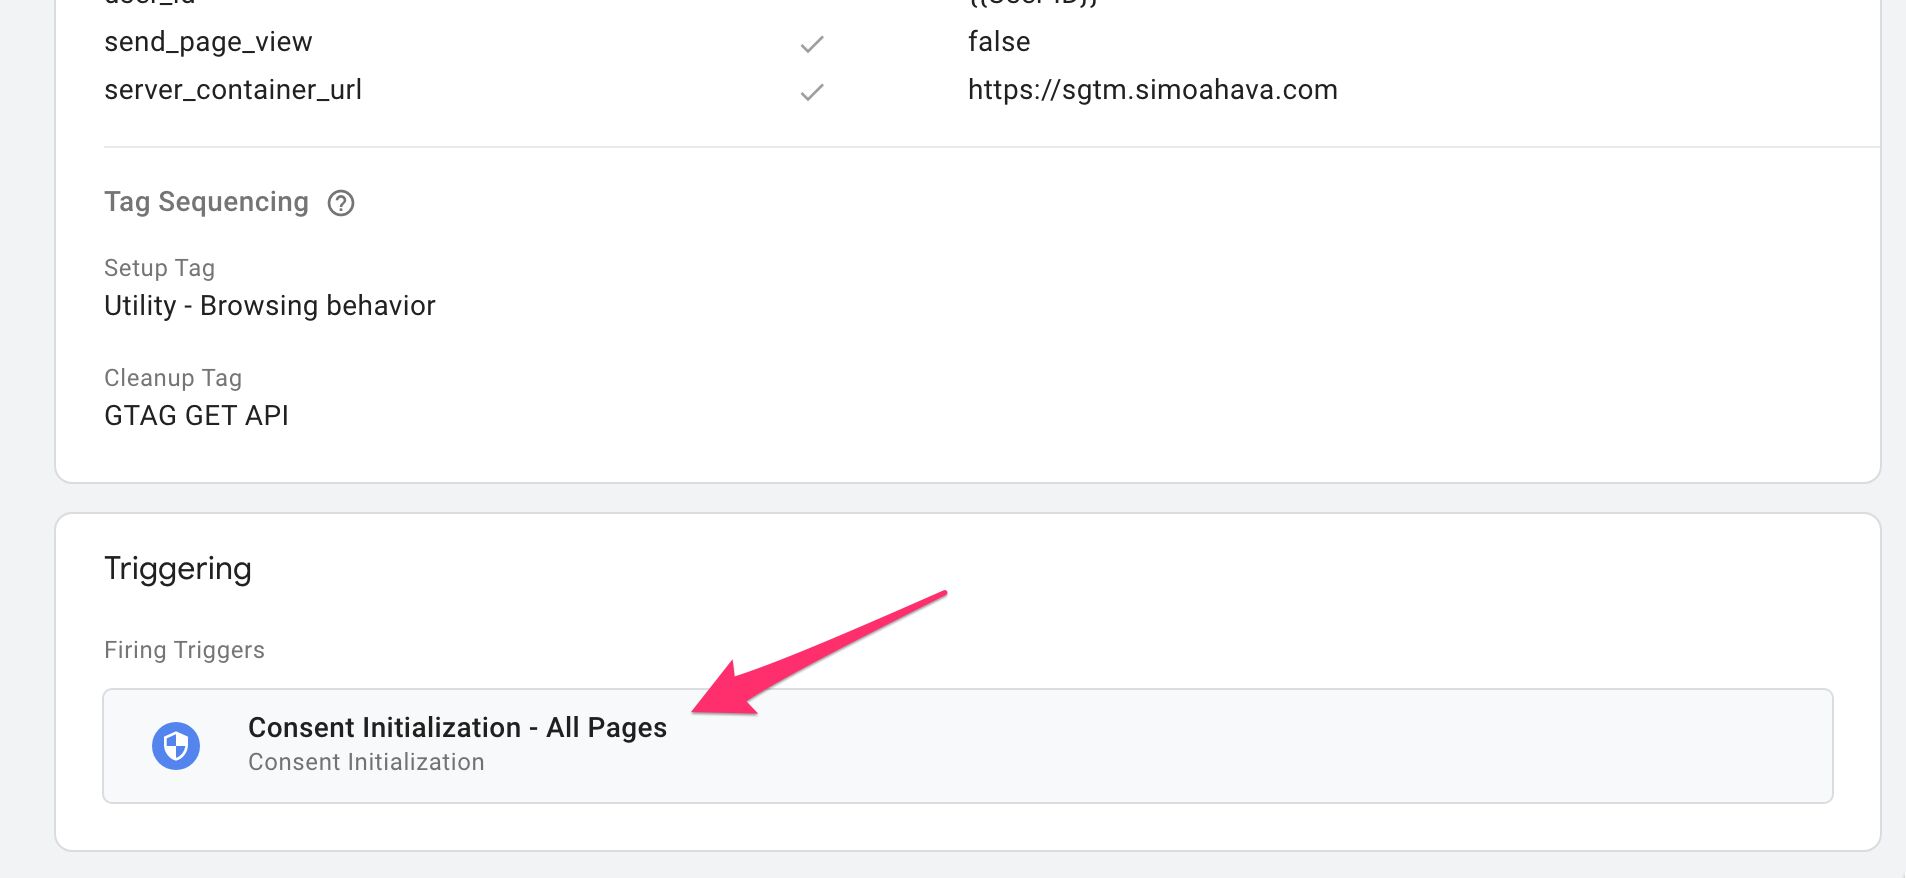
Similarly, it’s a good practice to set the Google Tag to fire as early as possible in the load process. Typically you’ll want to use either the Consent Initialization or the Initialization trigger events, depending on whether you are loading consent signals or not.
If an event tag ever happens to fire before its corresponding Google Tag has fired, the event tag will generate a dummy configuration for itself, without any custom settings you might have configured in your Google Tag. This, too, can mess up your server-side Google Tag Manager setup.
This leads to a fun thought experiment: You could build your Google Analytics 4 setup in Google Tag Manager without a single Google Tag created! The event tags will generate their own configuration using settings you add to the event tags’ Event Parameters.
The experiment seemed to work fine when I tested it – the only thing that didn’t work was the automatic
page_viewevent dispatch. But I don’t recommend doing this in a production environment – it’s just a fun experiment to highlight the enormous amount of overlap that exists between the Google Tag and individual product tags…
How do I…
In this chapter, I’ll share some walkthroughs for navigating the new Google Tag.
An important (and confusing) aspect of Google Tag, and individual product tags that use it, is that many of the settings can be configured in multiple places.
For example, you can add Google Analytics User Properties in any one of these settings, technically:
- Under Google Analytics User Properties in an Event Settings variable.
- Under User Properties in a Google Analytics 4 Event tag.
- With the key
user_propertiesin the Google Tag’s Configuration Settings. - With the key
user_propertiesin a Configuration Settings variable. - With the key
user_propertiesin the Google Tag’s Event Settings. - With the key
user_propertiesin an Event Settings variable. - With the key
user_propertiesin the Event Parameters of a Google Analytics 4 event tag.
And this applies to most configuration settings. But in this chapter I’ll share what I think is the optimal way of adding these features to your Google Tags (and related product tags).
Configure automatic page view dispatch
You need to add the field send_page_view with the value true or false into the Google Tag’s Configuration Settings directly or by using a Configuration Settings variable (the recommended approach).
Note that it’s true by default, so if you do want the automatic page view dispatch to happen, you don’t need to add the field at all.
Configure the server-side Google Tag Manager URL
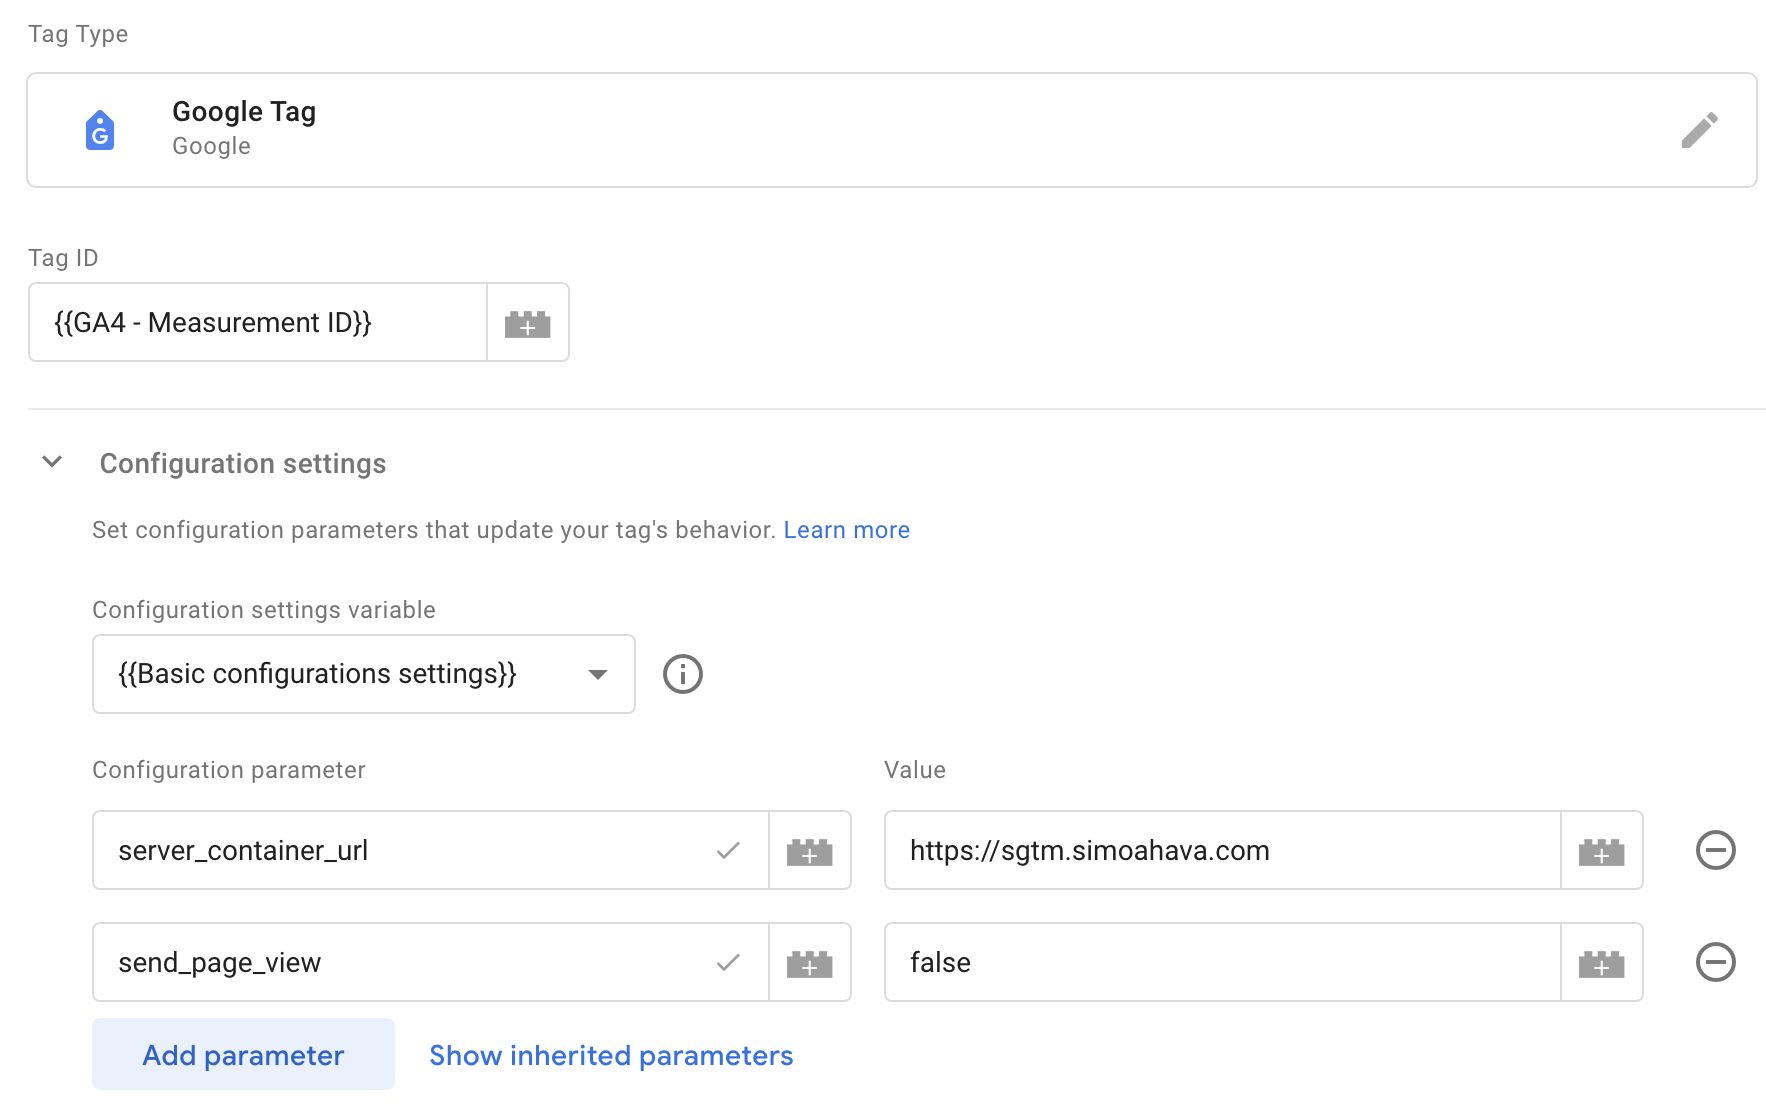
To add the URL of the Server container, you need to use the server_container_url field, with the value set to the URL origin of your Server container (e.g. https://sgtm.simoahava.com).
You can set this in the Google Tag’s Configuration Settings directly or with a Configuration Settings variable (recommended).
As a good practice, I recommend also adding it to an Event Settings variable that all of your Google Analytics 4 event tags reference. That way any rogue GA4 configurations won’t be able to prevent your event data collection to your server container.
Configure first-party user data dispatch to Server containers
To collect first-party user data to Server containers, you can add the field user_data to the Google Tag’s Shared event settings directly or by using an Event Settings variable (the recommended approach).
You can also set this in the Event Parameters of a Google Analytics 4 event tag (with or without an Event Settings variable), if the user data isn’t available when the Google Tag fires.
Add user properties for Google Analytics 4
You have a number of options for adding user properties for Google Analytics 4.
If you want to add them one by one, the best place to add them is in an Event Settings variable in the dedicated Google Analytics User Properties table. This variable can be attached to a Google Tag or a GA4 Event tag, depending on when the values are available on the page.
If you don’t want to use an Event Settings variable, you can also add them directly into a GA4 Event tag, using a similar table UI.
Another option is to add the user properties in bulk. This is useful if you want to set multiple properties in one go, or if you want to use some custom JavaScript logic to determine the list of properties to set at any given time.
In this case, you’d need to use the key user_properties whose value is set to a JavaScript object, where the key-value pairs correspond with the user properties (and their values) you want to set:
function() {
  var user_props = {
    loyalty_status: {{Get user loyalty status}},
    signup_method: 'email'
  };
  return user_props;
}
Summary
Upon release, the Google Tag is mostly a cosmetic update, where the Google Analytics 4 configuration tags have been replaced with this more product-agnostic approach.
From a Google Analytics 4 developer’s point of view, I’m personally not a fan of the degraded UX when compared to the old configuration tags. Instead of having handy user interface features like checkboxes and drop-down menus for configuring GA4-specific settings, we now have to utilize the parameter table.
At the same time, I love that we can now use settings variables! Once Google Tag becomes more prolific across all Google’s tagging products, setting everything up through GTM will probably be very intuitive and streamlined.
It’s still very confusing how everything works together. For example, you can configure settings in the Google Tag, but you can also configure them in an Event tag. User Properties are added with a key-value pair in a Google Tag but in a table selector in an Event tag. This all boils down to how Google Tag isn’t just for Google Analytics 4. The decision to make it completely product-agnostic must have been a difficult one.
I think we’re entering phase 2.0 of Google’s tagging platform. The first phase was building tagging solutions that would eventually share a backend and much of the implementation logic.
This second phase is about consolidating this shared technology to avoid the redundancy of deploying almost identical libraries to cater to the different tagging products. Instead, you’d ideally deploy just a single tag library and then toggle which products you want to activate.
While I feel like this consolidation is more in Google’s favor than in the favor of their end users, I do understand the rationale. It must be daunting to users (especially those with limited implementation skills) to wade through the waters of different product implementation guides and container snippets and configuration strings and such.
For these users, having a single tag with (hopefully) intuitive UI controls is a boon.
For us power users who want to use GTM as a deployment system for non-Google tags, too, I’m happy that none of our advanced feature sets is compromised with this shift. But I’m also worried that this might change in the future.
I think Google still has a lot of product design work ahead of them to make Google Tag more intuitive and to alleviate the concerns of purpose muddling.
For example, with Google Tag Manager I have full control over what is actually happening on the website – I control that with triggers. With Google Tag, I no longer have that control. Google Tag admins can now sideload additional products through the Google Tag UI, and they can enable potentially hazardous things like automatic user data scraping.
With this release, my mind is stimulated by a very confusing combination of optimism, curiosity, skepticism, and doubt. A typical Google release, in other words.


