When configuring your online store in Zen Cart, it is essential to organize your products into different categories. Product categories not only help you with navigation and setting up the main menu, but also improve the overall shopping experience for your customers. In this guide, we share how to add product categories in Zen Cart with a few simple steps.
Why Add Product Categories in Zen Cart?
Before learning how to add product categories in Zen Cart, it is first important to understand the use of categories. They allow you to group similar products in groups and thus improve your online store in several ways:
- Your store becomes easier to navigate
- Improve your SEO score
- Simplifies inventory management
- Contributes to increased conversion rates
Step 1: Log in to the Zen Cart Admin panel
To get started, log in to your Zan Cart admin panel.
Step 2: Navigate to the Category Manager
Once logged in, head to Catalog -> Categories/Products:

Step 3: Create a New Category
Now that you have opened the Categories/Products page, follow these steps:
Click the blue New Category button in the center of the page:

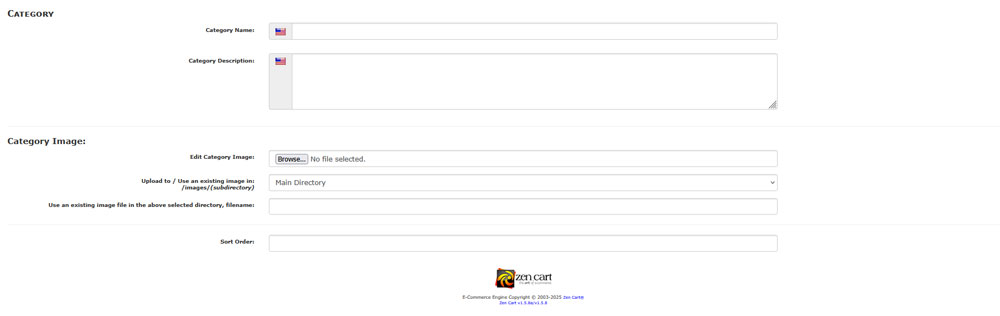
Then, fill in the category details:
- Category Name
- Category Description
- Sort Order
Also, don’t forget to add an image for the category:
After you add these details, click the blue Save button in the right corner of the page. Doing so will apply and save the edits:

Step 4 (OPTIONAL): Add Subcategories
If you need a more precise categorization in your Zen Cart store, you can add subcategories within each category. For example, if you have a clothing store, you might want to have a main category “Jeans” and two subcategories “Male Jeans” and “Female Jeans”. To add a subcategory, once again navigate to Catalog -> Categories/Products and click on any of your already existing categories:

Then, click on the blue New Category button, located at the center of the page:

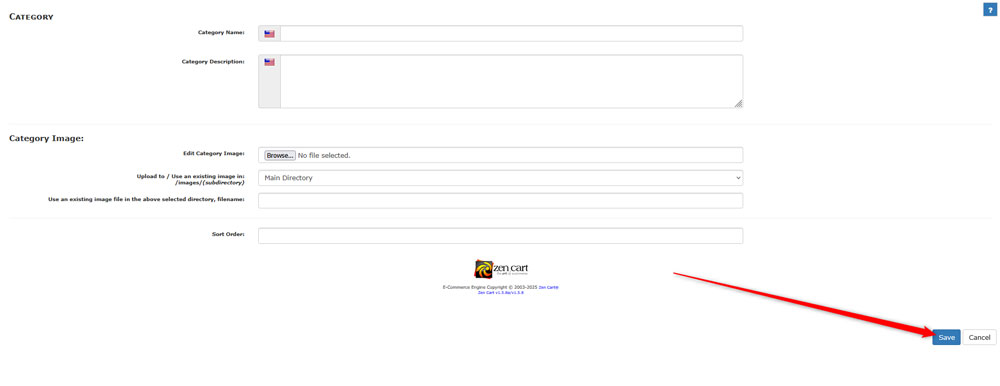
Again, fill in the subcategory details such as subcategory name, description, sort order, and add an image:

Then, click the blue Save button located at the bottom right of the page:
Step 5: Add Products to Categories
Now that you have added product categories in Zen Cart, it is time to add products in each corresponding category. To do so, via Catalog -> Categories/Products, click on a given category:
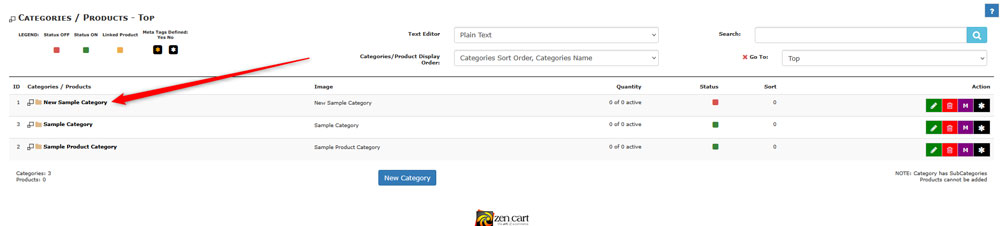
After that, click the blue New Product button located at the right of the page:

Then, follow the instructions and add product details, then save the changes. If you are not sure how to proceed, then have a look at our article explaining how to add a product in Zen Cart.
Tips and Tricks
To get the most out of Categories in Zen Cart, follow these tips:
- Use clear category names
- Add Category Image for a Visual Effect
- Include keywords in the category name and category description
Conclusion
Knowing how to add product categories in Zen Cart is essential for creating a user-friendly and well-structured online store. Regardless of your store’s niche, category setup and management can greatly enhance user experience across your web pages.