Tags are a handy feature for organizing your Zenphoto images and albums. Tags not only help you and your visitors navigate more easily and quickly through your website, but also improve its discoverability in search engines, and can also help you generate more organic traffic.
In this article, we share how to add tags to Zenphoto and boost your website’s overall user experience.
How are Tags Improving Your Website
Zenphoto tags serve numerous purposes:
- Improve the search functionality on your website.
- Allows for filtered browsing by topics and themes.
- Improve SEO, as relevant keywords and topic clusters can be incorporated.
- Help visitors find what they search for faster.
How to Add Tags in Zenphoto
Adding tags to Zenphoto is a simple process that consists of only a few steps.
Step 1: Log in to the Zenphoto Admin Backend
The first step is to log in to the Zenphoto admin dashboard. This is a necessary step, as through the dashboard, you can manage all aspects of your website, including adding, editing, and deleting tags.
Step 2: Navigate to the Tags Management Section
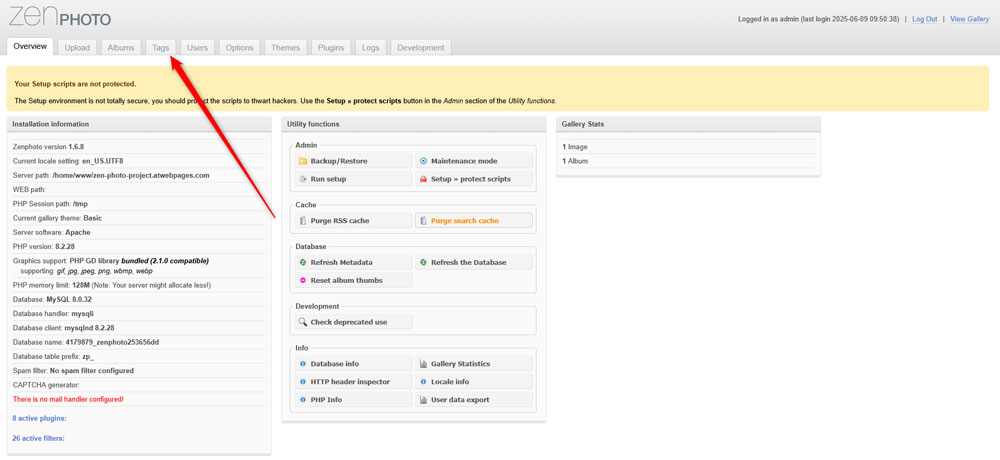
Once logged in to the admin panel, it is time to navigate to the Tags Management section. This is the place from which you manage all your Zenphoto tags. To access the section, simply click on the Tags tab at the top of the page:
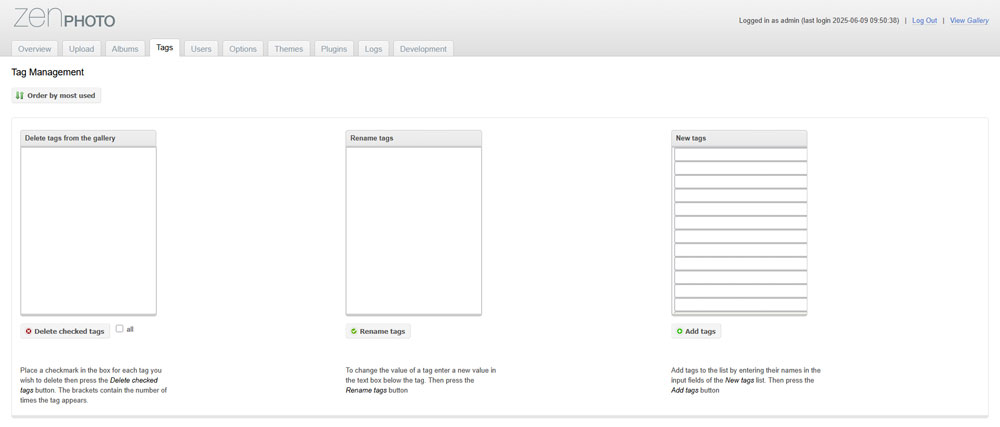
Once you access the Zenphoto tag management page, you will see three boxes: Delete Tags from the Gallery, Rename Tags, and New Tags:
Step 3: Add New Tags to Zen Photo
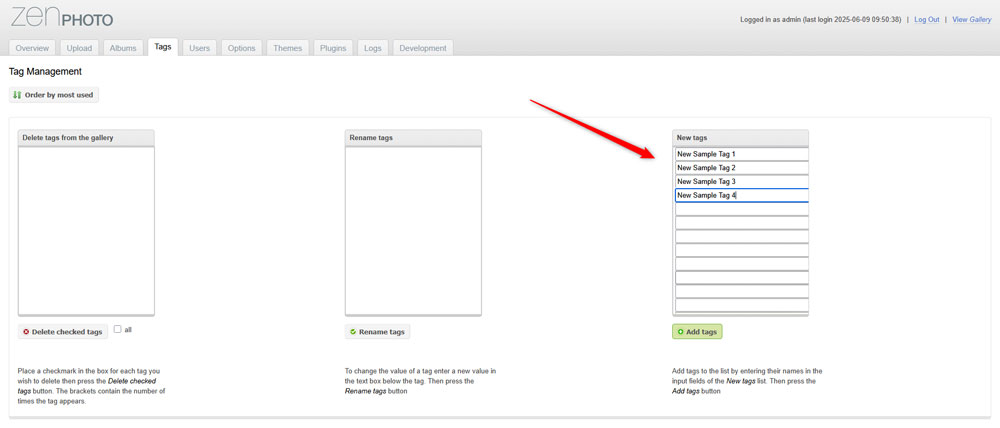
While on the Tags Management page, within the New Tags box, start adding your new tags:
Once you finish adding your tags, click on the green Add Tags button below the box, so Zenphoto can save and apply the changes you have just made:
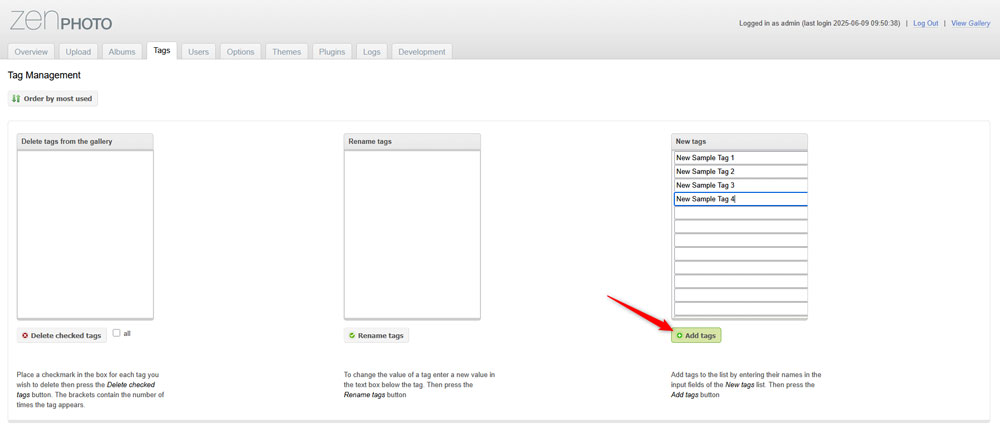
Now you have managed to create new Zenphoto tags.
Step 4: Add Tags to a Single Image
Now that you have created your first tags, you can start adding them to your photos and other media files.
To add tags to a certain media item, via the Zenphoto dashboard, head to Albums -> Click on any of your albums -> Images -> Select Image -> Edit all image data:
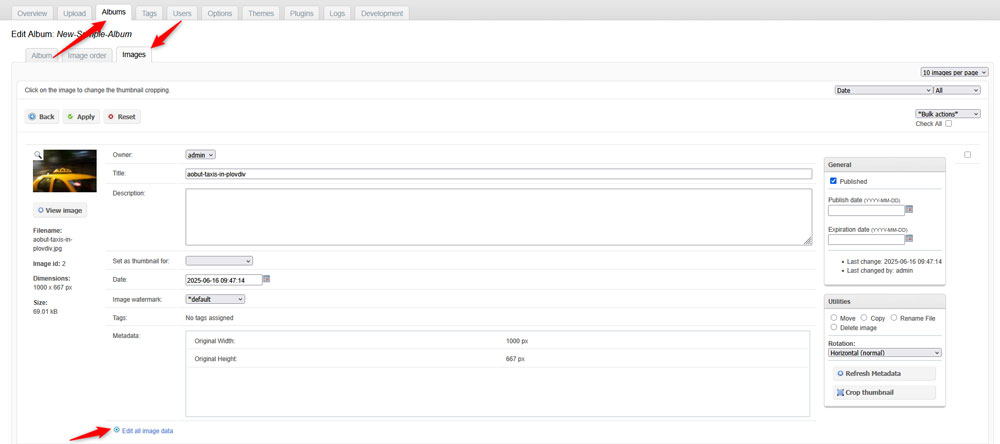
Once there, you will see a Tags section that contains all the tags you created. Simply add a tick to each tag you want to use and click the green Apply button at the top of the page:
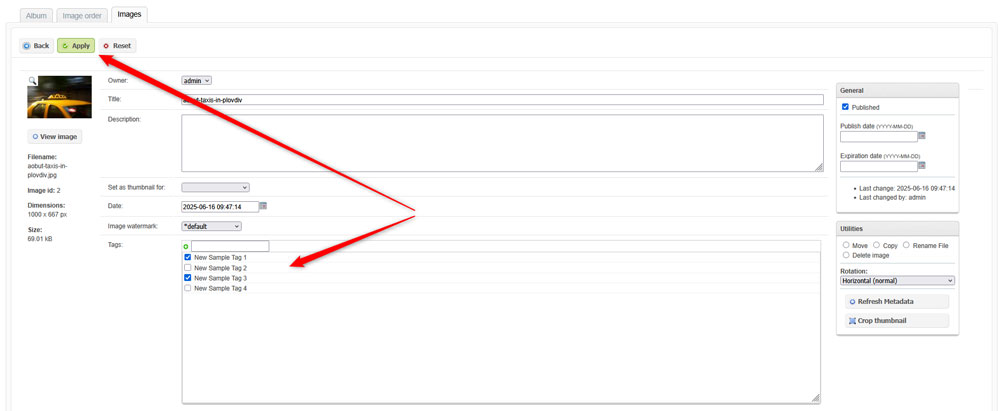
Now, you have added tags to your Zenphoto image.
Step 5: Add Tags to Zenphoto Albums
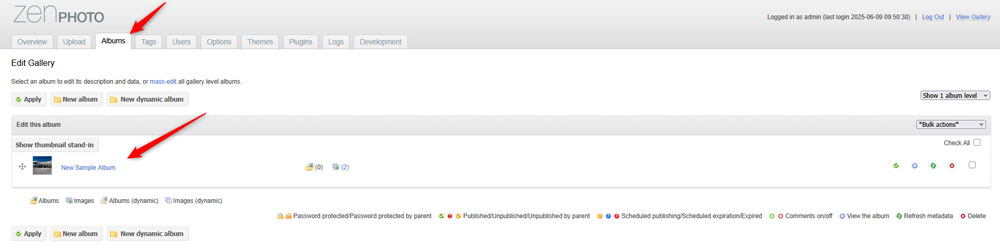
You can also add tags to albums. To do so, via the Zenphoto dashboard, head to Albums and select the album you wish to edit:
Once you open the Edit Album page, within the Tags section, add a tick to each tag you wish to associate your album with:
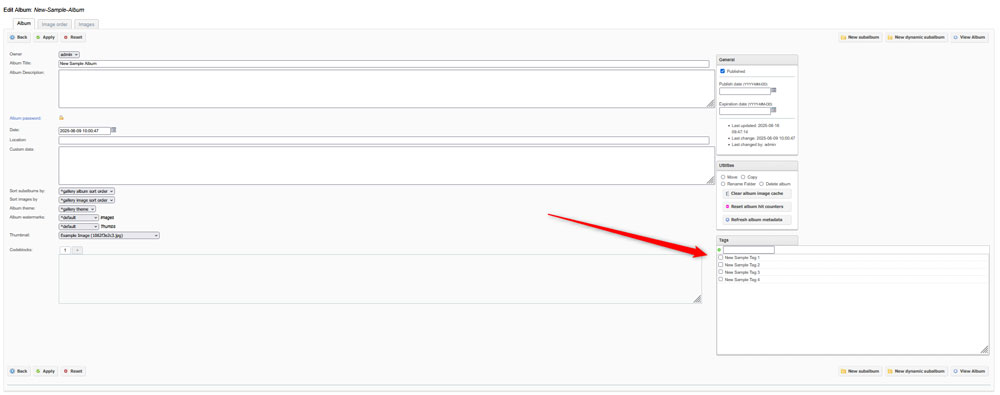
After you have selected the tags, click on the green Apply button at the top of the page, so Zenphoto saves and applies the changes you have just made:
Now you have managed to add tags to your Zencart album.
Conclusion
Knowing how to add tags in Zenphoto is an important part of creating a user- and SEO-friendly online gallery. Proper tagging not only helps your visitors use your website more easily, but also helps you appear in more search queries and therefore enhances your organic traffic.