Zenphoto allows you to customize the look of your online gallery by incorporating various themes. If you are interested in learning how to install themes in Zenphoto, then this article will guide you through the entire process – from browsing and downloading, through activation, and to customization and going live.
Why Use Zenphoto Themes
Zenphoto themes help you shape the visual aspect of your online gallery. Whether you wish to showcase some fine art photos or just use the CMS as a container for your personal photos, a well-designed theme improves user experience, helps you with branding, and makes an overall good impression on everyone visiting your website.
How to Install Themes in Zen Photo
The process of installing a Zenphoto theme consists of several steps: browsing, downloading, uploading, and activating the theme. In the following sections, we will walk you through each of these steps.
Step 1: Browse and Download a Zenphoto Theme
Visit the official Zenphoto themes library or any other trusted online repository and browse the available themes. Once you find a suitable one, download it on your computer device.
Step 2: Upload the Theme Pack to the Themes Directory
Now that you have downloaded the ZIP pack on your PC, it is time to upload it to your hosting account, so you can start using it right away.
To do so, first, log in to the AwardSpace hosting panel.
Once inside, head to File Manager:
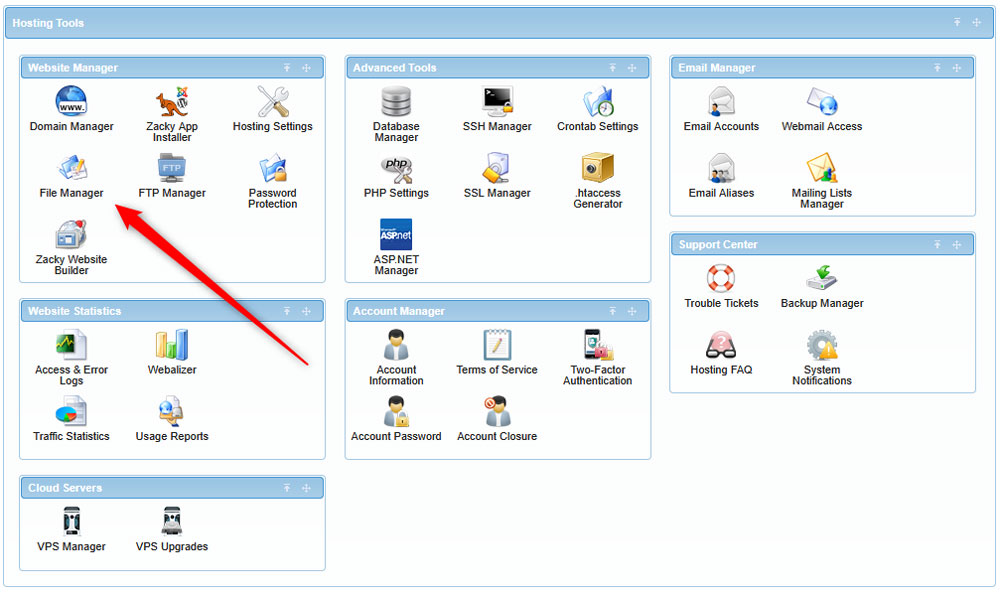
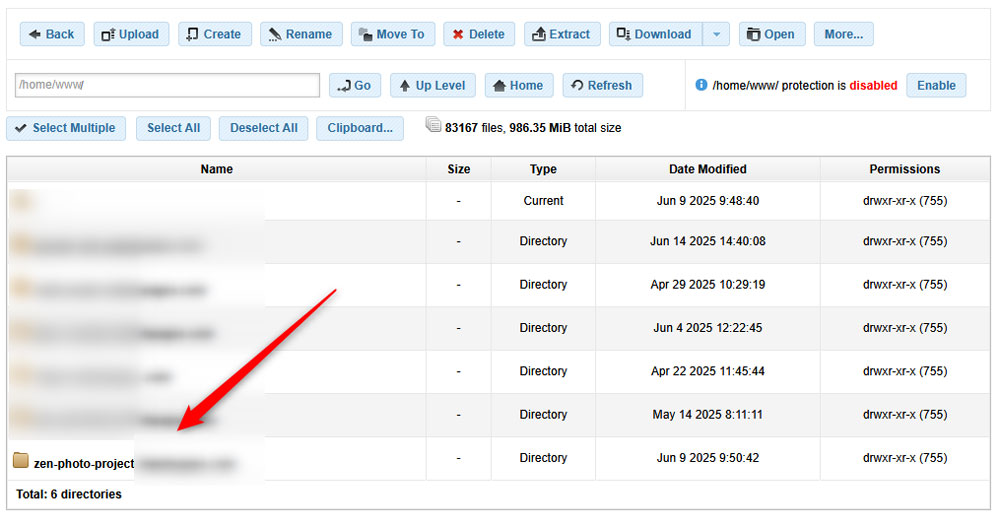
Then, open your Zenphoto root directory:
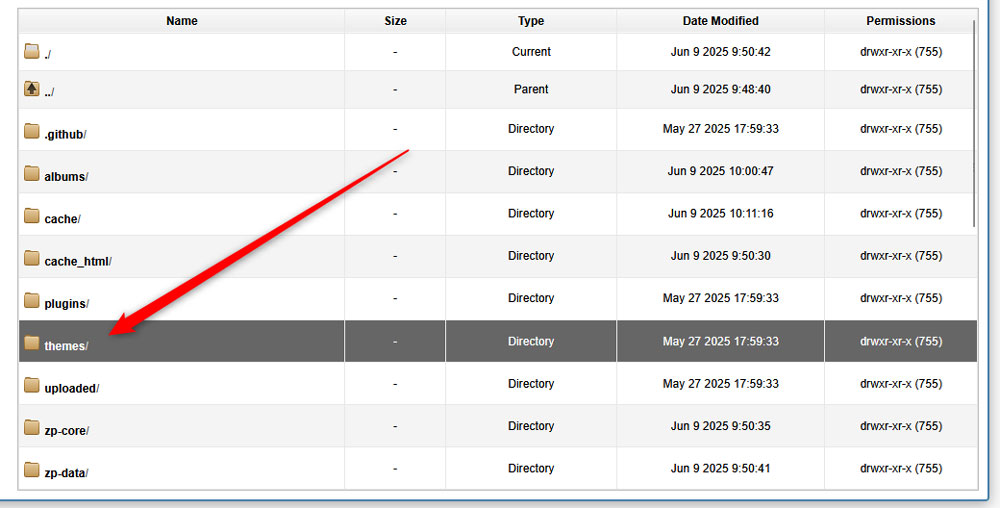
Once inside the root directory, head to Themes/:
Once there, via the main navigation menu, click on Upload:
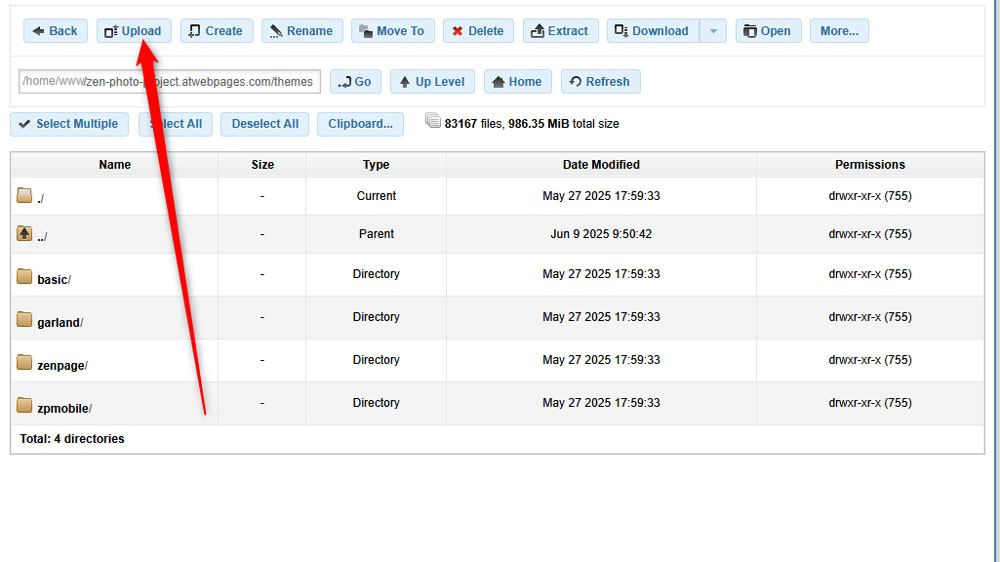
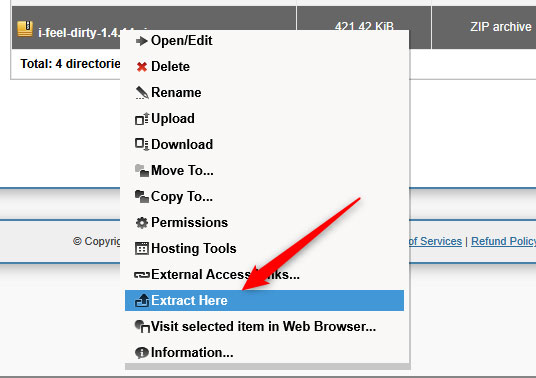
Then, find your theme pack on your device and upload it to the panel. Then, extract the ZIP file by right-clicking it and selecting Extract Here:
Step 3: Activate the Theme
Now that you have uploaded the theme to your Zenphoto root directory, it is time to activate it. To do so, first log in to the Zenphoto admin panel.
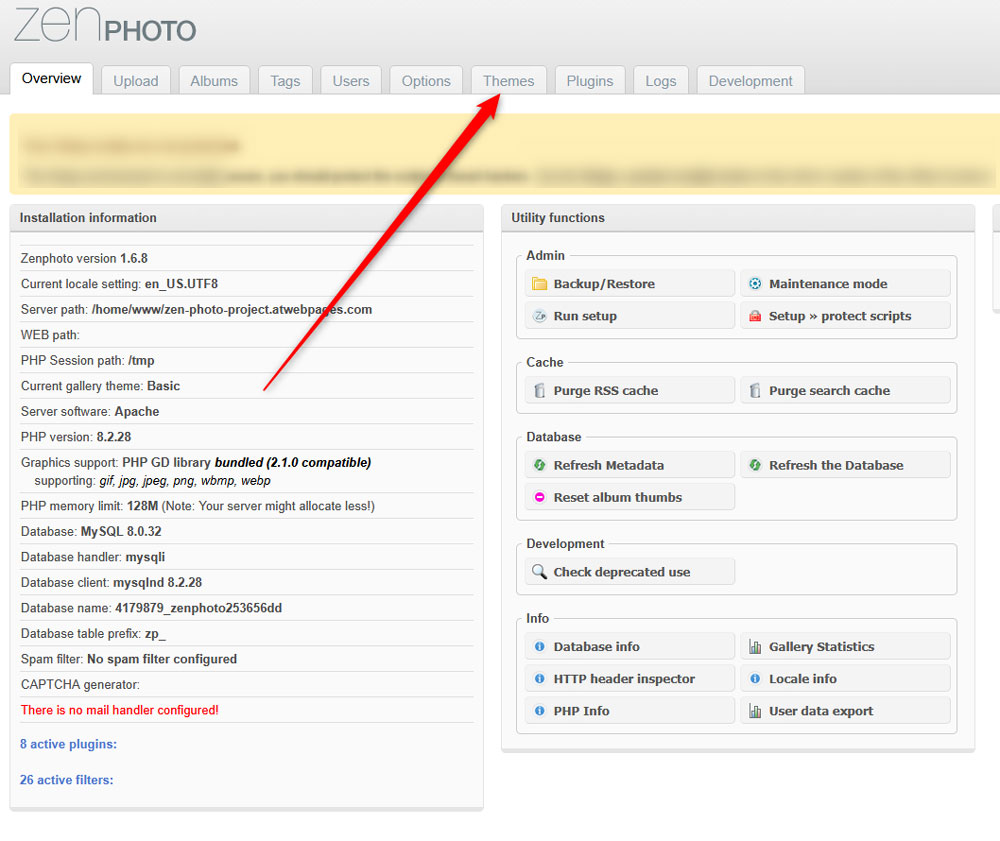
Then, head to the Themes tab:
From this tab, locate your newly installed theme and click the green Activate button:

Now, you have managed to install and activate a Zenphoto theme.
Conclusion – How to Install Themes in Zenphoto
Learning how to install themes in Zenphoto is essential to creating a visually appealing gallery. Luckily, the process is simple and doesn’t take much time to complete.