


Get started with bread machine baking! My bread machine tips for beginners cover yeast, flour, dough checks, storage, and troubleshooting advice.
Last Updated on September 29, 2025 – Originally Published December of 2018
Getting a new bread machine or using one for the first time is exciting. As I watched my first machine knead its first loaf of bread, I was enchanted.
But let’s be honest. Along with that excitement comes a few jitters. Bread flour? What’s that? Which yeast should I use? And what if the loaf doesn’t turn out the way I hoped? Even something as simple as how to store your bread can feel like a mystery in the beginning.
That’s where I come in. I’ve been baking with bread machines for years! I’ve gathered my best bread machine tips for beginners to help you skip the stress and get straight to the good part — the smell of fresh bread wafting through your kitchen.
First Step, Read the Instruction Manual
I know, I know — “read the manual” doesn’t sound like the most thrilling way to start your bread-making adventure. But trust me, it’s worth it! Each machine has its own quirks.
Check out what settings on your bread machine. See what order the bread machine ingredients should be added to the pan. Learn how to wash the pan.
With Zojirushi bread machines, for example, you do NOT immerse the pan in water. Instead, you carefully wash the inside while keeping the outside of the pan dry.
Don’t have a manual? I have a page with links to manuals for some bread machines.
Try the Recipes in the Manual
You know the saying you have to learn to walk before you run? It’s true with your bread machine too.
Follow those recipes exactly as written — at least for now. I know it’s tempting to swap out flour, tweak the yeast, or get creative with add-ins (believe me, I’ve been there!). But in these early days, it’s better to stick to the script. Once you’ve got a few loaves under your belt, you can start experimenting with confidence.
And don’t just stop at one recipe. Give several a try! Different breads bake up with different textures, flavors, and crusts. It’s a fun way to discover what you and your family love best.
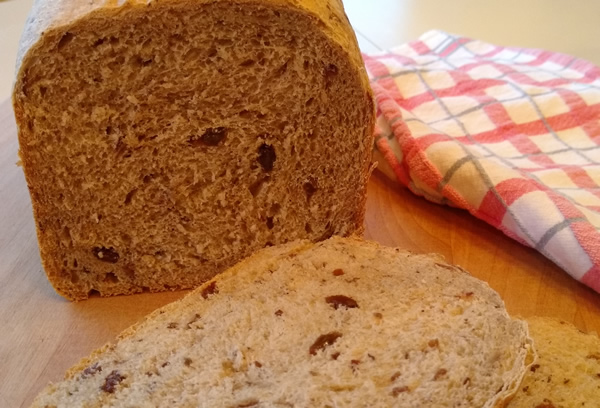
The bread machine manual can actually have some great recipes! For example, I love this raisin bread recipe that came directly from the manual that came with my machine.
Remember to Check the Dough
All of my bread and dough recipes remind people to check the dough. “Check on the dough after five or ten minutes of kneading. Just pop the top of the bread machine and see how the dough is doing. It should be a smooth, round ball.”
If it looks too dry, add water a teaspoon at a time until it comes together. If it looks too wet, sprinkle in flour a tablespoon at a time until the dough reaches that nice, balanced texture.
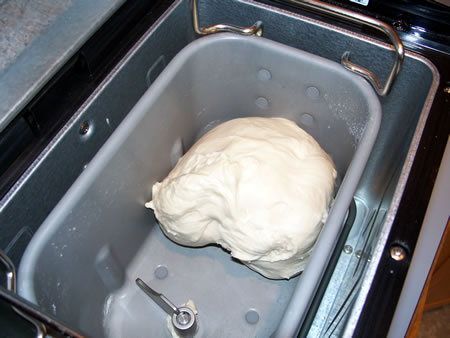
Here’s an example of a smooth, round ball of dough.
Bread Flour
You’ll want to use bread flour in your bread machine. It has a higher protein content so it’s better for making bread.
If you’d like to dive deeper, I have an article about different types of flour. And don’t miss my article on the two methods of measuring flour.
What Yeast Should You Use?
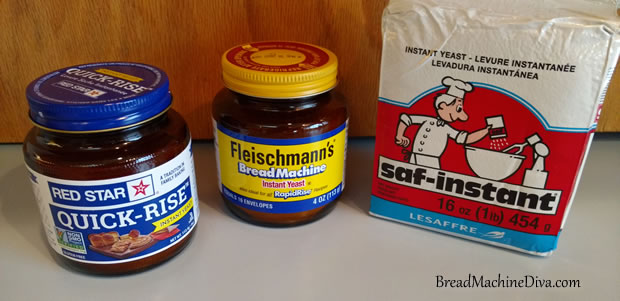
Bread machine yeast. Rapid rise yeast. Active dry yeast. Instant yeast. Sometimes it feels like there are too many choices, doesn’t it? Why does yeast have to sound so complicated?
Here’s the good news: it doesn’t have to be. I’ve been using active dry yeast in my bread machine for years, and most of the recipes on this site use that type. It’s reliable, easy to find, and it works beautifully.
But if you prefer instant yeast, that’s fine too! You’ll just need to adjust the amount. I’ve written an article that walks you through exactly how to switch between the two, plus a simple breakdown of the different types of yeast so you’ll know what you’re working with.
Problems? We’ve All Been There!
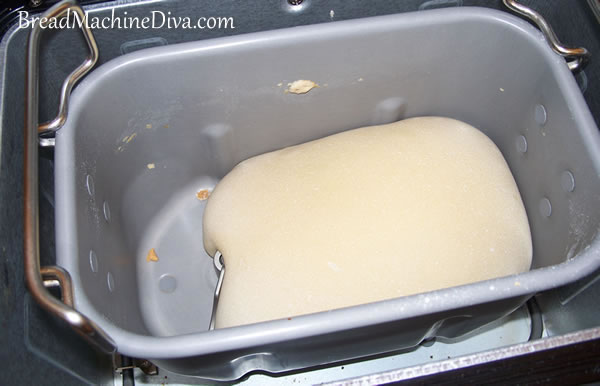
This is what it looks like when you forget to add the yeast.
Even seasoned bread machine bakers (including me!) have loaves that flop. Maybe the bread doesn’t rise. Maybe you forget an ingredient. I’ve even forgotten to add the yeast once!
The key is not to get discouraged. Every “problem loaf” is just another step on your bread-making journey.
Your bread machine manual should have a handy troubleshooting section for common problems — things like bread that rises too much, doesn’t rise enough, or sinks in the middle. And I’ve also put together a collection of troubleshooting articles to help you figure out what went wrong and how to fix it next time.
Remember: every baker has a story about a funny-looking loaf. You’re in good company!
How to Store Bread
Here’s one of the downsides of homemade bread. You know all of the chemicals that you’re not using in the bread? Some of those chemicals keep the bread from going bad.
Homemade bread just doesn’t keep as long as store-bought bread. Not to worry though, bread freezes really well.
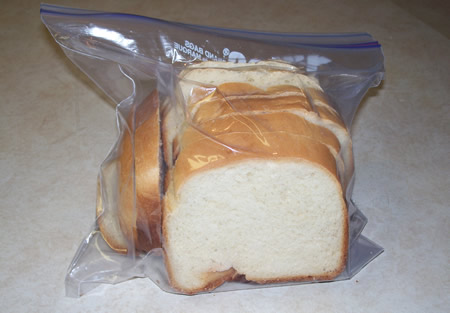
I slice the bread first, then pop it in the freezer. That way, I can grab just what I need. When it’s time to thaw, I slip a slice straight into the toaster. You may need to use a darker setting than usual since the bread is frozen..
Homemade bread may not last forever, but the taste is so worth it.
Enjoy and Keep At It
I’m not sure what I’d do without my bread machine. I make all our bread, hamburger buns, and dinner rolls.
And here’s the fun part: I’m still trying new recipes all the time. That’s the joy of bread-making — there’s always something new to explore, and every loaf brings its own little reward.
If you’d like to follow along, I’d love to have you join my newsletter. That way, you’ll get updates on new recipes, tips, and articles — all designed to help you get the most out of your bread machine.
So stick with it. Every loaf you bake is a step closer to the simple pleasure and self-sufficiency that come from making homemade bread.


