What is a chili dog bun?
Introduction by @homebreadbaker
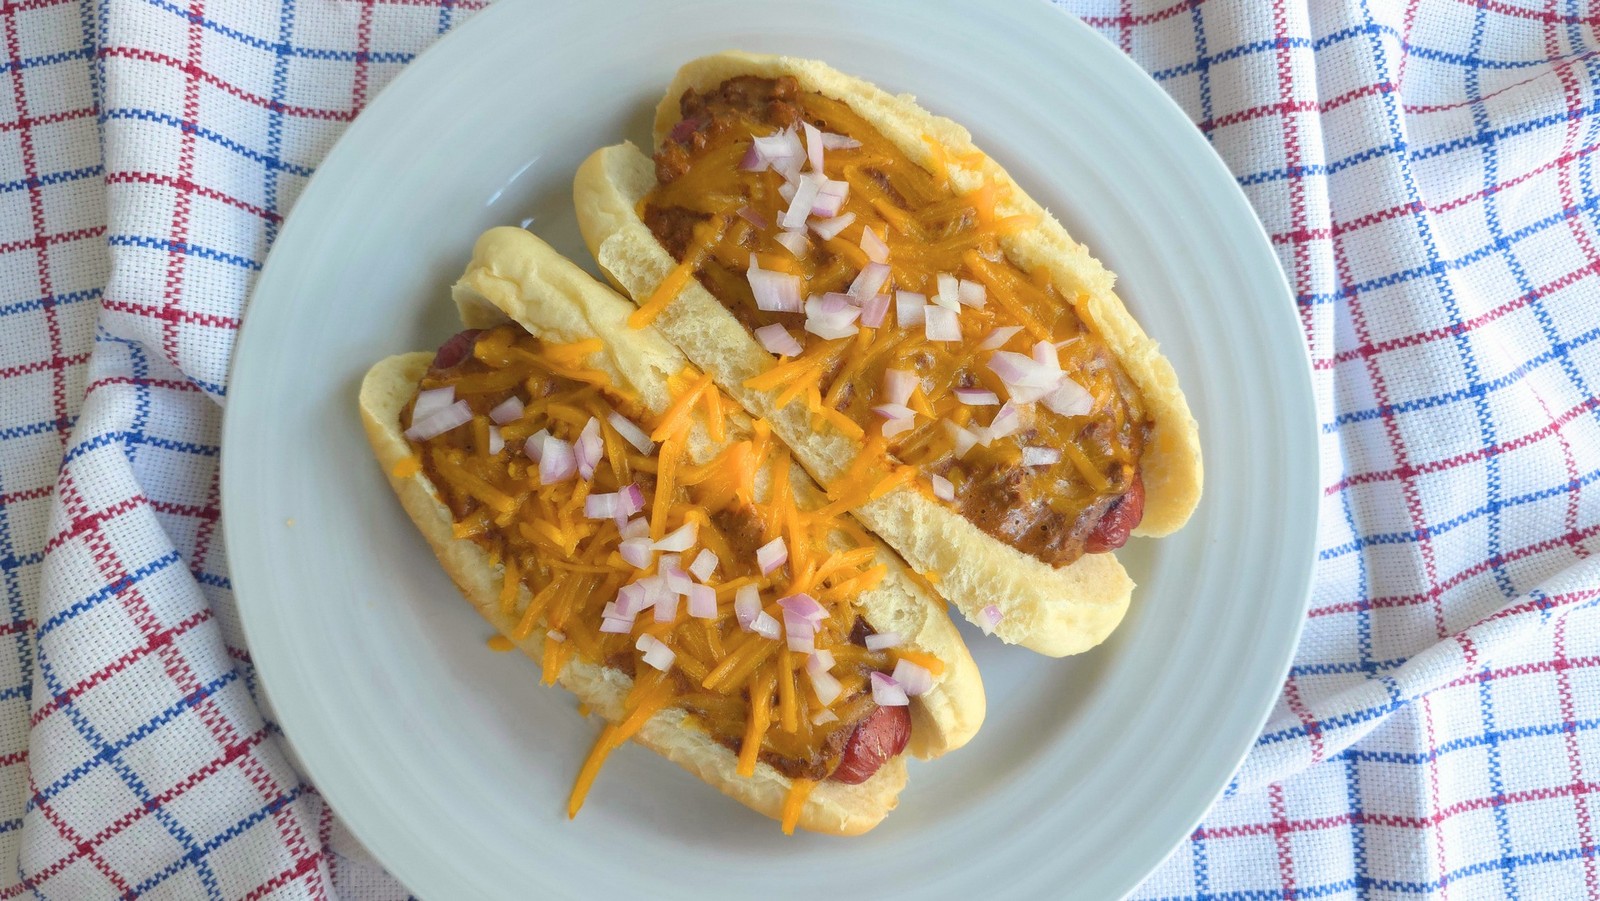
About a million years ago, when I was growing up in Los Angeles, my father used to take me and my brother out every once in a while to one of several little places in LA at that time that specialized in chili dogs. Some of these were like little diners; some were barely street food shacks. Names I remember include Cupid’s, Flooky’s, Wiener Factory, Carney’s, Pink’s, and Art’s, but I’m sure I’m forgetting some others. If I remember right, Cupid’s in the SFV was our regular go to. I have very old memories of watching the dogs being assembled; the long, thin, natural casing wiener taken off the rotating broiler and nestled in the soft, elastic bun – sticking out half an inch on either end, chili ladled on, then a healthy portion of shredded orange cheddar on top, the whole thing then wrapped in wax paper and popped briefly into a little stainless steel box for a couple quick blasts of steam that would soften the bun even more, melt the cheese a little, and bring the whole thing together. No lie: I’m drooling sitting here writing this out.
In my mind, there are a couple musts involved in a proper chili dog. First and foremost, the wiener has to be great quality and have a natural casing. There should be a strong snap when you bite into it; that mouthfeel experience is crucial. Secondly, and the main event in our purpose on this page, the bun has to be very soft and squishy, very gluteny-elastic so that it doesn’t split through the bottom when the goodies get piled into it and so it’s not any kind of obstacle to squishing the assembled chili dog into your mouth. BTW, there are endless arguments about the proper chili for a chili dog. Mostly this comes down to beans or no beans. I have no strong opinion on this; there are endless great chilis out there and for me, any great chili works on a chili dog. Diced white or red onions on top of the cheese are optional.
I’ve traveled some and sampled an amazing variety of fantastic street food on this globe of ours. In my experience a proper chili dog ranks up there with the best comfort food on the planet. On the street in NYC you have to get a slice of cheese pizza. In LA it could easily be tacos al carbon, but I’m going for a great chili dog nine times out of ten. Hungry yet?
When @homebreadbaker described these hot dog buns to me, I was excited for the challenge. The combination of squishiness and strength made me suspect I’d be trying to recreate industrial bread, finding alternatives to dough conditioners and production like the Chorleywood bread process. My healthy home baking arsenal for this project included: strong bread flour, tender all purpose flour, tangzhong, potato flakes, and instant yeast. Fluffy not-sour bread can be made with sourdough, but there is a signature flavor to yeast that we wanted to keep. Five…or was it six? batches in, we determined the winning combination of ingredients and process was bread flour and potato flakes in a fairly wet dough with an overnight refrigeration. The tangzhong buns weren’t quite as soft as potato flake buns. The all purpose buns a bit too fragile at the cut line. The final recipe below makes buns that are springy, pillowy soft, able to hold heavy and wet filling, and so delicious.

Photo Gallery


Chili dog buns are meant to be pillowy soft and springy—able to stand up to the weighty combo of hot dog and chili. This recipe makes squishy, delicious buns in a home kitchen with simple, healthy ingredients.
Total Time
1 hour, 21 minutes
Ingredients
- 20 grams potato flakes (1/2 cup)
- 175 grams boiling hot water (3/4 cup)
- 170-200 grams milk (3/4 – 5/6 cup) *
- 1 egg
- 500 grams bread flour (4 cups)
- 26 grams sugar (2 Tbsp)
- 7 grams salt (1 1/4 tsp)
- 4 grams instant yeast (1 1/2 tsp)
- 71 grams unsalted butter (5 Tbsp)
Instructions
- Chili dog buns are larger than the standard hot dog bun. This dough can be divided to make 12 standard buns (~85 grams), 10 chili dog buns (~105 grams), and 8 extra-large buns (~130 grams).
- In a small bowl, combine the potato flakes and hot water. Cover and let cool to under 85°F. You can add the milk and egg to make it cool faster, but you may want to hold back 20-30 grams of the milk to add as needed later. The target dough consistency after mixing is on the wet side. You should just barely be able to pull a windowpane and the dough should not wrap cleanly around the hook. See the photo gallery.
- Put the dry ingredients (flour, sugar, salt, yeast) in the bowl of a stand mixer or in a large bowl.
- Pour in the cooled liquids and mix until the ingredients are incorporated, 3-4 minutes med-low speed, scraping down the sides as needed.
- Add the butter and remaining milk as needed and run the mixer for 5-6 minutes at med-high speed.
- Fold the dough into in a lightly oiled container with measuring marks if possible. Cover and let the dough double in size at room temperature (1-2 hours) or in the refrigerator overnight. This dough is easier to work with when cool, and the long cold ferment enhances the flavor.
- Transfer the dough to a floured work surface, flatten/de-gas and divide it.
- Roll the pieces into balls, cover with a damp tea towel or inverted pan, and let the gluten rest for about 10 minutes.
- Form the buns (see video). Dough for a standard bun is shaped to about 6 inches long, chili dog buns about 7 inches, and XL buns about 8 inches. Place seam down on a parchment lined baking sheet with at least 1 inch in between.
- Cover and let double in size, 1-2 hours depending on dough and ambient temp.
- Preheat the oven to 350°F. Bake for 20 minutes, rotating the pan halfway for even browning. If you’d like a darker color bun, set the oven to broil for an additional minute and do not take your eyes off the buns. The internal temperature should be over 190°F when the buns are done.
Notes
* If you’re not using Breadtopia’s bread flour, reserve 20-30 grams of the milk and use it as needed. Other brands of bread flour may have a lower protein level and therefore are less thirsty.