Hey there, future sourdough baker! Creating your first sourdough starter might seem intimidating, but I’m here to walk you through every step. Think of your starter as a new pet – it needs regular feeding and attention, but the reward is absolutely worth it! And the world of baking having a sourdough introduces you…unparalleled. I can’t wait for you to fall in love with sourdough!

Table of Contents
What You’ll Need
Here are the ingredients and tools you’ll be using for making your brand new sourdough starter:
- Whole grain rye flour or whole wheat flour (these work better than all-purpose flour for beginning your starter)
- Unbleached all-purpose flour (for feeding after day 3)
- Filtered water at room temperature (chlorinated water can inhibit fermentation)
- A clean glass jar (about 1-quart size)
- A kitchen scale (trust me, measuring by weight is very important)
- A rubber band (to mark your starter’s height
- Some masking or washi tape (used to label your starter with a date or name)
- A clean spoon
- Breathable cover (coffee filter or clean kitchen towel)
| Image | Title | Price | Prime | Buy |
|---|---|---|---|---|
 |
Bob’s Red Mill Organic Whole Wheat Flour | Prime | Buy Now | |
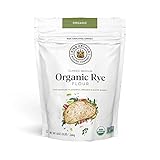 |
King Arthur Baking Organic Medium Rye Flour | PrimeEligible | Buy Now | |
 |
King Arthur Baking Unbleached All-Purpose Flour | Prime | Buy Now | |
 |
Pure Original Ingredients 9 Grain Flour | PrimeEligible | Buy Now |
Prices pulled from the Amazon Product Advertising API on:
The Process – Recipe + Day by Day Guide
Day 1: Making Your Sourdough Starter
- Mix 50g whole grain rye flour with 50g room temperature filtered water in your clean jar
- Stir vigorously until no dry flour remains
- Cover loosely with your breathable cover
- Place the rubber band at the level of your mixture
- Leave in a warm spot (70-75°F is ideal) for 24 hours
Quick Tip: The rubber band is a trick that helps you see how much your starter rises – this will become important later!
Days 2-7: The Feeding Schedule
Every 24 hours, do the following:
- Discard all but 50g of your starter
- Add 50g flour and 50g water
- Mix well
- Mark the new level with your rubber band
- Cover and wait another 24 hours
Recipe Note: After day 3, start using a mix of 25g whole grain flour and 25g all-purpose flour for feeding
Here’s What to Expect
Days 1-3
You might see some bubbles and activity early on – don’t get too excited! This is usually from different bacteria and not our desired yeast friends yet.
It might also smell a bit funky, like gym socks. This is totally normal!
Days 4-5
Things might seem to slow down. Your starter might not show much activity.
Don’t worry! This is when the good bacteria are starting to take over. Keep feeding consistently.
Days 6-7
You should start seeing regular bubbles and a more pleasant, tangy smell. Your starter should begin doubling in size between feedings.

In Case Something Goes Wrong
- Temperature Matters: If your house is cold, try placing your starter on top of your refrigerator or near (not on) a warm appliance.
- The Float Test: Once your starter is doubling consistently, drop a small spoonful in water. If it floats, it’s ready for baking! If not, keep feeding.
- Weird Smells:
- Acetone/nail polish remover smell = hungry starter, feed it
- Rotten smell = something’s wrong, start over
- Pleasant, yogurty tang = you’re on the right track!
- No Bubbles? Check your water (use filtered) and flour (whole grain works best). Also, ensure your jar is clean but not antibacterial-soap clean.
Beginner Tips That Will Help!
- Consistency: Feed at the same time each day. Your starter will develop a rhythm.
- Save Your Discard: Once your starter is healthy, save the portion you’d normally throw away in a separate jar in the fridge. Use it for pancakes, waffles, or crackers!
- Take Pictures: Document your starter’s progress daily. This helps you learn what “normal” looks like for your environment.
- Name Your Starter: It might sound silly, but naming your starter helps you form a routine of caring for it. Plus, it’s fun!
Foolproof Sourdough Starter for Beginners
Every starter is unique and develops at its own pace. Don’t get discouraged if it takes a few extra days to get going.
Two things you’ll need through this process: consistency and patience. Once you have a healthy starter, you would have unlocked the door to amazing homemade sourdough bread!
Here’s a beginner recipe to try: Sourdough Bread for Beginners
FAQs
Let me address some questions you might have, and if I miss anything, let me know!
Can I use any flour to start my sourdough?
While you technically can, whole grain rye or wheat flour works best for beginners. These flours contain more nutrients and wild yeast, giving your starter the best chance of success. Once established, you can transition to all-purpose flour.
Do I really need filtered water? My tap water seems fine.
Yes, it makes a difference! Chlorine in tap water can inhibit fermentation. If you can’t get filtered water, leave tap water out overnight in an open container – this allows the chlorine to evaporate.
Help! I forgot to feed my starter for a day (or two)!
Don’t panic! Sourdough starters are surprisingly resilient. Feed it right away and resume your normal schedule. If it’s been more than three days, you might see a layer of liquid on top (called “hooch“) – just stir it back in and feed as usual.
Should I close my jar tightly?
No, your starter needs to breathe! Use a coffee filter, cloth, or loose-fitting lid. The starter produces carbon dioxide and needs to release it. A tight lid could cause pressure buildup or affect the fermentation process.
My starter smells like alcohol/vinegar – is it bad?
This usually means your starter is hungry. The smell occurs when it’s consumed all its food (flour). Try feeding it more frequently or increasing the amount of flour in each feeding.
Why isn’t my starter doubling in size?
Several factors could be at play:
Temperature is too cold
Your container is too large (try a smaller one)
The starter needs more time to establish
Your flour might be old or low in nutrients
Can I take a break from daily feeding?
Yes! Once your starter is established, you can store it in the refrigerator and feed it just once a week. Take it out 1-2 days before baking to reactivate it with regular feedings.
How much starter should I maintain?
Unless you’re baking daily, you don’t need much. A small amount (around 100g total) is plenty – you can always build it up before baking.
Do I need to get starter from an old, established source?
Not at all! While it’s fun to use a century-old starter, you can create a perfectly good one from scratch. Wild yeast is everywhere – your starter will capture local varieties.
Does older starter make better bread?
No! A healthy two-week-old starter can make bread just as good as a 100-year-old one. What matters is how well you maintain it, not its age.
How do I know when my starter is ready for baking?
Look for these signs:
Doubles in size predictably after feeding
Passes the float test
Has a pleasant, tangy smell
Shows lots of bubbles throughout
Takes about 4-8 hours to peak after feeding