The disappointment of dense, flat homemade bread attempts can be crushing. Many home bakers struggle with lifeless dough, unpredictable rising times, and confusing terminology. But mastering yeast bread doesn’t require professional training or special equipment. This guide breaks down the science of fermentation and gluten development into straightforward steps anyone can follow. From basic sandwich loaves to artisanal sourdough, you’ll discover foolproof techniques and variations that guarantee impressive results every time.

Table of Contents
What Is Yeast Bread?
Yeast bread is distinguished from quick breads by its use of living organisms—yeast—as the leavening agent rather than chemical leaveners like baking powder. These microscopic fungi consume sugars in the dough, producing carbon dioxide that creates the bread’s rise and distinctive texture.
The fermentation process is central to yeast bread. It develops complex flavors through the production of organic acids and alcohol alongside carbon dioxide. Longer fermentation typically yields more complex flavor profiles, which is why artisan bakers often opt for extended rising times.
Gluten development is equally crucial, forming a protein network during mixing and kneading that traps the carbon dioxide bubbles. This structure gives yeast bread its characteristic chewiness and allows it to maintain its shape after rising.
Related: Want to Substitute Sourdough Starter for Yeast? Here’s How!
Basic Yeast Bread
Ingredients
- 4 cups (500g) all-purpose flour or bread flour
- 2¼ teaspoons (1 packet) active dry yeast
- 2 tablespoons sugar
- 1 teaspoon salt
- 2 tablespoons olive oil or butter
- 1½ cups warm water (105-110°F)
- Optional: 1 egg for brushing (for a shiny crust)
- Optional: sesame seeds, oats, or herbs for topping
Step-by-Step Recipe
1. Activate the yeast. Start by combining the warm water and sugar in a large bowl. The water should feel warm to the touch, but not hot—too hot will kill the yeast. Sprinkle the yeast over the surface and let it sit for 5-10 minutes until foamy. This foam is your first sign that the yeast is alive and ready to work its magic.
2. Form the dough. Add the oil to the yeast mixture, then gradually incorporate the flour and salt. Begin with a wooden spoon, then switch to your hands when the mixture becomes too thick to stir. The dough will start shaggy and rough—this is normal!
3. Knead the dough. Turn the dough out onto a lightly floured surface and knead for 8-10 minutes. Proper kneading develops the gluten network that gives bread its structure. You’ll know you’ve kneaded enough when the dough becomes smooth, elastic, and springs back when poked gently. If it tears easily, continue kneading.
4. First rise. Place the dough in a lightly oiled bowl, turning once to coat all sides. Cover with a damp cloth or plastic wrap and let rise in a warm, draft-free spot until doubled in size, about 1-1½ hours. The longer the rise, the more complex the flavor will be.
5. Shape the loaf. Gently punch down the dough to release air bubbles. Turn onto a lightly floured surface and shape as desired—a simple boule (round loaf), a batard (oval loaf), or even divided into dinner rolls. The key is to create surface tension by pulling the dough toward the bottom.
6. Second rise Place the shaped dough on a parchment-lined baking sheet or in a loaf pan. Cover loosely and let rise again until nearly doubled, about 45 minutes. Meanwhile, preheat your oven to 425°F.
7. Score and bake. Just before baking, use a sharp knife or razor blade to score the top of the loaf with shallow cuts. This allows for controlled expansion during baking. If desired, brush with beaten egg and sprinkle with seeds or herbs.
8. Create steam. Place a metal pan on the bottom rack of the oven while preheating. When you put your bread in, pour 1 cup of hot water into this pan to create steam. This helps develop a crispy, golden crust.
9. Bake to perfection. Bake for 25-30 minutes until deeply golden brown. The bread should sound hollow when tapped on the bottom. For the most accurate test, use a thermometer—the internal temperature should read 190°F for softer bread or 200-210°F for crusty bread.
10. Cool properly. This step is crucial but often overlooked! Transfer your bread to a wire rack and let it cool for at least 30 minutes before slicing. Cutting into hot bread releases steam and can make the texture gummy.
Related: Sourdough vs Yeast: What’s the Difference?
Why This Bread Recipe Shines
- Skip the kneading step – while the initial mixture appears uneven, the dough’s softness ensures it expands sufficiently to create a smooth finished texture.
- Preheated Dutch oven purpose explained – creates a moisture-rich environment that boosts oven spring before the crust hardens (which halts expansion). Professional bakers use steam-injected ovens – the cast iron pot recreates this at home!
- Cold fermentation enhances bread flavor – refrigeration slows yeast activity (preventing over-proofing, which would exhaust the yeast), while allowing enzymatic processes to convert starches to sugars, developing deeper complexity. We first let it rise, then refrigerate to preserve leavening power.
- Soft, tacky dough texture creates ideal conditions for impressive rise compared to denser doughs.
- Dutch oven alternative – simply create steam by placing a pan of hot water in your oven while baking the loaf on a standard tray.
- Achieving that open, airy crumb–less flour creates a wetter mixture, high temperature plus preheated vessel allows dramatic oven spring, resulting in beautiful air pockets. Bread flour enhances this effect – all-purpose flour yields a tighter structure.
- Incredibly adaptable formula – too firm? Incorporate water. Too wet? Sprinkle in flour. Slow rise? Find a warmer spot. Whether it rises in 45 minutes or several hours, success is guaranteed provided your yeast remains fresh!
- Immediate baking option for when time is tight…
- …but allowing extended refrigeration (8+ hours) significantly improves flavor!
Bread Variations to Explore
- French Baguettes – Long, thin loaves with crisp crusts and tender interiors, perfect for sandwiches or serving with cheese and wine. Recipe: Mix 4 cups bread flour, 2 tsp salt, 1 tsp yeast, and 1½ cups water. Rest for 18 hours, shape into thin loaves, rise for 1 hour, slash tops, and bake at 450°F with steam for 25 minutes.
- Whole Grain Breads – Made with wheat, rye, or multigrain flour blends for robust flavor and added nutritional benefits. Recipe: Combine 3 cups whole wheat flour, 1 cup bread flour, 2 tsp salt, 2 tsp yeast, 2 tbsp honey, and 1¾ cups warm water. Knead, rise, shape, rise again, and bake at 375°F for 35 minutes.
- Brioche – Enriched with butter and eggs for an incredibly tender crumb and slightly sweet flavor that’s ideal for both sweet and savory applications. Recipe: Beat 3 eggs with ¼ cup sugar, add 3½ cups flour, 2 tsp yeast, 1 tsp salt, and ½ cup warm milk. Knead, then work in ½ cup softened butter. Chill overnight, shape, rise, brush with egg wash, and bake at 375°F for 30 minutes.
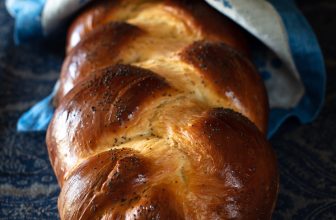
- Challah – Beautiful braided Jewish bread enriched with eggs that makes exceptional French toast and bread pudding. Recipe: Mix 4 cups flour, 2 tsp yeast, 2 tsp salt, ¼ cup sugar, 2 eggs plus 1 yolk, ¼ cup oil, and ¾ cup warm water. Knead, rise, braid, rise again, brush with egg wash, and bake at 350°F for 30 minutes.
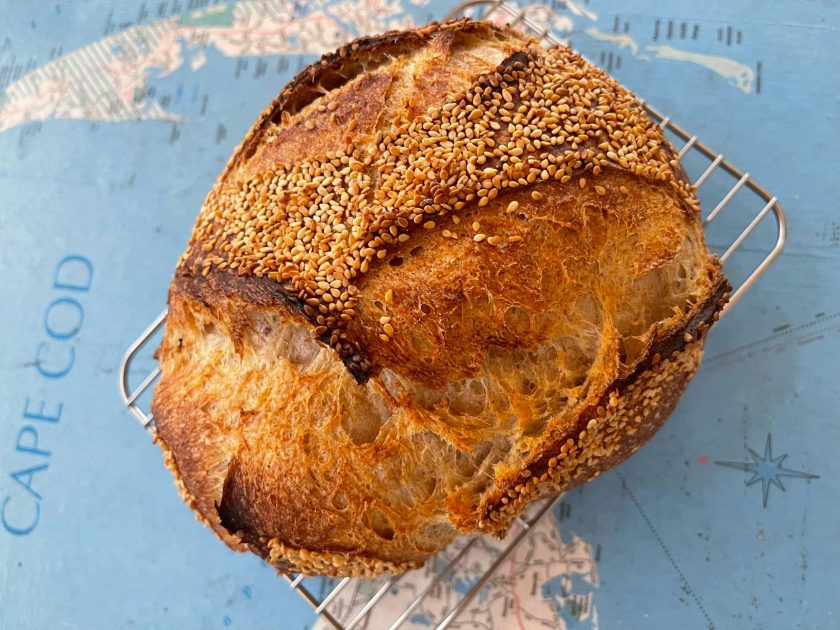
- Sourdough – Naturally leavened with wild yeast cultures, offering complex tangy flavor and excellent keeping qualities. Recipe: Mix ½ cup active starter, 3 cups flour, 1½ tsp salt, and 1¼ cups water. Rest 30 minutes, fold dough 4 times over 3 hours, shape, refrigerate overnight in a banneton, and bake in a preheated Dutch oven at 450°F for 30 minutes covered, 15 minutes uncovered.
- Focaccia – Italian flatbread typically topped with olive oil, herbs, and sometimes vegetables or cheese. Recipe: Mix 4 cups flour, 2 tsp salt, 2 tsp yeast, and 1¾ cups warm water with ¼ cup olive oil. Rise 1 hour, spread in oiled pan, dimple surface with fingers, drizzle with more oil and toppings, rise 30 minutes, and bake at 425°F for 20-25 minutes.
- Ciabatta – Rustic Italian bread characterized by its flat shape and airy interior, perfect for sandwiches and dipping. Recipe: Mix 3½ cups bread flour, 1½ tsp salt, 1 tsp yeast, and 1¾ cups cool water to make a very wet dough. Rest for 18 hours, gently shape into rectangular loaves on a well-floured surface, rise for 1 hour, and bake at 450°F with steam for 25 minutes.
- Naan – Indian flatbread traditionally baked in a tandoor oven, often brushed with ghee. Recipe: Mix 3 cups flour, 1 tsp salt, 1 tsp yeast, 2 tbsp yogurt, 2 tbsp oil, 1 egg, and ¾ cup warm milk. Knead, rise 1 hour, divide into 6 balls, roll into teardrop shapes, and cook on a very hot cast iron skillet 2 minutes per side. Brush with melted ghee.
- Pretzel Bread – Distinguished by its deep brown, shiny crust achieved through an alkaline bath before baking. Recipe: Mix 4 cups flour, 1 tbsp sugar, 1 tsp salt, 1 tbsp yeast, and 1½ cups warm water. Knead, rise, shape into pretzels, dip in a solution of 4 cups water and ¼ cup baking soda, sprinkle with coarse salt, and bake at 450°F for 12-15 minutes.
- Rye Bread – Ranges from light to dark varieties, often used for deli sandwiches with its distinctive hearty flavor. Recipe: Mix 2 cups rye flour, 2 cups bread flour, 2 tsp salt, 2 tsp caraway seeds, 2 tsp yeast, 2 tbsp molasses, and 1½ cups warm water. Knead, rise, shape, rise again, and bake at 375°F for 35 minutes.
- Pita – Middle Eastern flatbread that puffs dramatically during baking, creating a pocket perfect for fillings. Recipe: Mix 3 cups of flour, 1 tsp of salt, 2 tsp of yeast, 1 tbsp olive oil, and 1 cup warm water. Knead, rise 1 hour, divide into 8 balls, roll into discs, rest 15 minutes, and bake on a preheated pizza stone at 500°F for 3-4 minutes until puffed.
- Pumpernickel – Dense, dark German bread made with rye flour and often flavored with molasses or coffee. Recipe: Mix 2 cups rye flour, 1 cup bread flour, 2 tbsp cocoa powder, 1 tsp salt, 1 tsp yeast, 2 tbsp molasses, 1 tbsp coffee, and 1¼ cups warm water. Knead, rise slowly (4+ hours), shape, rise again, and bake at a low temperature (325°F) for 45-50 minutes.
From Dough to Delight: Your Yeast Bread Journey
Yeast bread transforms humble ingredients into culinary magic through science and patience. From basic loaves to artisanal sourdoughs, you now possess the essential knowledge for success. Remember: active yeast, proper gluten development, and controlled fermentation are your keys. With these techniques, endless possibilities await – from crusty baguettes to soft naan. So flour your hands and embrace this ancient art. Your perfect loaf isn’t just possible – it’s guaranteed!
FAQs
What is a yeast bread?
Yeast bread is a type of bread leavened with yeast organisms rather than chemical leaveners. These microscopic fungi consume sugars in the dough, producing carbon dioxide that creates the bread’s rise and distinctive texture. The fermentation process develops complex flavors through the production of organic acids and alcohol alongside carbon dioxide.
Is it healthy to eat yeast bread?
Yeast bread can be part of a healthy diet, especially whole grain varieties that provide fiber, vitamins, and minerals. The fermentation process may enhance nutrient availability and digestibility. However, moderation is key, as some commercial breads contain added sugars, preservatives, or refined flours that reduce nutritional value.
Is yeast bread the same as sourdough?
No, sourdough is a specific type of yeast bread. While traditional yeast bread uses commercial yeast (Saccharomyces cerevisiae), sourdough is naturally leavened with wild yeast cultures and beneficial bacteria. This slower fermentation process creates sourdough’s distinctive tangy flavor, improved digestibility, and longer shelf life.
What are some examples of yeast bread?
Common yeast breads include French baguettes, Italian ciabatta, Jewish challah, brioche, focaccia, naan, pretzel bread, rye bread, and pita. These vary in ingredients, techniques, and cultural origins, but all use yeast fermentation for leavening. Basic sandwich bread, dinner rolls, and cinnamon rolls are also popular examples of everyday yeast breads.


![Homemade Sourdough Breadcrumbs [One Ingredient]](https://som2nynetwork.com/wp-content/plugins/phastpress/phast.php/c2VydmljZT1pbWFnZXMmc3JjPWh0dHBzJTNBJTJGJTJGc29tMm55bmV0d29yay5jb20lMkZ3cC1jb250ZW50JTJGdXBsb2FkcyUyRjIwMjUlMkYxMSUyRnNwb29uLW9mLXNvdXJkb3VnaC1icmVhZGNydW1icy0zMzZ4MjIwLmpwZyZjYWNoZU1hcmtlcj0xNzYzOTYyOTAwLTIxOTUyJnRva2VuPTRlYTJiYTZiZDY1OThmOTk.q.jpg)