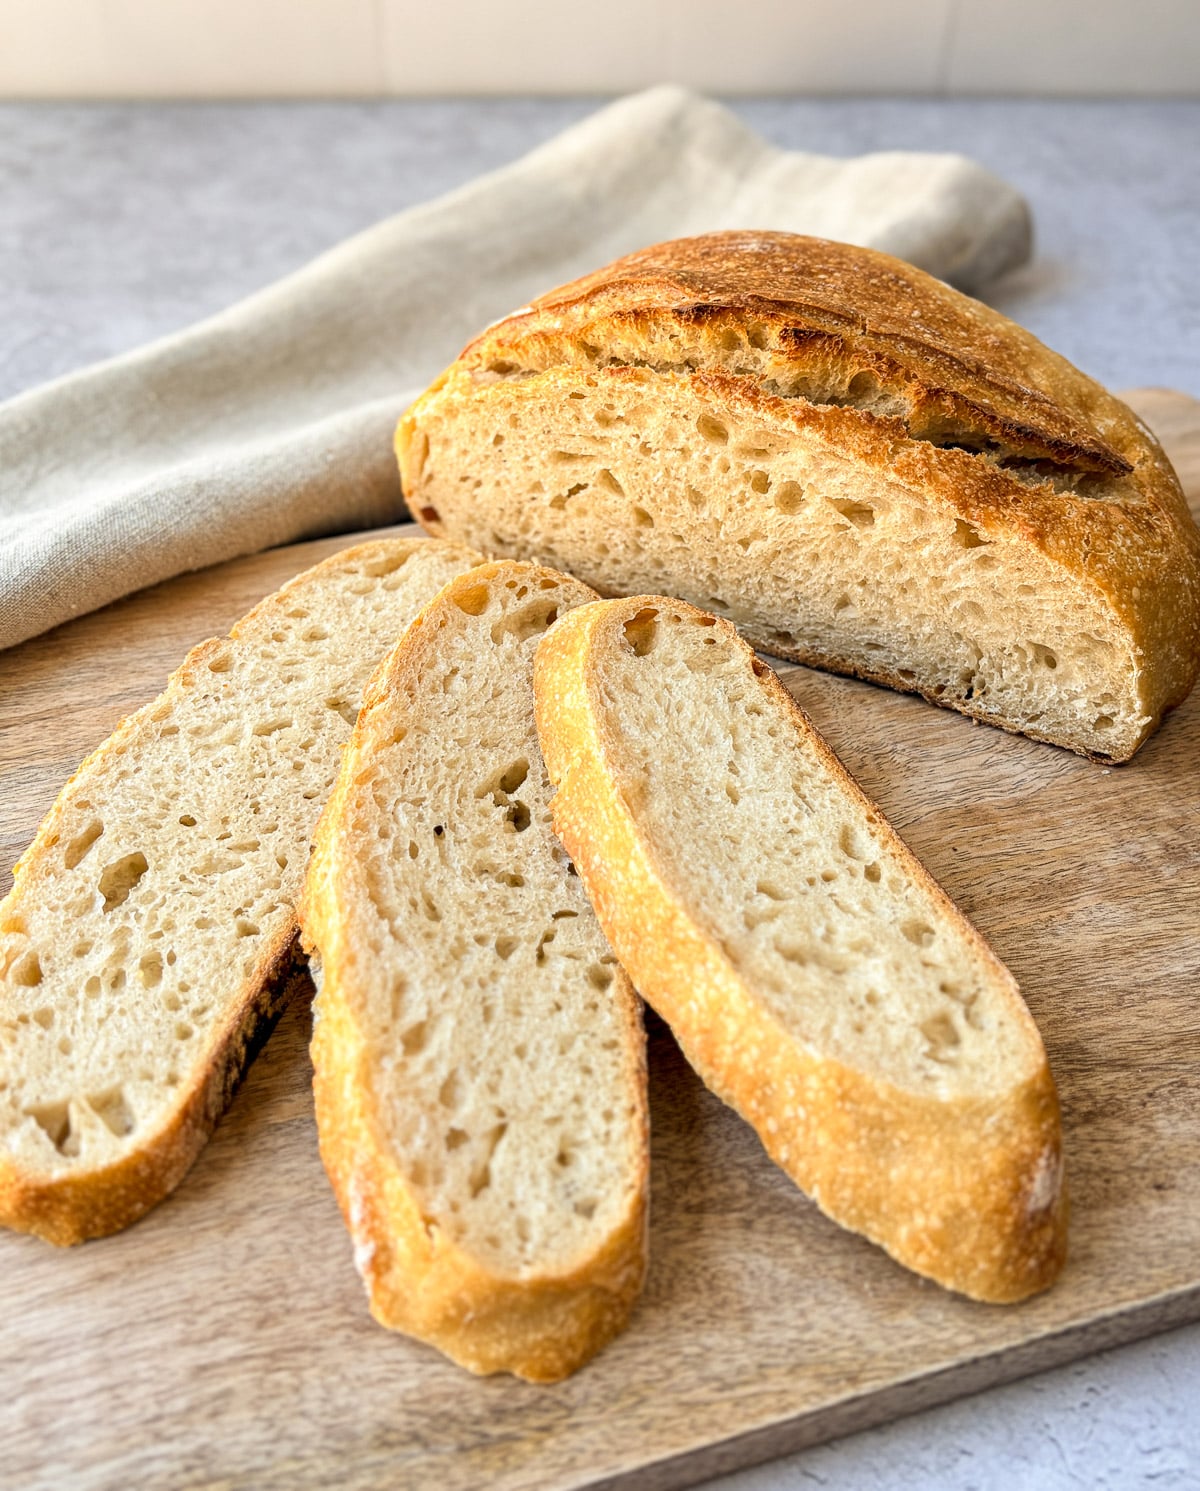
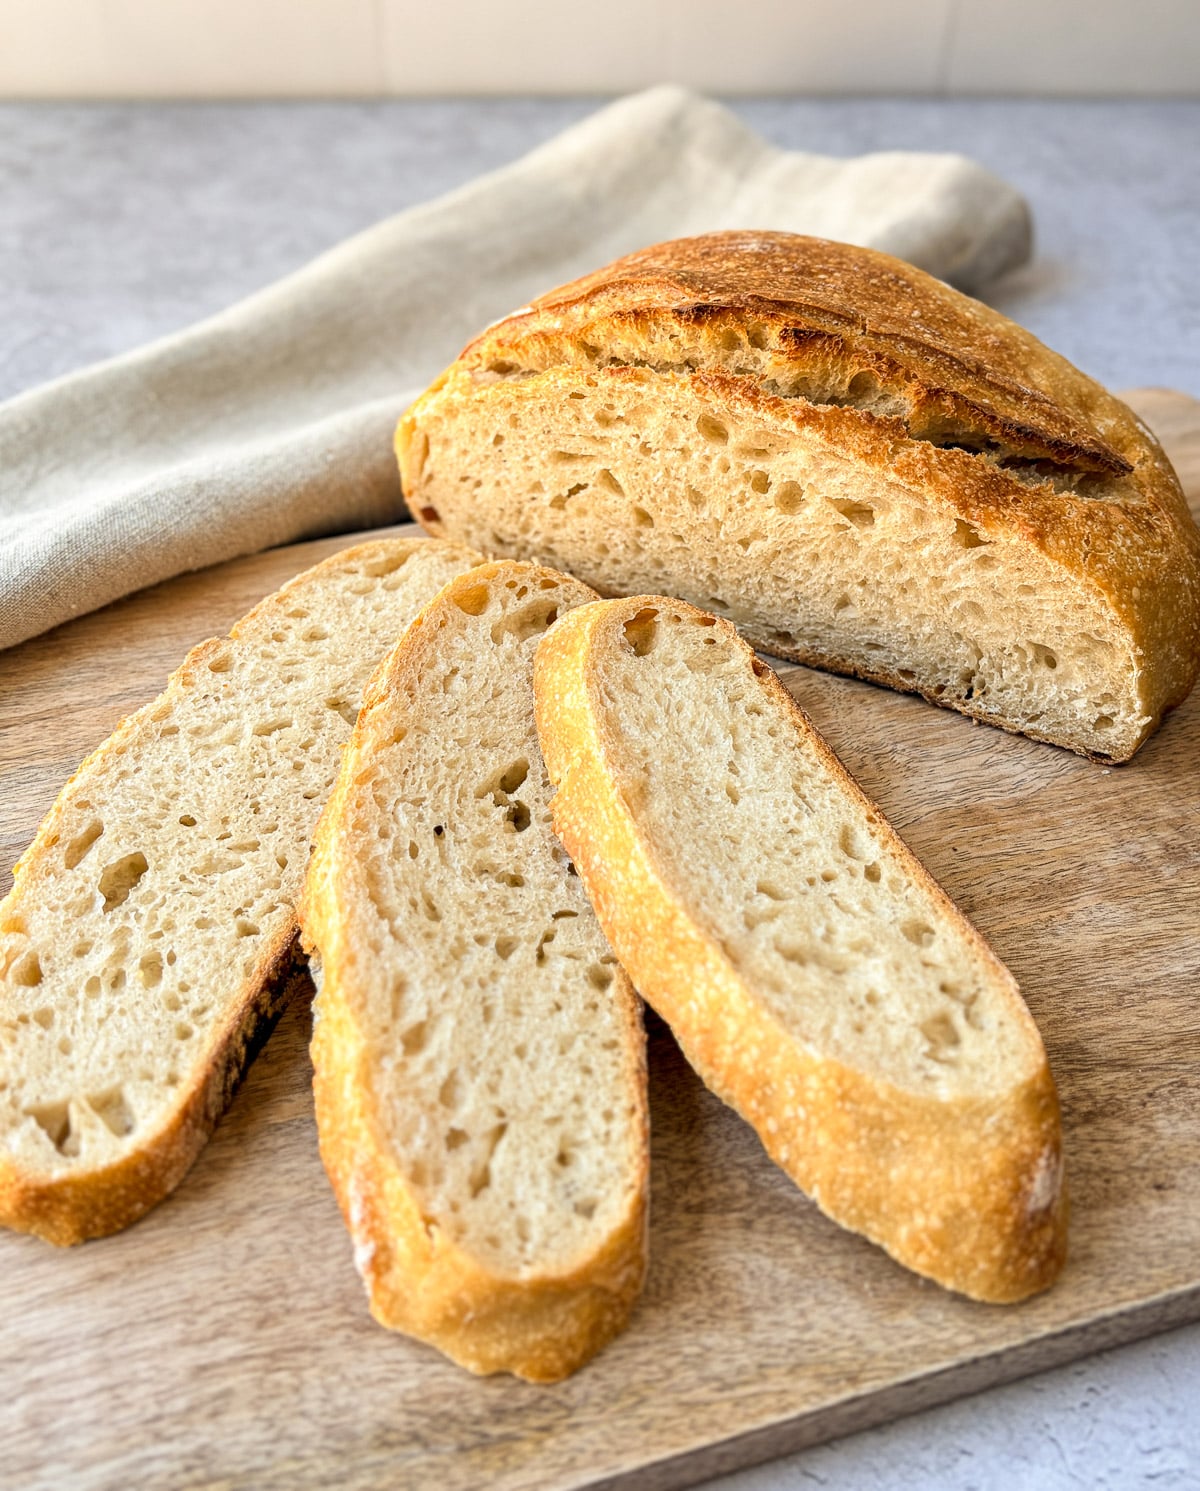
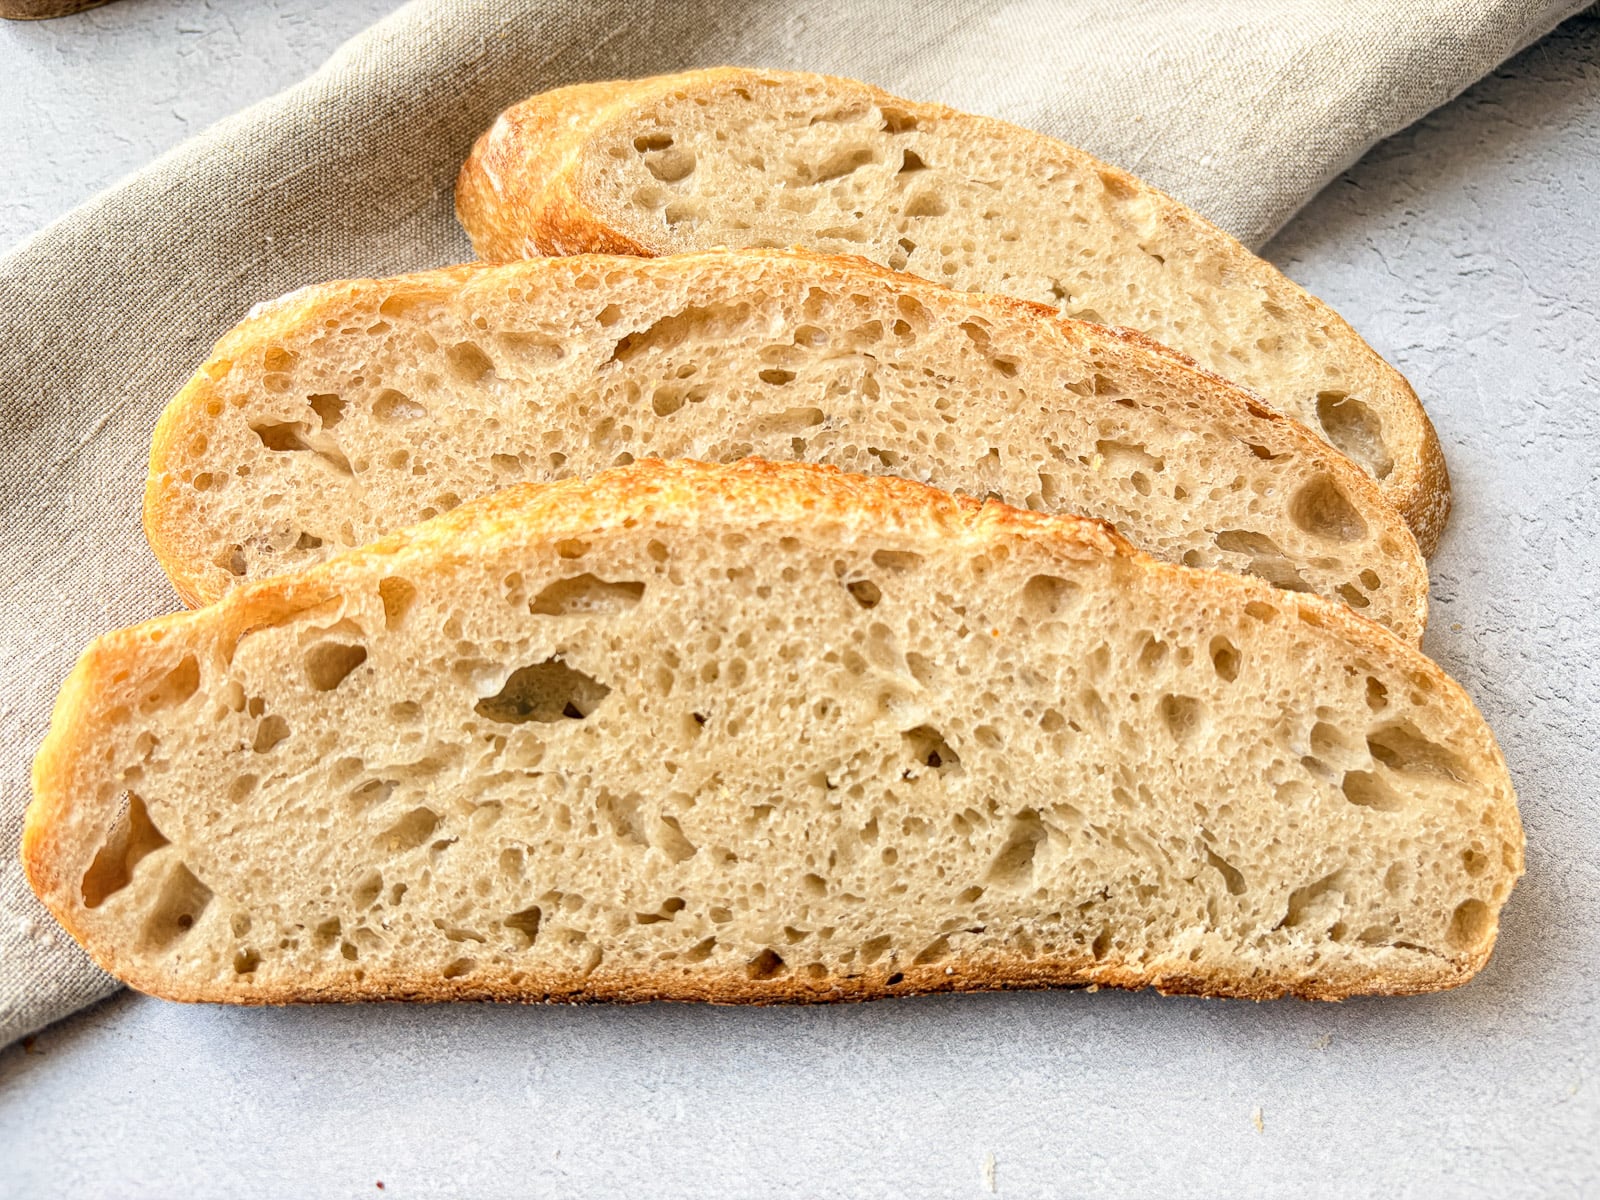
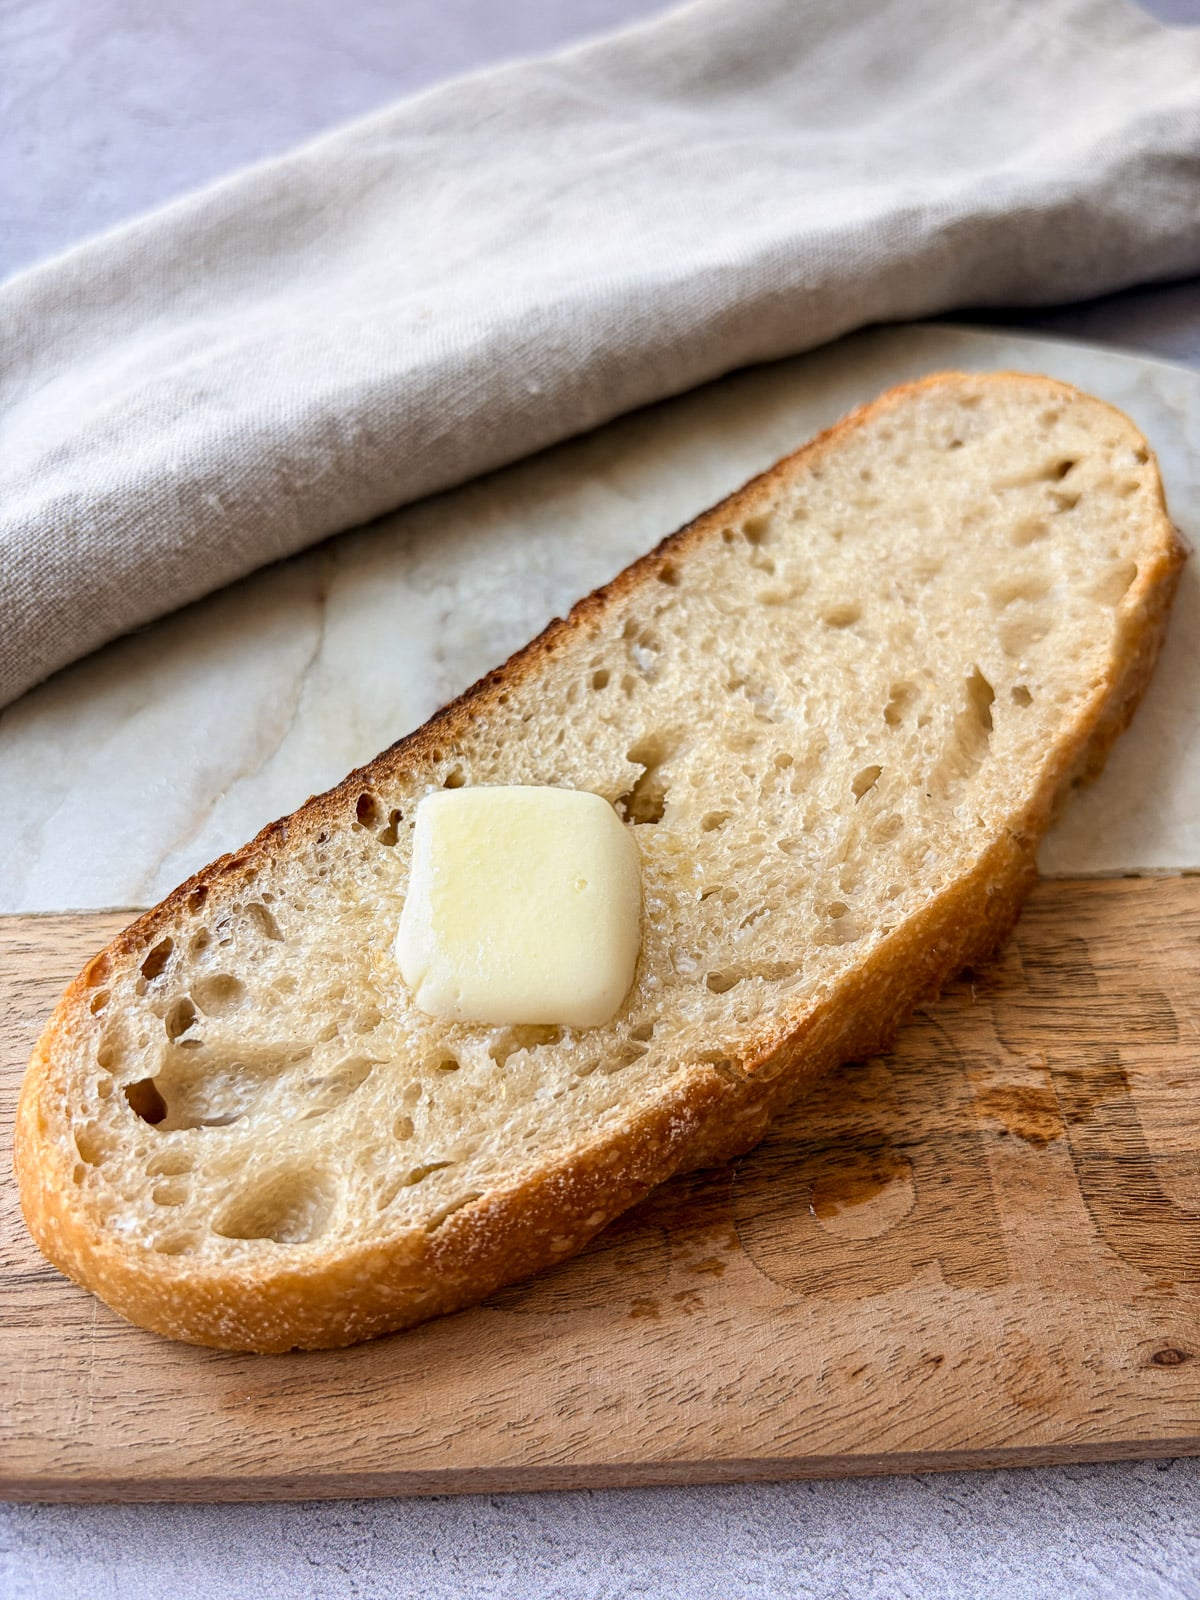
This simple sourdough bread recipe makes a soft, springy loaf with a golden crust, chewy center, and lightly open crumb. It is made with bread flour, water, active sourdough starter, salt, honey, and olive oil for a loaf that feels homemade, reliable, and approachable.
The process takes time, but most of that time is hands-off. The dough is mixed in the evening, strengthened with a few rounds of stretch-and-folds, left to rise overnight, then shaped, chilled, scored, and baked the next day.
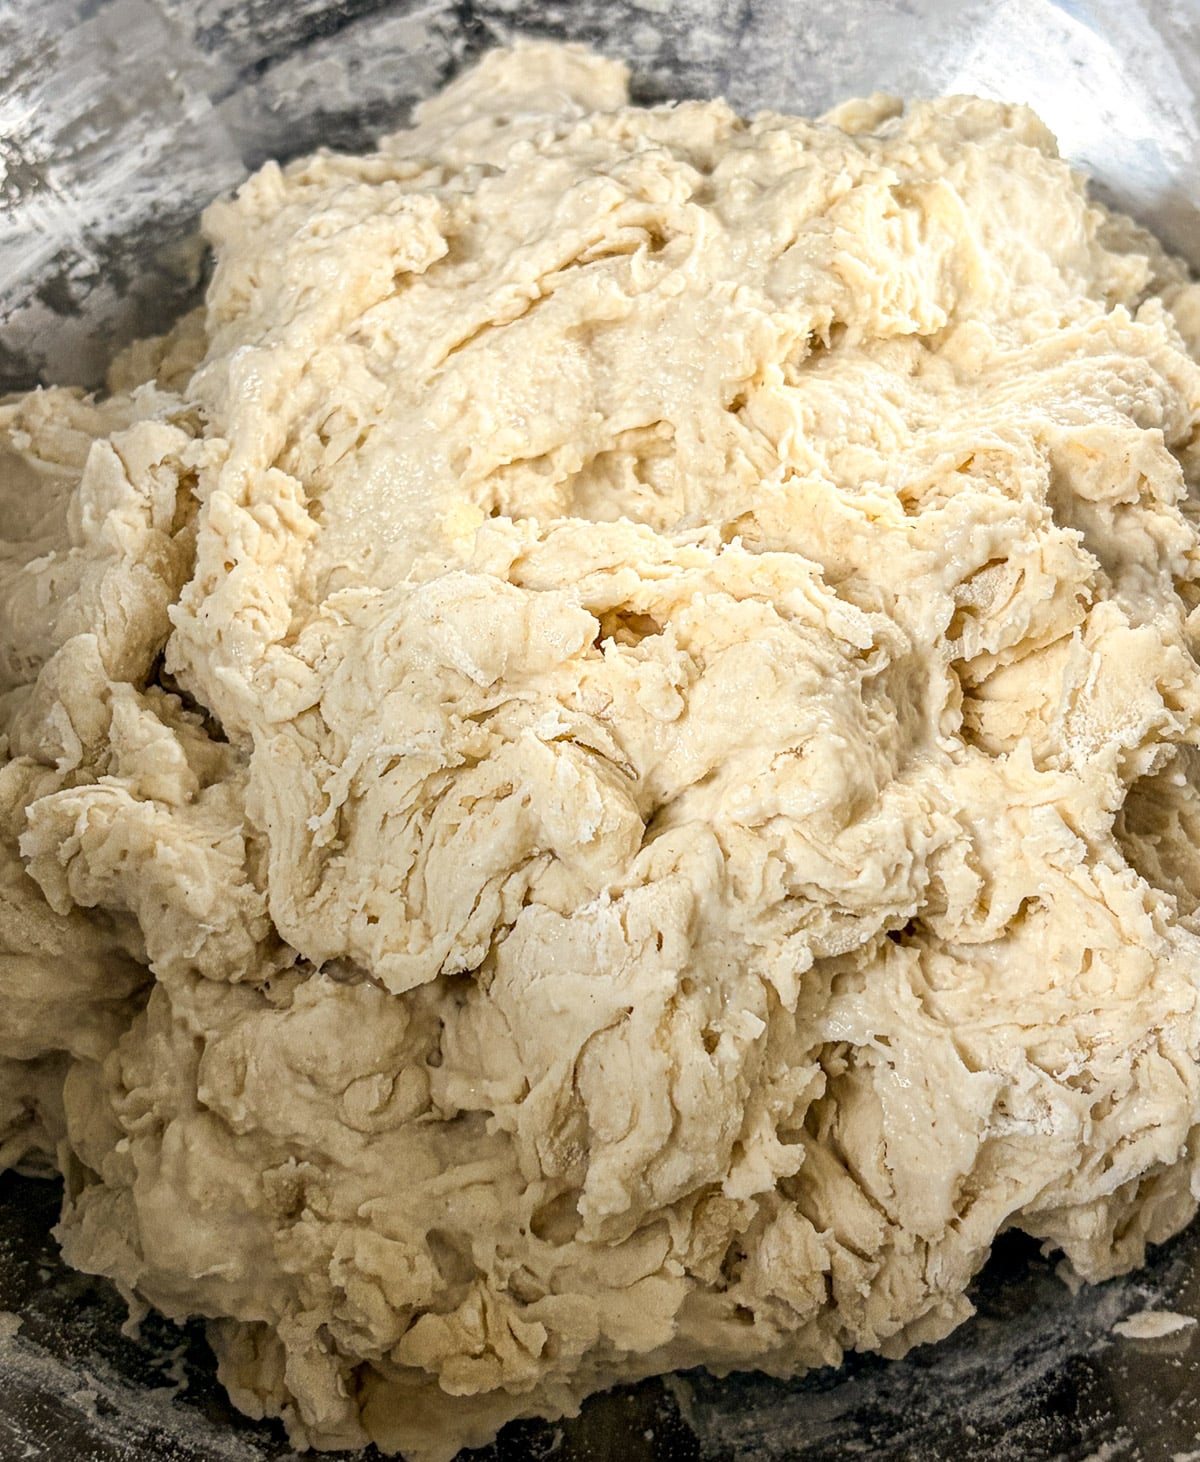
When I first started making sourdough bread, the biggest challenge was knowing what the dough should look and feel like at each stage. This walkthrough includes process photos so you can compare your dough as it changes from shaggy and sticky to smooth, airy, and ready to bake.
Why You’ll Love This Simple Sourdough Bread
Soft, springy crumb
Golden crust
Simple overnight process
No commercial yeast
Made with basic ingredients
Great for toast, sandwiches, soups, and serving with butter
After a few test bakes, we kept coming back to this version because it gave us the texture we actually wanted: a soft, springy loaf with a lightly open crumb instead of a super holey artisan-style bread that is hard to slice and use.
What Is Sourdough Starter?
A sourdough starter is a mixture of flour and water that contains wild yeast and natural bacteria. It helps the bread rise without commercial yeast and gives sourdough its classic flavor.
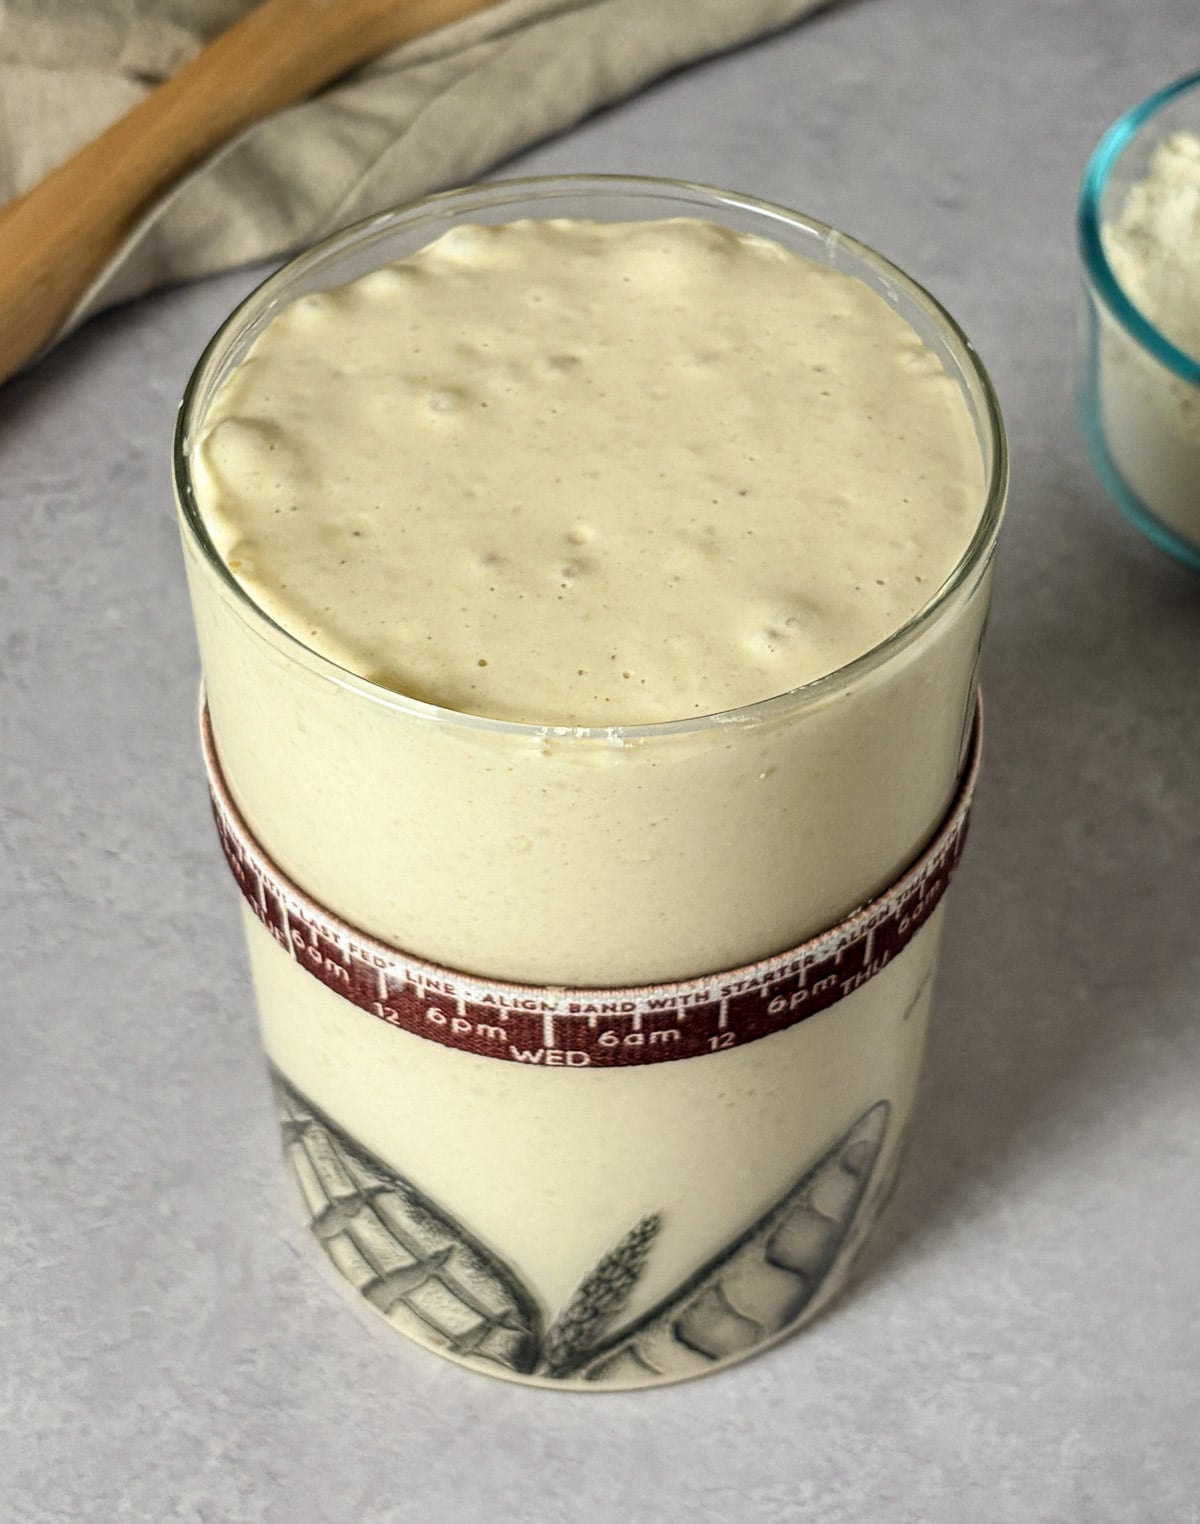
For this recipe, use an active starter that has been recently fed. It should be bubbly, doubled or tripled in size, and just starting to flatten on top. If your starter has been in the refrigerator, feed it twice before baking so it is strong enough to raise the dough.
Your starter does not need to be this full. For this recipe, you only need 100g of active starter. Look for bubbles, rise, and a slightly flattened top.
If you are starting from scratch, a sourdough starter takes several days of regular feedings before it is ready to use. This recipe works best with a fully established starter, not a brand-new one. We used all-purpose flour for feeding the starter, then bread flour for the dough itself.
Ingredients You’ll Need
Bread flour
Warm water
Active sourdough starter
Salt
Honey
Olive oil
A kitchen scale is strongly recommended for this recipe. Sourdough is much more consistent when the flour, water, starter, and salt are measured by weight.
This recipe uses a short list of simple ingredients, but each one matters. Bread flour gives the loaf structure, the active starter helps it rise, salt adds flavor, honey gives the dough a little softness, and olive oil helps create a tender crumb.
How to Make Simple Sourdough Bread
Mix the Dough
In the evening, combine the warm water, active starter, honey, and olive oil. Add the bread flour and salt, then mix by hand or with a Danish dough whisk until no dry flour remains. Cover and let the dough rest for 30 minutes.
Stretch and Fold
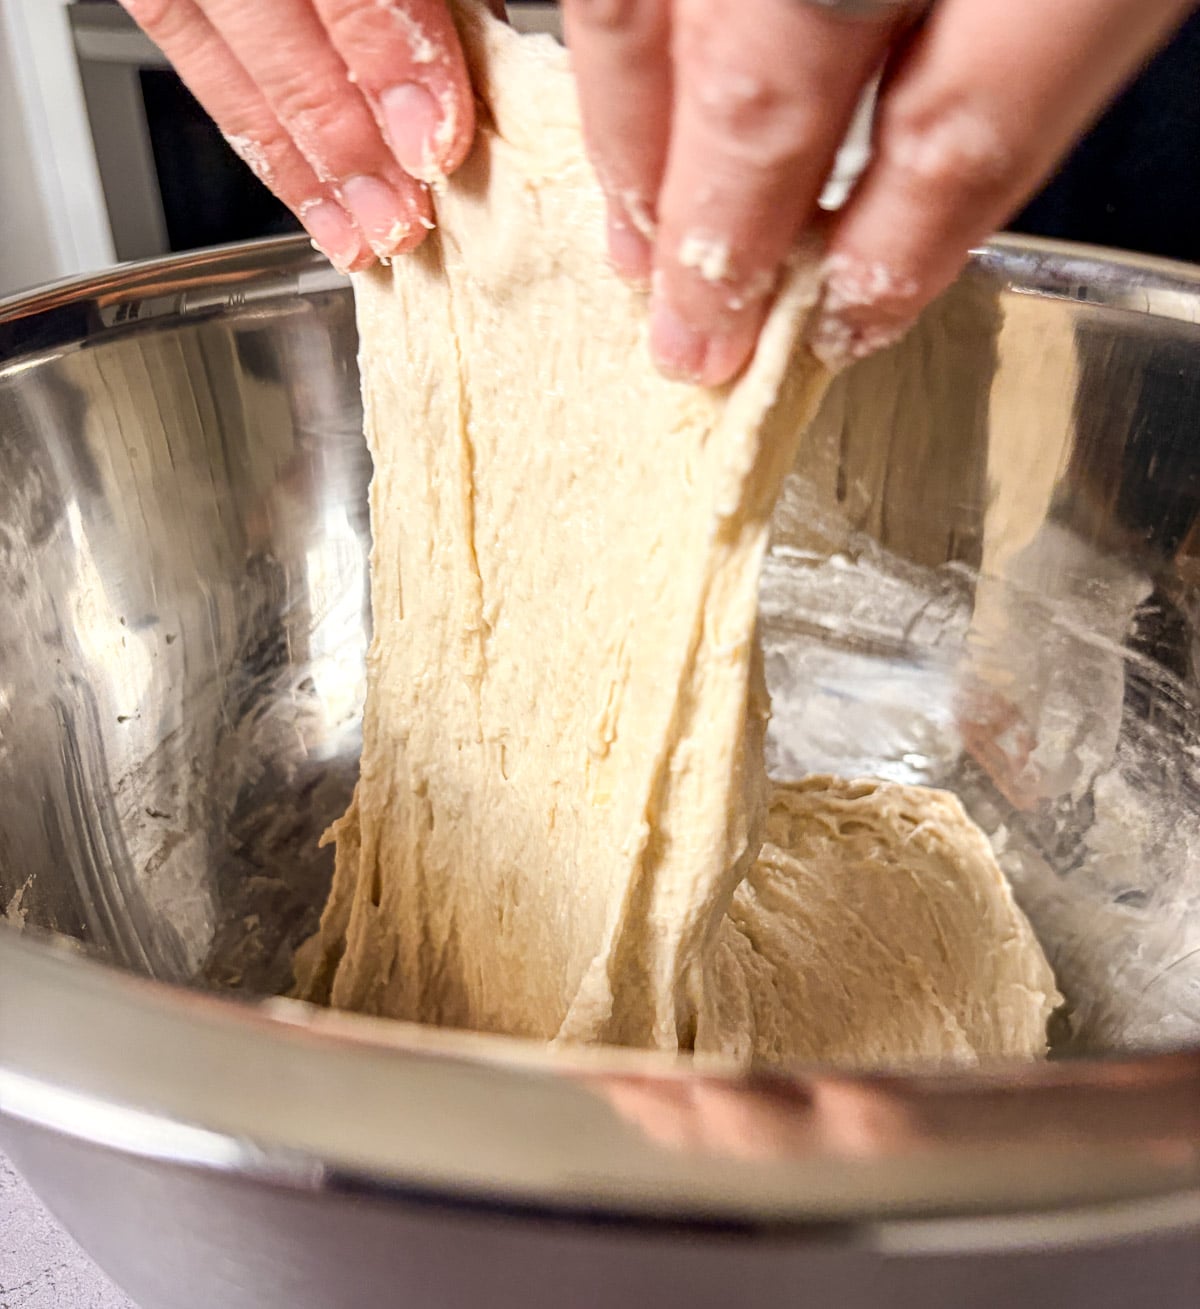
Perform 3 rounds of stretch-and-folds, spaced 30 minutes apart. To do this, gently pull one side of the dough up and fold it over itself. Rotate the bowl and repeat. Cover the dough between each round.
Bulk Ferment Overnight
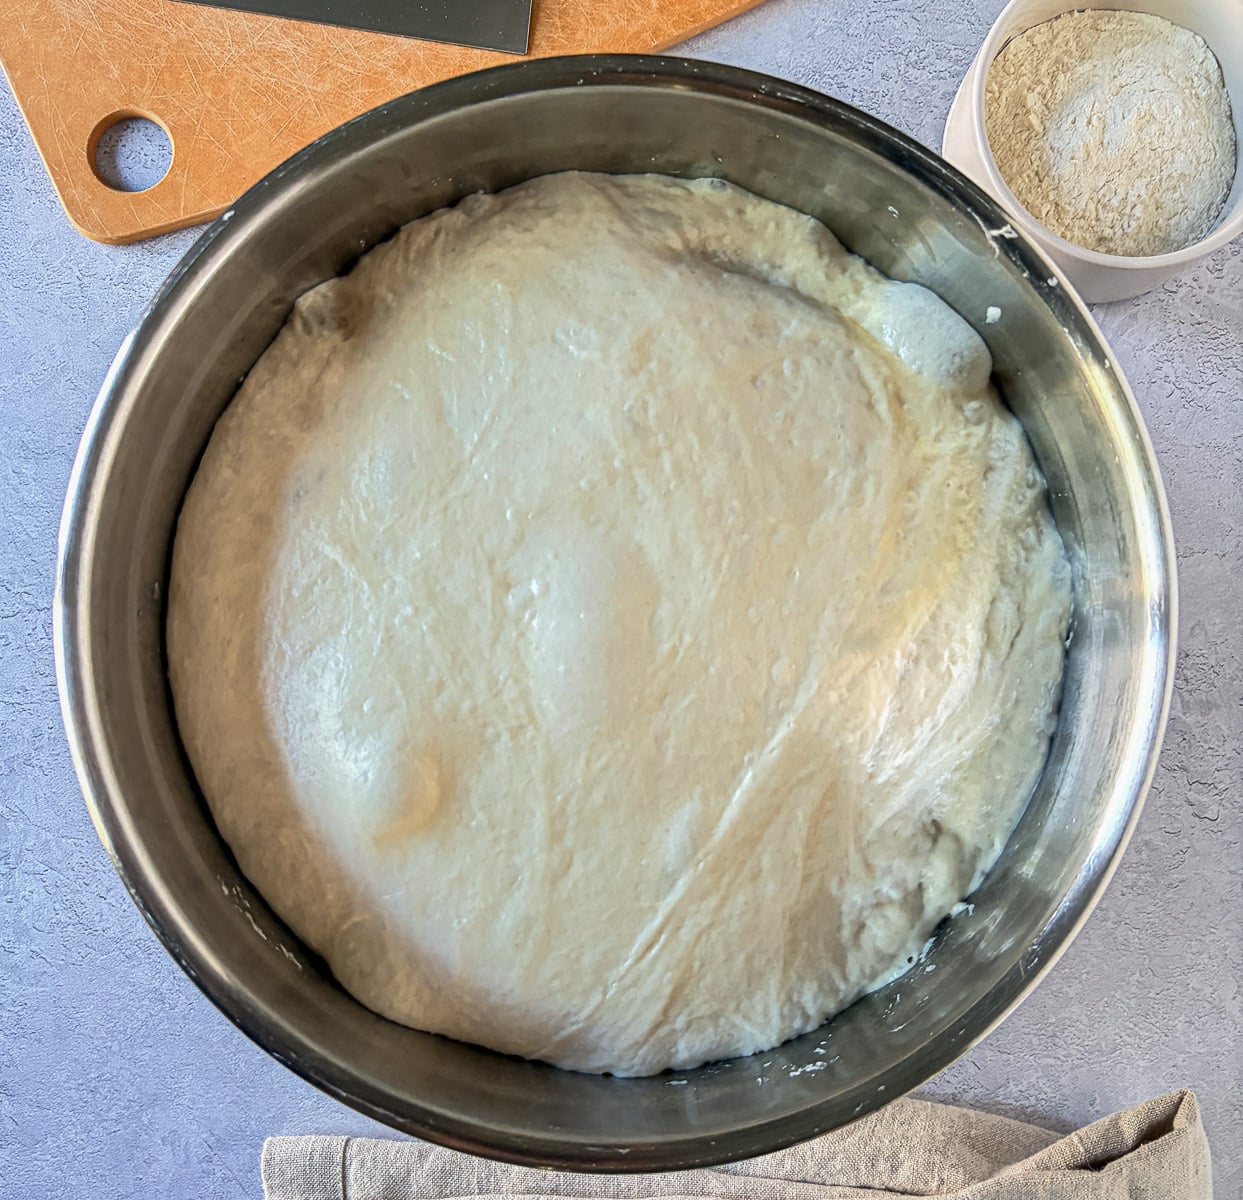
After the final fold, cover the bowl tightly with a lid, plastic wrap, or reusable wrap and let the dough bulk ferment overnight at about 75 to 77°F. By morning, the dough should look puffed and bubbly, and it should have increased by about 60 to 75%.
Bulk fermentation is the first long rise after the dough is mixed, before it is shaped. During this time, the sourdough starter helps the dough rise, build flavor, and develop bubbles.
Check the Dough
The dough is ready to shape when it has visible bubbles and passes the poke test. When gently pressed, it should spring back slowly and leave a slight indentation. The dough can be sticky, so a lightly floured finger works great. If it springs back immediately, it may need more time. If it collapses or feels very slack, it may be overproofed.
How to Shape Sourdough Bread
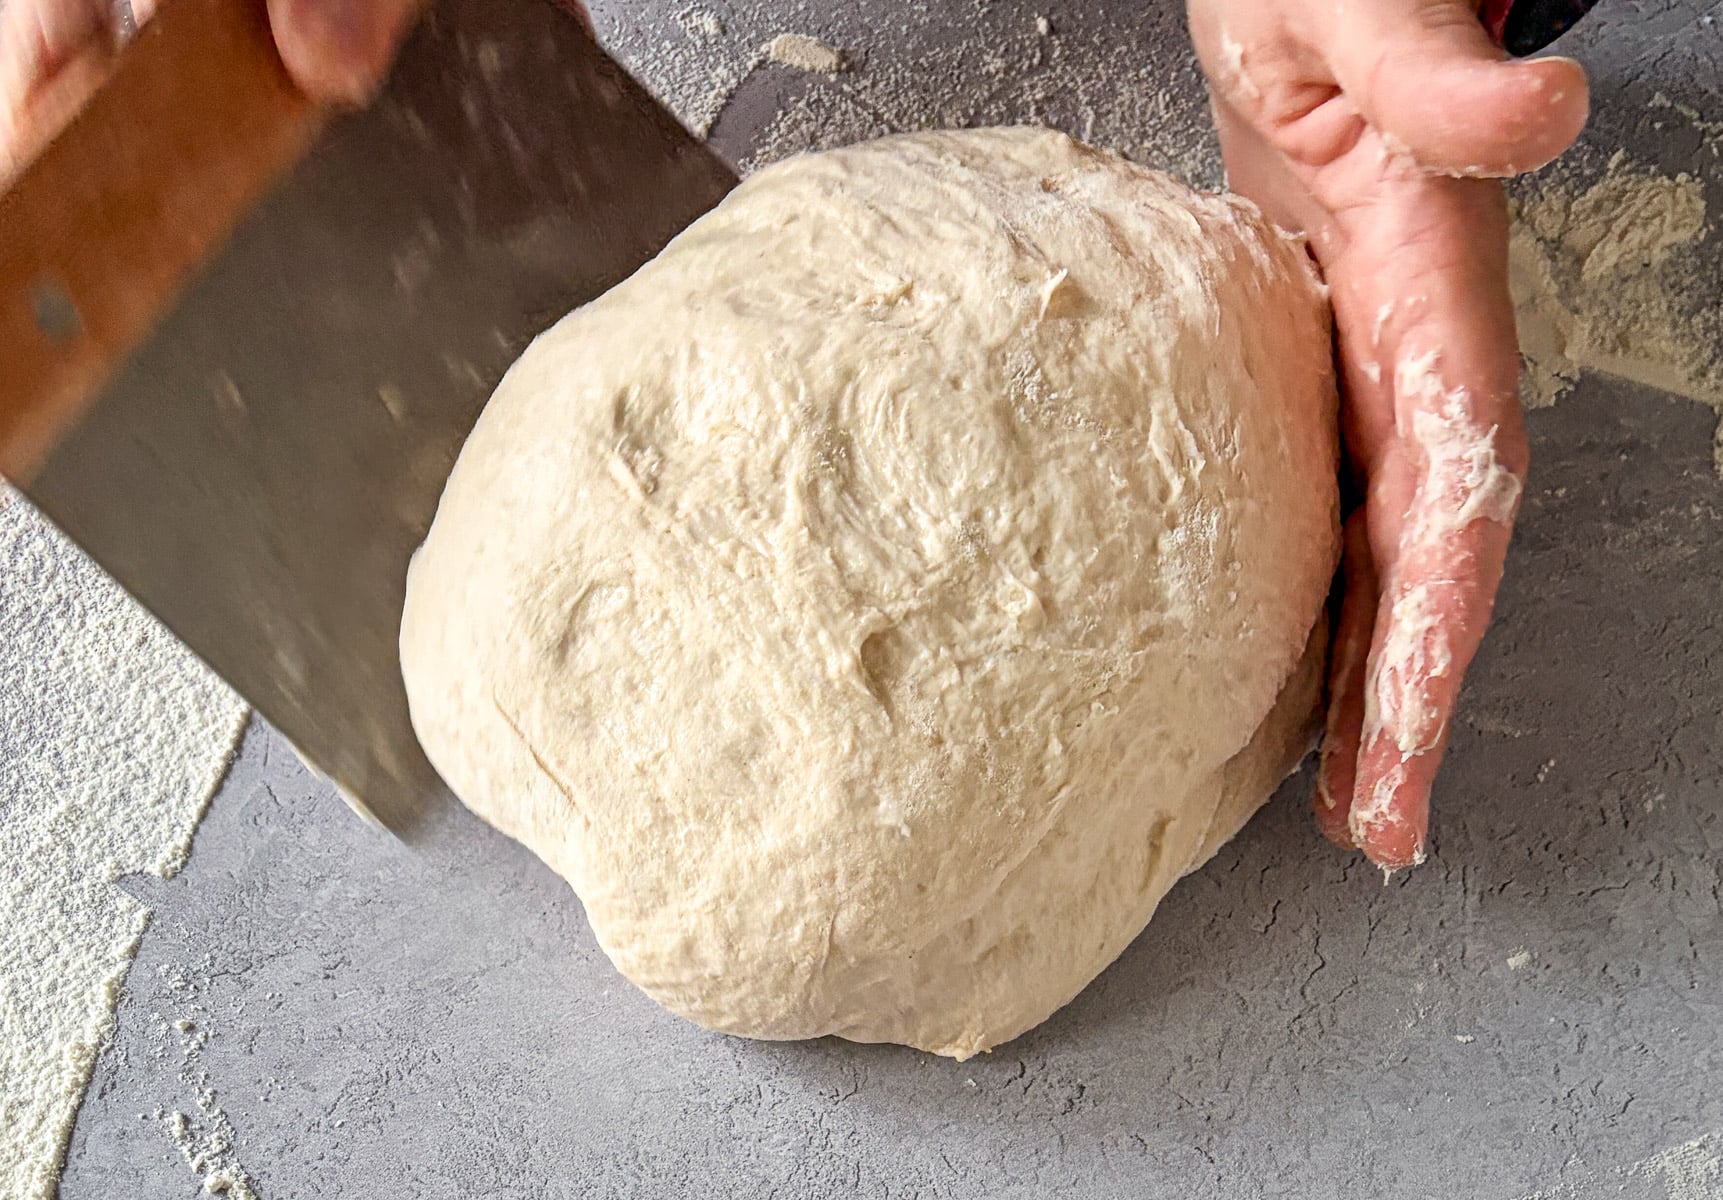
Turn the dough onto a lightly floured surface with a bowl scraper. Gently fold the edges of the dough toward the center, then use a bench scraper to pull the dough into a tighter round while preserving as much gas as possible. Let it rest for 15 to 20 minutes, then perform the final shape and place it seam-side up in a floured banneton or towel-lined bowl.
Use a bench scraper to gently pull the dough into a tighter round without pressing out too much air.
Watch how to gently fold the dough and use a bench scraper to pull it into a tighter round. Use light pressure and avoid flattening the dough.
The goal is to build surface tension without knocking out all the air you built during fermentation. Handle the dough gently, especially after the overnight rise.
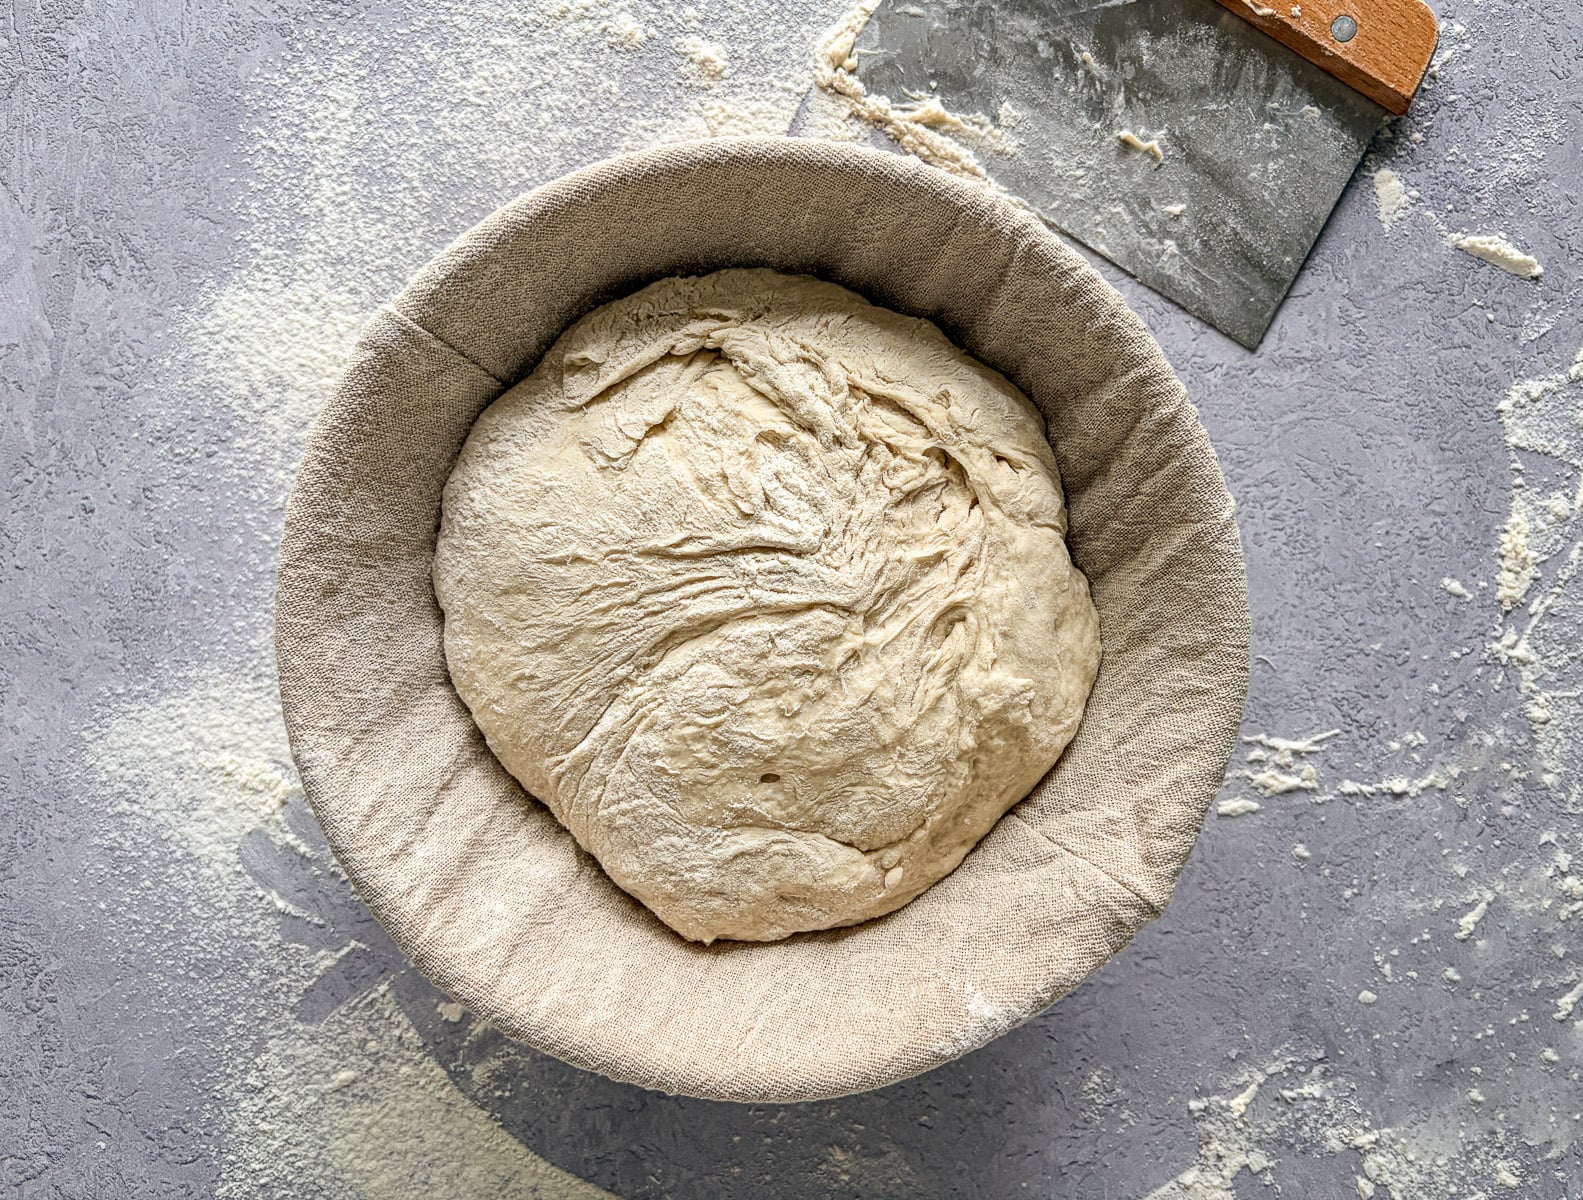
Place the shaped dough seam-side up in a floured banneton or towel-lined bowl.
Chill, Score, and Bake
Cover the banneton or bowl loosely with plastic wrap, a reusable cover, or a clean kitchen towel, then refrigerate the shaped dough for 2 to 4 hours. This short cold proof helps the loaf hold its shape and improves oven spring.
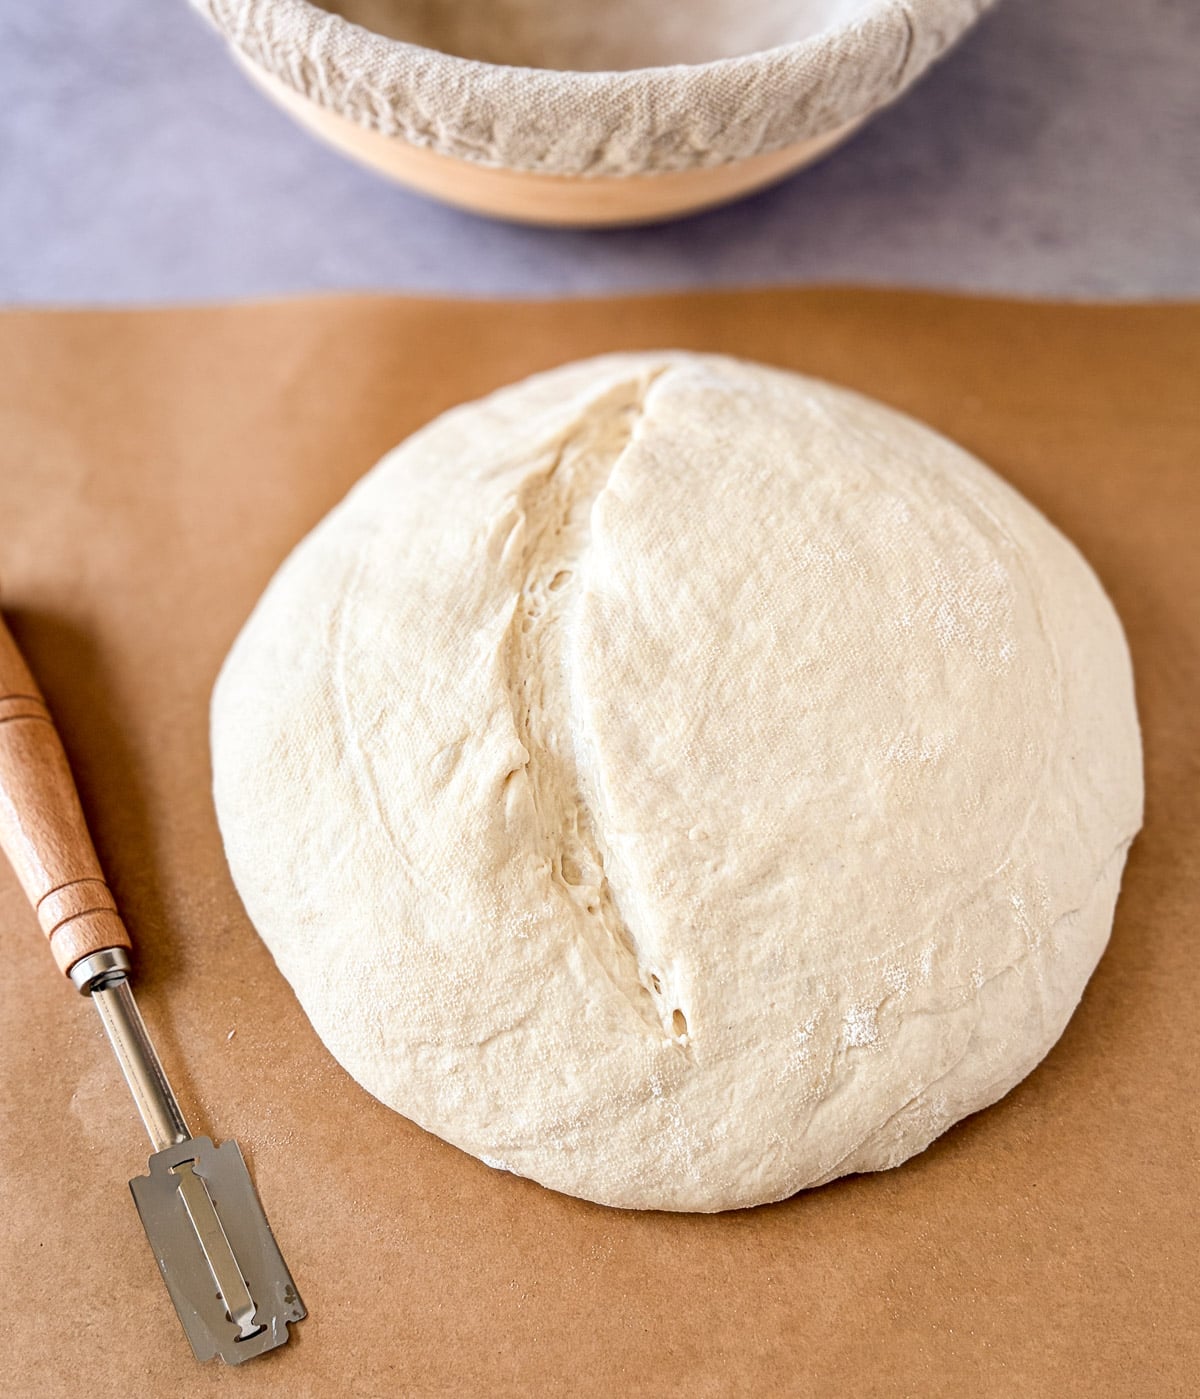
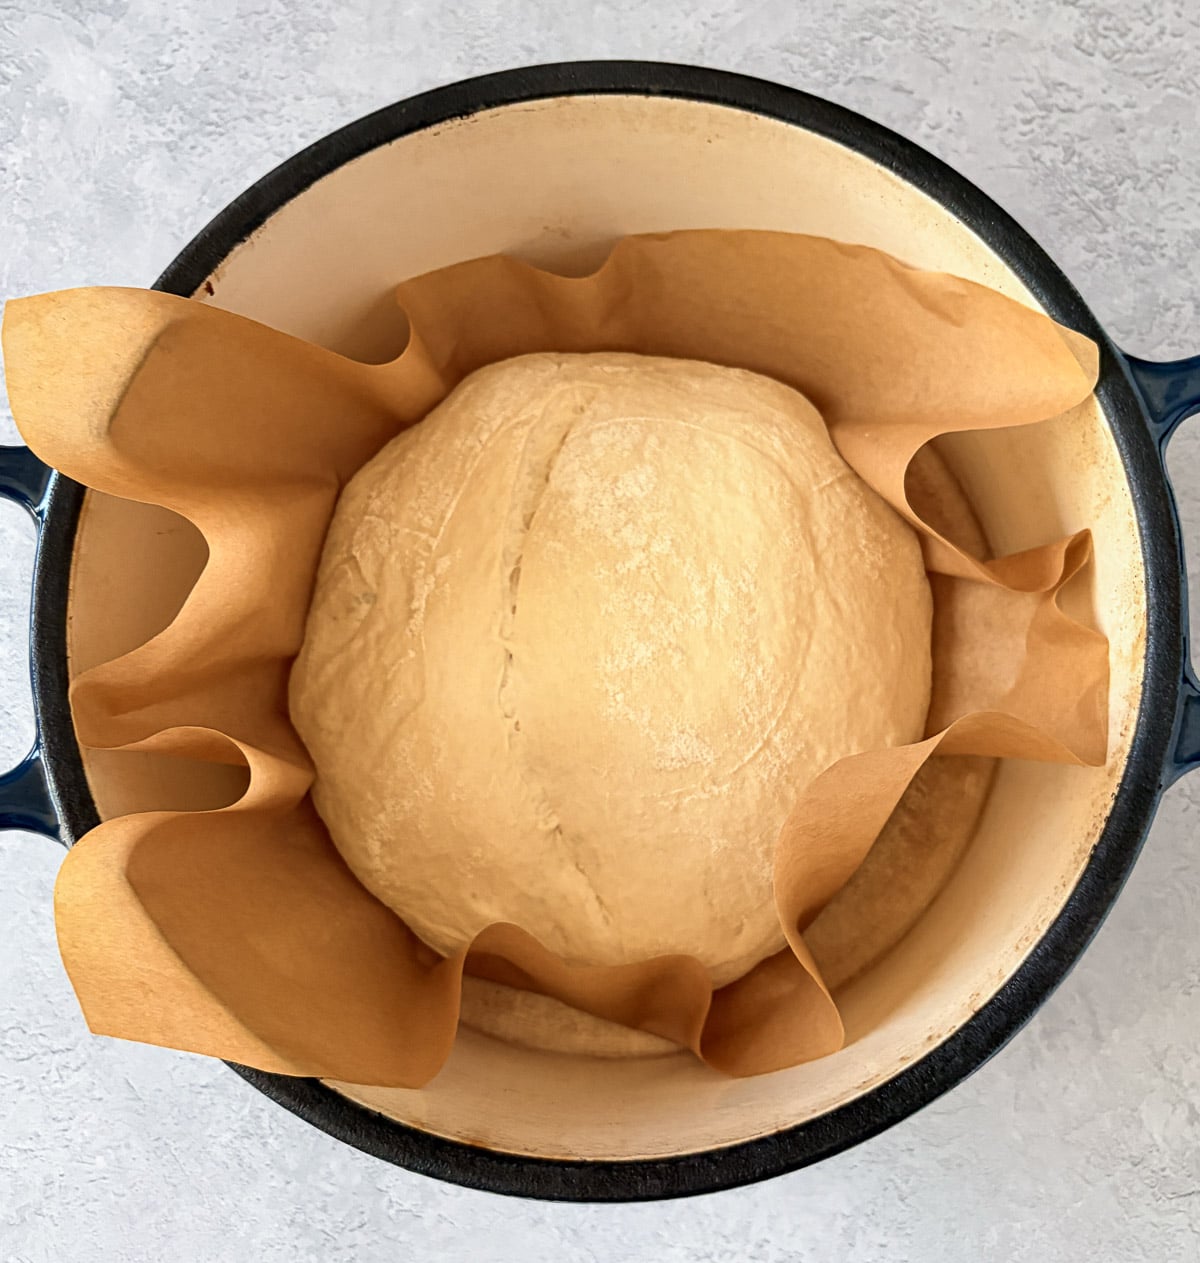
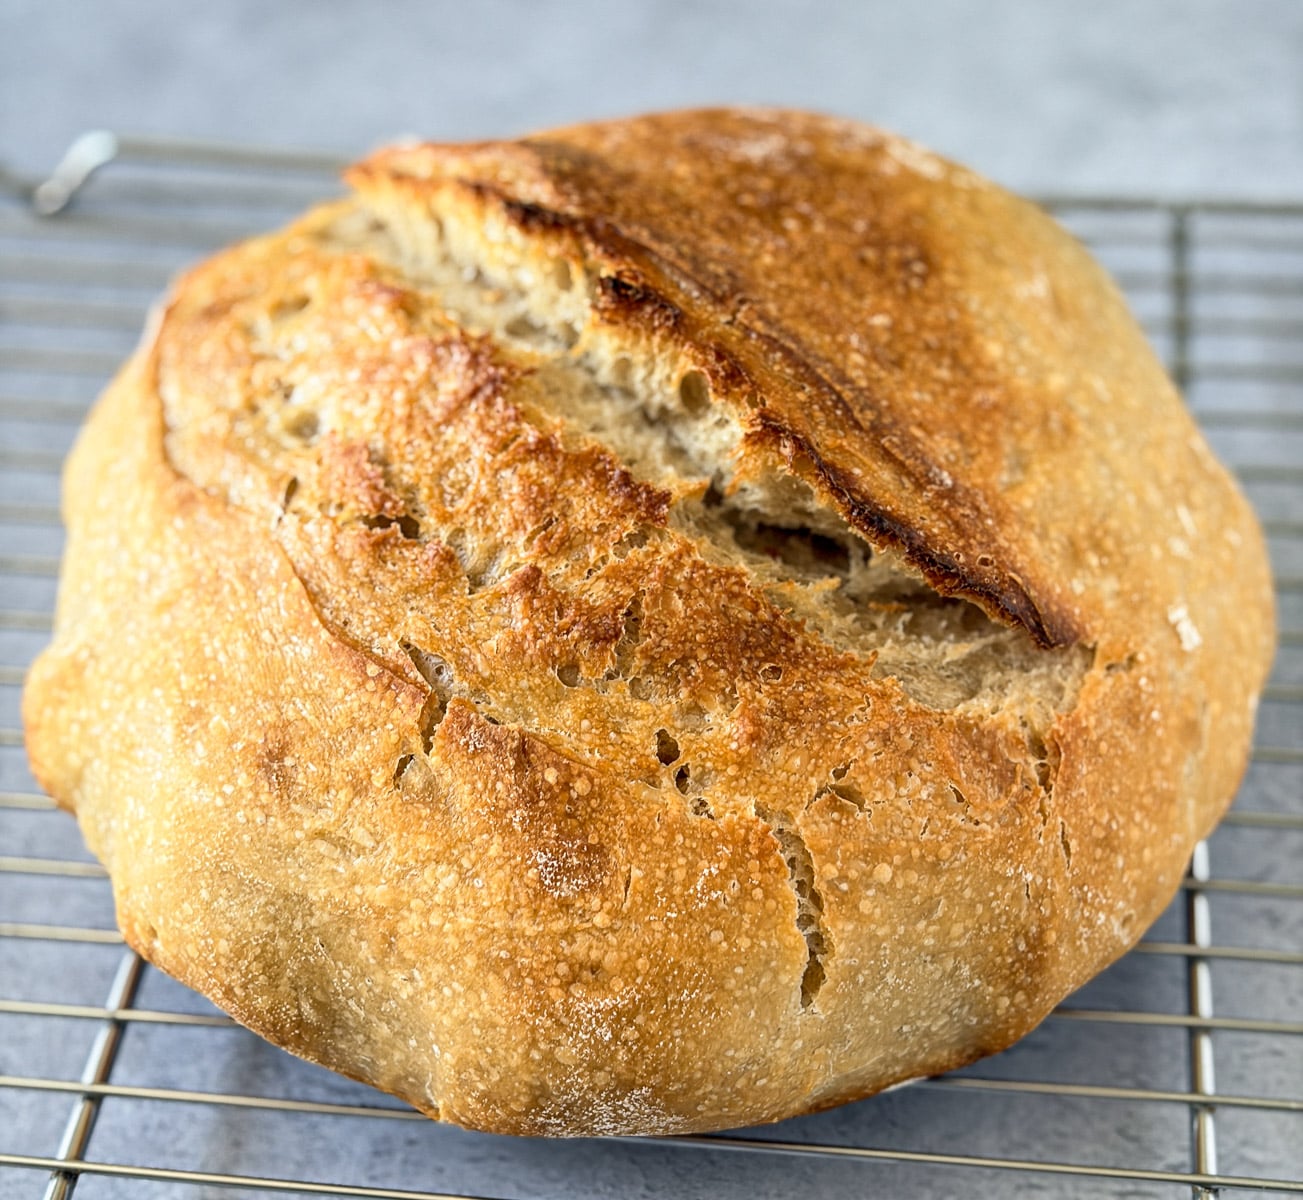
Place the Dutch oven with the lid in the oven, then preheat the oven to 450°F for at least 45 minutes. Turn the dough onto parchment paper, score it with one confident slash about ¼-inch deep, then use the parchment paper to carefully lower the dough into the hot Dutch oven. Bake covered for 20 minutes at 450°F. Remove the lid, reduce the oven to 425°F, and continue baking for about 15 minutes, or until the loaf reaches at least 205°F in the center.
If the crust is getting too dark before the inside is done, reduce the oven to 400°F and keep baking until the center reaches 205 to 208°F.
Cool Before Slicing
Let the loaf cool completely on a wire rack for at least 3 hours before slicing. This is the part I rushed when I first started making sourdough. I wanted to see the inside and taste it right away, but waiting really does make a difference. If you slice sourdough too early, the inside can seem gummy even when the bread is fully baked.
How to Store Sourdough Bread
Store cooled sourdough bread at room temperature in a bread bag, paper bag, or loosely wrapped in a clean kitchen towel for 2 to 3 days. For longer storage, slice the loaf and freeze the slices in a freezer-safe bag. Toast slices straight from frozen as needed.
Sourdough Bread FAQs
Can I make this sourdough bread without a Dutch oven?
Yes, but a Dutch oven gives the best crust because it traps steam around the dough. Without one, use a heavy oven-safe pot with a lid or bake on a preheated stone with steam added to the oven.
How do I know when my starter is ready?
Your starter should be bubbly, active, and doubled or tripled in size. For this recipe, the top should be just starting to flatten, which means it is near peak activity.
Why is my sourdough bread dense?
The most common reasons are a weak starter, under-fermented dough, a cold kitchen, rough handling after bulk fermentation, or slicing the loaf before it has fully cooled.
Why is my dough so sticky?
Sourdough dough is naturally sticky, especially before it builds strength. Lightly wet your hands during stretch-and-folds and use only enough flour during shaping to prevent sticking.
Can I use all-purpose flour instead of bread flour?
Bread flour is recommended because it gives the loaf better structure and chew. All-purpose flour may work, but the dough may feel softer and the loaf may not rise quite as well.
How long should sourdough bread cool before slicing?
Let it cool for at least 3 hours. Cutting too early can make the inside gummy because the crumb is still setting.
This simple sourdough bread recipe makes a soft, springy loaf with a golden crust and lightly open crumb. It uses an active starter, an overnight rise, and a short cold proof before baking in a Dutch oven.
500g bread flour, about 4 cups plus 2 tablespoons
350g warm water, about 1 ½ cups minus 1 tablespoon
100g active sourdough starter, about ⅓ cup plus 1 tablespoon
10g salt, about 1 ¾ teaspoons
15g honey, about 2 teaspoons
15g olive oil, about 1 tablespoon
Instructions
In the evening, combine the warm water, active starter, honey, and olive oil in a large bowl.
Add the bread flour and salt. Mix by hand or with a Danish dough whisk until no dry flour remains. Cover and rest for 30 minutes.
Perform 3 rounds of stretch-and-folds, spaced 30 minutes apart. Cover the dough between each round.
After the final fold, cover the bowl tightly with a lid, plastic wrap, or reusable wrap and let it bulk ferment overnight at about 75 to 77°F.
The next morning, check the dough. It should be increased by about 60 to 75%, show visible bubbles, and pass the poke test with a slow spring back and slight indentation.
Turn the dough onto a lightly floured surface using a bowl scraper. Gently pre-shape it into a round, preserving as much gas as possible.
Let the dough bench rest for 15 to 20 minutes.
Perform a gentle final shape and place the dough seam-side up in a floured banneton or towel-lined bowl.
Cover the banneton or bowl loosely with plastic wrap, a reusable cover, or a clean kitchen towel, then refrigerate for 2 to 4 hours.
Place a Dutch oven with the lid in the oven and preheat the oven to 450°F for at least 45 minutes.
Turn the dough onto parchment paper and score the top with one confident slash about ¼-inch deep.
Carefully transfer the dough using the parchment paper into the hot Dutch oven. Cover and bake for 20 minutes at 450°F.
Remove the lid, reduce the oven to 425°F, and continue baking for about 15 minutes, or until the loaf reaches at least 205°F in the center.
If the crust is dark but the loaf is not fully baked, reduce the oven to 400°F and continue baking until the internal temperature reaches 205 to 208°F.
Transfer the loaf to a wire rack and cool completely for at least 3 hours before slicing.
Notes
If your starter has been refrigerated, feed it twice before baking.
Use the starter at peak activity, when it has doubled or tripled and the top is just starting to flatten.
Any early evening start works as long as the dough has time for the stretch-and-folds before the overnight bulk fermentation. Three stretch-and-folds are enough for this loaf.
Handle the dough gently after bulk fermentation to preserve the airy crumb.
The short refrigerator proof helps with shaping and oven spring.
Bake to internal temperature, not crust color.
For the best texture, cool the loaf completely before slicing.
For best results, use a kitchen scale. The cup measurements are approximate, especially for flour and sourdough starter.