Essential Move-In Procedures for the Perfect Tenant Experience



Handling a vacancy can be stressful for landlords. Once you have an approved application and confirmed move-in date, there is still work to do. Clear move-in procedures help you prepare the property, complete the necessary paperwork, and give tenants the information they need. Let’s look at what to handle before, during, and after move-in day.
Key Takeaways
- Clear move-in procedures help landlords prepare the property, complete required paperwork, and give tenants the information they need.
- Complete necessary repairs, cleaning, required inspections, lease signing, and payment arrangements before handing over the keys.
- Document the property’s condition at move-in and provide clear instructions for rent, maintenance, utilities, emergencies, and other property-specific procedures.
- Move-in requirements can vary by location and rental program, so landlords should follow applicable federal, state, local, and housing assistance program requirements.
Move-in Procedures to Prepare for the Perfect Move-In Day
Moving can be stressful for everyone involved. Without a clear plan, landlords and tenants may overlook important details.
Landlords and a property management company in Philadelphia can prevent last-minute confusion by preparing early. Here are the main tasks to complete before the tenant arrives.
- Make Repairs and Address Any Safety or Health Issues
- Schedule Professional Cleaning
- Complete Required Property Inspections and Compliance
- Prepare, Review, and Sign the Lease Agreement
- Collect the Deposit and First Month’s Rent
- Verify Utility Account Set-up
- Reiterate Move-In Procedures in Writing
 Make Repairs and Address Any Safety or Health Issues
Landlords must provide a rental that meets applicable health and safety requirements. Inspect the property early enough to complete necessary repairs before the tenant moves in.
Pay close attention to the following areas:
- Safety Concerns – Test smoke and carbon monoxide alarms and check railings, locks, windows, stairs, and electrical fixtures. Correct any hazards and confirm the property meets applicable building and fire codes.
- Property Damage and Repairs – Make sure the plumbing, HVAC system, appliances, and other included features work properly. Repair broken windows, damaged flooring, wall holes, missing tiles, and similar problems.
- Moisture and Mold – Look for leaks, water damage, musty odors, and visible mold. Correct the source of the moisture instead of only cleaning the affected surface.
- Lead-Based Paint – Most landlords renting pre-1978 housing must follow federal lead-disclosure rules before the tenant signs the lease. This generally includes disclosing known lead-based paint or hazards, providing available records or reports and the EPA-approved lead-safety pamphlet, and including the required Lead Warning Statement. Certain properties are exempt, and additional state or local requirements may apply.
Completing these tasks protects the property and gives your tenant a safer place to live.
Schedule Professional Cleaning
Clean the property after completing repairs and before the move-in inspection. Pay attention to kitchens, bathrooms, floors, appliances, cabinets, and other areas the previous tenant used.
You can clean the unit yourself or hire a professional service. The goal is to give the new tenant a clean property that is ready for occupancy.
Complete Required Property Inspections and Compliance
Check the state and local requirements that apply to your rental. Depending on the location, you may need a rental license, occupancy inspection, lead certification, or other approval before move-in.
Voucher-assisted tenancies follow additional steps. The public housing agency must approve the tenancy, and the property may need to pass a required inspection before the lease term begins. Start early. Missing a required inspection, license, or disclosure could delay move-in and lead to penalties.
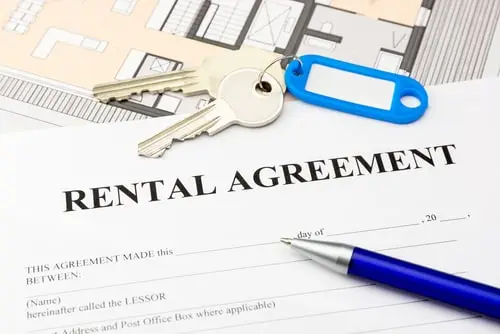 Prepare, Review, and Sign the Lease Agreement
The lease is the cornerstone of any great landlord-tenant relationship as it outlines each party’s rights and responsibilities. Therefore, this document demands your undivided time and attention.
As the landlord, take the opportunity to review the lease section by section as well as any important clauses or special provisions. For tenants, this is their best chance to ask questions and ensure they understand the terms fully before signing. This is also ideal for reviewing specifics about the property, such as any parking restrictions, waste management rules, or key amenities.
Once everyone signs the document, both the landlord and tenant should get a copy for their records.
Collect Permitted Move-In Payments
Before handing over the keys, confirm that the lease is signed and all required move-in payments have been received. The amount and timing should follow the lease and applicable law.
For Pennsylvania rentals, a landlord generally cannot require a security deposit exceeding two months’ rent during the first lease year. During the second year and generally thereafter, additional statutory rules and limitations apply, including the one-month security-deposit limit. Landlords should also check for applicable local requirements.
Voucher-assisted tenancies work differently. The tenant is responsible for their required portion of the rent and, when applicable, a permitted security deposit, while the public housing agency pays its housing assistance payment directly to the landlord under the HAP contract. Landlords should also follow applicable PHA policies and state or local security deposit requirements.
Do not assume the housing agency will automatically release payment immediately after move-in. Confirm the inspection, approval, lease, and payment process with the agency handling the voucher.
Verify Utility Account Setup
Review the lease to confirm which utilities the tenant must place in their name. Give them the provider information and enough time to arrange service before move-in. Ask for confirmation before handing over the keys if utility setup is required under the lease. You can set an internal deadline, such as three business days before move-in, to leave time for any delays. Utility responsibility varies by property and provider. Avoid shutting off services that must remain active for safety, maintenance, or legal reasons.
Reiterate Move-In Procedures in Writing
Before move-in day, send tenants a few quick reminders via email. As we mentioned before, moving is stressful, and it is easy to become preoccupied and forget key details. So, reach out to your tenants a few days before and reiterate some important move-in procedures such as –
- Confirm the agreed-upon move in time
- Verify utility accounts
- Reminders about parking restrictions
- Instructions for elevator use for large items (if applicable)
- A reminder of any outstanding funds due – if the first month’s rent was not already paid
- Remind them to allow time in their moving process to complete a walkthrough inspection with you or your property manager
Day of Move-In Procedures for Landlords
The day has finally arrived, and your new tenants will be moving in soon. After the preparation above, the move-in day will hopefully be smooth sailing. However, there are a few additional steps to complete the process that are equally important to your success. Continue reading as we review these critical final move-in procedures below.
- Get There Early
- Complete the Move-In Checklist
- Include and Review the Welcome Packet
Get There Early
Moving day is stressful enough without the tenant having to wait on you to arrive with their keys. So, at the very least, be on time. Ideally, get there early and make any final preparations to ensure the best first impression possible on your new tenants. Consider having some cold waters or packaged snacks available to greet them and their friends, family, or movers. Remember, these first impressions set a tone for the entire landlord-tenant relationship, so make it a good one!
 Complete the Move-In Checklist
A detailed move-in inspection checklist creates a record of the property’s condition at the beginning of the tenancy. You can compare it with the move-out inspection when identifying tenant damage versus normal wear and tear.
Describe the condition of each room and any exterior areas included with the rental. Record existing damage or defects, and take dated photos when possible.
Give the tenant an opportunity to review the checklist. Both parties should sign or otherwise acknowledge it when required by local law or your inspection process. Keep copies with the tenancy records.
Include and Review the Welcome Packet
As a new tenant, especially one new to the area, moving means having a lot of information coming at them all at once. So, a small packet with essentials is a great way to welcome tenants to the area and help them easily find critical information. Common things to include in a Welcome Packet are the following items –

- Contact Information for the owner or property manager
- Instructions on where to send rent payments
- Rules about painting or making alterations to the unit
- Emergency phone numbers
- Procedures for reporting an emergency and standard maintenance requests
- Property-specific information such as the location of the breaker box, water shut-off valve, and instructions on how to replace the HVAC filter. Also, if the unit has special amenities such as a gas fireplace, include instructions for use or maintenance.
- Helpful information such as waste collection/recycling schedules or rules.
In addition to property specifics and helpful information, the welcome packet can include other items that help your tenants. The items below are optional but much appreciated if your budget allows –
- Essential household items (such as a roll of toilet paper, hand soap, hand sanitizer, trash bags, or paper towels)
- Bottled water
- Snacks
- A small gift card to a local coffee shop or pizza place
What Happens After Move-in Day?
Tenants may notice questions or minor concerns after they have had time to settle in. Follow up within a few days and remind them how to report maintenance issues.
A quick check-in keeps communication open and gives you a chance to address small concerns before they become larger problems.
Make Move-in Day a Breeze with Professional Rental Management
Creating solid move-in procedures as part of your rental business is critical to a positive tenant experience and building a strong foundation of landlord-tenant relations. However, for individual owners, the many steps leading up to move-in day can become overwhelming. Plus, if you have more than one unit, scheduling everything needed can become difficult and stressful.
With professional rental management, owners can leave all the details to the experts with the staff and know-how to ensure a smooth transition. At Bay Property Management Group, we understand the long-term impact of having a great move-in day for tenants and owners. As a result, we have perfected the process from application to keys, so everyone stays informed and prepared to meet their individual obligations.
Once the move-in is over, our team continues to work on the owner’s behalf, handling maintenance needs, compliance, tenant communications, rent collection, and financial reporting. Contact BMG today to learn more about our property management services.