Winner Spotlight: Vestiges of Humanity within Spirited Automatons made with Cartoon Animator and XPPen


In the Reallusion 2024 Animation at Work Contest, artist Francis Bon Vun Hong secures first place in the “Comic & Arts” category. In this article, he guides us through the creative process that brought life to his winning entry, “The Horizon”.

Francis Bong Vun Hong
Hello, I’m Francis, a recent graduate with a Bachelor of Arts with Honors in Creative Digital Media, completed over three and a half years. My journey into the 3D industry began during my studies, where I discovered a passion for animation, character design, and digital storytelling.
In September 2023, I joined Betapuru Digital Studio as an intern, immersing myself in a professional environment to hone my skills and gain hands-on experience. Now, I am continuing to build my career in 3D and animation, aiming to create visually captivating content.
Transitioning from 3D to 2D
I think my 3D animation background helped a lot! The principles of animation—like timing, posing, and movement—are more or less the same, so it was more about getting used to a different workflow. The best trick up my sleeve was focusing on rigging and motion editing right away. Since I was already familiar with Reallusion’s tools from my 3D work, picking up Cartoon Animator felt pretty natural. I also watched how the pros used it and just kept experimenting until things clicked. In addition, I made use of parallax, camera tricks, and depth—just like I would in a 3D workflow—in order to make my 2D animations feel more dynamic. That crossover knowledge made for a way faster learning process!
I really enjoy using the Spring Editor, which adds natural wiggle effects to body parts. It creates smooth, fluid animation without the extra effort of manually keyframing the character.
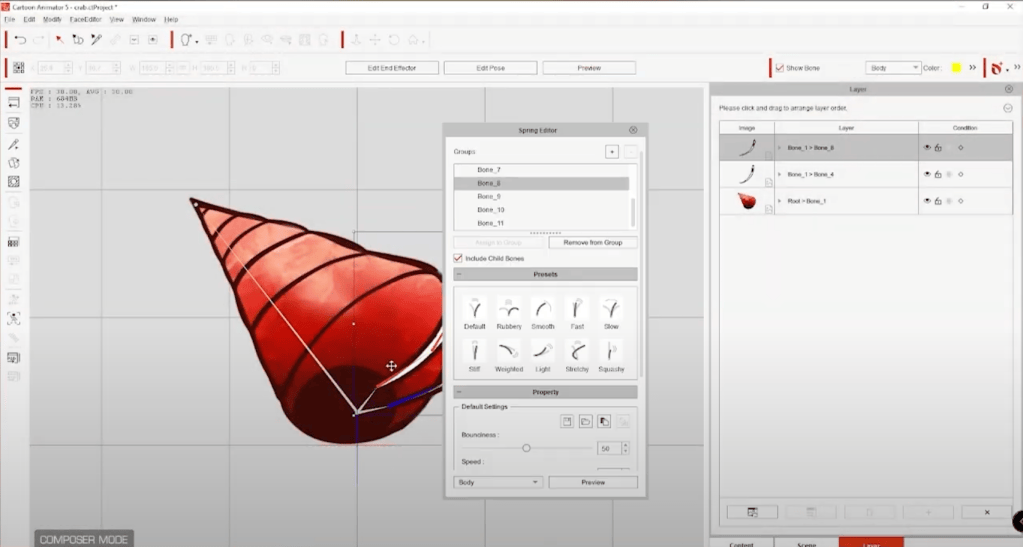

Most importantly, the built-in assets and animations significantly sped up my workflow. Instead of animating characters from scratch, I could simply drag and drop assets from the content browser to bring them to life! Another major advantage was the rigging system. Unlike traditional frame-by-frame animation, it works similarly to 3D: once a character is rigged, I can create a series of animations with ease. It’s an absolute game-changer!
Story Background & Concept
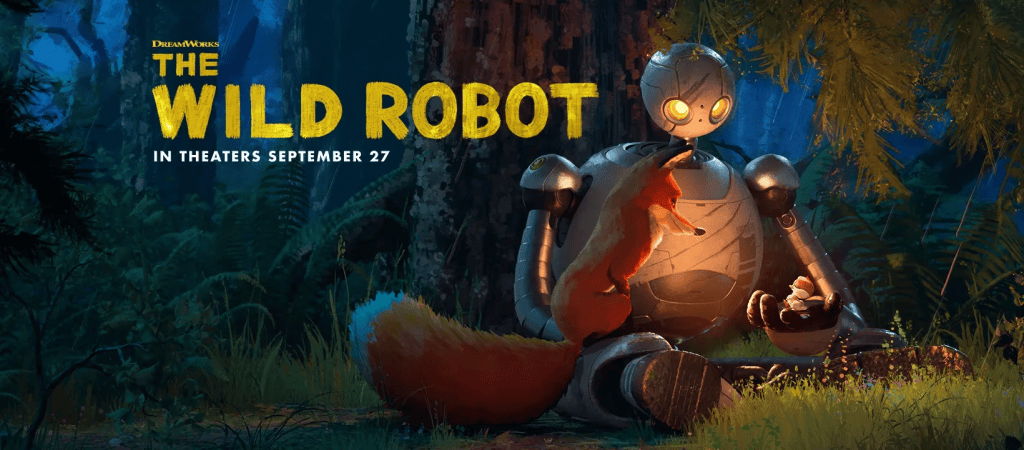
My character was inspired by The Wild Robot. I loved the film’s plot and contrast. Spoiler: The robot was programmed to follow orders but eventually broke the rules and acted on her own. In my story, however, the robot is tasked with rebuilding his civilization elsewhere after his home is invaded and destroyed. The entire production took over a month, though Cartoon Animator significantly sped up the process.
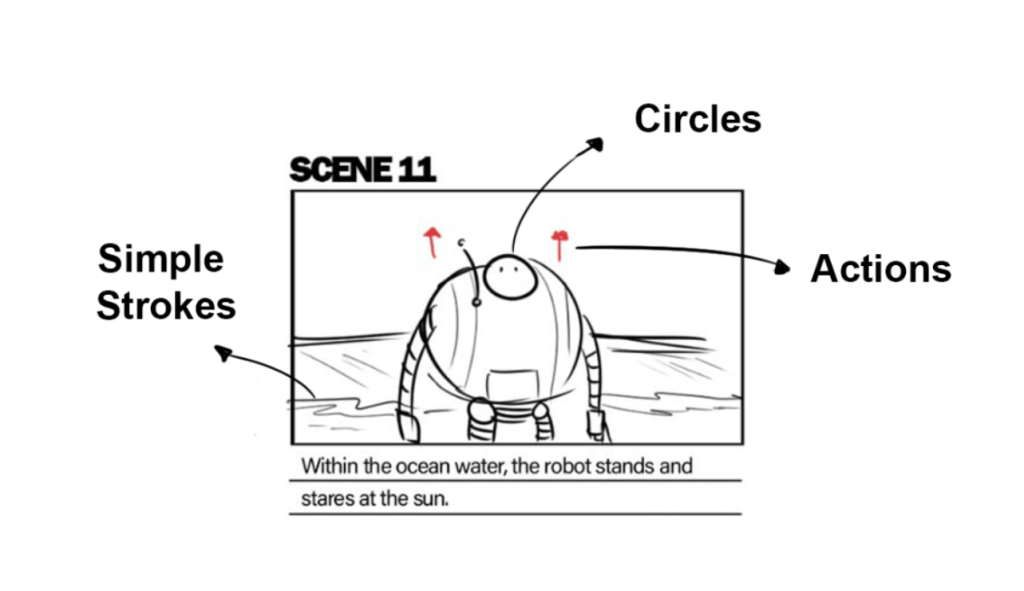
Before moving into the production stage, I needed to establish a solid plot to guide the process. Therefore, storyboards played a crucial role in ensuring a smooth workflow. Creating the storyboard typically took a few days, and it wasn’t as difficult as it might have seemed. They were simple, serving as a visual guide for how each scene was set. Using basic shapes and strokes was an effective way to create a strong storyboard. I didn’t hesitate to be bold with my strokes—there was no need to perfect every line. Adding arrows also helped show the direction of actions or camera angles. In short, I kept storyboards simple and focused; they were just guidelines for the production.
Character Design with XPPen Tablet
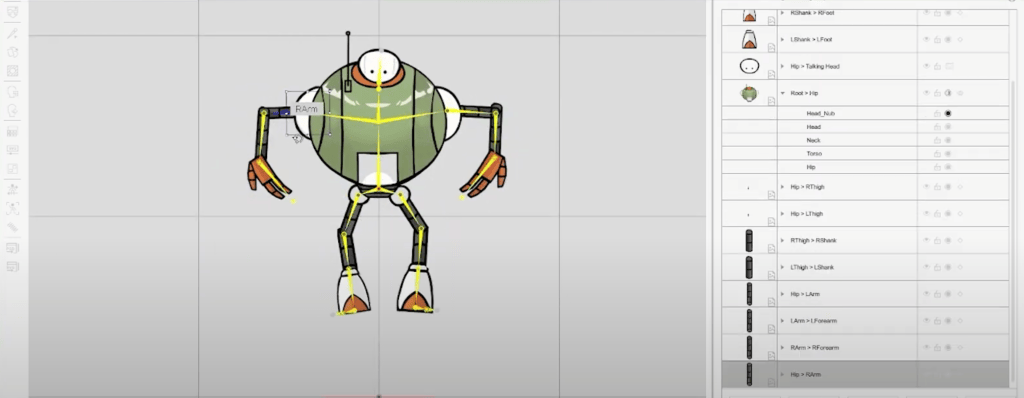
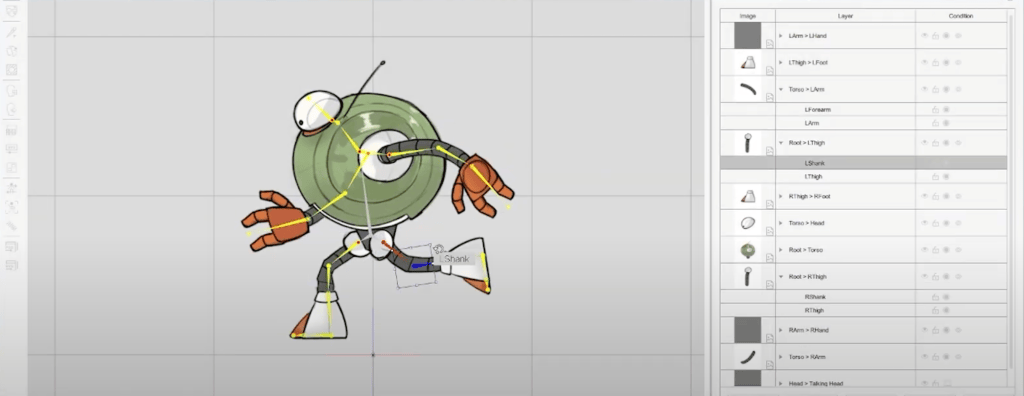
The character was drawn in Photoshop using an XPPen tablet. To animate the character in Cartoon Animator, it had to be separated into parts, as shown in the image below. These separated parts enabled efficient rigging in Cartoon Animator, with each bone attached to specific body parts. The rigging process for the character is broken down in the images below.
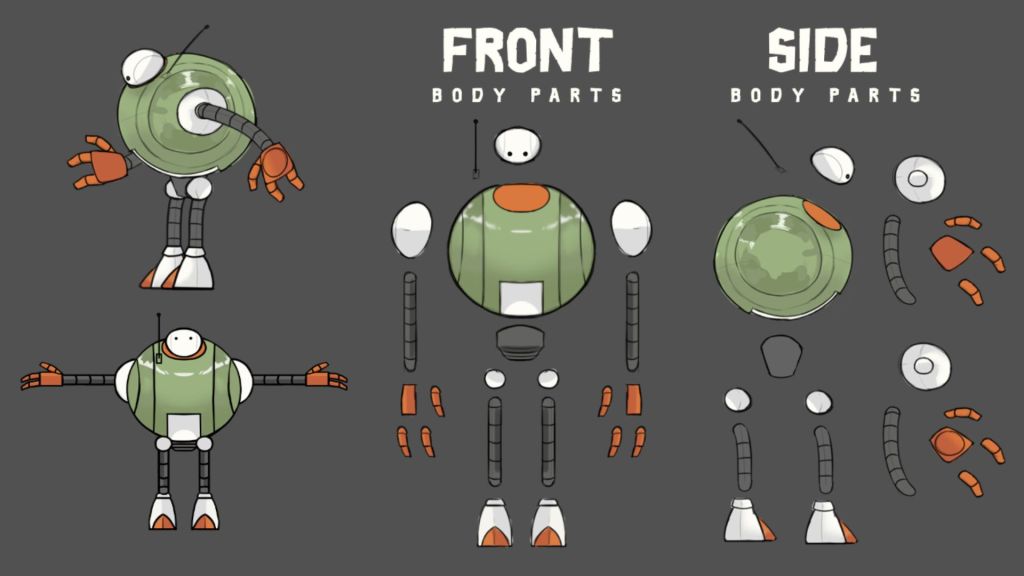
I then imported the base, which was the body with the combined parts. Next, I created the skeleton based on the character’s base. After that, I assigned the different parts of the body to the skeleton. Finally, I deleted the base of the character, and that was it—simple as that.
Character and Scene Animation
I utilized the 360 Heads in Cartoon Animator to allow slight turns of the character’s head. It was not perfect since the head is not exactly humanoid. The robot’s eyes are actually not of the human eye proportion and there are no mouths involved, so the only way to do it is to retarget only the head without separating the eyes.
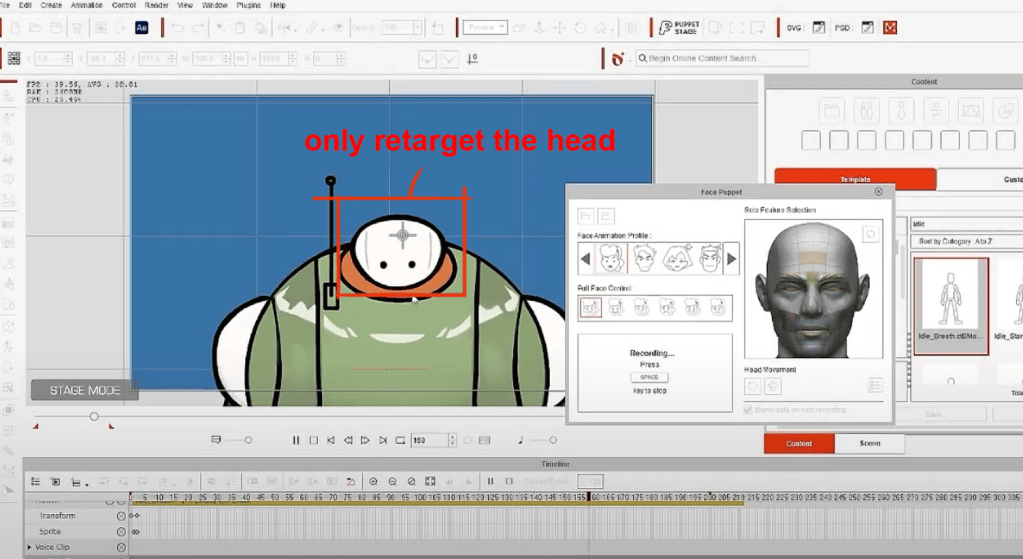
As mentioned before, the motions of the characters were mostly from the available assets in Cartoon Animator. Only a few required hands-on animating, which greatly reduced the work time. Another great thing about Cartoon Animator was that those motions can be blended with each other, creating a series of smooth movements.
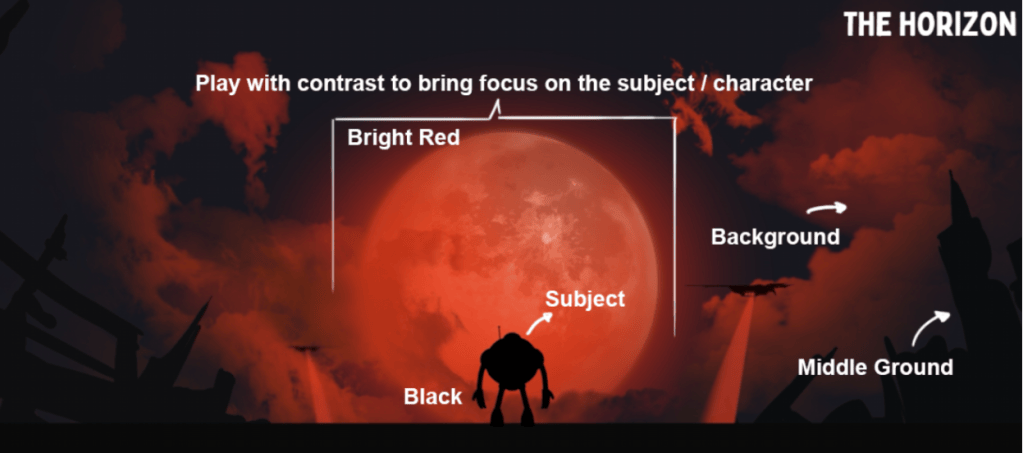
I always focus on making 2D scenes feel more alive and dynamic. Adding depth, camera movement, and parallax can take things to the next level. Use contrast to grab the audience’s attention. In my opinion, don’t just animate characters; instead, animate the whole scene. Use foreground and background elements, play with lighting, and add small details that make the world feel real.
VFX and Extras
Camera shakes can enhance the actions of the character. For example, aggressive shakes are used during the running scene to give a sense of panicking and the feeling of the character running with full effort. It can be simply achieved in After Effects by doing this:

ALT + Left click on the “Orientation” key of the camera and type in “wiggle(A,B)”. Wiggle means shaking while A means how many times the wiggle happens while B means the level of wiggles. Higher value in A makes more wiggle per seconds, while higher value in B makes bigger movements.
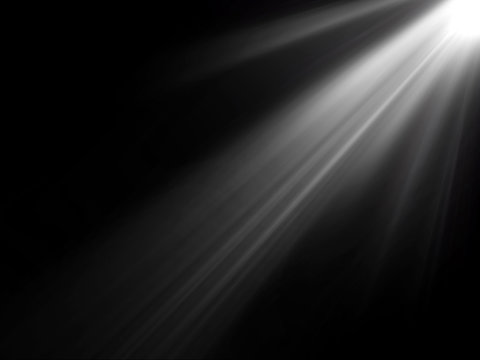
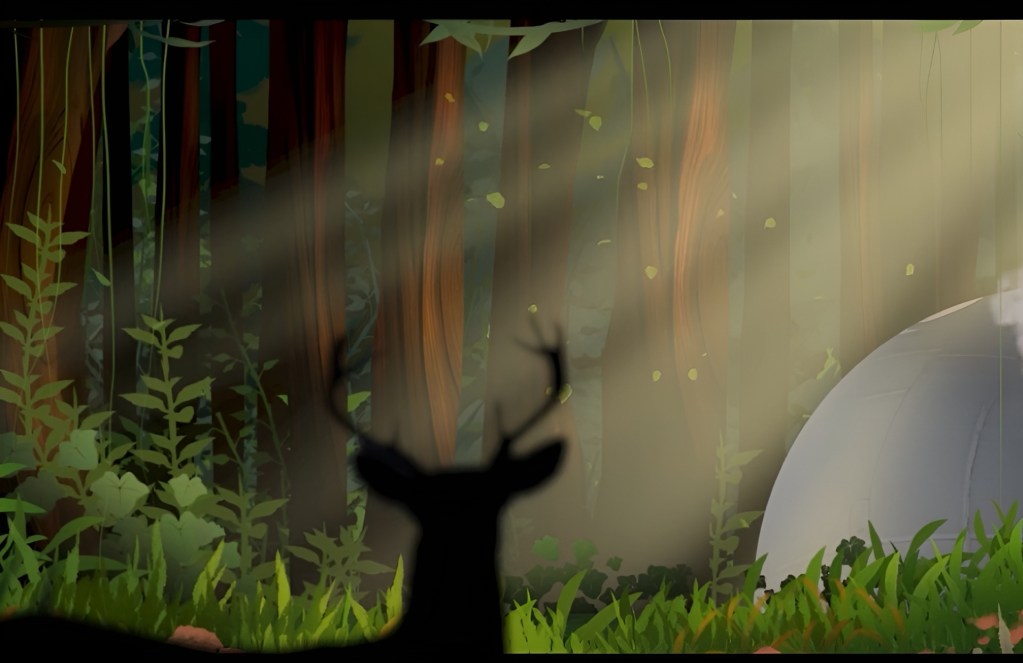
The light rays, or the so-called volumetric lights, are pretty straightforward. It is just a simple light ray PNG image that is added in during the post-production stage. During the final editing in Premiere Pro or After Effects, drop in this PNG while changing the opacity mode to “screen” and it’s all done.
Closing Thoughts
This competition was an awesome experience! Seeing so many creative entries really pushed me to bring my best. It also showed how powerful a Cartoon Animator can be when you push its limits. I’m grateful for the opportunity and the recognition!
Advice for Future Contestants
Go beyond just animating characters; think about the entire scene. Try to experiment with camera movements, lighting, and effects to add more depth. Use colors and contrast to effectively bring out the moods and emotions. Most importantly, every project is a chance to grow, keep learning, and have fun!