How to Add Extra DIY Storage to the Ends of a Closet | Thrifty Decor Chick


This is one of my favorite ways to make a closet even more functional!
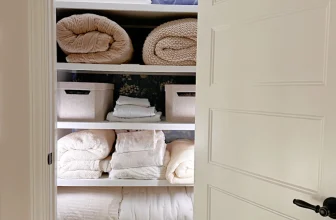
I first did this DIY years ago in our guest room closet — it was a wide
closet with sliding doors. We didn’t really need it for hanging clothes, so
we utilized it for extra bedding and other random stuff.


These were super simple versions using scrap pieces of wood I had in the
garage. These shelves made this closet so much more functional for how we used
this closet!
Years ago I did the same DIY, just a little more finished out, in our
mud/laundry room closet:

My dream was always to have a big closet in our mud room! When we built our
home years ago and I saw how large our laundry/mud combo was going to be, I
knew we’d have plenty of room for a cleaning closet.
My favorite part is the OUTLET I had put inside. Game changer.
Initially after moving in, we just chucked things in there as we got
settled:

This post contains affiliate links for your convenience.
I may earn a small commission when you make a purchase through links.
Pretty! 😁
I knew I could make better use of the space in this closet! That dead space
at the ends of closets like this has always bugged me. Unless you are
filling it with clothes, it’s usually an awkward spot that can be utilized
MUCH better.
DIY floating shelves
I’ve built here and there over the years. Be sure to check that out for a
step-by-step tutorial.
Before I started in here I removed the door trim on the inside of the closet
so I could bring the front of the shelves right up to the edge:

I kept that piece so I could add it back later.
You’ll need to secure your supports (a 1×2 is perfect) into studs or anchors
on the back and side walls, then nail or glue a piece of wood onto the top
of those supports.
I was going to leave these pretty basic, but then I realized they’d look so
much better with some trim on the front. So I added that. I planned to leave
them unpainted…but then I realized how good they would look in
white.
And this is how a super simple project turns into a multi-day process. 😂
This is how that side looked when I was done:

Look at all that glorious storage space! I love it! By the way, I cut down
the door trim (that I had taken down) and put it back up in between each
shelf.

I recently decided to make this a dedicated cleaning closet with
all of our products, rags and cleaning supplies. So I added similar
shelves on the other side of the closet as well:

I was able to do both new shelves with all scrap wood, so that was awesome!
Not sure why I didn’t do this earlier! On this side I only added two shelves
because I wanted to be able to store our Shark vacuum underneath for easy
charging:

You can see I also cut a hole into the bottom shelf so I could keep our
handheld vacuum charger on the shelf as well. I ran the cord from the plug
up to the shelf:
Now all of our cleaning needs are in one spot in the house, it’s SO nice and
organized. We still keep one litter box for the cats in here, (the rest are
in our basement) but I decided to leave that out of the pics. You’re
welcome. 🙂
It is SO lovely to have this awesome storage space in our mud room — I
think adding it is one of the best decisions I made in our home.
All of these shelves are about nine inches deep by 24 inches wide. It
doesn’t sound like a lot, but look how much surface storage they added —
especially for smaller items like these.
If you aren’t using the ends of your closets I highly recommend this little
project.