
Saving a 1996 Mitsubishi GTO, Chapter 14: Stereo hero



Like any other teenager, I used to lower the windows, blast my music, and give everyone the middle finger. Two out of those three are true.
But the GTO’s stereo didn’t really work, so this week, I finish up the interior with some sound.
What’s different about a JDM car’s stereo?


First as a general thing you should know, the Japanese broadcast FM radio at lower frequencies than we do, 76 MHz to 90 MHz. So anything you import won’t get radio reception here, if such things like terrestrial radio still matter to you.
Now, like many other systems in the car, the GTO’s stereo differed ever so slightly from the US-spec 3000GT. There was no upgraded Infinity stereo, and in fact Mitsubishi left one off entirely on the lighter MR model.


- The Head Unit: The standard setup was a double-DIN configuration. It featured a basic Mitsubishi-branded AM/FM cassette tuner in the top slot. If you checked the optional upgrade box, you could get a matching, single-disc CD player deck mounted directly underneath it in the second DIN slot. I have no idea what my car came with, it was long gone.
- The speakers:
- Two 2.8-inch paper-cone dashboard tweeters
- Two 6.5-inch door mid-range speakers
- Two 6×9-inch rear-quarter speakers
- The Power Source: Unlike the US-spec 3000GT’s dedicated Infinity amplifier, the JDM GTO’s speakers were powered directly by the head unit’s internal amplifier, which struggled to push more than a meager 15 to 20 watts per channel. That’s a good thing now – one less item to wire.
Why didn’t the GTO get an Infinity option?


At the time, every high end Chrysler product offered an Infinity option because of their contract with Harman.
Since the Dodge Stealth and 3000GT were being built with shared architecture and wiring harnesses for the North American market, it was incredibly easy and cost-effective for Mitsubishi Motors North America to piggyback on Chrysler’s contract and offer the Infinity system to US buyers.


Another reason is prestige – Infinity was down market. At the time, the Japanese were kings of home electronics, so if a GTO buyer wanted premium audio, they either selected a high-end dealer-installed domestic system or put one in themselves.


Lastly, Mitsubishi Electric (MELCO) was already manufacturing high-quality, highly reliable double-DIN head units and cassette players. From a corporate standpoint, it made zero sense for Mitsubishi Motors to pay licensing and shipping fees to a foreign competitor like Harman/Infinity for their domestic Japanese market.
So what did my GTO come with?


An aftermarket single din Carrozzeria unit. It worked, but there was no way to plug in my phone because it had no AUX port, and as I mentioned above, the radio didn’t work. I might also mention that the GTO has a power antenna that pops up out of the trunk (remember those?). It didn’t work, which is common on these cars.
The stock speakers were mostly blown – especially the ones on the dash. Made of paper and glue, with small magnet drivers, they were showing their age.


Need help with your JDM build?
Get everything you need for a 90’s JDM stereo – from universal wire harnesses to trim kits.
As an Amazon Associate, I earn from qualifying purchases.
Replacing the stereo in the Mitsubishi GTO
If you remember back to right before the NY Auto Show display, I had to remove the Japanese toll system. I did what I could, but since most of the dash would be apart, I figured I could get the rest out. So I did:


Next, let’s remove the old stereo, which in the GTO is very easy – just pop a single trim piece off and unscrew four screws.


Let’s remove it all
The entire rear of the car, trunk, and door skins need to come out. Obviously this isn’t a job to tackle all at once, but it’s also not as hard as you might think. 90s cars did not have the layers of sound deadening material, miles of wires, or tons of features that needed to be removed before getting to what you actually needed.


Figuring out where new things go


There’s no way I can just plop everything at random inside the car – it needs to look OEM as much as possible. That means planning for where the GPS receiver goes, and the Bluetooth speaker.


First, the GPS. In new cars, this antenna lives inside the shark fin placed on the roof of just about everything (I had painted mine on the G80 M3). But as long as the antenna was away from heavy layers of steel, it would work well. Mitsubishi, in their infinite wisdom, provided a little access door in the center storage console.


Next, the Bluetooth speaker needed to be in front of me somehow. New cars tuck them into the roof, but I’m not removing the already questionable headliner. Instead, I can place the mic right in front of me on the steering column. It’ll stay out of the way unless you know where to look, and should make my voice clear on calls.


Installing Dynamat
With the car apart, I next had to figure out where to place the Dynamat. This rubber butyl product dampens sound and vibrations, so the stereo will sound better, and the road noise will be more isolated. Basically we’re adding some refinement to the car.


There, no exact science to this, it’s simply a matter of trial and error. I cut pieces as needed, and mostly adhered them to metal surfaces like under the back seats or in the spare tire well, or the speaker housings to prevent rattles. Once complete, the frameless doors felt heavier, and the car was overall much quieter down the road. An A+ mod.
The best head unit for the GTO


The brains of my stereo needed to do three things:
- Have wireless Apple CarPlay
- Produce decent sound
- Fit the JDM vibe


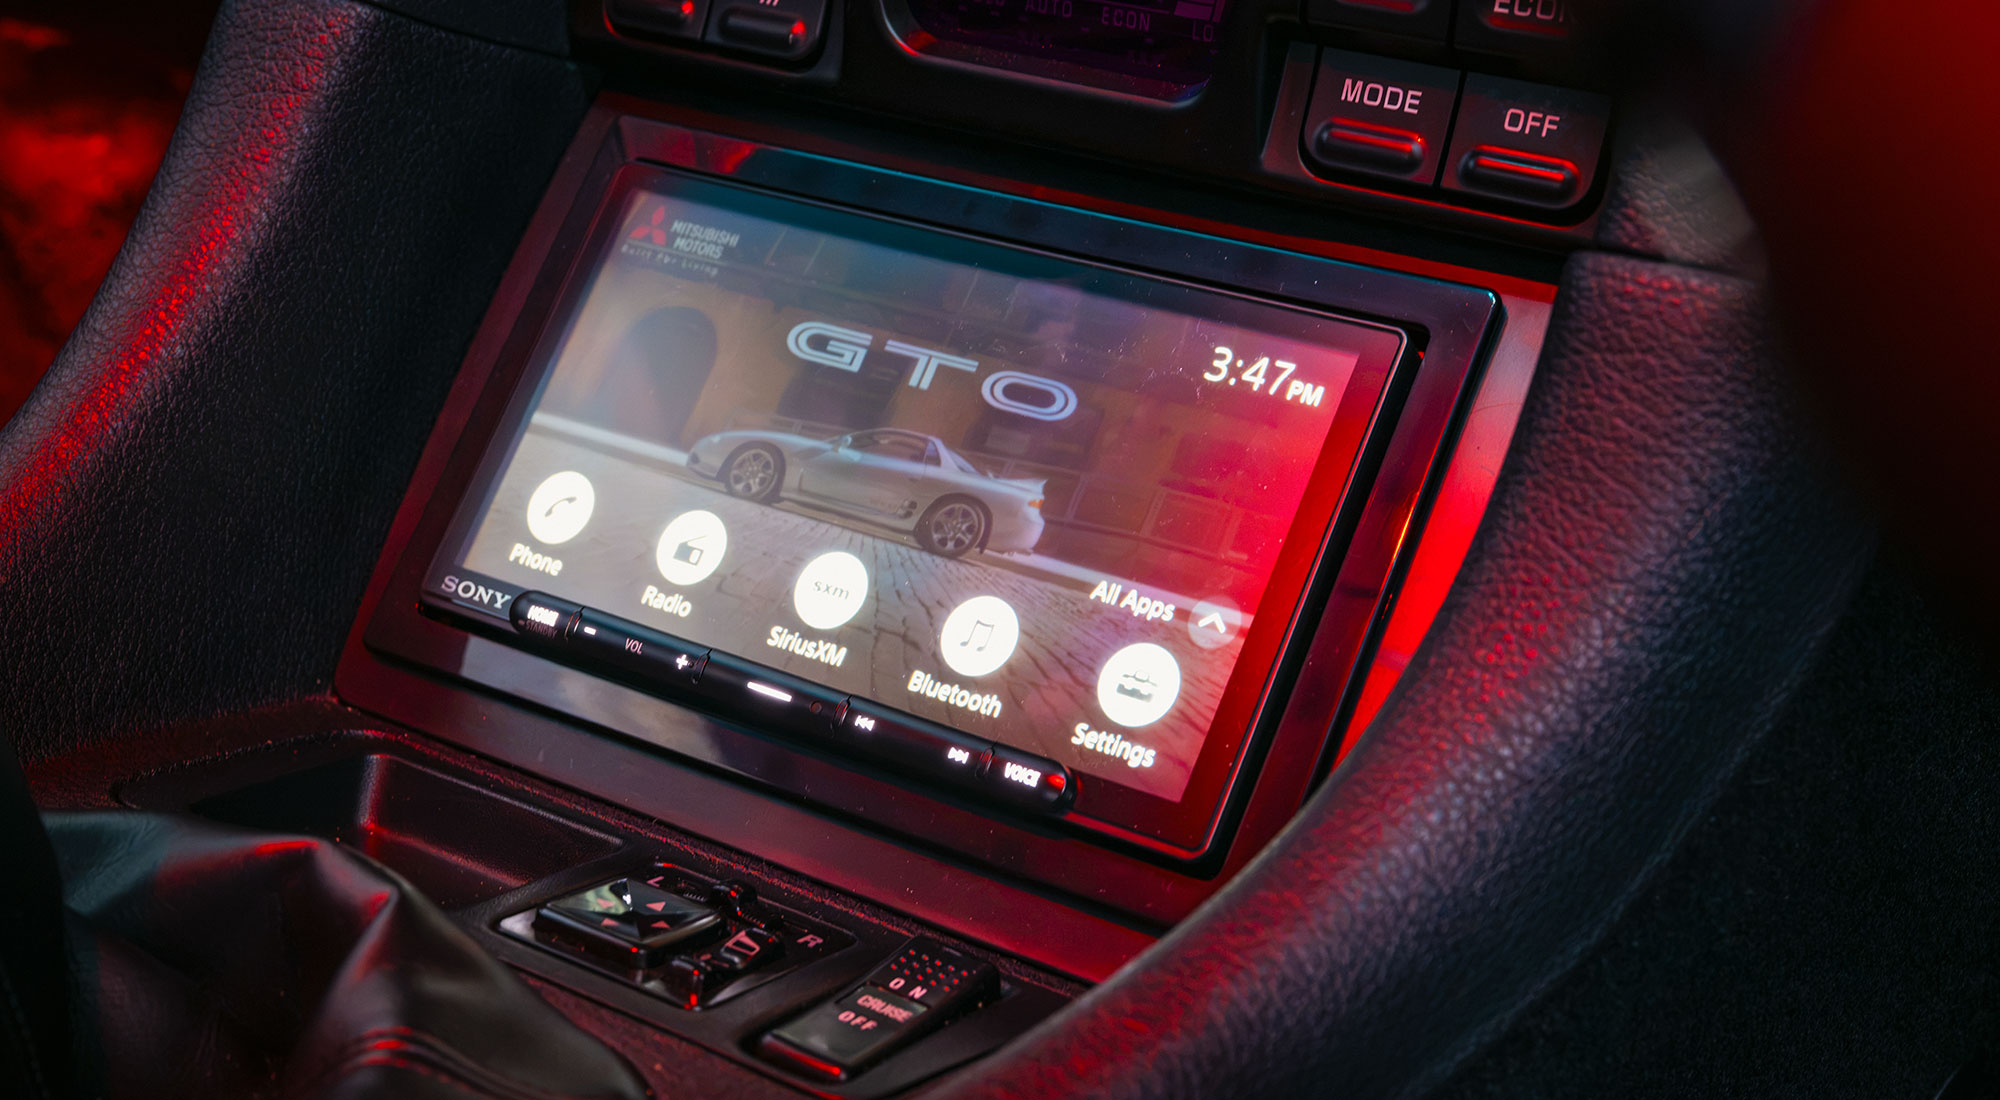
Keeping it JDM meant Japanese brands only, so that left me with companies like Alpine, Panasonic, or Sony. For me, there really wasn’t much of a choice – going with Sony would honor the GTO’s original tie in to Gran Turismo for PlayStation. Remember, the GTO was the car to have in the original game.


Sony makes a variety of head units, but I went with the middle ground model (XAV-AX6000) – it has wireless CarPlay, but lacks some of the sound output options of their highest model. Budgets still matter for this build.


But because of the savings, I’d be able to get a Sony XM-S400D 4 Channel Micro Amplifier. The head unit only pushes out about 20 watts per channel, but with this small amp, we could up it to 45, more than enough for six speakers.


The best part is that though the head unit is a double-din size, it fits all its electronics into a single-din sized slot, leaving space to put the amp right in the dash behind the head unit.
The best speakers for the GTO


There are a ton of aftermarket options, but for the GTO it comes down to two separate issues – the door speakers needed to be thin enough to fit in the shallow cavity, and the dash speakers are just a weird size that needed a custom solution.


To solve both issues, I went with a crossover kit from Alpine, 6.5-inch for the doors, and a 1-inch component for the dash. A matching set of 6x9s were purchased for the rear seat.


This specific set has a built-in crossover which would fit inside the dash cavity, so I would not need to plug in and hide 2 boxes randomly in the cockpit. A crossover essentially blocks all the heavy, deep bass from those tiny 1-inch tweeters, and it’s important because the original size that fits the GTO’s dash was never made again…
The dash speakers


The factory hole is three inches in diameter, which is a common size. But Mitsubishi designed the speaker cage as one entire unit, so once the stock one comes out, I’m left with an odd size of about 2.8 inches, and nothing to hold the speaker in.


Thankfully, the internet comes to the rescue with a set of 3D printed speaker cages. This would allow me to place the 1-inch tweeter inside and fill the gap, though I’d have to modify the hole to fit the magnet.


As an aside, this was a terrible design by Mitsubishi to begin with. The speaker under the glass gets pelted directly by the sun – an issue that happened on my old SL 25 years ago as well.
Floor mats


The theme here is “difficult”, and even though floor mats aren’t really supposed to be, for a rare JDM import they are.
My car had the original floor mats in, and they were in decent enough shape – a good deep cleaning would probably bring them back to life. But they looked like they were out of the 90s, with thick heavy pile, and the grommet they held it in place broke, so the driver side kept sliding under my pedals. No good.


Obviously, 3000GT mats won’t fit this car, but I found a solution with a company called Alpha Auto Mats, based in California. They carry mats for all kinds of imports, including the GTO, and let you customize colors and badging.


But beware here – the mats took about 4 weeks to ship, and they forgot my rear set. Following up with the company is difficult, and the result is I still do not have the rear mats (though they did ship out finally). Options are limited, but if you like an OEM+ look, these still seem to be the best option.
LED lighting inside the Mitsubishi GTO


I figured that since I’m here, I might as well upgrade the lighting so I could actually see at night. All the halogen bulbs would be replaced with their LED equivalent, and to match the GTO’s dash and door lighting, I’d use red bulbs. The map and trunk lights would get 6000k so I could actually see, just like in a modern BMW.


The interior is complete


With the new MOMO steering wheel and Evo shift knob in place, the GTO looks refreshed inside, while still being close to OEM – the perfect mix of old and new. Feels good to say at least one part of the car is done.
Which is good, because although I didn’t know it yet, disaster was about to strike…
FREQUENTLY ASKED QUESTIONS
Why can’t an imported JDM Mitsubishi GTO tune into North American FM radio stations?
Japan’s FM radio broadcasting spectrum is allocated between 76 MHz and 90 MHz, whereas the North American FM band operates at a higher frequency range between 88 MHz and 108 MHz. Because of this minimal overlap, a factory or aftermarket JDM radio imported directly from Japan will only pick up a tiny fraction of the lowest stations on the dial in the United States, necessitating a modern receiver upgrade for terrestrial radio.
How do you fit an aftermarket amplifier inside the dashboard of a Mitsubishi 3000GT or GTO?
Modern compact stereos like the Sony XAV-AX6000 utilize a full double-DIN touchscreen face with an ultra-shallow, single-DIN rear chassis. This clever footprint leaves a significant amount of empty space directly behind the head unit inside the dashboard cavity, allowing you to neatly hide a micro 4-channel amplifier (like the Sony XM-S400D) right on top of the center console transmission tunnel without cutting factory trim or routing heavy power wires to the trunk.
What is the solution for replacing blown 2.8-inch dashboard speakers in a Mitsubishi 3000GT or GTO?
The factory dashboard speakers use a proprietary 2.8-inch driver fused directly into an integrated plastic mounting cage, a size no longer produced by aftermarket audio manufacturers. The cleanest replacement method is downloading a 3D-printable adapter file (available on open-source repositories like Thingiverse) to print custom replacement cages. These printed mounts drop into the factory dash openings and can be modified to securely house modern 1-inch component tweeters.
Why are inline crossovers preferred over standard external crossover boxes for the GTO dash speakers?
Traditional component speaker packages rely on bulky external crossover boxes to filter low-end bass away from delicate high-frequency tweeters. Finding space to mount and cleanly wire two separate crossover boxes beneath the cramped 3000GT/GTO dashboard is difficult. Speaker sets featuring built-in, inline crossovers integrate the filtering circuit directly into the speaker wiring harness, allowing for a seamless plug-and-play installation inside the factory dashboard cavity.
Why do aftermarket floor mats for a JDM Mitsubishi GTO differ from US-spec 3000GT floor mats?
Because the Mitsubishi GTO is a Right-Hand Drive (RHD) vehicle, the floor pan stamping, pedal clearances, dead pedal location, and floor mat anchor grommets are mirrored compared to a Left-Hand Drive (LHD) US-spec 3000GT. Standard USDM mats will not clear the pedal assembly properly or align with the floor contour. RHD-specific mats from specialist vendors (such as Alpha Auto Mats) are required to ensure the driver’s mat stays securely anchored without interfering with pedal travel.


