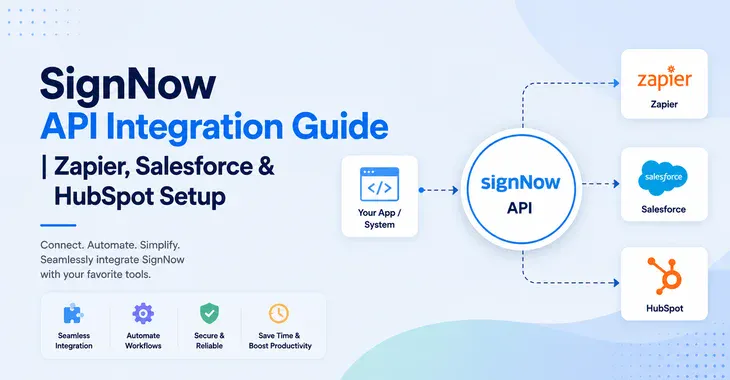
If you’re building software, running a CRM-driven sales team, or just tired of copy-pasting contract data between tools, doing SignNow API Integration can save your team hours every week.
But SignNow API means different things depending on what you’re trying to do;
- embed signing directly into your own app,
- automate signing workflows between tools you already use like Salesforce and HubSpot.
I’ll walk through what the SignNow API actually is, SignNow API integraiton example, how the pricing works, a hands-on integration example, and step-by-step setup instructions for the three most common integration paths: Zapier, Salesforce, and HubSpot.
Disclosure: This post contains affiliate links.
SignNow API Integration Guide To Connect Zapier, Salesforce & HubSpot
What Is SignNow API?
The SignNow API is a REST API that lets your website, app, or internal system send, sign, and track documents programmatically — without a human clicking through SignNow’s dashboard.
There are many SignNow integration use cases.
With the SignNow API, you can:
Common real-world uses include auto-sending an NDA from your CRM the moment a deal opens, generating onboarding packets from your HR system when a new hire is added, and collecting customer agreements inside a client-facing web or mobile app.
Important distinction: API access is not included in SignNow’s regular self-serve subscription plans (Business, Business Premium, Enterprise). It’s sold separately.
SignNow API Documentation: Where to Look?
Before writing a single line of code, I recommend bookmarking this SignNow API integration guides & documentation reference
Environments: SignNow provides a SignNow sandbox for testing (so you’re not burning real signature invites while developing) and a separate production environment once you’re ready to go live. It’s good practice to build and fully test your integration in sandbox first.
This SignNow API guide covers everything from basic OAuth 2.0 authentication through advanced use cases like document groups, bulk operations, and embedded editors — so it’s worth skimming the whole reference before you start building, even if you only need one endpoint today.
SignNow API Integration Tutorial
Getting started with the SignNow API is relatively straightforward, even if you’re new to API integrations. Follow these steps to connect SignNow with your application or automate your document signing workflows.
Here’s a simplified SignNow API integration example to show the shape of a typical workflow: authenticate, upload a document, and send it for signature.
Step 1: Create an Account:
Register for a free developer account on the SignNow API Dashboard from here.
Your developer account gives you access to a testing environment where you can experiment with the API before moving to a live integration. The test environment supports up to 500 signature invites, making it suitable for development and testing.
Step 2: Choose an Authentication Method
Before making API requests, you need to authenticate your application. SignNow supports two main options:
- API Key: Best for server-to-server integrations where your application operates under a single SignNow account.
- OAuth 2.0: Recommended when your application needs to connect to individual users’ SignNow accounts and act on their behalf.
For most simple internal automations, an API key can be easier to get started with. OAuth 2.0 is generally more suitable for applications or SaaS products that need to support multiple users.
API looks like this;
POST https://api.signnow.com/oauth2/token
Content-Type: application/x-www-form-urlencoded

grant_type=password
&username=YOUR_ACCOUNT_EMAIL
&password=YOUR_ACCOUNT_PASSWORD
&client_id=YOUR_CLIENT_ID
&client_secret=YOUR_CLIENT_SECRET
This returns an access token you’ll pass in the header of every subsequent request.
Step 3: Upload a document
Once authentication is configured, you can upload a document to SignNow using an API request. You’ll provide the document file and your authentication credentials, and SignNow will return a unique document ID.
This document ID is important because you’ll use it in subsequent API requests to configure the document, add recipients, create signing fields, and manage the signing process.
POST https://api.signnow.com/document
Authorization: Bearer YOUR_ACCESS_TOKEN
Content-Type: multipart/form-data

[email protected]
This returns a document_id you’ll reference going forward.
Step 4: Add fillable fields (optional, or use a pre-built template)
With your document uploaded, you can use the SignNow API to automate different parts of the eSignature process. For example, you can:
- Add signing invitations and recipients
- Pre-fill document fields
- Configure signing orders
- Send documents for signature
- Track document status
- Set up webhooks for real-time notifications
This allows you to create automated electronic signature workflows without requiring users to manually perform every step inside the SignNow interface.
For a complete list of available endpoints and API capabilities, check the SignNow Full REST API Reference.
Step 5: Test Your SignNow API Integration
Before using your integration in production, test the complete workflow in the developer environment. Verify that documents upload correctly, recipients receive signing invitations, fields are populated as expected, and webhook notifications are triggered correctly.
Once everything works as expected, you can move your SignNow API integration to a production environment.
Here is sample SignNow Signature request invite via API looks like
POST https://api.signnow.com/document/{document_id}/invite
Authorization: Bearer YOUR_ACCESS_TOKEN
Content-Type: application/json

{
  "to": [{ "email": "[email protected]", "role": "Signer 1" }],
  "from": "[email protected]"
}
Step 5: Track status and download the signed copy
Once signed, a webhook (if configured) notifies your system, or you can poll the document’s status endpoint and then hit the download endpoint to retrieve the completed PDF and its audit trail.
This five-step pattern — authenticate, upload, prepare, send, retrieve — covers the vast majority of real-world SignNow API integrations example whether you’re building a client portal, automating contract generation from a database, or wiring SignNow into your own SaaS product.
How to Integrate SignNow With Zapier
If you don’t want to write code at all, the SignNow Zapier integration is the fastest path to a working SignNow integration. It connects SignNow to thousands of other apps using simple trigger → action logic.
SignNow’s Zapier integration can connect with tools such as Google Drive, Microsoft 365, Slack, HubSpot, Salesforce, Airtable, and many others.
SignNow Zapier Integration Step-by-Step Guide
Here’s how to connect SignNow with Zapier.
- First, log in to SignNow or sign up for SignNow here if your dont have an account.
- Then go to the top corner, click on your profile picture and click on Account settings. From Account Settings, click on Integration and choose Automation as a category. You will see Zapier as an option to integrate. Click on that.
4. It will take you to the installation screen. Click on Install
5. After that, it takes you to the Zapier portal. If you have an account with Zapier, then sign in; if not, then create one.
6. Choose a Trigger (like a Document Completed)
7. Select an Action. i.e., choose what should happen after the trigger. (For example, Cancel Document Group Invite)
8. Add More Automation Steps you want. Zapier allows you to chain multiple actions, add filters and paths, and transform data as it moves between applications. This lets you build more sophisticated document workflows without developing and maintaining your own integration.
9. Test and Turn On Your Zap: Test each step to make sure the data is being transferred correctly. Once everything works as expected, turn on the Zap and let the workflow run automatically.
Example use case for Zapier SignNow Automation: “When a document is fully signed in SignNow, create a new record in Salesforce and post a notification in Slack.” Zapier handles the connection — no API keys or code required on your end.
Zapier also supports building these automations conversationally through AI by Zapier, where you can describe the workflow in plain language and have it assembled for you, rather than manually configuring each trigger and action.
How to Integrate SignNow With Salesforce
SignNow has a native, dedicated app for Salesforce — this is the most direct route if Salesforce is your CRM of record.
But there are some prerequisites to install, configure, and use the SignNow application for your Salesforce organisation:
Try SignNow full features with a free trial.
SignNow Salesforce Integration Step-by-Step Guide
Here’s how to connect SignNow with Salesforce.
Note: Users can start using SignNow in the Salesforce organisation once their SignNow account is set up and the appropriate subscription is assigned. To enable access to the SignNow for Salesforce app, the admin must add these users to the SignNow Permission Set.
- First, log in to SignNow or sign up for SignNow here if your dont have an account.
- Then go to the top right corner, click on your profile picture and click on account settings. From Account Settings, click on Integration and search for “Salesforce“
3. Hover the mouse over the “Salesforce” option. Click on “Submit Request“. You will see the window “Get Help Setting up signNow for Salesforce“. Fill out the form, and the SignNow team will get back to help you set up the Salesforce SignNow integration.
4. Once Integration done, the Salesforce Admin needs to prepare documents for Signing. Drag and drop the elements you need in the document for signing. Click Save.
5. Then, in the Template section, click on Pre-fill Fillable fields to set up data mapping to populate the document with Salesforce data.
6. Now you can run the flow to send the document for Signature without leaving the Salesforce window. If you want, you can customise the email.
7. Your customer can review and sign the document without registering with SignNow or downloading any software. All signed documents are securely stored in Salesforce. Isn’t it amazing?
How to Integrate SignNow With HubSpot
The SignNow application for HubSpot provides CRM cards that allow users to send documents for signature, set up templates and data mapping, track invitation status directly from HubSpot records, and generate pre-filled documents using HubSpot data.
Prerequisites:
Try SignNow full features with a free trial
There are two ways you can integrate HubSpot with SignNow
- From HubSpot Marketplace
- From SignNow Integration
Follow this guide for SignNow HubSpot integration
1) Integrate SignNow From HubSpot Marketplace
- To install the SignNow application: Navigate to the HubSpot Marketplace. Type SignNow into the search bar. Select the application and click Install.
2. Sign in to your SignNow account.
3. Grant SignNow access inside HubSpot to your account.
4. Check the box to confirm you agree to use the third-party application, then click Connect app.
5. The SignNow application is now installed for your HubSpot organisation, allowing you to explore its features or customise the app cards.
6. For that, review the feature blocks. Click Learn more on any block to read details about each action. That’s it.
B) Integrate SignNow with HubSpot from SignNow Integration Section
- First, log in to SignNow or sign up for SignNow here if you don’t have an account
- Then go to the top corner, click on your profile picture and click on account settings. From Account Setting click on Integration and search for “HubSpot”
3. Click on the “HubSpot” option; it will show “Submit Request”. You will see the window “Get Help Setting up signNow for HubSpot”. Fill out the form, and the SignNow team will get back to help you set up the HubSpot SignNow integration.
Here is a simple example of SignNow HubSpot integration:
- When a new lead is added in HubSpot, automatically create a document from a SignNow template and send it for signature” — a genuinely useful flow for sales teams that want contracts to go out the moment a deal reaches a certain stage, without a rep manually jumping into SignNow.
Other than built-in integration support for HubSpot and SignNow, no-code platforms like Appy Pie Automate and Integrately also support HubSpot–SignNow connections using similar trigger/action logic, if you’re already using one of those instead of Zapier.
Other SignNow API Integrations Worth Knowing
Beyond Zapier, Salesforce, and HubSpot, SignNow’s broader integration ecosystem includes:
If you want the deeper walkthrough on connecting SignNow to ChatGPT and Claude specifically, that’s covered in a separate guide on this site.
SignNow Login: Account vs. API Access
Worth clarifying since these get confused often:
If you’re building an integration, you’ll register your application separately through SignNow’s developer portal to get your API credentials — that’s a distinct step from just logging into your SignNow account normally.
SignNow API Pricing
This trips a lot of people up.
SignNow API pricing is separate from regular SignNow subscription pricing, and it’s billed differently — by signature invites, not by user seats.
A signature invite = one request sent to one signer. So 1 document sent to 2 signers = 2 invites, and 1,000 documents sent to 1 signer each = 1,000 invites.
Here’s the general breakdown:
|
Plan |
Price |
Signature Invites |
|---|---|---|
|
SignNow Free Trial (API Starter) |
$0 |
250 invites |
|
SignNow Professional API |
From ~$146/month (annual billing) |
1,000/year, scalable. For less its cost less |
|
SignNow Enterprise+ |
Custom pricing |
High volume |
A few things worth knowing about SignNow API pricing before you budget for it:
Since exact current rates change, always confirm live pricing on SignNow’s API pricing page before committing to a plan.
FAQs on SignNow API Integration Guide
Do I need a paid SignNow plan to access the API?
No — you can start with the free trial (API Starter) tier, which includes 250 signature invites and full API functionality, no credit card required.
How much is SignNow API?
SignNow Free Trial (API Starter) is free up to 250 invites, and the SignNow Professional API plan costs from ~$146/month (annual billing) for 1,000/year, scalable signature invites. For less it cost less you pay. For more details, you can check SignNow’s API pricing page
Is SignNow API pricing based on users or documents?
Neither, technically — it’s based on signature invites (one invite per signer per document), which makes usage-based scaling more predictable than per-seat CRM pricing.
Is the SignNow API documentation good for beginners?
Yes — the official REST API reference includes detailed endpoint documentation, and SDKs are available in several languages (Python, Node, .NET, Java, PHP) if you’d rather not build raw HTTP requests from scratch. Here is the SignNow API integration guide & documentation reference
What’s the difference between SignNow API and the regular SignNow Business plan?
The SignNow Business plan is user-based, dashboard-driven software for manually sending documents. The SignNow API is a separate, invite-based product meant for developers embedding signing into their own software — full API access isn’t included on standard subscription tiers.
Can I test the SignNow API before paying?
Yes — the SignNow free trial includes a full-featured sandbox with 250 signature invites, so you can build and test a real integration before committing to a paid plan.
Where do I log in to manage my SignNow API credentials?
Through SignNow’s developer portal, separate from your regular SignNow account login — that’s where you register applications and generate OAuth client credentials.
Bottom Line: SignNow API Integrations Tutorial
Whether you need a full custom integration through the SignNow API, a native connection through Salesforce, or a no-code Zapier automation to bridge the HubSpot gap, there’s a practical path here for almost any team.
Developers get a well-documented SignNow REST API and a SignNow SDK with a genuinely usable free tier to prototype on; non-technical teams get Zapier and native apps that require zero code.
If you’re just getting started, my suggestion is simple: sign up for the free API trial, build one small end-to-end workflow.