The impulse to make art is integral to the human experience, yet even the most seasoned artists can find themselves unsure how to begin when faced with a blank page. Our Art Prompts are designed to hone the hand, sharpen the eye, and offer refreshing pathways into the creative process. If you’d love to build consistency in your artmaking, overcome a period of creative stagnation, return to your practice after a break, or work outside of your comfort zone, the Jackson’s Art Prompts provide the structure and insight to help, combining practical advice with art historical context. As you work through each prompt, we encourage you to share what you create and connect with fellow artists exploring the series alongside you.
This article is the first in the series of prompts, covering The Fundamentals of Drawing. This course encourages you to experiment with linework, tonality, perspective, and texture through a collection of applied drawing techniques.

Artists can create different weights of line by varying the pressure they apply to a surface using the same drawing material. Heavy lines are darker and advance towards us, whereas light lines gently recede away from us. When drawing with line alone, varying the line weight is a succinct means to suggest form, weight, and distance. Drawings made with one weight of line generally appear flatter – which is effective when lack of depth is a deliberate aesthetic choice.
First, choose a subject to draw from. Begin drawing the features that are closest in physical proximity to you with heavy lines, before capturing those that are further away with light lines. For example, to draw a portrait in profile, the subject’s ear will require the heaviest line, whereas their nose and the background behind them should be delineated in successively lighter lines.
Next, consider the physical weight of your subject matter, and allow that to inform the weight of your line. Wispy hair, floating fabric, and leaves ask for light lines, whereas strong legs, heavy pottery, and tree trunks require heavier lines.
Finally, vary the weight of the line according to the tonal value of your subject, using heavier lines to delineate shadowy areas, and soft, gentle lines to skirt around areas of light.
Once you’ve tried all three approaches to varying the weight of your line, you’ll be able to determine which captures your subject best. Combining these approaches in the same drawing will make you adept at describing form through line alone.
You will need: A 2B pencil, a sketchbook
Fact: Linear drawing was foundational to Jean-Auguste-Dominique Ingres’ painting practice, since he executed detailed studies of his subjects before painting them. These drawings didn’t require extensive shading and blending to acutely convey the three-dimensional form, texture, weight, and distance of his sitters, their clothes, and the environment. All of these factors are achieved through the varied weight of his line.

Jean-Auguste-Dominique Ingres
Graphite on paper, 26.3 x 21.8 cm | 10.4 x 8.6 in
National Gallery of Art

Hatching refers to media that has been applied in parallel lines to build up tone, texture, and form. Crosshatching describes lines that are placed on top of each other to create a ‘woven’ effect, which increases shadow, light, or the intensity of colour, depending on the materials used. Hatching can be straight or curved, or layered repeatedly to create a complex network of lines. Straight hatching has a rigidity – perhaps best for rendering flat planes in your subject matter. Curved hatching can wrap around forms to create the illusion of three-dimensionality. For this prompt, create an entire drawing of a part of your own body using hatching and crosshatching only – wrapping the lines around the form to describe its tonal variations.
You will need: A sketching pen or ink dip pen with a bottle of drawing ink, a sketchbook
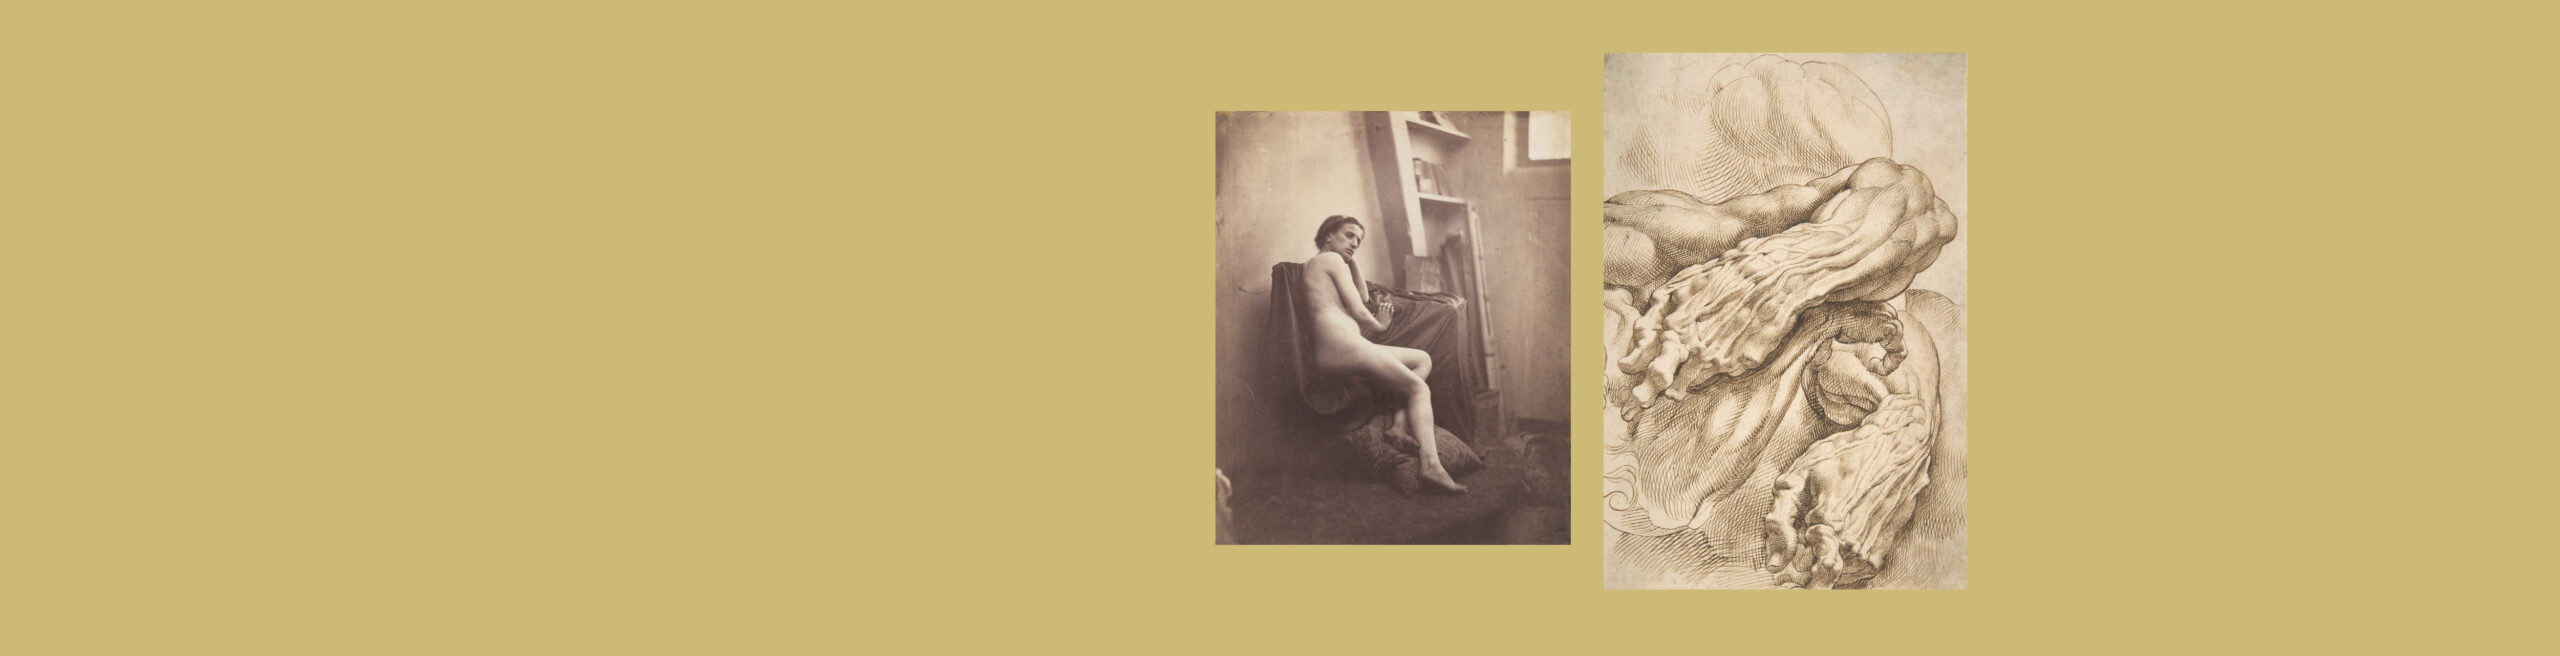
Fact: Écorché, meaning ‘flayed’, is the term for anatomical drawings that emphasise musculature without the skin. This masterful example by Peter Paul Rubens utilises hatching and crosshatching in brown ink to wrap around the bulging muscles and veins in the arms. He made this study, amongst others, after a trip to Italy to study works by the Italian masters of anatomy, like Leonardo da Vinci.

Peter Paul Rubens
Pen and brown ink, 27.8 x 18.6 cm | 10.9 x 7.3 in
The Metropolitan Museum of Art

Sighting is an observational drawing technique where artists measure the proportions of their subject matter by holding a straight object at arms length and recording its size by moving their thumb. This is usually done with the pen or pencil they’re drawing with. This can be done by planting your feet still, or finding a secure position in your chair, then extending your arm straight out towards your subject with a pencil in hand. Then line up the tip of the pencil with the ‘top’ of the part you’d like to measure, and slide the tip of your thumb to the other edge. Once you have this measurement, mark it on your page. With this unit of measurement, you can begin to mark the proportions of other parts of the drawing. For instance, the classic rule for drawing the human figure is that the body is 7-8 heads tall.
For this art prompt, choose your subject, and draw it with visible measuring marks left on the page.
You will need: A pencil, drawing paper
Fact: The British painter Euan Uglow’s precise figurative works retain the measuring marks he made whilst painting his sitters from life. These marks create constellations of horizontal and vertical lines across the picture plane. The meticulous geometry of his paintings gives his works a balanced structure that harmonises with the precise measurements of the canvases themselves.

Franck-François-Genès Chauvassaignes
Salted paper print from glass negative, 19.1 x 15.2 cm | 7.5 x 6 in
The Metropolitan Museum of Art

Instead of adding marks to your drawings – why not try subtracting them? The eraser isn’t solely a tool for correcting mistakes – it can be one of the most useful drawing implements in your kit. Start by lighting an object or subject with a strong single light source to create chiaroscuro. Then apply an even ground layer of charcoal to your paper before carving into it with your eraser to reveal the surface below. This will allow you to pick out textures, planes of form, and intricate details by drawing with light. The process can also be more economical than drawing around each highlight in a complex work, and can be used to quickly block in tone before refinement.
You will need: charcoal, drawing paper, an eraser
Fact: Draftsmen used chunks of white bread to erase their drawing media for over 150 years before the rubber eraser was invented in 1770. This was done by wetting it slightly and rolling it into a ball before rubbing the drawing away. However, this technique wasn’t ideal as it could leave behind residual flour, grease and breadcrumbs, which would litter careful drawings.

Odilon Redon
Charcoal drawing with stumping, incising, erasing, and subtractive brushwork, on pale-pink wove paper, 47.1 x 35.4 cm | 18.5 x 14 in
Art Institute of Chicago

Make an architectural structure from cardboard and place it on a surface in front of you. Draw your miniature room or building with 1, 2, and then 3-point perspective by changing its position to practice identifying the angles that denote space. This can be made more complex by introducing additional factors, such as adding sculpted characters into the structure, changing the lighting to cast shadows within or upon it, and making complex interventions on the cardboard model itself by crafting decorative features. The resulting three drawings will make clear that the position we place the viewer in architectural space has emotive potential.
You will need: scrap cardboard or a cardboard box, ink, a water jar, ceramic dishes, assorted brushes, watercolour paper
Fact: The French Baroque artist Nicolas Poussin used a model box filled with wax figures to paint from, which he called his ‘great machine’. By opening and closing carefully placed windows, he would control the lighting within the box, which he viewed through an eyehole. Then he would make a preparatory tonal study from the model scene before transferring his study to canvas.

Nicolas Poussin
Oil on canvas, 125.7 x 165.1 cm | 49.5 x 65 in
The Metropolitan Museum of Art

We live in a world constantly in motion, which naturally presents artists with a brilliant challenge – how can we capture a sense of movement without losing sight of our subject? For this prompt, find a moving subject to study, whether it’s people walking by a window, cars passing under a bridge, or animals running across a field. If you’re restricted to the indoors, this could even be from a sports broadcast, documentary, or live zoo camera. The faster your subject moves, the less time you’ll have to capture their movement. Experiment with the brevity of your gesture to describe the form in as few marks as possible. This exercise can be liberating for those who prefer detailed static study, and open up new possibilities for conveying speed and power.
You will need: charcoal, sheets of drawing paper or newsprint
Fact: Rosa Bonheur disguised herself as a man twice a week for a year and a half to make preparatory drawings for her masterpiece, The Horse Fair. In it, we see horses and riders churning around the market, kicking up dust, rearing, and being dutifully led. The masterful character imbued in each horse in the finished painting is the direct result of prolonged study of motion.

Rosa Bonheur
Black chalk and graphite drawing, 18.4 x 41.1cm | 7.2 x 16.2 in
The Metropolitan Museum of Art

One of the pitfalls of drawing is our physical proximity to the page – we often take a step back and realise the work is unbalanced. Painting more often encourages distance, since artists often work on a vertical support, with longer handled tools. To encourage you to take in the entire drawing surface before committing to detail, attach your drawing implement to the end of a long stick with tape. This could be a bamboo stick, a long ruler, or a thin piece of wood. This technique is also brilliant for drawing at scale, allowing you to make fluid, sweeping gestures with an extended reach, rather than being restricted by the range of your own arm.
You will need: a long stick, tape, large drawing paper, and your drawing implement of choice. This would work well with charcoal, a graphite stick, or a marker pen.
Fact: Henri Matisse used bamboo sticks to scale up his works and create his signature curving lines, seen in works like his mural, The Dance. For a work of this scale, the alternative approach would’ve been to scale up the preparatory drawing with a grid, but this rigid method would’ve been at odds with Matisse’s artmaking philosophy.

Henri Matisse
Oil on canvas, 194.3 x 96.2 cm | 76.5 x 37.9 in
Barnes Foundation
Let us know how you found the prompts, and subscribe to our newsletter to receive the next batch of Jackson’s Art Prompts to your inbox.
Further Reading
Hatching Techniques for Drawing, Painting, and Printmaking
The History of Cast Drawing, and How it Can Help You Draw Form
The Dark History of the Pencil
In Conversation With Nicola Coate About Coates Willow Charcoal